LG KG220 Quick Start Guide
LG KG220 Manual
 |
View all LG KG220 manuals
Add to My Manuals
Save this manual to your list of manuals |
LG KG220 manual content summary:
- LG KG220 | Quick Start Guide - Page 1
on the software installed or your service provider or country, some of the descriptions in this guide may not match your phone exactly. • Depending on your country, your phone and accessories may appear different from the picture in this guide. Installing the Battery To install the battery, insert - LG KG220 | Quick Start Guide - Page 2
and Due Date. Serial Number simply displays the information of your phone's MEID. Code Entry Mode will allow the phone to accept Tracfone-related codes in order to add units, modify specific data and troubleshoot the phone. In using the Code Entry Mode, you can't receive incoming calls or use events
-
 1
1 -
 2
2
 |
 |
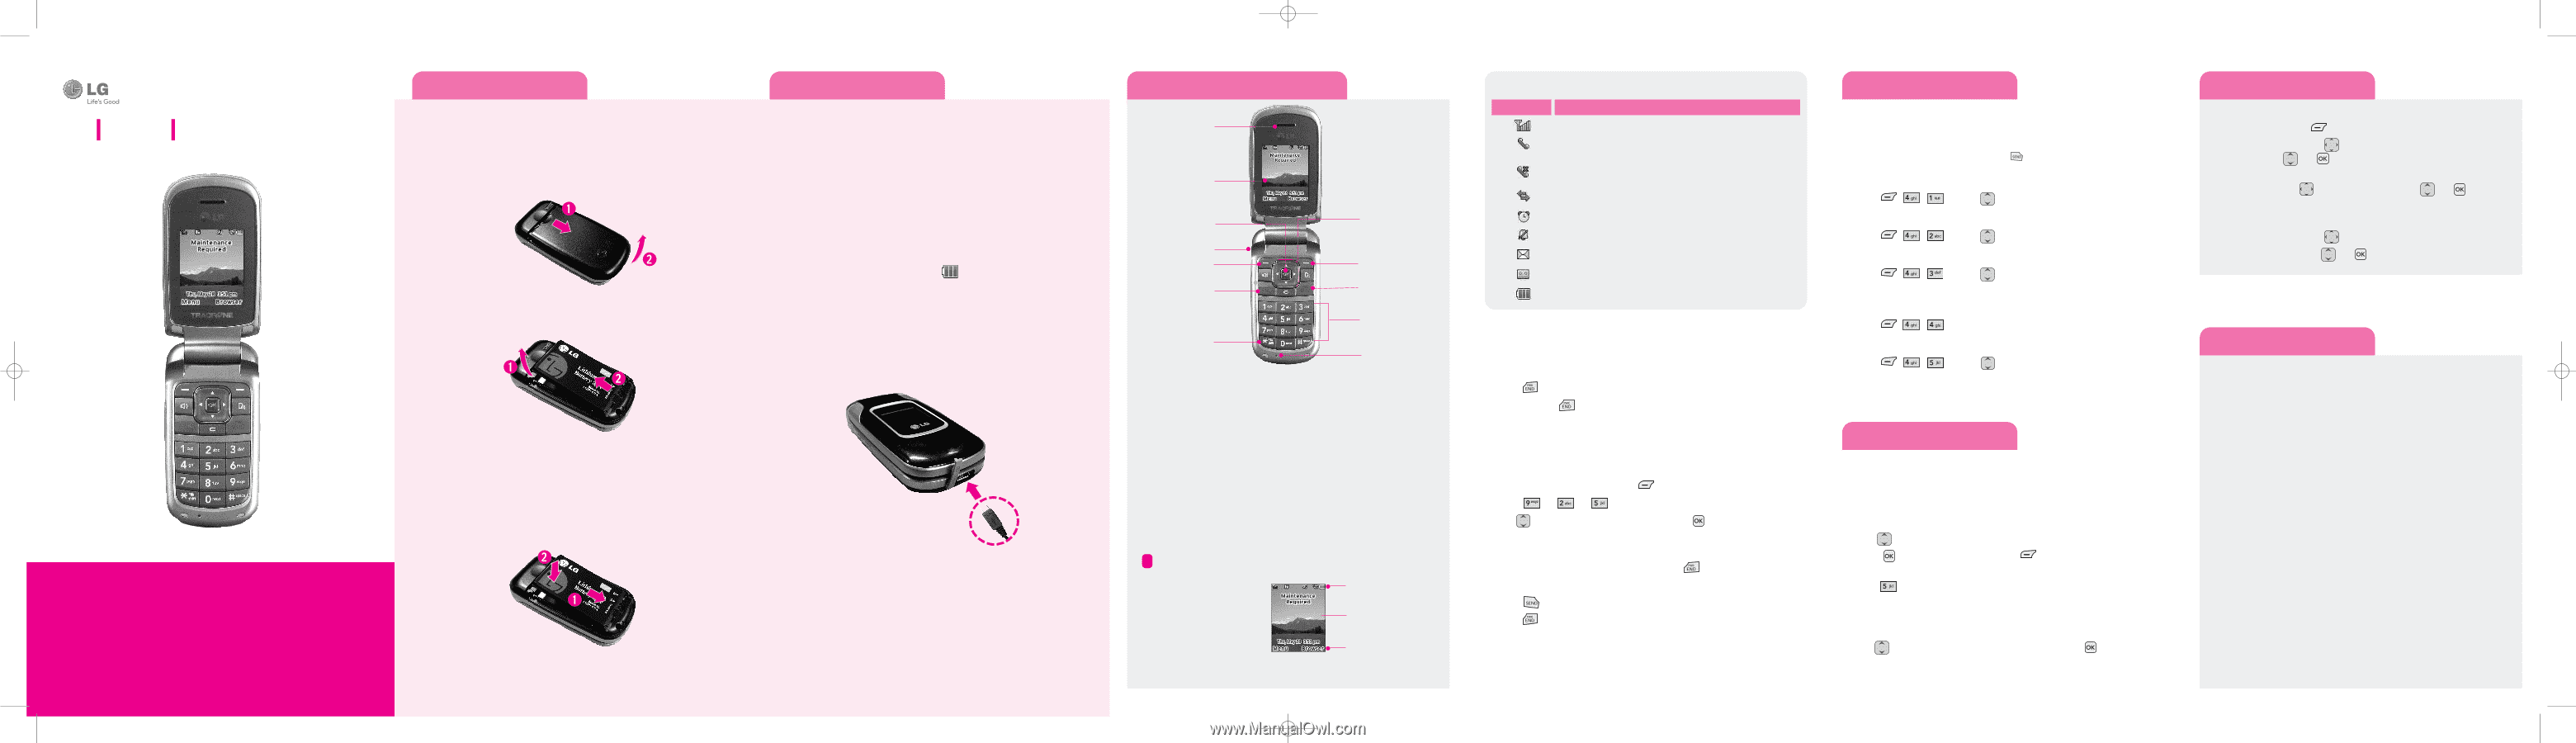
Installing the Battery
To install the battery, insert the battery into the opening on the back of the
phone. Put the battery cover on the battery and push it slightly upwards.
Removing the Battery
1. With your phone turned off, press in on the battery cover release (1) on the
back of your phone, slide the battery cover up and lift off (2).
2. Lift the battery up (1) and away (2) from the phone, as shown.
Replacing the Battery
1. To reinstall the battery, align the battery contacts (1) with those in the battery
compartment. Press the battery down until it clicks into place (2).
2. With the battery in position in the phone, replace te battery cover on the back
of your phone so that it fits.
Charging the Battery
Your phone is powered by a rechargeable Li-ion battery. Use the wall charger to
charge the battery, and use only LG approved batteries and chargers.
Note:
You must fully charge te battery before using your phone for the first time. A fully dis-
charged battery requires up to 4 hours of charge time.
Note:
For connection to an electrical supply not located in the U.S., you must use an adaptor of
the proper configuration for the power outlet. Using the wrong adaptor can damage your phone
and void your warranty.
1. Open the cover on the accessory port on the left side of the phone and plug
the wall charger connector into the jack. Be sure to orient the connector as
shown to avoid damaging your phone.
2. Plug the charger into a standard AC wall outlet.
3.
When the phone is completely charged(
), unplug the charger from the
wall outlet.
4. Remove the charger from the phone by gently pulling out the connector.
Replace the plastic cover over the open jack.
Important:
The battery charging function may stop when you are on a call. to avoid damage to the
battery,do not remove the battery from the phone while charging. Make sure the wall charger is
disconnected from the phone beforeremoving the battery.
Phone layout and key functins
Using the menus
Turning the Phone On or Off
1.
Install a charged battery or connect the phone to an external power source
such as a cigarette lighter charger or hands-free car kit.
2. Press
until the LCD screen lights up.
3.
Press and hold
until the display turns off.
Changing the display language
Allows you to use the bilingual feature according to your preference. Choose
between English and Spanish.
1. In Idle mode, press the Left soft key
to access Main menu.
2. Select
±
±
.
3. Use
to select English or Spanish, then press
.
Making Calls
1.
Make sure the phone is turned on. If not, press
for about 3 seconds.
2.
Enter the phone number (include the area code if needed).
3. Press
. lf the phone is locked, enter the lock code.
4. Press
to end the call.
Earpiece
Navigation Keys
END/PWR Key
SEND Key
Left Soft Key
LCD Screen
Headset Jack
Manner Mode Key
Right Soft Key
Alphanumeric
Keypad
Microphone
OK Key
•
Large, easy-to-read, 7-line backlight LCD with status icons.
•
Paging, messaging, voice mail, and caller ID.
•
22-key keypad.
•
Speaker phone feature.
•
Menu-driven interface with prompts for easy operation and configuration.
•
Any key answer, auto answer, auto retry, one-touch and speed dialing with
99 memory locations.
•
Bilingual (English and Spanish) capabilities.
•
Internal Antenna, described as 'antenna' throughout this user guide.
Your phone is in Idle mode
when you are not on a call
or using a menu. You must
be in Idle mode to dial a
phone number.
Your phone displays the following status indicators on the top of the screen:
D
D
e
e
s
s
c
c
r
r
i
i
p
p
t
t
i
i
o
o
n
n
Signal strength
Call in progress
Out of your service area; you cannot make or receive calls
except for emergency calls
GPRS network
Alarm set
Silent mode
New text message
New voicemail message
Battery power level
I
I
c
c
o
o
n
n
Display
Icons
Text and graphics area
Soft key function indications
Menu map
Recent Calls
The Recent Calls Menu is a list of the last phone numbers or Contacts entries for calls
placed, accepted, or missed. It is continually updated as new numbers are added to the
beginning of the list and the oldest entries are removed from the bottom of the list.
Note:
To view a quick list of all your recent calls, press
Key while in standby mode.
1. Missed Calls : Allows you to view the list of missed calls; up to 40 entries.
Press
,
,
±
Use
to highlight an entry.
2. Received Calls : Allows you to view the list of incoming calls; up to 40 entries.
Press
,
,
±
Use
to highlight an entry.
3. Dialed Calls : Allows you to view the list of ougoing calls; up to 40 entries.
Press
,
,
±
Use
to highlight an entry.
4. All Calls : Allows you to view the list of missed, received and dialed calls; up to
120 entries.
Press
,
,
±
The history of all calls are displayed.
5. Call Timer : Allows you to view the duration of selected calls.
Press
,
,
±
Use
to highlight a call type (below).
Last Call/ Home Calls/ Roam Calls/ All Calls
Sound
Options to customize your phone's sounds:
Ringers
1. Select All Calls/ Caller ID/ No Caller ID/ Restricted Calls.
2. Select My Audios / Default.
3. Use
to highlight the ringtone.
4. Press
Play to play the ringtone, and
Set to set the ringtone to your
phone.
5. Press
Buy Ringtones to purchase ringtones.
Volume
1. Select Master Volume/ Keypad/ Earpiece/ Speaker.
2. Use
to adjust the volume of the function, then press
to save the
setting.
Selecting or Modifying a Menu or Feature:
1. Press the Left soft key
to access Main menu.
2. Press the Navigation keys
to reach a desired menu and then press the
Select soft key
or
.
3. If the menu contains any submenus, locate the one you want by pressing
the Navigation keys
. Press the Select soft key
or
to enter
the submenu.
If the selected menu contains additional submenus, repeat this step.
4. Press the Navigation keys
to find the setting of your choice.
5.
Press the Select soft key
or
to confirm your chosen setting.
1. Prepaid
1.1 Add Airtime
1.2 Buy Airtime
1.3 My Phone Number
1.4 Airtime Info
1.5 Airtime Display
1.6 Serial Number
1.7 Code Entry Mode
2. Contacts
2.1 New Contact
2.2 Contact List
2.3 Groups
2.4 Speed Dials
2.5 My Name Card
3. Messages
3.1 New Message
3.2 Inbox
3.3 Sent
3.4 Drafts
3.5 Voicemail
3.6 Templates
3.7 Msg Settings
3.8 Delete All
4. Recent Calls
4.1 Missed Calls
4.2 Received Calls
4.3 Dialed Calls
4.4 All Calls
4.5 Call Timer
5. My Folder
5.1 Record Voice
5.2 Images
5.3 Audios
6. Browser
6.1 Start Browser
6.2 Web Messages
7. My Schedule
7
.1 Alarm Clock
7
.2 Calendar
7
.3 Notepad
8. Tools
8.1 Voice Command
8.2 Ez Tip Calc
8.3 Calculator
8.4 World Clock
8.5 Stopwatch
8.6 Unit Converter
9. Settings
9.1 Sound
9.2 Display
9.3 Security
9.4 Call Settings
9.5 Bluetooth
9.6 System
9.7 Phone Memory
9.8 Phone Info
LG 220C
Quick Start Guide
• Depending on the software installed or your service provider or country,
some of the descriptions in this guide may not match your phone exactly.
• Depending on your country, your phone and accessories may appear
different from the picture in this guide.
LG220C_TF_Eng_QSG_0713
7/13/09
2:37 PM
Page 1