LG L1981Q User Manual
LG L1981Q Manual
 |
View all LG L1981Q manuals
Add to My Manuals
Save this manual to your list of manuals |
LG L1981Q manual content summary:
- LG L1981Q | User Manual - Page 1
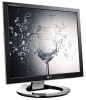
's Guide L1780U L1980U L1780Q L1980Q L1781Q L1981Q Make sure to read the Important Precautions before using the product. Keep the User's Guide(CD) in an accessible place for furture reference. See the label attached on the product and quote this information to your dealer when you require service. - LG L1981Q | User Manual - Page 2
service provider for a replacement. The power supply cord is used as the main disconnection device. Ensure that the socket-outlet is easily accessible after installation. Operate the display only from a power source indicated in the specifications of this manual Some internal parts carry hazardous - LG L1981Q | User Manual - Page 3
allow anything to rest upon or roll over the power cord, and do not place the display where the power cord is subject to damage. Do not use appear on the screen. However, this is characteristic of the fixed-resolution LCD panel. On Cleaning Unplug the display before cleaning the face of the display - LG L1981Q | User Manual - Page 4
the monitor, ensure that the power to the monitor, the computer system, and other attached devices is turned off. For the desktop monitor, install sound using a coin or - shape screw driver, while pressing down the stand base to the monitor. Coin, "-"shape screwdriver Folding Stopper Important This - LG L1981Q | User Manual - Page 5
Using the Computer 1. Connect the signal cable. When attached, tighten the thumbscrews to secure the connection. 2. Connect the power cable with the AC adapter (AC power supply) , and then plug the cable in the outlet. (Voltage will be automatically controlled.) 12 When connecting to a 3 wall - LG L1981Q | User Manual - Page 6
to turn the power on. When monitor power is turned on, the 'Self Image Setting Function' is executed automatically.(Only Analog Mode) NOTE ' adjust the monitor while in use, or wish to manually run this function once again, touch the 'AUTO/SET' button on the front panel of the monitor. Otherwise, - LG L1981Q | User Manual - Page 7
then, perform Automatic setting.(Manual is the default setting when you purchase the product.) - Refer to the installation guide included in the CD , and these functions are not supported in the DOS mode. Auto Pivot Screen rotation : You can rotate the monitor screen part clockwise by 180 . Caution : - LG L1981Q | User Manual - Page 8
Using the Auto Pivot, Auto Mirror function Auto Mirror Screen switch : The monitor screen part is automatically mirrored when you switch it forward/backward as shown in the figure an ergonomic and comfortable viewing position, the forward tilt angle of the monitor should not exceed 5 degrees. A7 - LG L1981Q | User Manual - Page 9
Control Panel Functions Front Panel Controls MENU ( - ) ( + ) ENGINE SOURCE AUTO/SET Control MENU Button Function Use this button to enter or exit the On Screen Display. OSD LOCKED/UNLOCKED This function allows you to lock the - LG L1981Q | User Manual - Page 10
image to the ideal settings for the current screen resolution size (display mode). The best display mode is 17 inch monitor : 1280x1024 19 inch monitor : 1280x1024 Power Button Power Indicator Use this button to turn the display on or off. This Indicator lights up blue when the display operates - LG L1981Q | User Manual - Page 11
another function. Touch the MENU Button twice to exit from the OSD. Automatic save With the OSD open, once you have made an adjustment the monitor automatically save any adjustments you have made, even if you exit the menu or open another menu. If you make an adjustment and then wait - LG L1981Q | User Manual - Page 12
OSD HORIZONTAL POSITION VERTICAL WHITE BALANCE POWER INDICATOR FACTORY RESET FLATRON MOVIE/TEXT F-ENGINE(- ) USER NORMAL To customize the screen status for a user's operating environment To select or customize desired image settings : Adjustable A : Analog - LG L1981Q | User Manual - Page 13
: Enter : Select another sub-menu * You can use the Forte Manager program when configuring or controlling the screen display. For more details, refer to the manual included in the Forte Manager Software CD. NOTE OSD (On Screen Display) menu languages on the - LG L1981Q | User Manual - Page 14
Decrease : Increase SET : Select another sub-menu To adjust the contrast of the screen. Set your own gamma value. : -50/0/50 On the monitor, high gamma values display whitish images and low gamma values display high contrast images. COLOR COLOR PRESET Select the screen color. • 6500K: Slightly - LG L1981Q | User Manual - Page 15
output of the video card is different the required specifications, the color level may deteriorate due to video signal POWER MENU : Exit +- : Adjust : Adjust INDICATOR SET : Select another sub-menu Use this function to set the power indicator on the front side of the monitor analog signal. A14 - LG L1981Q | User Manual - Page 16
front side of the monitor. Menu Name Icons Sub-menu Name (-) button at the FLATRON F-ENGINE When you Word processing etc.) USER User You can manually adjust brightness, ACE or RCM. You 2 SAVE (Brightness): Adjusts screen brightness. ACE(Adaptive Clarity Enhancer) Selects the clarity mode. RCM( - LG L1981Q | User Manual - Page 17
Troubleshooting Check the following before calling for service. No image appears Is the power cord of the display connected? Check and see if the power cord is connected properly to the power outlet. Is the power indicator light on? Touch the Power button. Is the power on and the power - LG L1981Q | User Manual - Page 18
Troubleshooting Display image is incorrect Display Position is incorrect. Touch the AUTO/SET button to automatically adjust is set to interlace mode and if yes, change it to the recommend resolution. Make sure the power voltage is high enough, It has to be higher than AC100-240V 50/60Hz. A17 - LG L1981Q | User Manual - Page 19
from the display driver CD (or diskette) that comes with your display. Or, you can also download the driver from our web site: http://www.lge.com. Do you see an "Unrecognized monitor, Plug&Play (VESA DDC) monitor found" message? Make sure to check if the video card supports Plug&Play function - LG L1981Q | User Manual - Page 20
Specifications L1780U/L1780Q/L1781Q Display Sync Input Video Input Resolution Plug&Play Power Consumption Dimensions &Weight (with tilt stand) Tilt/Height Range Power Input Environmental Conditions Tilt Stand Signal cable Power cord 17 inches (43.2cm) Flat Panel Active matrix-TFT LCD RGB Analog - LG L1981Q | User Manual - Page 21
Specifications L1980U/L1980Q/L1981Q Display Sync Input Video Input Resolution Plug&Play Power Consumption Dimensions &Weight (with tilt stand) Tilt/Height Range Power Input Environmental Conditions Tilt Stand Signal cable Power cord 19 inches (48.18cm) Flat Panel Active matrix-TFT LCD RGB Analog - LG L1981Q | User Manual - Page 22
Specifications Preset Modes (Resolution) 17 inch monitor Display Modes (Resolution) 1 VGA 640 x 350 2 VGA 720 x 400 3 VGA 640 x 37.500 37.879 46.875 49.725 48.363 60.023 68.681 61.805 63.981 79.976 19 inch monitor Display Modes (Resolution) 1 VGA 640 x 350 2 VGA 720 x 400 3 VGA 640 x 480 4 VESA - LG L1981Q | User Manual - Page 23
How to Install the Rack wall mounting This monitor meets VESA-compliant mounting interface pad specifications. Installation guide Accessories Rack Anchor - 4EA Screws for wall mount rack - 4EA Screws for monitor stationary rack-4EA This rear view represents a general model; your display may - LG L1981Q | User Manual - Page 24
until you hear the click sound using a coin or - shape screw driver, while pressing down the stand base to the monitor. Coin, "-"shape screwdriver Folding Stopper 100 Tighten the four screws about half into the slots in the base part, hold the two screws at the bottom to pull them inward, and - LG L1981Q | User Manual - Page 25
Digitally yours
-
 1
1 -
 2
2 -
 3
3 -
 4
4 -
 5
5 -
 6
6 -
 7
7 -
8
-
9
-
10
-
11
-
12
-
13
-
14
-
15
-
16
-
17
-
18
-
19
-
20
-
21
-
22
-
23
-
24
-
25
 |
 |

M
ake sure to read the
Important Precautions
before using the product.
Keep the User's Guide(CD) in an accessible place for furture reference.
S
ee the label attached on the product and quote this information to your
dealer when you require service.
User’s Guide
L1780U
L1980U
L1780Q
L1980Q
L1781Q
L1981Q