LG LBN22515ST Owner's Manual
LG LBN22515ST Manual
 |
View all LG LBN22515ST manuals
Add to My Manuals
Save this manual to your list of manuals |
LG LBN22515ST manual content summary:
- LG LBN22515ST | Owner's Manual - Page 1
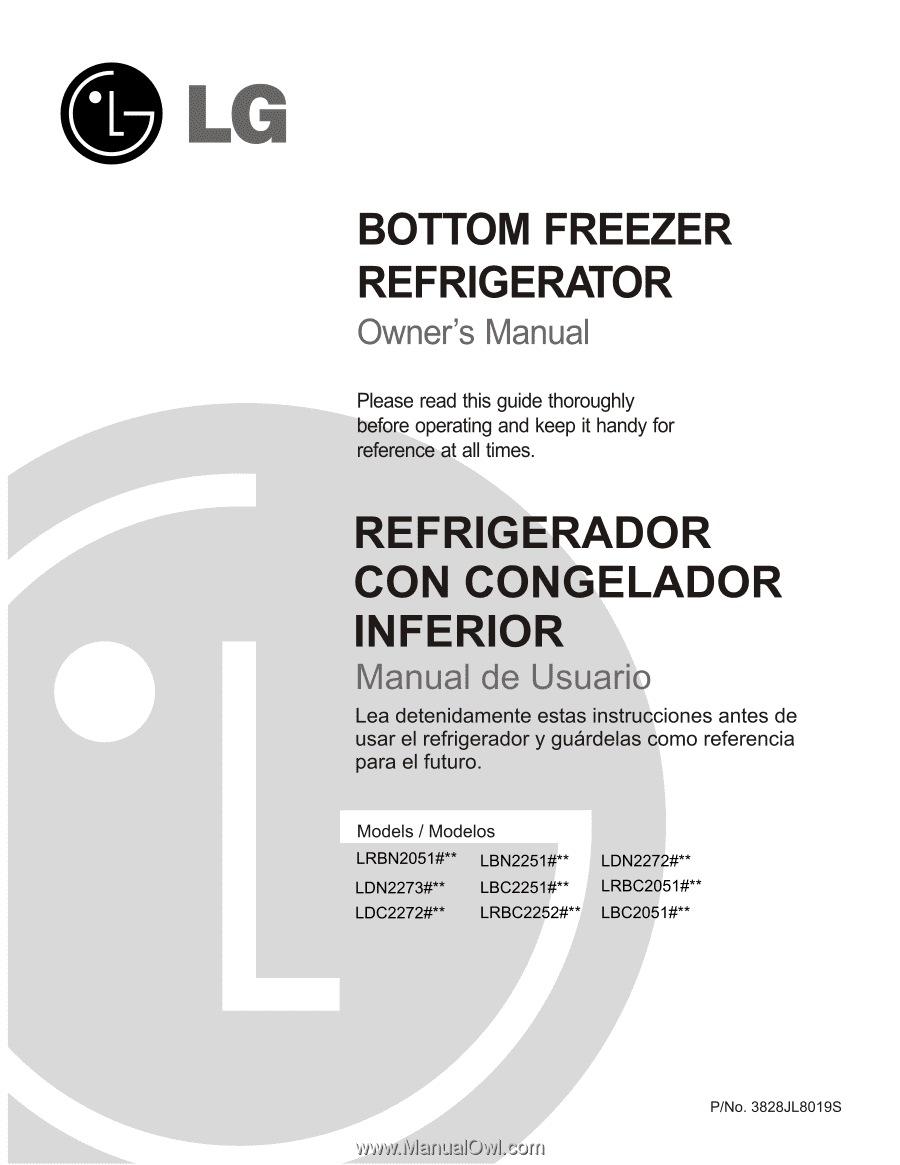
BOTTOM FREEZER REFRIGERATOR Owner's Manual Please read this guide thoroughly before operating and keep it handy for reference at all times. REFRIGERADOR CON CONGELADOR INFERIOR Manual de Usuario Lea detenidamente estas instrucciones antes de usar el refrigerador y guárdelas como referencia para el - LG LBN22515ST | Owner's Manual - Page 2
Version Spanish Version Warranty (U.S.A.) Safety Instructions Grounding Requirements Parts and Features Refrigerator Installation Unpacking Your Refrigerator Installation Base Grille Removing, Reversing and Replacing Your Refrigerator Doors Pull out Drawer Door Closing and Alignment Using Your - LG LBN22515ST | Owner's Manual - Page 3
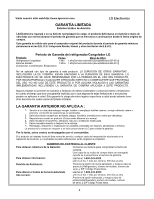
, and U.S. Territories. LG Refrigerator / Freezer Warranty Period Product Parts Labor Refrigerator / Freezer 1 year 1 year [In-Home Service (Except Model GR-051)] Sealed System 7 years 1 year [In-Home Service (Except Model GR-051)] (Compressor, Condenser, Evaporator) No other express - LG LBN22515ST | Owner's Manual - Page 4
de E.E.U.U. Período de Garantía del refrigerador/Congelador LG Producto Partes Mano de Obra Refrigerador/Congelador 1 año 1 año[Servicio ón relacionado en la reparación del producto, o el reemplazo de partes defectuosas, serán cargados al propietario. NÚMEROS DE ASISTENCIA AL CLIENTE - LG LBN22515ST | Owner's Manual - Page 5
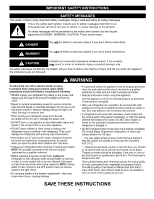
the outlet is properly grounded. Read all instructions before using this appliance. Use this appliance only for its intended purpose as described in this use and care guide. After your refrigerator is in operation, do not touch the cold surfaces in the freezer compartment when hands are damp or wet - LG LBN22515ST | Owner's Manual - Page 6
sit for "just a few days". If you are getting rid of your old refrigerator, please follow the instructions at right to help prevent accidents. BEFORE YOU THROW AWAY YOUR OLD REFRIGERATOR OR FREEZER Take off the doors. Leave the shelves in place so that children may not easily climb inside. CFC - LG LBN22515ST | Owner's Manual - Page 7
with the parts and features. NOTE: This guide covers several different models. The refrigerator you have purchased may have some or all of the items listed below. The Ice Bin I Ice Tray (Inside of H)* J Durabase K Divider L Dairy Bin M Design-A-Door N Egg Box O Refrigerator Door Rack P Freezer - LG LBN22515ST | Owner's Manual - Page 8
FEATURES A B J C K D L E M F N G H I O Use this section to become more familiar with the parts and features. NOTE: This guide covers several different models. The refrigerator you have purchased may have some or all of the items listed below. The locations of the features shown below may not - LG LBN22515ST | Owner's Manual - Page 9
items listed below. The locations of the features shown below may not match your model. A Digital Sensor Control B Refrigerator Light C Shelves D Snack Pan E Optibin Crisper Keeps fruits and vegetable fresh and crisp F Ice Trays* G Ice Bin H Wire Durabase I Dairy Bin J Design-A-Door K Wire Freezer - LG LBN22515ST | Owner's Manual - Page 10
Weight Hazard Use two or more people to move and install refrigerator. Failure to do so can result in back or other injury. UNPACKING YOUR REFRIGERATOR Remove tape and any temporary labels from your refrigerator before using. Do not remove any warningtype labels, the model and serial number - LG LBN22515ST | Owner's Manual - Page 11
INSTALLATION REMOVING, REVERSING AND REPLACING REFRIGERATOR DOORS (OPTIONAL) NOTE: See the Parts and Features section to match your model. NOTE: Reversing the refrigerator door is not possible on water dispenser models TOOLS NEEDED: 10mm hex-head socket wrench, No. 2 Phillips screwdriver - LG LBN22515ST | Owner's Manual - Page 12
REFRIGERATOR INSTALLATION To remove Freezer Door Handle • Remove the screws(2) of the rail on both sides. •Grasp the handle tightly with both hands,and slide the handle to the right, until align keyholes back on handle with the screws mounted in front of the door. Then pull out the handle. (This - LG LBN22515ST | Owner's Manual - Page 13
instructions. • Make sure you have a right rail cover for each side. 2. Installing Pullout Drawer • With both hands, hold the center of the bar and pull it out to let both rails out to full extension simultaneously. • Align the top holes of the rail cover with the top holes of the door supports - LG LBN22515ST | Owner's Manual - Page 14
REVERSING AND REPLACING REFRIGERATOR DOORS (OPTIONAL) NOTE: See the Parts and Features section to match your model. TOOLS cover (9) using a slotted screwdriver and attach it on the right. 2. Removing Freezer Door Lift the door (10) slightly and remove it. Loosen the 2 screws (11), the 2 screws - LG LBN22515ST | Owner's Manual - Page 15
INSTALLATION 3. Removing Refrigerator Handle NOTE: To assist in installing the handle on bottom of the back of the handle with the screws (3) mounted on the front of the door. Press the handle against the door front, making sure that the screws (3) go into the keyhole slots (2). Grasping the handle - LG LBN22515ST | Owner's Manual - Page 16
type is not neccesary remove it. 5. Installing Freezer Door Install the base grille (1). Install the door (3) onto the bottom hinge pin. Install the middle hinge (4) on the opposite side with the screw (5) and the screws (9). 6. Installing Refrigerator Door Place the washer (6) on the middle hinge - LG LBN22515ST | Owner's Manual - Page 17
a level. 5. Replace the base grille. DOOR CLOSING AND ALIGNMENT Door Closing Your refrigerator has two front leveling screws one on the right and one on the left. If your refrigerator seems unsteady or you want the doors to close easier, adjust the refrigerator tilt using the instructions below - LG LBN22515ST | Owner's Manual - Page 18
control: - 6°F to 9°F (- 21°C to - 13°C) When the setting is at a lower number, the freezer compartment becomes colder. But the refrigerator compartment becomes warmer because less cold air flows into the refrigerator. Ice Plus: Press the Ice Plus key and the LED will turn on. This function will - LG LBN22515ST | Owner's Manual - Page 19
set correctly when milk or juice is as cold as you like and when ice cream is firm. The refrigerator control functions as the thermostat for the entire appliance (refrigerator and freezer sections.) The higher the number setting, the longer the compressor will run to keep the temperature colder. The - LG LBN22515ST | Owner's Manual - Page 20
storage times, check a freezer guide or a reliable cookbook. Packaging Successful freezing depends on correct packaging. When you close and seal the package, it must not allow air or moisture in or out. If you do, you could have food odor and taste transfer throughout the refrigerator and also dry - LG LBN22515ST | Owner's Manual - Page 21
of time the refrigerator door is open, saving energy guide the shelf hooks into the slots at a desired height. Then lower the front of the shelf so that the hooks drop into the slots. Sliding Out Shelves (optional on some models) You can slide some glass shelves in and out of your refrigerator - LG LBN22515ST | Owner's Manual - Page 22
REFRIGERATOR CHEF FRESH / SNACK PAN While holding the chef fresh with one hand, pull it forward slightly. Lift slightly and pull it out. CRISPER HUMIDITY CONTROL (on some models of the crisper, then pull it out to remove. 3. Replace the crisper by sliding it back in fully past the drawer stop. 22 - LG LBN22515ST | Owner's Manual - Page 23
YOUR REFRIGERATOR CRISPER COVER WITH LATTICE ON INNER SURFACE (on some models) To remove the crisper cover: 1. Remove both crisper drawers. 2. While holding the crisper cover support (2), pull the cover up and out(1). DOOR RACKS The door racks may be removed for easier cleaning. Snap-on Door Racks - LG LBN22515ST | Owner's Manual - Page 24
in rail assembly. EGG BOX (on some models) Store Egg Box on interior shelf, not on door shelf. CAUTION: Do not use the egg box as an ice storage bin in the freezer compartment. The egg box can easily easily break if it freezes. DURABASE DIVIDER (on some models) The Durabase divider allows you to - LG LBN22515ST | Owner's Manual - Page 25
Hook the basket supports into the rail tabs and push to the back of compartment. FREEZER SHELF (on some models) To remove the shelf, take it from the front part, and pull it towards you. To place the shelf, reverse the removal procedure. TILTING DOOR (on some models) The tilting door provides easy - LG LBN22515ST | Owner's Manual - Page 26
a stainless steel exterior, use a clean sponge or soft cloth and a mild detergent in warm water. Do not use abrasive or harsh cleaners. Dry thoroughly with a soft cloth. INSIDE WALLS (allow freezer to warm up so cloth won't stick) To help remove odors, you can wash the inside of the refrigerator - LG LBN22515ST | Owner's Manual - Page 27
. 1. Use up any perishables and freeze other items. 2. Empty the ice bin. If you choose to turn the refrigerator off before you leave, follow these steps. 1. Remove all food from the refrigerator. 2. Depending on your model, set the thermostat control (refrigerator control) to OFF. See the Setting - LG LBN22515ST | Owner's Manual - Page 28
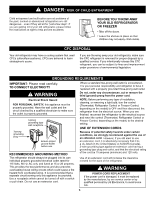
Ice Maker feature is included only in certain models. Please check your product specification. WARNING Personal Injury Hazard Avoid contact with the moving parts on freezer compartment temperature, room temperature, number of door openings and other operating conditions. If the refrigerator is used - LG LBN22515ST | Owner's Manual - Page 29
line installation is needed when the Automatic Ice Maker and/or Water Dispenser features are available on your product. BEFORE YOU BEGIN This water line installation is not warranted by the refrigerator or icemaker manufacturer. Follow these instructions carefully to minimize the risk of expensive - LG LBN22515ST | Owner's Manual - Page 30
CONNECTING THE WATER LINE INSTALLATION INSTRUCTIONS (CONTINUED) 4. FASTEN THE SHUTOFF VALVE Fasten the the tubing between the cold water line and the refrigerator. Route the tubing through a hole drilled in the wall or floor (behind the refrigerator or adjacent base cabinet) as close to the wall - LG LBN22515ST | Owner's Manual - Page 31
refrigerator's water valve. Install the filter in the water line near the refrigerator. Remove the plastic flexible cap from the refrigerator connection. 11. PLUG IN THE REFRIGERATOR refrigerator or against the wall. Push the refrigerator . Refrigerator Connection Ferule of the refrigerator. First, - LG LBN22515ST | Owner's Manual - Page 32
TROUBLESHOOTING GUIDE UNDERSTANDING SOUNDS YOU MAY HEAR Your new refrigerator compressor may cause your new refrigerator to run longer than your old one, and you may hear a pulsating or high-pitched sound. You may hear the evaporator fan motor circulating the air through the refrigerator and freezer - LG LBN22515ST | Owner's Manual - Page 33
TROUBLESHOOTING GUIDE COMPRESSOR MOTOR SEEMS TO RUN TOO MUCH Check if... Then... The refrigerator that was replaced was an older model. Modern refrigerators with more storage space require more operating time. The room temperature is hotter than normal. The motor will run longer under warm - LG LBN22515ST | Owner's Manual - Page 34
... Then... The sounds may be normal for your refrigerator. Refer to the Understanding Sounds You May Hear section. THE ICEMAKER IS NOT PRODUCING ICE OR ICE CUBES ARE FREEZING TOO SLOWLY Check if... Then... The freezer temperature is cold enough to produce ice. Wait 24 hours after hook-up for - LG LBN22515ST | Owner's Manual - Page 35
TROUBLESHOOTING GUIDE AUTOMATIC ICEMAKER DOES NOT WORK Check if... Then... Icemaker power switch in the O (off) position. Move the switch to the I (on) position. Water supply turned off or not connected. See the Connecting the Water Line section. Freezer compartment too warm. Wait 24 hours - LG LBN22515ST | Owner's Manual - Page 36
-
 1
1 -
 2
2 -
 3
3 -
 4
4 -
 5
5 -
 6
6 -
 7
7 -
8
-
9
-
10
-
11
-
12
-
13
-
14
-
15
-
16
-
17
-
18
-
19
-
20
-
21
-
22
-
23
-
24
-
25
-
26
-
27
-
28
-
29
-
30
-
31
-
32
-
33
-
34
-
35
-
36
 |
 |