LG LDC22720ST Owner's Manual (English)
LG LDC22720ST - 22.4 cu. ft. Bottom-Freezer Refrigerator Manual
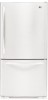 |
UPC - 048231782555
View all LG LDC22720ST manuals
Add to My Manuals
Save this manual to your list of manuals |
LG LDC22720ST manual content summary:
- LG LDC22720ST | Owner's Manual (English) - Page 1
BOTTOM FREEZER REFRIGERATOR Owner's Manual Please read this guide thoroughly before operating and keep it handy for de la main pour le consulter à tout moment. REFRIGERADOR CON CONGELADOR INFERIOR Manual de Usuario Lea detenidamente estas instrucciones antes de usar el refrigerador y guárdelas como - LG LDC22720ST | Owner's Manual (English) - Page 2
Alaska, Hawaii, and U.S. Territories. LG Refrigerator / Freezer Warranty Period Product Parts Labor Refrigerator / Freezer 1 year 1 year [In-Home Service (Except Model GR-051)] Sealed System 7 years 1 year [In-Home Service (Except Model GR-051)] (Compressor, Condenser, Evaporator - LG LDC22720ST | Owner's Manual (English) - Page 3
de E.E.U.U. Período de Garantía del refrigerador/Congelador LG Producto Partes Mano de Obra Refrigerador/Congelador 1 año 1 año[Servicio ón relacionado en la reparación del producto, o el reemplazo de partes defectuosas, serán cargados al propietario. NÚMEROS DE ASISTENCIA AL CLIENTE - LG LDC22720ST | Owner's Manual (English) - Page 4
remanufacturés. µ Le centre de service autoris é LG garantit les r éparations pendant trente (30) jours. LA RESPONSABILITÉ DE LG CANADA SE LIMITE À LA GARANTIE l'utilisation du produit dans une atmosphère corrosive ou contraire aux instructions spécifiées dans le mannuel d'utilisation de produit. 5. - LG LDC22720ST | Owner's Manual (English) - Page 5
Replacement of light bulbs, filters, or any consumable parts. Ÿ Repairs when your Product is used in other than normal and usual household use (including, without limitation, commercial use, in offices or recreational facilities) or contrary to the instructions outlined in the Product owner's manual - LG LDC22720ST | Owner's Manual (English) - Page 6
Wire Durabase Freezer Shelf Care and Cleaning General Cleaning Tips Outside Inside Walls Door Liner and Gaskets Plastic Parts Condenser Coils Light Bulb Replacement Power Interruptions When you go on vacation About the Custom Cube Icemaker Connecting the Water Line Troubleshooting Guide 24 24 25 - LG LDC22720ST | Owner's Manual (English) - Page 7
in the area. Unplug your refrigerator before cleaning or making any repairs. NOTE: We strongly recommend that any servicing be performed by a qualified individual. Before replacing a burned-out light bulb, unplug the refrigerator or turn off power at the circuit breaker or fuse box in order to avoid - LG LDC22720ST | Owner's Manual (English) - Page 8
which cannot be turned off with a switch or pull chain. Do not use an extension cord. NOTE: Before performing any type of installation, cleaning, or removing a light bulb, turn the control (Thermostat, Refrigerator Control or Freezer Control, depending on the model) to OFF and then disconnect the - LG LDC22720ST | Owner's Manual (English) - Page 9
. NOTE: This guide covers several different models. The refrigerator you have purchased may have some or all of the items listed below. The locations of the features shown below may not match your model. A Digital Sensor Control B Refrigerator Light C Shelves D Temperature Control* E Chef Fresh - LG LDC22720ST | Owner's Manual (English) - Page 10
model. A Digital Sensor Control B Refrigerator Light C Shelves D Chef Fresh / Snack Pan E Optibin Crisper Keeps fruits and vegetable fresh and crisper F Ice Bin G Ice Tray (Inside of F)* H Durabase I Divider J Dairy Bin K Design-A-Door L Pull out Drawer M Refrigerator Door Rack N Freezer Light - LG LDC22720ST | Owner's Manual (English) - Page 11
listed below. The locations of the features shown below may not match your model. A Digital Sensor Control B Refrigerator Light C Shelves D Snack Pan E Optibin Crisper Keeps fruits and vegetable fresh and crisp F Ice Trays* G Ice Bin H Wire Durabase I Dairy Bin J Design-A-Door K Wire Freezer Shelf - LG LDC22720ST | Owner's Manual (English) - Page 12
damage could occur. WARNING 1. Remove the 2 screws from the bottom front part of refrigerator. 2. Place Base Grille into position and insert and tighten screws. To remove the base grille 1. Open the doors. (Refrigerator and Freezer) 2. Once doors are open, remove screws from Base Grille and remove - LG LDC22720ST | Owner's Manual (English) - Page 13
REVERSING AND REPLACING REFRIGERATOR DOORS (For Drawer Type Models . Set parts aside (2). • Lift the Refrigerator door (3) slightly side). Using a ¼-inch socket wrench, loosen and remove Hinge Pin (8) from the Middle Hinge Pin Bracket. 8 NOTE: At this point the door will be loose, lift up door - LG LDC22720ST | Owner's Manual (English) - Page 14
3. Replacing Refrigerator Handle • Turn handle upside down (5) • Place the handle (2) on the door by adjusting handle footprints to fit mounting fastners and tighten the set screws (1) with the 3/32 " Allen wrench. 4.Installing Refrigerator Door • Install the middle hinge (1) on the opposite side - LG LDC22720ST | Owner's Manual (English) - Page 15
REFRIGERATOR INSTALLATION HOW TO REMOVE AND INSTALL THE PULL OUT DRAWER IMPORTANT: To avoid possible injury, product or property damage, you will need two people to perform the following instructions. • With both hands, hold both sides of the door and pull it up to separate it from the rails. 1. - LG LDC22720ST | Owner's Manual (English) - Page 16
sure you have a right rail cover for each side. Right Rail cover Left Rail cover • Align the top holes of the rail cover with the top holes of the door supports to assemble the rail cover. Verify the hole's assembly • Hook door supports (1) into rail tabes (2) . 1 • With the drawer pulled out - LG LDC22720ST | Owner's Manual (English) - Page 17
REVERSING AND REPLACING REFRIGERATOR DOORS (For Swing Type Models parts aside (2). 7 Lift the Refrigerator door Freezer Door Before, remove totally the refrigerator door. Lift the door side of the base. 3.Removing Refrigerator Handle NOTE: To assist in installing the handle on the right side - LG LDC22720ST | Owner's Manual (English) - Page 18
type is not neccesary remove it. 5. Installing Freezer Door Install the base grille (1). Install the door (3) onto the bottom hinge pin. Install the middle hinge (4) on the opposite side with the screw (5) and the screws (9). 6. Installing Refrigerator Door Place the washer (6) on the middle hinge - LG LDC22720ST | Owner's Manual (English) - Page 19
right and one on the left. If your refrigerator seems unsteady or you want the doors to close easier, adjust the refrigerator tilt using the instructions below: 1. Plug the refrigerator power cord into a 3-prong grounded outlet. Move the refrigerator into its final position. 2. Use a screwdriver to - LG LDC22720ST | Owner's Manual (English) - Page 20
If water or foreign substances enter the cool air vent while cleaning, efficiency will be lowered. In addition, if gasket is damaged, efficiency may be lowered because of escaping cool air. SETTING THE CONTROLS Your refrigerator has two controls that let you regulate the temperature in the freezer - LG LDC22720ST | Owner's Manual (English) - Page 21
of ice. FREEZER TEMP WARMER 4 IS RECOMMENDED COLDER ADJUST FREEZER section too warm/ ice not made fast enough Door opened often Large amount of food added Very cold room temperature (can't cycle often enough) Heavy ice usage Air vents blocked by items REFRIGERATOR section too cold Controls not - LG LDC22720ST | Owner's Manual (English) - Page 22
in plastic wrap or aluminum foil. Milk Wipe milk cartons. For best storage, place milk on interior shelf, not on door shelf. Eggs Store in original carton on interior shelf, not on door shelf. Fruit Wash, let dry, and store in refrigerator in plastic bags or in the crisper. Do not wash or hull - LG LDC22720ST | Owner's Manual (English) - Page 23
replace a shelf : Tilt the front of the shelf up and guide the shelf hooks into the slots at a desired height. Then lower the front of the shelf so that the hooks drop into the slots. Sliding Out Shelves (optional on some models) You can slide some glass shelves in and out of your refrigerator as - LG LDC22720ST | Owner's Manual (English) - Page 24
USING YOUR REFRIGERATOR CHEF FRESH / SNACK PAN While holding the chef fresh with one hand, pull it forward slightly. Lift slightly and pull it out. CRISPER HUMIDITY CONTROL (on some models) You can control the amount of humidity in the moisturesealed crispers. Adjust the control to any setting - LG LDC22720ST | Owner's Manual (English) - Page 25
remove the lattice on inner surface: To replace the racks: 1. Hold either end of the door rack against the inside wall of the door. 2. Push down the rack until it locks in place. DESIGN-A-DOOR 1. Bins can be moved to either side of the door. 1. Remove crisper cover(as illustrated above). 2. Hold - LG LDC22720ST | Owner's Manual (English) - Page 26
straight out. 2. To install, insert the Durabase in rail assembly. EGG BOX (on some models) Store Egg Box on interior shelf, not on door shelf. CAUTION: Do not use the egg box as an ice storage bin in the freezer compartment. The egg box can easily easily break if it freezes. DURABASE DIVIDER (on - LG LDC22720ST | Owner's Manual (English) - Page 27
place. TILTING DOOR (on some models) The tilting door provides easy access to stored foods. How to use: Tilt the door down and pull it out. E FREEZER SHELF (on some models) To remove the shelf, take it from the front part, and pull it towards you. To place the shelf, reverse the removal procedure - LG LDC22720ST | Owner's Manual (English) - Page 28
at least twice a year to keep your refrigerator working efficiently. COVER BACK LIGHT BULB REPLACEMENT WARNING Electrical Shock Hazard Before replacing a burned-out light bulb, either unplug the refrigerator or turn off power at the circuit breaker or fuse box. NOTE: Moving the control to the OFF - LG LDC22720ST | Owner's Manual (English) - Page 29
at the back and then push up the light shield. To change the freezer light: 1. Unplug refrigerator or disconnect power. 2. Reach behind light shield to remove bulb. 3. Replace bulb with a wattage indicated in the refrigerator section, as shown in picture 1 . WHEN YOU GO ON VACATION If you choose - LG LDC22720ST | Owner's Manual (English) - Page 30
a 24-hour period, depending on freezer compartment temperature, room temperature, number of door openings and other operating conditions. If the refrigerator is used before the water connection is made to the icemaker, set the power switch to O (off). When the refrigerator has been connected to the - LG LDC22720ST | Owner's Manual (English) - Page 31
and 0.82 MPa on models with a water filter. Power drill. 1/2" or adjustable wrench. Straight- and Phillipsblade screwdriver Two 1/4" outer diameter compression nuts and 2 ferrules (sleeves) to connect the copper tubing to the shut off valve and the refrigerator water valve. All installations must - LG LDC22720ST | Owner's Manual (English) - Page 32
best to connect into the side of a vertical water pipe. When it is necessary to connect into a horizontal water pipe, make the connection to the top or side, rather than at the bottom, to avoid drawing off any sediment from the water cm of diameter) to allow the refrigerator to move out from the wall - LG LDC22720ST | Owner's Manual (English) - Page 33
refrigerator's water valve. Install the filter in the water line near the refrigerator. IMPORTANT: Do not use old, worn or used waterlines, only use new for a better use and service. Connect only to the supply of drinking water icemaker power switch is in the I (on) position. Refrigerator Connection - LG LDC22720ST | Owner's Manual (English) - Page 34
to refrigerator's low energy consumption design, the fans will remain off by the door switch activates the inner compartment light. REFRIGERATOR DOES NOT OPERATE Check if... The power supply cord is unplugged. A household fuse has blown or circuit breaker tripped. The refrigerator control is set - LG LDC22720ST | Owner's Manual (English) - Page 35
on the gaskets after cleaning. Level the refrigerator. Refer to the Door Closing and Alignment Section. Remove and replace the doors according to the Removing, Reversing and Replacing Refrigerator Doors section or call a qualified service technician. FROST OR ICE CRYSTALS ON FROZEN FOOD Check if - LG LDC22720ST | Owner's Manual (English) - Page 36
if food is not wrapped properly. The water supply contains minerals such as sulfur. A filter may need to be installed to eliminate taste and odor problems. The interior of refrigerator needs cleaning. See Care and Cleaning section. Ice storage bin needs cleaning. Empty and wash bin. Discard - LG LDC22720ST | Owner's Manual (English) - Page 37
TROUBLESHOOTING GUIDE AUTOMATIC ICEMAKER DOES NOT WORK Check if... Then... Icemaker power switch in the O (off) position. Move the switch to the I (on) position. Water supply turned off or not connected. See the Connecting the Water Line section. Freezer compartment too warm. Wait 24 hours - LG LDC22720ST | Owner's Manual (English) - Page 38
-
 1
1 -
 2
2 -
 3
3 -
 4
4 -
 5
5 -
 6
6 -
 7
7 -
8
-
9
-
10
-
11
-
12
-
13
-
14
-
15
-
16
-
17
-
18
-
19
-
20
-
21
-
22
-
23
-
24
-
25
-
26
-
27
-
28
-
29
-
30
-
31
-
32
-
33
-
34
-
35
-
36
-
37
-
38
 |
 |
