LG LFC23760ST Owner's Manual (English)
LG LFC23760ST - Bottom Freezer Refrigerator Manual
 |
UPC - 048231782364
View all LG LFC23760ST manuals
Add to My Manuals
Save this manual to your list of manuals |
LG LFC23760ST manual content summary:
- LG LFC23760ST | Owner's Manual (English) - Page 1
://us.lge.com 1-800-243-0000 24 HOURS A DAY, 7 DAYS A WEEK FOR LG CUSTOMER SERVICE para el servicio LG (Atención al Cliente) 24 horas al día, 7 días a la semana BOTTOM FREEZER REFRIGERATOR Owner's Manual Please read this guide thoroughly before operating and keep it handy for reference at all times - LG LFC23760ST | Owner's Manual (English) - Page 2
cleaning tips Outside Inside walls Door liner and gaskets Plastic parts Condenser coils Light bulb replacement Power interruptions When you go on vacation About the Custom Cube Ice Maker Connecting the Water Line Troubleshooting Guide 2 34 3 - 4 5 - 6 6 7 - 8 9 - 16 9 9 9 10 - 12 13 - 14 15 16 - 23 - LG LFC23760ST | Owner's Manual (English) - Page 3
LG Refrigerator / Freezer Warranty Period Product Parts Labor Refrigerator / Freezer 1 year 1 year [In-Home Service (Except Model GR-051)] Sealed System 7 years 1 year [In-Home Service (Except Model 1. Service trips to your home to deliver and pickup, install, instruct, or replace house - LG LFC23760ST | Owner's Manual (English) - Page 4
en los E.E. U.U. Incluyendo Alaska, Hawaii y otros territorios de E.E.U.U. Período de Garantía del refrigerador/Congelador LG Producto Partes Mano de Obra Refrigerador / Congelador 1 año 1 año[Servicio a domicilio (Excepto ModeloGR-051)] Sistema Sellado 7 años 1 año[Servicioa domicilio - LG LFC23760ST | Owner's Manual (English) - Page 5
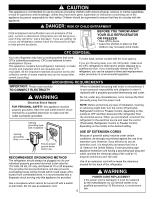
servicing be performed by a qualified individual. Before replacing a burned-out light bulb, unplug the refrigerator instructions before using this appliance. Use this appliance only for its intended purpose as described in this use and care guide. After your refrigerator eaten. Thawed ice cream should - LG LFC23760ST | Owner's Manual (English) - Page 6
) and 120 volts. Use of an extension cord will increase the clearance needed for the back of the refrigerator. WARNING POWER CORD REPLACEMENT If the power cord is damaged, it must be replaced by the manufacturer, by our service center or by qualified personal by LG Electronics, to avoid some risk. 6 - LG LFC23760ST | Owner's Manual (English) - Page 7
this section to become more familiar with the parts and features. NOTE: This guide covers several different models. The refrigerator you have purchased may have some or all crisper H Customcube Icemaker I Ice Bin J Durabase K Divider L Dairy Bin M Egg Box* N Refrigerator Door Rack O Freezer Light - LG LFC23760ST | Owner's Manual (English) - Page 8
the parts and features. NOTE: This guide covers several different models. The refrigerator you have model. A Digital Sensor Control * B Refrigerator Light C Shelves D Chef Fresh / Snack Pan E Can Dispenser * F Optibin Crisper Keeps fruits and vegetable fresh and crisper G Customcube Icemaker H Ice - LG LFC23760ST | Owner's Manual (English) - Page 9
. You may be injured or receive an electrical shock. BASE GRILLE INSTALLATION To install or replace Base Grille: 1. Remove the 2 screws from the bottom front part of refrigerator. 2. Place Base Grille into position and insert and tighten screws. To remove the base grille 1. Open the doors - LG LFC23760ST | Owner's Manual (English) - Page 10
in 3/8 in Hex head socket wrench Phillips screwdriver Flat head screwdriver 1/4 in 3/32 in Allen wrench To move refrigerator through a house door, it maybe necessary to remove refrigerator and freezer door handles. NOTE: Handle appearance may vary from illustrations on this page. 1. Removing - LG LFC23760ST | Owner's Manual (English) - Page 11
Door NOTE: Handle appearance may vary. IMPORTANT: Before you begin, turn the refrigerator OFF and unplug it. Remove food and any bins from doors. Left Door Loosen the cover screws (1). Disconnect door switch wire (2). Loosen hinge bolts (3). Lift - LG LFC23760ST | Owner's Manual (English) - Page 12
Replacing Refrigerator Door Right Door Lower the door onto the middle hinge pin (7). Make sure the door is aligned with the cabinet. 7 Replace the top hinge (4) installing hinge screws (3) to secure it. Make sure the gasket on the door is flush against the cabinet and is not folded. Support - LG LFC23760ST | Owner's Manual (English) - Page 13
REFRIGERATOR INSTALLATION HOW TO REMOVE AND INSTALL THE PULL OUT DRAWER IMPORTANT: To avoid possible injury, product or property damage, you will need two people to perform the following instructions. • With both hands, hold both sides of the door and pull it up to separate it from the rails. 1. - LG LFC23760ST | Owner's Manual (English) - Page 14
REFRIGERATOR INSTALLATION HOW TO REMOVE AND INSTALL THE PULL OUT DRAWER IMPORTANT: To avoid possible injury or product or property damage, you will need two people to perform the following instructions door supports to assemble the rail cover. Verify the hole's assembly • Hook door supports (1) - LG LFC23760ST | Owner's Manual (English) - Page 15
Refrigerator's tilt using the instructions below: 1. Plug the refrigerator's power cord into a 3-prong grounded outlet. Move the refrigerator the same amount. 4. Re-adjust if necessary. 5. Replace the base cover. NOTE: Your new refrigerator is uniquely designed with two fresh food doors. Either - LG LFC23760ST | Owner's Manual (English) - Page 16
REFRIGERATOR TEMP ADJUST WARMER 4 IS RECOMMENDED Freezer control: position 1 to 7 represent the following temperature range (-6 °F to 8 °F or -21 °C to -13 °C) When the setting is at a higher number, the freezer compartment becomes colder. Ice Plus Press the Ice and moisture problems may occur. - LG LFC23760ST | Owner's Manual (English) - Page 17
room temperature (Can not le often enough). Heavy ice usage. Air vents blocked by items. REFRIGERATOR section too Cold Controls not set correctly for your , then re-check. FOOD STORAGE GUIDE Storing Fresh Food Wrap or store food in the refrigerator in airtight and moisture-proof material unless - LG LFC23760ST | Owner's Manual (English) - Page 18
guide or a reliable cookbook. Packaging Successful freezing depends on correct packaging. When you close and seal the package, it must not allow air or moisture in or out. If you do, you could have food odor and taste transfer throughout the refrigerator package or container instructions for proper - LG LFC23760ST | Owner's Manual (English) - Page 19
reduce the amount of time the refrigerator door is open, saving energy. out. To replace a shelf: Tilt the front of the shelf up and guide the shelf hooks stop position. 3. Lift up the shelf to remove. Replace the shelf by reversing the above steps. Convenience Shelves (optional on some models - LG LFC23760ST | Owner's Manual (English) - Page 20
USING YOUR REFRIGERATOR CHEF FRESH / SNACK PAN While holding the chef fresh with one hand, pull it forward slightly. Lift slightly and pull it out. CRISPER HUMIDITY CONTROL (on some models) You can control the amount of humidity in the moisturesealed crispers. Adjust the control to any setting - LG LFC23760ST | Owner's Manual (English) - Page 21
REFRIGERATOR OPTIBIN CRISPERS (on some models models) To remove the crisper cover: 1. Remove both crisper drawers. 2. While holding the crisper cover support stop. 2. Lift the front of the crisper, then pull it out to remove. 3. Replace the crisper by sliding it back in fully past the drawer stop - LG LFC23760ST | Owner's Manual (English) - Page 22
YOUR REFRIGERATOR DESIGN-A-DOOR The door bins are removable for easy cleaning and adjusting. 1. To remove the bin, simply lift the bin up and pull straight out. 2. To replace the bin, slide it in above the desired support button and push down until it stops. FREEZER SECTION ICE BIN (on some models - LG LFC23760ST | Owner's Manual (English) - Page 23
so that you do not injure your foot! GLIDE - OUT DRAWER BASKET (on some models) 1. To remove, lift basket up and pull out straight out. 1 2 2. To Install, pull both rails out to full extension. Hook the basket supports into the rail tabs and push to the back of compartment. WARNING:To avoid - LG LFC23760ST | Owner's Manual (English) - Page 24
. GENERAL CLEANING TIPS Unplug refrigerator or disconnect power. Remove all removable parts, such as shelves, crispers refrigerator working efficiently. COVER BACK LIGHT BULB REPLACEMENT WARNING Electrical Shock Hazard Before replacing a burned-out light bulb, either unplug the refrigerator - LG LFC23760ST | Owner's Manual (English) - Page 25
to four days. While handling dry ice, wear gloves to protect your hands from frostbite. 6. Take out all removable parts, wrap them well and tape them together so they do not shift and rattle during the move. 7. Depending on the model, raise the front of the refrigerator so it rolls more easily OR - LG LFC23760ST | Owner's Manual (English) - Page 26
Ice Maker feature is included only in certain models. Please check your product specification. WARNING Personal Injury Hazard Avoid contact with the moving parts the refrigerator is plugged in. OPERATION INSTRUCTIONS A newly-installed refrigerator may take 12 to 24 hours to begin making ice. Icemaker - LG LFC23760ST | Owner's Manual (English) - Page 27
Ice Maker and/or Water Dispenser features are available on your product. BEFORE YOU BEGIN This water line installation is not warranted by the refrigerator or icemaker manufacturer. Follow these instructions in the reverse osmosis system is blocked. Replace the filter if necessary. Ÿ Allow the - LG LFC23760ST | Owner's Manual (English) - Page 28
CONNECTING THE WATERLINE INSTALLATION INSTRUCTIONS (CONTINUED) 2. CHOOSE THE VALVE LOCATION Choose drill a 1/4 hole may result in reduced ice production or smaller cubes. 6. ROUTE THE TUBING Route the tubing between the cold water line and the refrigerator. Route the tubing through a hole drilled - LG LFC23760ST | Owner's Manual (English) - Page 29
the wall. Push the refrigerator back to the wall. Place the compression nut and ferrule (sleeve) onto the end of the tubing. Insert the end of the tubing into the connection as far as possible. While holding the tubing, tighten the fitting. 12. START THE ICE MAKER Set the icemaker power switch - LG LFC23760ST | Owner's Manual (English) - Page 30
NOISE Check if... The refrigerator is not resting solidly on the floor. LIGHTS DO NOT WORK Check if... The power supply cord is unplugged. Light bulb is loose in the socket. Light bulb has burned out. Then... Firmly plug the cord into a live outlet with proper voltage. Replace the fuse or reset - LG LFC23760ST | Owner's Manual (English) - Page 31
TROUBLE SHOOTING GUIDE COMPRESSOR MOTOR SEEMS TO RUN TOO MUCH Check if... Then... The refrigerator that was replaced was an older model. Modern refrigerators with more storage space require more operating time. The room temperature is hotter than normal. The motor will run longer under warm - LG LFC23760ST | Owner's Manual (English) - Page 32
wrapped properly. The water supply contains minerals such as sulfur. The interior of refrigerator needs cleaning. A filter may need to be installed to eliminate taste and odor problems. See Care and Cleaning Section. Ice storage bin needs cleaning. Empty and wash bin. Discard old cubes. THERE - LG LFC23760ST | Owner's Manual (English) - Page 33
TROUBLE SHOOTING GUIDE AUTOMATIC ICEMAKER DOES NOT WORK Check if... Then... Icemaker power switch in the O ( of food has just been added to the refrigerator or freezer. Adding food warms the refrigerator. It can take a few hours for the refrigerator to return to normal temperature. The food is - LG LFC23760ST | Owner's Manual (English) - Page 34
-
 1
1 -
 2
2 -
 3
3 -
 4
4 -
 5
5 -
 6
6 -
 7
7 -
8
-
9
-
10
-
11
-
12
-
13
-
14
-
15
-
16
-
17
-
18
-
19
-
20
-
21
-
22
-
23
-
24
-
25
-
26
-
27
-
28
-
29
-
30
-
31
-
32
-
33
-
34
 |
 |
