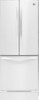
LG LFC23760SW Owner's Manual - Page 11
To install the refrigerator doors, Right Door, Left Door - assembly
 |
View all LG LFC23760SW manuals
Add to My Manuals
Save this manual to your list of manuals |
Page 11 highlights
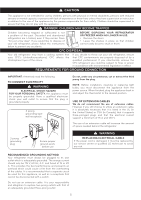
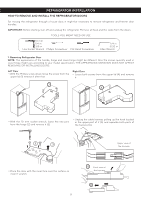
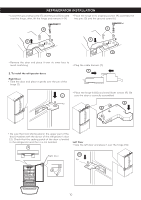
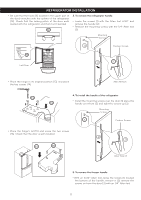
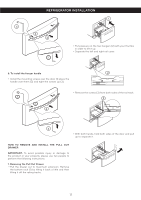
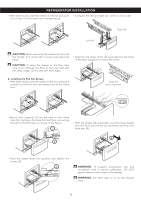
REFRIGERATOR INSTALLATION • Loose the grounding screw (7) and the pins (8) located • Place the hinge in its original position (4) assembly the over the hinge, after, lift the hinge and remove it (9). two pins (5) and the ground screw (6). 8 5 4 9 6 7 • Remove the door and place it over its inner face to avoid scratching. • Plug the cable harness (7). 7 2. To install the refrigerator doors Right Door • Take the door and place it gently over the pin of the hinge (1). • Place the hinge lid (8) and install both screws (9). Be 1 sure the door is correctly assembled. Pin 8 9 • Be sure the hook (2) (located in the upper part of the door) matches with the divisor of the refrigerator's door (3). Check that the sealing patch of the door is leveled to the refrigerator and that it is not bended. 3 Left Door • Take the left door and place it over the hinge (10). Right Door 10 Pin 2 10
-
 1
1 -
2
-
3
-
4
-
5
-
 6
6 -
 7
7 -
 8
8 -
 9
9 -
 10
10 -
 11
11 -
 12
12 -
 13
13 -
 14
14 -
 15
15 -
 16
16 -
17
-
18
-
19
-
20
-
21
-
22
-
23
-
24
-
25
-
26
-
27
-
28
-
29
-
30
-
31
 |
 |
