LG MHEC1737F INSTALLATION
LG MHEC1737F Manual
 |
View all LG MHEC1737F manuals
Add to My Manuals
Save this manual to your list of manuals |
LG MHEC1737F manual content summary:
- LG MHEC1737F | INSTALLATION - Page 1
25, 2021 10:15 AM INSTALLATION MANUAL MICROWAVE OVEN Read this installation manual thoroughly before installing the appliance and keep it handy for reference at all times. ENGLISH MHES173** MHEC173** MFL06208713 Rev.01_112521 www.lg.com Copyright © 2021 LG Electronics Inc. All Rights Reserved - LG MHEC1737F | INSTALLATION - Page 2
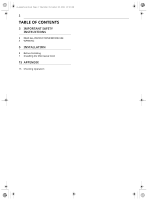
us_main.book.book Page 2 Thursday, November 25, 2021 10:15 AM 2 TABLE OF CONTENTS 3 IMPORTANT SAFETY INSTRUCTIONS 3 READ ALL INSTRUCTIONS BEFORE USE 3 WARNING 5 INSTALLATION 5 Before Installing 7 Installing the Microwave Oven 15 APPENDIX 15 Checking Operation - LG MHEC1737F | INSTALLATION - Page 3
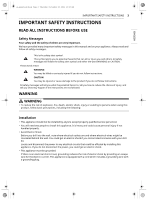
to persons when using this product, follow basic precautions, including the following: Installation • This appliance should not be installed by anyone except properly qualified service personnel. • You will need two people to install this appliance. It is heavy and could cause personal injury if not - LG MHEC1737F | INSTALLATION - Page 4
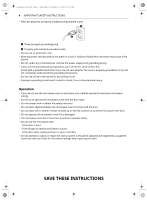
25, 2021 10:15 AM 4 IMPORTANT SAFETY INSTRUCTIONS • Place the plug into a properly installed and grounded outlet a Three-pronged (grounding) plug do not use the microwave oven as instructed, you could be exposed to excessive microwave energy. • Do not try to operate the microwave oven with the door - LG MHEC1737F | INSTALLATION - Page 5
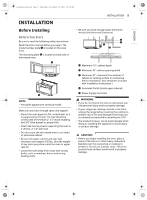
instructions Read the entire manual before you begin. The model number plate a is located on the oven front. The mounting plate b is located on back side of microwave oven. INSTALLATION the two lag screws supporting the oven to a vertical, 2" x 4" wall stud. • Do not mount the microwave oven to an - LG MHEC1737F | INSTALLATION - Page 6
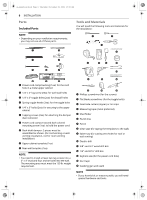
requirements, you may not use all of these parts. Tools and Materials You will need the following tools and materials for the installation: a Power cord clamp bushing (1ea): for the cord hole in a metal upper cabinet b 1/4" x 2" lag screw (2ea): for wall stud holes c 1/4" x 3" toggle bolts - LG MHEC1737F | INSTALLATION - Page 7
wall and roof caps must have a back-draft damper (shown in Parts section). • Wear proper gloves to protect your hands from injury. Installing the Microwave Oven Step 1: Prepare the Electrical Connection 1 Locate the grounded electrical outlet b for this oven in the upper cabinet a. NOTE • The outlet - LG MHEC1737F | INSTALLATION - Page 8
number of elbows to a minimum to ventilate your oven efficiently. See examples in next section. • Keep the size of the ductwork the same. • Do not install two elbows together. • Use duct tape to seal all joints in the duct system. • Use caulking to seal the exterior wall or roof opening around - LG MHEC1737F | INSTALLATION - Page 9
the circuit breaker. • To avoid risk of personal injury, wear protective gloves when handling the mounting plate. Installation 1 Remove any shipping materials and parts from inside the microwave oven. Set them aside for later use. 2 Cover the countertop or cooktop with a thick, protective covering - LG MHEC1737F | INSTALLATION - Page 10
November 25, 2021 10:15 AM 10 INSTALLATION and one or two blower unit mounting screw plate 2 Carefully lift the blower unit out of the microwave oven. 6 Attach the blower plate d to the microwave oven so the blow unit exhaust ports c and c Guides e Slide exhaust adapter into guides on rear panel. - LG MHEC1737F | INSTALLATION - Page 11
After installation, check the air ventilation path. Refer to step 2 for proper vent selection. Improper installation can cause problems such • To avoid personal injury or property damage, do not attempt to install this microwave oven if you cannot find a wall stud. Consult a carpenter or - LG MHEC1737F | INSTALLATION - Page 12
electrical circuits that could be affected by installing this oven. • To avoid risk of filler blocks b (not included) to provide additional support for the bolts. a Cabinet front c Cabinet b over the two openings in the top of the microwave oven cabinet and attach to the cabinet with masking tape. - LG MHEC1737F | INSTALLATION - Page 13
1 lag screw in a stud, and 2 toggle bolts in the drywall or the plaster. INSTALLATION 13 A B A B C a Minimum 66" from the floor b For wall - venting only c Draw lines on studs d Draw center Line e Mounting plate f Support tab NOTE • Cut out the shaded area marked F on the rear wall template - LG MHEC1737F | INSTALLATION - Page 14
to the Wall WARNING • To avoid risk of personal injury or property damage, you will need two people to install this microwave oven. 1 Carefully lift microwave oven and hang it on the support tabs at the bottom of the mounting plate. Reaching through the upper cabinet, thread the power supply cord - LG MHEC1737F | INSTALLATION - Page 15
us_main.book.book Page 15 Thursday, November 25, 2021 10:15 AM APPENDIX Checking Operation Before Using the Oven 1 Plug in the power supply cord. 2 Read your Owner's Manual, and then check the operation of your oven. APPENDIX 15 ENGLISH - LG MHEC1737F | INSTALLATION - Page 16
us_main.book.book Page 16 Thursday, November 25, 2021 10:15 AM
-
 1
1 -
 2
2 -
 3
3 -
 4
4 -
 5
5 -
 6
6 -
 7
7 -
8
-
9
-
10
-
11
-
12
-
13
-
14
-
15
-
16
 |
 |
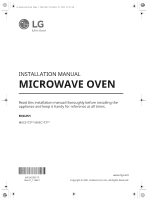
INSTALLATION MANUAL
MICROWAVE OVEN
Read this installation manual thoroughly before installing the
appliance and keep it handy for reference at all times.
ENGLISH
MHES173** MHEC173**
MFL06208713
Rev.01_112521
www.lg.com
Copyright © 2021 LG Electronics Inc. All Rights Reserved.
us_main.book.book
Page 1
Thursday, November 25, 2021
10:15 AM