Lacie 301496U User Manual
Lacie 301496U - 8TB Ethernet Disk XP Embedded Network Attached Storage Manual
 |
UPC - 093053786793
View all Lacie 301496U manuals
Add to My Manuals
Save this manual to your list of manuals |
Lacie 301496U manual content summary:
- Lacie 301496U | User Manual - Page 1
LaCie Ethernet Disk User Manual Table of Contents page 1 Table of Contents 1. Introduction...6 2. Your LaCie Ethernet Disk 7 2.1. Minimum System Requirements 7 2.2. Box Content...8 2.3. Front Panel...9 2.4. Rear Panel...10 3. Setting Up Your LaCie Ethernet Disk 11 3.1. Stand-alone Installation - Lacie 301496U | User Manual - Page 2
11.5. Diagnostics...49 11.6. Logging Off the System via Remote Desktop (Windows and Macintosh 51 12. Troubleshooting 52 13. Contacting Customer Support 54 13.1. LaCie Technical Support Contacts 55 14. Restoring Your Ethernet Disk Using the LaCie Restore CD 56 15. Warranty...58 16. Glossary...59 - Lacie 301496U | User Manual - Page 3
LaCie Ethernet Disk User Manual Forward page 3 Copyrights Copyright © 2011 LaCie. All rights reserved. No part of this publication may frequency energy and, if not installed and used in accordance with the instructions, may cause harmful interference to radio communications. However, there is no - Lacie 301496U | User Manual - Page 4
your LaCie Ethernet Disk. ✦✦ Do not place heavy objects on top of the LaCie Ethernet Disk or use excessive force on it. ✦✦ Never use excessive force on your LaCie Ethernet Disk. If you detect a problem, consult the 12. Troubleshooting section in this manual. ✦✦ Protect your LaCie Ethernet Disk from - Lacie 301496U | User Manual - Page 5
LaCie Ethernet Disk User Manual IMPORTANT INFO: Any loss, corruption or destruction of data while using a LaCie drive is the sole responsibility of the user, and under no circumstances will LaCie be held liable for the recovery or restoration of this data. To help prevent the loss of your data, - Lacie 301496U | User Manual - Page 6
LaCie Ethernet Disk User Manual 1. Introduction Share information across diverse platforms, over a network or over the Web. The LaCie Ethernet Disk is the first hard drive that can be connected to a network, without any technical expertise. You'll be able to easily communicate by sharing content - Lacie 301496U | User Manual - Page 7
LaCie Ethernet Disk User Manual 2. Your LaCie Ethernet Disk 2.1. Minimum System Requirements Client's Minimum Requirements: •• TCP/IP enabled network •• Microsoft Windows 95, 98, Me, NT, 2000, XP •• Mac OS 9.x, 10.x •• Any computer with a browser •• Any computer with an FTP client LaCie Network - Lacie 301496U | User Manual - Page 8
LaCie Ethernet Disk User Manual 2.2. Box Content 1. LaCie Ethernet Disk 2. Ethernet cable 3. Power cable 4. LaCie Ethernet Disk Utilities CD-ROM 5. Quick Install Guide IMPORTANT INFO: Please save your packaging. In the event that the drive should need to be repaired or serviced, it must be returned - Lacie 301496U | User Manual - Page 9
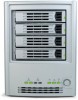
LaCie Ethernet Disk User Manual 2.3. Front Panel 1 Your LaCie Ethernet Disk page 9 READY H DISK 2 3 4 1. Power Button - Used to turn the LaCie Ethernet Disk on and off. You can turn on the Ethernet Disk by pressing the Power button (see 4.2. Turning On Your LaCie Ethernet Disk). You can also - Lacie 301496U | User Manual - Page 10
to connect a monitor (not recommended). 7. Hi-Speed USB 2.0 Ports - These ports can be used to attach additional hard drives. Please see section 10. Adding Additional Storage Space for more information. 8. Serial Number Sticker - This is where you will find your LaCie Ethernet Disk's serial number - Lacie 301496U | User Manual - Page 11
refer to your equipment rack's documentation for specific details about device weight and installation instructions. CAUTION: Once you have mounted the LaCie Ethernet Disk, do not set heavy objects on top of the unit (the LaCie Ethernet Disk can support up to 25 kilos). Fig. 01 Fig. 02 READY - Lacie 301496U | User Manual - Page 12
LaCie Ethernet Disk User Manual Installing Your LaCie Ethernet Disk page 12 4. Installing Your LaCie Ethernet Disk The LaCie Ethernet Disk is compatible with either 10BaseT or 100BaseTX, or Gigabit. 4.1. Connecting the LaCie Ethernet Disk to Your Network 1. Connect the included AC power cord to - Lacie 301496U | User Manual - Page 13
LaCie Ethernet Disk User Manual Configuring Your LaCie Ethernet Disk page 13 5. Configuring Your LaCie Ethernet Disk Before your users can access and use the LaCie Ethernet Disk, you have to make sure the correct IP address and network settings are assigned to the unit. 5.1. Connecting Using - Lacie 301496U | User Manual - Page 14
LaCie Ethernet Disk User Manual Configuring Your LaCie Ethernet Disk page 14 Launch the Administration Page Windows Users 1. Select LaCie Network Assistant in Start/Programs. A Network Assistant icon will appear in the system tray and Network Assistant will automatically detect your LaCie Ethernet - Lacie 301496U | User Manual - Page 15
server, you may need to manually assign your LaCie Ethernet Disk an IP address and other network information. The easiest way to modify your LaCie Ethernet Disk's network configuration is to use the LaCie Network Assistant. See section 5.1. Connecting Using LaCie Network Assistant for information on - Lacie 301496U | User Manual - Page 16
LaCie Ethernet Disk User Manual Configuring Your LaCie Ethernet Disk page 16 5.3. Using Ethernet Disk with Apple™ Time Machine The Ethernet Disk can be selected as a target for Apple's Time Machine software, which automatically backs up internal hard drives onto external volumes. From the web - Lacie 301496U | User Manual - Page 17
LaCie Ethernet Disk User Manual Accessing the Ethernet Disk Over the Network page 17 6. Accessing Your Ethernet Disk Over the Network Use LaCie Network Assistant to access your shared folder(s) (see section 5.1. Connecting Using LaCie Network Assistant). 6.1. Accessing Shared Folders When your - Lacie 301496U | User Manual - Page 18
LaCie Ethernet Disk User Manual Accessing the Ethernet Disk Over the Network page 18 6.1.1. Other Connection Methods Vista/XP/2000 Users - My Network Places IMPORTANT INFO: If you have just turned on the LaCie Ethernet Disk password.) The LaCie Ethernet Disk will appear as a drive with one share - Lacie 301496U | User Manual - Page 19
address of the LaCie Ethernet Disk into the address field: For FTP access - ftp://[Ethernet Disk IP address] For HTTP access - http://[Ethernet Disk IP address] For SMB/CIFS access (in order for this to method to work, the services need to be properly configured) - smb://[Ethernet Disk IP address]. - Lacie 301496U | User Manual - Page 20
LaCie Ethernet Disk User Manual Accessing the Ethernet Disk Over the Network page 20 6.2. Connecting Via HTTP or FTP If you have enabled HTTP share, you can access your share directly from any computer with a current browser. Just open a browser to http://[Ethernet Disk IP address] (the " - Lacie 301496U | User Manual - Page 21
LaCie Ethernet Disk User Manual Using the Web Administration Page page 21 7. Using the Web Administration Page LaCie provides a Web Administration Page with utilities that allow the LaCie Ethernet Disk administrator to easily create and customize shares, add and modify users and groups, and - Lacie 301496U | User Manual - Page 22
LaCie Ethernet Disk User Manual an easy way to create new shares and users. This mode will guide you through a series of questions and will help you to create system configuration (machine name, time, etc.) and defrag or back up drives. Click the Advanced Mode button to utilize these tools. Fig. 21 - Lacie 301496U | User Manual - Page 23
LaCie Ethernet Disk User Manual 7.3.2. Username The share that you are about to create is public - this means that anyone who has an account on the LaCie Ethernet Disk will be able to access it. To limit access, you have to create users. If you already have user accounts, you may skip this step - Lacie 301496U | User Manual - Page 24
you will need to reboot the LaCie Ethernet Disk for your changes to take effect. TECHNICAL NOTE: The default name for the LaCie Ethernet Disk will always be LACIE- followed by 9 random characters (letters and numbers). This manual will refer to this default name as LACIE-XXXXXXXXX. Fig. 25 Fig. 26 - Lacie 301496U | User Manual - Page 25
LaCie Ethernet Disk User Manual Moving From A Workgroup To A Domain Windows Users: You can choose whether or not your LaCie Ethernet Disk should belong to a Workgroup or a Domain (Fig. 27). By default, your LaCie Ethernet Disk will belong to the workgroup named WORKGROUP. You can also set your LaCie - Lacie 301496U | User Manual - Page 26
LaCie Ethernet Disk User Manual Using the Web Administration Page page 26 7.4.3. Sharing Your LaCie Ethernet Disk in Advanced Mode Your LaCie Ethernet Disk works like a typical file sharing system: you create users and/or groups that have access to use and share data, then create a share and - Lacie 301496U | User Manual - Page 27
LaCie Ethernet Disk User Manual Using the Web Administration Page page 27 Creating Shares Click on the Shares tab and press the Add a share icon (Fig. 31). Enter a share name* and select a drive or partition for the share, and then press the Submit Changes button. *The share name must be unique - Lacie 301496U | User Manual - Page 28
LaCie Ethernet Disk User Manual Using the Web Administration Page page 28 FTP This share not you checked the read and/or write checkboxes. 7.5. Shutting Down the Ethernet Disk The recommended method to turn off the Ethernet Drive is to use the Web Administration tool (Fig. 33). Two other methods - Lacie 301496U | User Manual - Page 29
LaCie Ethernet Disk User Manual Advanced Management of Users, Groups and Shares page 29 8. Advanced Management of Users, Groups and Shares 8.1. Listing Local Users A user is any individual with a valid username and password who, once authenticated, has access to those shares on the LaCie Ethernet - Lacie 301496U | User Manual - Page 30
LaCie Ethernet Disk User Manual Advanced Management of Users, Groups and Shares page 30 Administration Page, click on the Groups tab to have access to the list of local groups on your LaCie Ethernet Disk (Fig. 35). 8.2.1. Creating a Group In the Web Administration Page, click on the Groups tab. - Lacie 301496U | User Manual - Page 31
LaCie Ethernet Disk User Manual Advanced Management of Users, Groups and Shares page 31 8.3. database, but will not be physically present. If you connect your removable drive again, they will not work. The LaCie Ethernet Disk program allows you to remove the broken shares from the database. At the - Lacie 301496U | User Manual - Page 32
LaCie Ethernet Disk User Manual Managing Your LaCie Ethernet Disk page 32 9. Managing Your LaCie Ethernet Disk 9.1. Checking Your Server Configuration From the Web Administration Page, click on the Server tab to find out the configuration of your LaCie Ethernet Disk (Fig. 37). You should see: •• - Lacie 301496U | User Manual - Page 33
LaCie Ethernet Disk User Manual Managing Your LaCie Ethernet Disk page 33 9.2. Changing the Administrator's Password By to connect to protected shares unless you map the share as a drive, and there are also security issues. Some problems may also occur under the Mac OS, as well. Therefore, it - Lacie 301496U | User Manual - Page 34
LaCie Ethernet Disk User Manual Managing Your LaCie Ethernet Disk page 34 9.4. Rebooting Your Server 1. In the Web Administration Page, click on the Server tab. 2. At the bottom of the page, click on the Reboot - Lacie 301496U | User Manual - Page 35
LaCie Ethernet Disk User Manual Managing Your LaCie Ethernet Disk page 35 9.6. Changing Your Network 2. Enter the parameters for the network, and submit the changes (Fig. 41). For your LaCie Ethernet Disk, only the IP address and subnet mask need to be double-checked prior to making changes. - Lacie 301496U | User Manual - Page 36
tool: 1. In the Web Administration Page, click on the Disk tab. 2. Check format for the drive that you want to format (Fig. 42). (There should only be one drive, unless you have attached an external hard disk drive to your LaCie Ethernet Disk.) 3. Answer the following questions, then click on the - Lacie 301496U | User Manual - Page 37
. 1. In the Web Administration Page, click on the Disk tab. 2. Check defragment for the drive that you want to defragment (Fig. 44). There should only be one drive, unless you have attached an external hard disk drive to your LaCie Ethernet Disk. 3. Answer the following questions, then click on the - Lacie 301496U | User Manual - Page 38
LaCie Ethernet Disk User Manual Managing Your LaCie Ethernet Disk page 38 9.9. Backing Up LaCie Ethernet Disk Using the Built-In Backup Engine The LaCie Ethernet Disk uses Microsoft's NT Backup to perform a backup of one, many, or all directories of your drive, and can be scheduled to run every - Lacie 301496U | User Manual - Page 39
LaCie Ethernet Disk User Manual Managing Your LaCie Ethernet Disk speed of the drive that you are using, the port that you are using (internal drives are limited to 133Mb as permissions. 1. Connect locally to the Ethernet Disk using keyboard, mice and monitor. You can also connect using the Remote - Lacie 301496U | User Manual - Page 40
LaCie Ethernet Disk User Manual 5. Select the file(s) or folder(s) you want to restore (Fig. 49). 6. Click the Next button. Managing Your LaCie Ethernet Disk page 40 7. Click the Finish button (Fig. 50). 8. The restore progress dialog will appear. When then restore is complete click the Close - Lacie 301496U | User Manual - Page 41
LaCie Ethernet Disk User Manual Managing Your LaCie Ethernet Disk page 41 9.10. Backing Up Disks Using Thirdparty Software Programs The LaCie Ethernet Disk utilize these programs to backup your LaCie Ethernet Disk over the network to a Tape Drive. Since your LaCie Ethernet Disk can be seen on the - Lacie 301496U | User Manual - Page 42
LaCie Ethernet Disk User Manual Managing Your LaCie Ethernet Disk page 42 9.12. Restoring Your LaCie Ethernet Disk CAUTION: This is an emergency procedure only! Do not attempt to restore your LaCie Ethernet Disk if your system is functioning properly. If you want to restore your system to its - Lacie 301496U | User Manual - Page 43
LaCie Ethernet Disk User Manual Adding Additional Storage Space page 43 10. Adding Additional Storage Space You can add additional storage space to your LaCie Ethernet Disk by connecting an external hard drive using a Hi-Speed USB 2.0 port. 1. Connect the hard drive to the LaCie Ethernet Disk - Lacie 301496U | User Manual - Page 44
sound card drivers installed and does not support the audio feature. Connection to the LaCie Ethernet Disk using Remote Desktop should only be used for setting up your firewall, scheduling a backup to a shared directory over the network (i.e. to another NAS), or troubleshooting. Supported Operating - Lacie 301496U | User Manual - Page 45
LaCie Ethernet Disk User Manual 11.1. Accessing the LaCie Shell Using Remote Desktop (Windows) First make Connection dialog Computer field enter the IP address of the LaCie Ethernet Disk, and click Connect (Fig. 55). 3. In the LaCie Log On dialog Type in the Administrator username and password, - Lacie 301496U | User Manual - Page 46
LaCie Ethernet Disk User Manual 11.2. Accessing the LaCie Shell Using Remote Desktop for Mac OS X Desktop Connection dialog Computer field enter the IP address of the LaCie Ethernet Disk, and click Connect (Fig. 59). 3. In the LaCie Log On dialog Type in the Administrator username and password, and - Lacie 301496U | User Manual - Page 47
LaCie Ethernet Disk User Manual 11.3. Firewall To configure the firewall of the Ethernet Disk 1. Click on the Firewall button. 2. In the LaCie Ethernet Disk Firewall dialog that appears select the desired settings in each section of the dialog. 3. Click Apply Settings, then 4. Click Quit. Fig. 62 - Lacie 301496U | User Manual - Page 48
LaCie Ethernet Disk User Manual 4. In the dialogue window that opens, click on Browse and navigate to the target volume on which to backup your Ethernet Disk and click Open (Fig. 66). Using the LaCie Shell page 48 5. Type a name for the backup and click Next (Fig. 67). Fig. 66 6. Review the - Lacie 301496U | User Manual - Page 49
LaCie Ethernet Disk User Manual 11.5. Diagnostics When you click on the Diagnostics unfamiliar with Windows error messages, or have any questions about errors you see here, contact LaCie Technical support. There are three types of messages: errors, warnings, and information. For each event the - Lacie 301496U | User Manual - Page 50
Backup options described in sections 9.9. Backing Up LaCie Ethernet Disk Using the Built-In Backup Engine and 9.10. Backing Up Disks Using Third-party Software Programs. Please contact LaCie Technical Support before attempting any restore of the Ethernet Disk, they will advise you whether to use - Lacie 301496U | User Manual - Page 51
LaCie Ethernet Disk User Manual 11.6. Logging Off the System via Remote Desktop (Windows and Macintosh) If you click the Close button of the Remote Desktop secure way of ending a Remote Desktop session, and is the recommended way to log off the system. Fig. 72 Using the LaCie Shell page 51 Fig. 73 - Lacie 301496U | User Manual - Page 52
Disk User Manual Troubleshooting page 52 12. Troubleshooting In the event that your LaCie Ethernet Disk is not working correctly, please refer to the following checklist to find out where the problem is coming from. If you have gone through all of the points on the checklist and your drive - Lacie 301496U | User Manual - Page 53
LaCie Ethernet Disk User Manual Troubleshooting page 53 Issue How do you grant access to a few users, while restricting others, on the same network? A share cannot be computers, you will need to follow these naming protocols: These characters cannot be used in share, filer, folder or drive names - Lacie 301496U | User Manual - Page 54
LaCie Ethernet Disk User Manual 13. Contacting Customer Support 1. Read the manuals and review section 12. Troubleshooting. 2. Try to isolate the problem. If possible, make the drive the only external device on the CPU, and make sure that all of the cables are correctly and firmly attached. If you - Lacie 301496U | User Manual - Page 55
LaCie Ethernet Disk User Manual Contacting Customer Support page 55 13.1. LaCie Technical Support Contacts LaCie Asia, Singapore, and Hong Kong Contact us at: http://www.lacie.com/asia/contact/ LaCie Belgium Contact us at: http://www.lacie.com/be/contact/ (Français) LaCie Denmark Contact us at: - Lacie 301496U | User Manual - Page 56
LaCie Ethernet Disk User Manual Restoring Your LaCie Ethernet Disk page 56 14. Restoring Your Ethernet Disk Using the LaCie Restore CD In the event that LaCie Technical Support asks you to restore your Ethernet Disk from CD please use the steps outlined below. IMPORTANT INFO: Restoring will erase - Lacie 301496U | User Manual - Page 57
LaCie Ethernet Disk User Manual Restoring Your LaCie Ethernet Disk page 57 6. When you see the words "5. Ready" displayed in bold, click Shutdown (Fig. 75). 7. When prompted, disconnect the USB CD-ROM drive, and restart the system by pressing the power button on the front of the Ethernet Disk. - Lacie 301496U | User Manual - Page 58
LaCie Ethernet Disk User Manual Warranty page 58 15. Warranty LaCie warrants your drive against any defect in material and workmanship, under normal use, for the period designated on your warranty certificate. In the event this product is found to be defective within the warranty period, LaCie - Lacie 301496U | User Manual - Page 59
LaCie Ethernet Disk User Manual data from electromechanical storage (hard drives, floppy disks, CD/DVD-ROM, and external components of the system, including memory, disk drives, to zero or one bits. Driver (peripheral manager) - A instructions and data programmed directly into the circuitry of a - Lacie 301496U | User Manual - Page 60
LaCie Ethernet Disk User Manual Glossary page 60 mable read-only memory or an electronically-erasable, programmable read-only memory chip. Used for controlling the operation of the computer or tape drive Initialize, -ed, Initialization - After a hard drive (or other storage device) is formatted and - Lacie 301496U | User Manual - Page 61
LaCie Ethernet Disk User Manual Glossary page 61 Network - A series of points or nodes interconnected by is provided a service (such as a Web page) by another computer (a server) in the network. Volume - A desktop mountable storage area, may be a partition of a hard drive, a removable disk or a - Lacie 301496U | User Manual - Page 62
LaCie Ethernet Disk User Manual uses the Internet Protocol (IP). UDP uses the IP to get a data unit (a datagram) or its components. Examples include backup programs, programs to retrieve files and data on disk, programs for preparing (or formatting) a disk or and resource editors. Glossary page 62
-
 1
1 -
 2
2 -
 3
3 -
 4
4 -
 5
5 -
 6
6 -
 7
7 -
8
-
9
-
10
-
11
-
12
-
13
-
14
-
15
-
16
-
17
-
18
-
19
-
20
-
21
-
22
-
23
-
24
-
25
-
26
-
27
-
28
-
29
-
30
-
31
-
32
-
33
-
34
-
35
-
36
-
37
-
38
-
39
-
40
-
41
-
42
-
43
-
44
-
45
-
46
-
47
-
48
-
49
-
50
-
51
-
52
-
53
-
54
-
55
-
56
-
57
-
58
-
59
-
60
-
61
-
62
 |
 |

LaCie Ethernet Disk
Table of Contents
User Manual
page 1
Table of Contents
1. Introduction
...........................................................................................................
6
2. Your LaCie Ethernet Disk
.......................................................................................
7
2.1. Minimum System Requirements
..................................................................................................
7
2.2. Box Content
.............................................................................................................................
8
2.3. Front Panel
..............................................................................................................................
9
2.4. Rear Panel
.............................................................................................................................
10
3.
Setting Up Your LaCie Ethernet Disk
....................................................................
11
3.1. Stand-alone Installation
..........................................................................................................
11
3.2. Rack Installation
.....................................................................................................................
11
4. Installing Your LaCie Ethernet Disk
......................................................................
12
4.1. Connecting the LaCie Ethernet Disk to Your Network
.................................................................
12
4.2. Turning On Your LaCie Ethernet Disk
.......................................................................................
12
5. Configuring Your LaCie Ethernet Disk
.................................................................
13
5.1. Connecting Using LaCie Network Assistant
...............................................................................
13
5.2. Configuring the LaCie Ethernet Disk on a Network Without a DHCP Server
.................................
15
5.3. Using Ethernet Disk with Apple’s Time Machine™
......................................................................
16
6.
Accessing Your Ethernet Disk Over the Network
..................................................
17
6.1. Accessing Shared Folders
........................................................................................................
17
6.1.1. Other Connection Methods
..........................................................................................
18
6.2. Connecting Via HTTP or FTP
...................................................................................................
20
6.3. Connecting with an FTP Client
.................................................................................................
20
7. Using the Web Administration Page
....................................................................
21
7.1. Accessing the Web Administration Page
...................................................................................
21
7.2. Wizard Mode and Advanced Mode
.........................................................................................
22
7.3. Using the Wizard Mode
..........................................................................................................
22
7.3.1. Creating a Share: “Share Name”
..................................................................................
22
7.3.2. Username
...................................................................................................................
23
7.3.3. Confirmation
...............................................................................................................
23
7.3.4. Set-up Complete
..........................................................................................................
24
7.4. Using the Advanced Mode
......................................................................................................
24
7.4.1. Changing the Name and Location of the LaCie Ethernet Disk
..........................................
24
7.4.2. Setting the Date and Time
............................................................................................
25
7.4.3. Sharing Your LaCie Ethernet Disk in Advanced Mode
......................................................
26
7.5. Shutting Down the Ethernet Disk
..............................................................................................
28
8.
Advanced Management of Users, Groups and Shares
.........................................
29
8.1. Listing Local Users
..................................................................................................................
29
8.1.1. Creating a User
...........................................................................................................
29
8.1.2. Editing a User
..............................................................................................................
29
8.1.3. Deleting a User
...........................................................................................................
29
8.2. Listing Local Groups
...............................................................................................................
30
8.2.1. Creating a Group
........................................................................................................
30
8.2.2. Editing a Group
...........................................................................................................
30
8.2.3. Deleting a Group
........................................................................................................
30