Lacie LaCinema Classic HD User Manual
Lacie LaCinema Classic HD Manual
 |
View all Lacie LaCinema Classic HD manuals
Add to My Manuals
Save this manual to your list of manuals |
Lacie LaCinema Classic HD manual content summary:
- Lacie LaCinema Classic HD | User Manual - Page 1
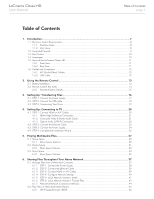
LaCinema Classic HD User Manual Table of Contents page 1 Table of Contents 1. Introduction...7 1.1. Minimum System Requirements...8 1.1.1. Windows Users...8 1.1.2. Mac Users...8 1.2. Supported Formats...9 1.3. Box Content...10 1.4. Languages...10 1.5. Views of the LaCinema Classic HD 11 1.5.1. - Lacie LaCinema Classic HD | User Manual - Page 2
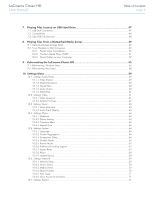
LaCinema Classic HD User Manual Table of Contents page 2 7. Playing Files Located on USB Hard Drive 47 7.1. USB Disk Connection...47 7.2. Compatibility...48 7.3. Safe USB Disk Removal...48 8. Playing Files From a Networked Media Server 49 8.1. Network-Attached Storage (NAS)...49 8.2. From - Lacie LaCinema Classic HD | User Manual - Page 3
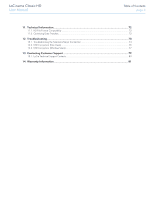
LaCinema Classic HD User Manual Table of Contents page 3 11. Technical Information 72 11.1. HD File Format Compatibility...72 11.2. Optimizing Data Transfers...72 12. Troubleshooting...73 12.1. Troubleshooting the Television/Stereo Connection 74 12.2. USB Connection (Mac Users)...75 12.3. USB - Lacie LaCinema Classic HD | User Manual - Page 4
of the information contained herein. LaCie reserves the right to make changes or revisions in the product design or the product manual without reservation and without obligation to notify any person of such revisions and changes. FCC Statement LaCinema Classic HD Tested to comply with FCC standards - Lacie LaCinema Classic HD | User Manual - Page 5
of electrical shock, fire, shortcircuiting or dangerous emissions. The disk drives shipped with your LaCinema Classic HD contain no user-serviceable parts. If it appears to be malfunctioning, have it inspected by a qualified LaCie Technical Support representative. ■■ Never expose your device to rain - Lacie LaCinema Classic HD | User Manual - Page 6
either on your internal hard disk, another external hard disk or some other form of removable storage media. LaCie offers a complete line of CD and DVD drives. If you would like more information on backup, please refer to our website. IMPORTANT INFO: 1GB = 1,000,000,000 bytes. 1TB = 1,000,000,000 - Lacie LaCinema Classic HD | User Manual - Page 7
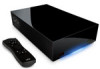
LaCinema Classic HD User Manual 1. Introduction Congratulations on the purchase of your new LaCinema Classic HD! The LaCinema Classic HD plugs directly into a wide array of audio/visual equipment for instant playback of stored home movies, music or photos. And with high-quality video and quality - Lacie LaCinema Classic HD | User Manual - Page 8
LaCinema Classic HD User Manual 1.1. Minimum System Requirements 1.1.1. Windows Users ■■ 500MHz Intel Pentium II processor or later ■■ Windows XP, Vista, or Windows 7 ■■ 256MB RAM ■■ USB interface port ■■ Internet connection (for downloading updates) 1.1.2. Mac Users ■■ G5 or later, or Intel Core - Lacie LaCinema Classic HD | User Manual - Page 9
. For a file to play properly on your LaCinema Classic HD, both its codec and container type must be supported. TECHNICAL NOTE: You can download third party applications that will help you to identify a file's codec, container, and other information. LaCie suggests the free application Media Info. - Lacie LaCinema Classic HD | User Manual - Page 10
containing the items listed below. 1. LaCinema Classic HD 2. Remote control 3. 2 x AAA batteries 4. Video composite + stereo cable 5. HDMI cable 6. USB cable 7. External power supply 8. Quick Install Guide 9. LaCie Utilities CD-ROM (with detailed User Manual and soft- ware) IMPORTANT INFO: Please - Lacie LaCinema Classic HD | User Manual - Page 11
cable to your router 3. USB 2.0 host - Connect a USB Camera, Hard Disk or USB flash key/drive 4. USB 2.0 device - Connect to your PC or Mac to copy files to the LaCinema Classic HD's internal storage 5. HDMI - Connect to a High Definition flatscreen TV or video projector 6. Video out (yellow - Lacie LaCinema Classic HD | User Manual - Page 12
of this standard, and it provides the necessary bandwidth and data transfer rates to support high speed devices such as hard drives, CD/DVD drives and digital cameras. NOTE: Your LaCinema Classic HD is shipped with a Hi-Speed USB 2.0 cable to be used to connect the product to a PC or Mac (this cable - Lacie LaCinema Classic HD | User Manual - Page 13
LaCinema Classic HD User Manual 2. Using the Remote Control Some of the buttons of the remote control have different functions or no function at all depending on the type of file you are viewing. This chapter discusses the button functions for each type of file (movies, photos and music) and - Lacie LaCinema Classic HD | User Manual - Page 14
LaCinema Classic HD User Manual 2.2. Remote Control Key Index The LaCinema Classic HD's remote control allows you to control the LaCinema Classic HD while its connected to your TV or home theatre search menu 16. Option/info menu 17. Safely eject USB disk Fig. 10 Using the Remote Control page 14 - Lacie LaCinema Classic HD | User Manual - Page 15
LaCinema Classic HD User Manual 2.2.1. Important Button Details 1. OK: This button allows you to confirm a selection. 2. Return: Press this button to return to the previous menu. 3. Settings button: This button is used to display the available set- tings or actions in the different media spaces. - Lacie LaCinema Classic HD | User Manual - Page 16
LaCinema Classic HD User Manual 3. Setting Up: Transferring Files This chapter explains how to transfer files to the LaCinema Classic HD from your computer via the USB connection. If your files are located on external sources, such as a USB hard drive or a networked device, you can learn about how - Lacie LaCinema Classic HD | User Manual - Page 17
LaCinema Classic HD User Manual 3.1. STEP 1: Connect the Power Supply 1. Plug one end of the power adapter cord into the back of LaCinema Classic HD and the other end into a power outlet (Fig. 13). 2. Move on to the next step, 3.2. STEP 2: Connect the USB cable. CAUTION: Only use the AC adapter - Lacie LaCinema Classic HD | User Manual - Page 18
HD User Manual 3.2. STEP 2: Connect the USB cable 1. Make sure the power cable is connected as described in section 3.1. STEP 1: Connect the Power Supply. 2. Connect one end of the USB cable to your computer (Fig. 14) and the other end to the small USB port on the rear of the LaCinema Classic HD - Lacie LaCinema Classic HD | User Manual - Page 19
LaCinema Classic HD User Manual Setting Up: Transferring Files page 19 3.3. STEP 3: Unmounting Your Drive As the LaCinema Classic HD behaves like an external USB device when it is connected to your computer via USB, you should unmount its volume before unplugging the USB cable. Windows Users From - Lacie LaCinema Classic HD | User Manual - Page 20
the Power Supply 4.4. STEP 4: Complete the Installation Wizard 4.1. STEP 1: Connect HDMI or A/V Cables IMPORTANT INFO: The LaCinema Classic HD cannot be connected to a TV and computer at the same time. Disconnect the USB cable before proceeding (see 3.3. STEP 3: Unmounting Your Drive). The LaCinema - Lacie LaCinema Classic HD | User Manual - Page 21
LaCinema Classic HD User Manual Setting Up: Connecting to TV page 21 4.1.1. HDMI (High-Definition) Connection 1. Connect the HDMI cable to your television's HDMI port and to the corresponding port on the LaCinema Classic HD (Fig. 20). 2. Move on to the next step, 4.2. STEP 2: Connect the Ethernet - Lacie LaCinema Classic HD | User Manual - Page 22
LaCinema Classic HD User Manual Setting Up: Connecting to TV page 22 4.1.3. Optical Audio (S/PDIF) Connection In each of the above connection methods, it is possible to connect the LaCinema Classic HD to home theater systems by plugging the S/PDIF cable (not included) into your digital amplifier - Lacie LaCinema Classic HD | User Manual - Page 23
if necessary). Allow a few moments for your network to recognize the drive. Now move on to the next step, 4.3. STEP 3: Connect the Power Supply. NOTE: You can purchase a WiFi dongle from LaCie that will enable your LaCinema Classic HD to connect to the network wirelessly. For more information, refer - Lacie LaCinema Classic HD | User Manual - Page 24
LaCinema Classic HD User Manual 4.3. STEP 3: Connect the Power Supply IMPORTANT INFO: If your power supply cable is already connected, turn on your TV and then skip to 4.4. STEP 4: Complete the Installation Wizard. 1. Plug one end of the power adapter cord into the back of LaCinema Classic HD and - Lacie LaCinema Classic HD | User Manual - Page 25
help you configure your settings. The wizard appears only the first time you turn on the LaCinema Classic HD unless you have reset drive. 1. Make sure the LaCinema Classic HD is connected to the TV, the power supply has been connected, and the TV is turned on. 2. A startup screen will appear during - Lacie LaCinema Classic HD | User Manual - Page 26
LaCinema Classic HD User Manual 6. Select the type of network connection (Wireless or Ethernet) and click Next, or click Skip (Fig. 31). IMPORTANT INFO: In order to connect the LaCinema Classic HD to your network wirelessly, you can purchase a WiFi dongle from the LaCie website. 7. Select whether - Lacie LaCinema Classic HD | User Manual - Page 27
HD User Manual 5. Playing Multimedia Files This chapter explains how to use the interface and to play files you've transferred to the LaCinema Classic HD's internal storage. For information on accessing files located on external sources, refer to section 7. Playing Files Located on USB Hard Drive - Lacie LaCinema Classic HD | User Manual - Page 28
Manual 5.1. Movie Space Navigate to the Movies Space using the Left and Right buttons. Then use the Up and Down buttons to browse within the Movie Space (Fig. 35). The Movie Space will display all of the supported video files that are accessible to the LaCinema Classic HD. Only files recognized - Lacie LaCinema Classic HD | User Manual - Page 29
LaCinema Classic HD User Manual 5.1.1. Movie Space Options While a movie is playing, you can adjust several playback pa rameters. Press the Setup button to display or exit the on-screen menu, and use the Left - Lacie LaCinema Classic HD | User Manual - Page 30
LaCinema Classic HD User Manual 6. Change play mode: By pressing the Setup adjust the play mode as follows: button you can a. Normal (Fig. 42) b. Repeat one: The currently playing file - Lacie LaCinema Classic HD | User Manual - Page 31
Manual 5.2. Photos Space Navigate to the Photo Space using the Left and Right buttons. Then use the Up and Down buttons to browse within the Photo Space (Fig. 45). The Photo Space will display all of the supported video files that are accessible to the LaCinema Classic HD. Only files recognized - Lacie LaCinema Classic HD | User Manual - Page 32
LaCinema Classic HD User Manual 5.2.1. Photo Space Options While a photo is being displayed, you can adjust several playback parameters. Press the Setup button to display or exit the onscreen - Lacie LaCinema Classic HD | User Manual - Page 33
User Manual 5.3. Music Space Navigate to the Music Space using the Left and Right buttons. Then use the Up and Down buttons to browse within the Music Space (Fig. 51). The Music Space will display all of the supported video files that are accessible to the LaCinema Classic HD. Only files recognized - Lacie LaCinema Classic HD | User Manual - Page 34
LaCinema Classic HD User Manual ■■ Now playing: If a music file is playing, this icon will be present (Fig. 54). Clicking the button will take you to the Now Playing window. - Lacie LaCinema Classic HD | User Manual - Page 35
LaCinema Classic HD User Manual 5.3.1. Music Space Options During playback, you can adjust several parameters (Fig. 56). Press the Setup button to display or exit the on-screen menu - Lacie LaCinema Classic HD | User Manual - Page 36
LaCinema Classic HD User Manual 4. Random: Files in the current folder or playlist will play in random order (Fig. 60). 5. Random repeat all: Files in the current folder or playlist will play in random order and in succession repeatedly (Fig. 61). Fig. 60 Playing Multimedia Files page 36 Fig. 61 - Lacie LaCinema Classic HD | User Manual - Page 37
) files located on the LaCinema Classic HD using your networked computer: 6.1.1. STEP 1: Connect the Power Supply 6.1.2. STEP 2: Connect the Ethernet Cable 6.1.3. STEP 3: Connect HDMI or A/V Cables 6.1.4. STEP 4: Configure Network Settings 6.1.5. STEP 5: LaCie Network Assistant: Install 6.1.6. STEP - Lacie LaCinema Classic HD | User Manual - Page 38
LaCinema Classic HD User Manual Sharing Files Throughout Your Home Network page 38 6.1.1. STEP 1: Connect the Power Supply 1. Plug one end of the power adapter cord into the back of LaCinema Classic HD and the other end into a power outlet (Fig. 62). The LaCinema Classic HD may take a few seconds - Lacie LaCinema Classic HD | User Manual - Page 39
). Allow a few moments for your network to recognize the drive. Now move on to the next step, 6.1.3. STEP 3: Connect HDMI or A/V Cables. 6.1.3. STEP 3: Connect HDMI or A/V Cables 1. Connect your LaCinema Classic HD to your television using either the HDMI cable or the composite video & audio cable - Lacie LaCinema Classic HD | User Manual - Page 40
LaCinema Classic HD User Manual Sharing Files Throughout Your Home Network page 40 6.1.4. STEP 4: Configure Network Settings In order for your LaCinema Classic HD IP address to the LaCinema Classic HD. Move on to the next step, 6.1.5. STEP 5: LaCie Network Assistant: Install. Fig. 66 Fig. 67 Fig - Lacie LaCinema Classic HD | User Manual - Page 41
LaCinema Classic HD User Manual Sharing Files Throughout Your Home Network page 41 6.1.5. STEP 5: LaCie Network Assistant: Install LaCie Network Assistant software detects all LaCie network attached storage devices on your network and gives you easy ways to connect to or configure them. Once - Lacie LaCinema Classic HD | User Manual - Page 42
LaCinema Classic HD User Manual Sharing Files Throughout Your Home Network page 42 6.1.6. STEP 6: LaCie Network Assistant: Transfer Files Windows Users: a. Select LaCie Network Assistant in Start/Programs. A Network Assistant icon will appear in the system tray (Fig. 69) and Network Assistant will - Lacie LaCinema Classic HD | User Manual - Page 43
Classic HD User Manual Sharing Files Throughout Your Home Network page 43 IMPORTANT INFO: Make sure that IPConf support is activated in the LaCie Network Assistant preferences (Fig. 73, PC users, and Fig. 74, Mac users). IMPORTANT INFO: If you want to remove files from the LaCinema Classic HD - Lacie LaCinema Classic HD | User Manual - Page 44
LaCinema Classic HD User Manual Sharing Files Throughout Your Home Network page 44 6.1.7. Alternative Network Connection Methods If your LaCinema Classic HD is connected to your home network, it is possible to access its volume without using the LaCie Network Assistant. Windows Users drive listed - Lacie LaCinema Classic HD | User Manual - Page 45
Classic HD on any other UPnP/DLNA-certified player/adapter connected to your network. For a typical configuration, see section 6.2.1. UPnP Usage Example: XBOX. NOTE: Content located on the LaCinema internal HDD or attached USB disk will scanned and then shared in your home to other UPNP DLNA media - Lacie LaCinema Classic HD | User Manual - Page 46
Power Supply and 3.2. STEP 2: Connect the USB cable). 2. Load content on the LaCinema Classic HD's internal storage. 3. If not already done, connect the LaCinema Classic HD to your TV (see 4.1. STEP 1: Connect HDMI or A/V Cables). 4. Using the remote control, navigate to Settings > Network > Media - Lacie LaCinema Classic HD | User Manual - Page 47
LaCinema Classic HD User Manual Playing Files Located on USB Hard Drive page 47 7. Playing Files Located on USB Hard Drive Simply turn on and plug in external hard disks to the LaCinema Classic HD's front USB port (Fig. 82, left) or rear device USB port (Fig. 82, right) to be able to play - Lacie LaCinema Classic HD | User Manual - Page 48
LaCinema Classic HD User Manual Playing Files Located on USB Hard Drive page 48 4. Once connected, use the remote control to navigate to one of the Media Spaces (Movies, Photos, or Music). Files located on the external USB hard drive can be accessed under the USB1 heading (Fig. 83). 7.2. - Lacie LaCinema Classic HD | User Manual - Page 49
User Manual Playing Files From a Networked Media Server page 49 8. Playing Files From a Networked Media Server You can stream content to your LaCinema Classic HD via the network connection from a networked UPnP or DLNA server located on a host computer (Mac or PC) or a network-attached hard disk - Lacie LaCinema Classic HD | User Manual - Page 50
LaCinema Classic HD User Manual Playing Files From a Networked Media Server page 50 8.2. From Windows or Mac Computers You can install software on your computer which will enable it to act as a UPnP media server and stream files to the LaCinema Classic HD via your Ethernet or wireless network. - Lacie LaCinema Classic HD | User Manual - Page 51
features to network home entertainment that might not be compatible with the LaCinema Classic HD. Please visit the LaCie website for updates to the manual and firmware. Television Network Router PC or Mac with Windows Media Player software installed Fig. 88 LaCinema Classic HD Fig. 89 Fig. 90 - Lacie LaCinema Classic HD | User Manual - Page 52
LaCinema Classic HD User Manual Playing Files From a Networked Media Server page 52 8.2.3. Shared folders on your Computer After you modify some settings in your operating system, you can make files located in certain folders on your computer available for playback on your LaCinema Classic HD in - Lacie LaCinema Classic HD | User Manual - Page 53
LaCinema Classic HD User Manual Playing Files From a Networked Media Server page 53 Windows Vista 1. Locate the folder with the files you want to share. 2. . The files contained in the folders you select will now be available to the LaCinema Classic HD in Network > Shared Folders. Fig. 95 Fig. 96 - Lacie LaCinema Classic HD | User Manual - Page 54
LaCinema Classic HD User Manual Playing Files From a Networked Media Server page 54 Mac OS X 10.5.x 1. Open your to the LaCinema Classic HD in Network > Shared Folders. Mac OS X 10.4.x 1. Open your System Preferences and select Sharing in the Internet & Network section. 2. Click the Services tab, - Lacie LaCinema Classic HD | User Manual - Page 55
LaCinema Classic HD User Manual Reformatting the LaCinema Classic HD page 55 9. Reformatting the LaCinema Classic HD Please read the following information on file system formats for Windows and Mac operating systems to determine if you need to reformat the LaCinema Classic HD. The LaCinema Classic - Lacie LaCinema Classic HD | User Manual - Page 56
LaCinema Classic HD User Manual Reformatting the LaCinema Classic HD page 56 9.1. Reformatting: Windows Users The process of formatting a drive on a computer running Windows XP, Windows Vista, or Windows 7 consists of two steps: (1) installing a signature on the drive, and (2) formatting the drive - Lacie LaCinema Classic HD | User Manual - Page 57
LaCinema Classic HD User Manual Reformatting the LaCinema Classic HD page 57 8. Click Next. 9. Click Next. 10. Click Next. 11. Click Next. 12. On the Format Partition window, select Quick Format. Click Next. 13. Click Finish to begin the formatting process. 14. Windows Disk Management will format - Lacie LaCinema Classic HD | User Manual - Page 58
LaCinema Classic HD User Manual Reformatting the LaCinema Classic HD page 58 9.2. Reformatting: Mac Users TECHNICAL NOTE: The LaCinema Classic HD is formatted in NTFS for immediate use with Windows. Mac users must reformat the drive into Mac OS Extended (NOT journaled). IMPORTANT INFO: You can - Lacie LaCinema Classic HD | User Manual - Page 59
LaCinema Classic HD User Manual 10. Settings Menu The LaCinema Classic HD Setup Space will help you to properly configure and the method you used to connect the LaCinema Classic HD to your TV (note that HDMI is the default setting): ■■ Composite ■■ HDMI. Fig. 106 Settings Menu page 59 Fig. 107 - Lacie LaCinema Classic HD | User Manual - Page 60
LaCinema Classic HD User Manual 10.1.2. Display Resolution Choose a display resolution to match your television (default is Auto). 10.1.3. Aspect Ratio Depending on your television's setup, choose either (Fig. 108) ( - Lacie LaCinema Classic HD | User Manual - Page 61
LaCinema Classic HD User Manual 10.1.5. NTSC/PAL Depending on your television's configuration, choose either (Fig. 110) (note that PAL is the default setting): ■■ NTSC ■■ PAL 10.2. Settings: Video 10.2.1. - Lacie LaCinema Classic HD | User Manual - Page 62
LaCinema Classic HD User Manual 10.2.2. Subtitle Font Size Choose from a range of 24pt to 40pt (Fig. 113): Settings Menu page 62 Fig. 113 - Lacie LaCinema Classic HD | User Manual - Page 63
LaCinema Classic HD User Manual 10.3. Settings: Music 10.3.1. Music Sequence Choose from the following (Fig. 114): ■■ Repeat one: The currently playing file will repeat continuously. ■■ Repeat all: All files - Lacie LaCinema Classic HD | User Manual - Page 64
LaCinema Classic HD User Manual 10.4. Settings: Photo 10.4.1. Slideshow This parameter allows you to change the way pictures are played back (default is Normal) (Fig. 117): ■■ Normal ■■ Shuffle ■■ Repeat - Lacie LaCinema Classic HD | User Manual - Page 65
LaCinema Classic HD User Manual 10.4.3. Transition Effect This parameter allows you to modify the transition effects between photos (default is Normal) (Fig. 119): ■■ Normal ■■ Fade ■■ Random 10.4.4. Interval Time - Lacie LaCinema Classic HD | User Manual - Page 66
LaCinema Classic HD User Manual 10.5. Settings: System 10.5.1. Language Choose your language. 10.5.2. Content Aggregation This setting activates or deactivates the file database, which allows you to browse files within each media type according to certain parameters (date, recent, etc.). If this - Lacie LaCinema Classic HD | User Manual - Page 67
LaCinema Classic HD User Manual 10.5.5. Browse Mode This setting allows you to change how files are displayed in a list (default is Thumbnail) (Fig. 124): ■■ Thumbnail ■■ List mode 10.5.6. Additional Encoding Support Change this setting if you encounter incorrect text characters in file names in - Lacie LaCinema Classic HD | User Manual - Page 68
LaCinema Classic HD User Manual 10.5.8. About Clicking this feature will provide you with the firmware version of your LaCinema Classic HD (Fig. 127). 10.5.9. Update Device This feature allows you to update your LaCinema Classic HD's operating system. Update using USB Key If the drive does not - Lacie LaCinema Classic HD | User Manual - Page 69
LaCinema Classic HD User Manual 10.6. Settings: Network 10.6.1. Network Setup This page will display your LaCinema Classic HD's network values, such as IP address (Fig. 131). To modify these values or request that an IP address be assigned to the drive, click the Configure button. Then, choose from - Lacie LaCinema Classic HD | User Manual - Page 70
(default is OFF). For details on configuring your LaCinema Classic HD as a UPnP multimedia server, see section 6.2. Play Files on Networked Media Players. (Fig. 134). 10.6.4. Shared Folders Use this page to turn on or off shared folder (SMB/Samba) support (default is ON). SMB is a network protocol - Lacie LaCinema Classic HD | User Manual - Page 71
LaCinema Classic HD User Manual 10.6.5. Auto Login This feature allows your LaCinema Classic HD to connect automatically to your wireless network (default is ON) (Fig. 136). If auto login is turned off, you will need to type your network password each time your drive is turned on. 10.6.6. Clear - Lacie LaCinema Classic HD | User Manual - Page 72
devices. With external drives, such as the LaCinema Classic HD, the data is transferred from the drive to the computer via the USB interface. The data is fed from the drive through the USB port on the drive, and passes to the computer through the USB host-bus adapter interface. USB To utilize the - Lacie LaCinema Classic HD | User Manual - Page 73
LaCinema Classic HD User Manual 12. Troubleshooting If your LaCinema Classic HD is not working correctly, please refer to the following checklist to determine the source of the problem. If you have gone through all of the points on the checklist and your LaCinema Classic still does not work properly - Lacie LaCinema Classic HD | User Manual - Page 74
LaCinema Classic HD User Manual Troubleshooting page 74 12.1. Troubleshooting the Television/Stereo Connection Problem Question Answer The drive is connected, but the TV doesn't recognize it. Have you properly set the video out parameters in the Settings menu? Using the remote control, click - Lacie LaCinema Classic HD | User Manual - Page 75
LaCinema Classic HD User Manual Troubleshooting page 75 12.2. USB Connection (Mac Users) Problem The drive is not recognized by the computer. The drive is not recognized by the computer. Error messages under Mac OS 10.x. The drive is not running noticeably faster when connected via Hi-Speed USB - Lacie LaCinema Classic HD | User Manual - Page 76
LaCinema Classic HD User Manual Troubleshooting page 76 Problem The drive is not running noticeably faster when connected via Hi-Speed USB 2.0. Question Is the drive connected to a HiSpeed USB 2.0 port on your computer? Does your computer or operating system support Hi-Speed USB 2.0? Answer - Lacie LaCinema Classic HD | User Manual - Page 77
LaCinema Classic HD User Manual Troubleshooting page 77 12.3. USB Connection (Windows Users) Problem The drive is not recognized by the computer. The drive is not recognized by the computer. Question Has the drive been formatted? Does your computer's operating system support the file system? Is - Lacie LaCinema Classic HD | User Manual - Page 78
LaCinema Classic HD User Manual Troubleshooting page 78 Problem The drive is not running noticeably faster when connected via Hi-Speed USB 2.0. Question Is the drive connected to a standard USB port on your computer? Is the drive connected to a Hi-Speed USB 2.0 port on your computer? Does your - Lacie LaCinema Classic HD | User Manual - Page 79
LaCinema Classic HD User Manual 13. Contacting Customer Support Before You Contact Technical Support 1. Read the manuals and review section 12. Troubleshooting. 2. Try to isolate the problem. If possible, make the drive the only external device on the CPU, and make sure that all of the cables are - Lacie LaCinema Classic HD | User Manual - Page 80
LaCinema Classic HD User Manual Contacting Customer Support page 80 13.1. LaCie Technical Support Contacts LaCie Asia Contact us at: http://www.lacie.com/asia/contact/ LaCie Belgium Contact us at: http://www.lacie.com/be/contact/ (Français) LaCie Denmark Contact us at: http://www.lacie.com/dk/ - Lacie LaCinema Classic HD | User Manual - Page 81
LaCinema Classic HD User Manual Warranty Information page 81 14. Warranty Information LaCie warrants your drive against any defect in material and workmanship, under normal use, for the period designated on your warranty certificate. In the event this product is found to be defective within the
-
 1
1 -
 2
2 -
 3
3 -
 4
4 -
 5
5 -
 6
6 -
 7
7 -
8
-
9
-
10
-
11
-
12
-
13
-
14
-
15
-
16
-
17
-
18
-
19
-
20
-
21
-
22
-
23
-
24
-
25
-
26
-
27
-
28
-
29
-
30
-
31
-
32
-
33
-
34
-
35
-
36
-
37
-
38
-
39
-
40
-
41
-
42
-
43
-
44
-
45
-
46
-
47
-
48
-
49
-
50
-
51
-
52
-
53
-
54
-
55
-
56
-
57
-
58
-
59
-
60
-
61
-
62
-
63
-
64
-
65
-
66
-
67
-
68
-
69
-
70
-
71
-
72
-
73
-
74
-
75
-
76
-
77
-
78
-
79
-
80
-
81
 |
 |

LaCinema Classic HD
Table of Contents
User Manual
page 1
Table of Contents
1. Introduction
.................................................................................................................
7
1.1. Minimum System Requirements
........................................................................................................
8
1.1.1. Windows Users
...................................................................................................................
8
1.1.2. Mac Users
..........................................................................................................................
8
1.2. Supported Formats
.........................................................................................................................
9
1.3. Box Content
.................................................................................................................................
10
1.4. Languages
...................................................................................................................................
10
1.5. Views of the LaCinema Classic HD
................................................................................................
11
1.5.1. Front View
........................................................................................................................
11
1.5.2. Rear View
.........................................................................................................................
11
1.6. Cables and Connectors
................................................................................................................
12
1.6.1. A/V (Audio/Video) Cables
.................................................................................................
12
1.6.2. USB Cable
.......................................................................................................................
12
2.
Using the Remote Control
.........................................................................................
13
2.1. Battery Installation
........................................................................................................................
13
2.2. Remote Control Key Index
.............................................................................................................
14
2.2.1. Important Button Details
....................................................................................................
15
3.
Setting Up: Transferring Files
....................................................................................
16
3.1. STEP 1: Connect the Power Supply
.................................................................................................
17
3.2. STEP 2: Connect the USB cable
.....................................................................................................
18
3.3. STEP 3: Unmounting Your Drive
....................................................................................................
19
4.
Setting Up: Connecting to TV
....................................................................................
20
4.1. STEP 1: Connect HDMI or A/V Cables
...........................................................................................
20
4.1.1. HDMI (High-Definition) Connection
....................................................................................
21
4.1.2. Composite Video & Stereo Audio Cable
.............................................................................
21
4.1.3. Optical Audio (S/PDIF) Connection
....................................................................................
22
4.2. STEP 2: Connect the Ethernet Cable
..............................................................................................
23
4.3. STEP 3: Connect the Power Supply
.................................................................................................
24
4.4. STEP 4: Complete the Installation Wizard
.......................................................................................
25
5. Playing Multimedia Files
............................................................................................
27
5.1. Movie Space
................................................................................................................................
28
5.1.1. Movie Space Options
........................................................................................................
29
5.2. Photos Space
...............................................................................................................................
31
5.2.1. Photo Space Options
........................................................................................................
32
5.3. Music Space
................................................................................................................................
33
5.3.1. Music Space Options
........................................................................................................
35
6.
Sharing Files Throughout Your Home Network
.........................................................
37
6.1. Manage Files from a Networked Computer
....................................................................................
37
6.1.1. STEP 1: Connect the Power Supply
.....................................................................................
38
6.1.2. STEP 2: Connect the Ethernet Cable
...................................................................................
39
6.1.3. STEP 3: Connect HDMI or A/V Cables
................................................................................
39
6.1.4. STEP 4: Configure Network Settings
...................................................................................
40
6.1.5. STEP 5: LaCie Network Assistant: Install
..............................................................................
41
6.1.6. STEP 6: LaCie Network Assistant: Transfer Files
...................................................................
42
6.1.7. Alternative Network Connection Methods
............................................................................
44
6.2. Play Files on Networked Media Players
...........................................................................................
45
6.2.1. UPnP Usage Example: XBOX
.............................................................................................
46