Lenovo 0768 User Manual
Lenovo 0768 - N100 - P T2060 Manual
 |
UPC - 883609122485
View all Lenovo 0768 manuals
Add to My Manuals
Save this manual to your list of manuals |
Lenovo 0768 manual content summary:
- Lenovo 0768 | User Manual - Page 1
Lenovo 3000 N100 and N200 Hardware Maintenance Manual June 2007 This manual supports: Lenovo 3000 N100 (MT 0689 and 0768) Lenovo 3000 N200 (MT 0769) - Lenovo 0768 | User Manual - Page 2
- Lenovo 0768 | User Manual - Page 3
Lenovo 3000 N100 and N200 Hardware Maintenance Manual - Lenovo 0768 | User Manual - Page 4
using this information and the product it supports, be sure to read the general information under "Notices" on page 155. Second Edition (June 2007) © Copyright Lenovo 2007. All rights reserved. LENOVO products, data, computer software, and services have been developed exclusively at private expense - Lenovo 0768 | User Manual - Page 5
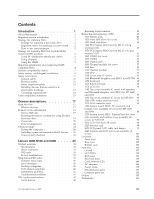
2040 Camera and LCD rear cover assembly (A cover 102 Locations 104 Front view 104 Rear view 105 Bottom view 105 Parts list 106 Overall 107 LCD FRUs 129 Keyboard 136 Recovery discs 138 Corel software CDs 149 AC adapters 149 Power cords 150 Miscellaneous parts 152 Common parts list 154 - Lenovo 0768 | User Manual - Page 6
iv MT 0689, 0768, and 0769 - Lenovo 0768 | User Manual - Page 7
product-specific parts information. Important This manual is intended for trained service personnel who are familiar with Lenovo 3000 products. Use this manual along with the advanced diagnostic tests to troubleshoot problems effectively. Before servicing a Lenovo 3000 product, be sure to review the - Lenovo 0768 | User Manual - Page 8
computers have both a processor board and a system board. If you are instructed to replace either the processor board or the system board, and replacing one of them does not correct the problem, reinstall that board, and then replace the other one. v If an adapter or a device consists of more than - Lenovo 0768 | User Manual - Page 9
Important service information Using PC Entitlement Warehouse (PEW) v PEW is the primary source for identifying FRU part numbers and FRU descriptions for the key commodities for CMV products at a MT - serial number level. An example of key commodities are hard disk drives, system boards, - Lenovo 0768 | User Manual - Page 10
be ready to support Lenovo's requirements and schedule. Products sold in 2005, will contain some RoHS compliant FRUs. The following statement pertains to these products and any product Lenovo produces containing RoHS compliant FRUs. RoHS compliant FRUs have unique FRU part numbers. Before or after - Lenovo 0768 | User Manual - Page 11
drive 3.5-inch Diskette capacity 1.0 MB 2.0 MB 4.0 MB Compatibility Read and write Read and write Not compatible Safety notices: multilingual translations In this manual, safety notices appear in English with a page number and listening for rattling sounds. Metallic parts or metal flakes can - Lenovo 0768 | User Manual - Page 12
battery as required by local ordinances or regulations. Use only the battery in the appropriate parts listing. Use of an incorrect battery can result in ignition or explosion of the battery. Certaines batteries apropiada puede provocar la ignición o explosión de la misma. 6 MT 0689, 0768, and 0769 - Lenovo 0768 | User Manual - Page 13
pack as required by local ordinances or regulations. Use only the battery in the appropriate parts listing when replacing the battery pack. Use of an incorrect battery can result in ignition or explosion of the battery. La batterie contient du nickel. Ne la démontez pas, ne l'exposez ni au feu - Lenovo 0768 | User Manual - Page 14
Dispose of the battery as required by local ordinances or regulations. Use only the battery in the appropriate parts listing. Use of an incorrect battery can result in ignition or explosion of the battery. La pile de al agua. Deséchela tal como dispone la normativa local. 8 MT 0689, 0768, and 0769 - Lenovo 0768 | User Manual - Page 15
se presenta algún síntoma del fluido despues de lavarse. Safety notice 6 DANGER To avoid shock, do not remove the plastic cover that protects the lower part of the inverter card. Afin d'éviter tout risque de choc électrique, ne retirez pas le cache en plastique protégeant la partie inférieure de - Lenovo 0768 | User Manual - Page 16
Safety notice 8 DANGER Before removing any FRU, power off the computer, unplug all power cords from electrical outlets, remove the battery pack, and then disconnect any interconnecting cables. ía y, a continuación, desconecte cualquier cable de conexión entre dispositivos. 10 MT 0689, 0768, and 0769 - Lenovo 0768 | User Manual - Page 17
need to be familiar before you service a Lenovo 3000 computer. General safety Follow removed covers and other parts in a safe place, away from all personnel, while you are servicing the machine. v Keep or working in any other conditions that might be hazardous to your eyes. v After service, reinstall - Lenovo 0768 | User Manual - Page 18
can then operate the switch or unplug the power cord quickly. v Do not work alone under hazardous conditions or near equipment that has hazardous voltages. v Disconnect all power before: - Performing a mechanical inspection - Working near power supplies - Removing or installing main units v Before - Lenovo 0768 | User Manual - Page 19
Safety information v Do not service the following parts with the power on when they are removed from their normal operating places in a machine: - Power supply units - Pumps - Blowers and fans - Motor generators and similar units. (This practice ensures correct grounding of the units.) v If an - Lenovo 0768 | User Manual - Page 20
part from touching your clothing. Most clothing is insulative and retains a charge even when you are wearing a wrist strap. v Use the black side of a grounded work mat to provide a static-free work surface. The mat is especially useful when handling ESD-sensitive devices. v Select a grounding system - Lenovo 0768 | User Manual - Page 21
statement Laser compliance statement Some models of Lenovo 3000 computer are equipped from the factory with an optical storage device such as a CD-ROM drive or a DVD-ROM drive. Such devices are also sold separately as options. If one of these drives is installed, it is certified in the U.S. to - Lenovo 0768 | User Manual - Page 22
Laser compliance statement A CD-ROM drive, a DVD-ROM drive, or any other storage device installed may contain an embedded Class 3A or Class 3B laser diode. Note the following: DANGER Emits examine con instrumental óptico el haz de luz. Evite la exposición directa al haz. 16 MT 0689, 0768, and 0769 - Lenovo 0768 | User Manual - Page 23
that you are servicing sequence might have been altered. If you select an incorrect drive, data or programs might be overwritten. v Replace a FRU only with another FRU of the correct model. When you replace a FRU, make sure that the model of the machine and the FRU part number are correct by - Lenovo 0768 | User Manual - Page 24
a liquid onto the keyboard v Use of an incorrect ac adapter on laptop products The following symptoms might indicate damage caused by nonwarranted activities: v Missing parts might be a symptom of unauthorized service or modification. v If the spindle of a hard disk drive becomes noisy, it may - Lenovo 0768 | User Manual - Page 25
diskette and the system program service diskette become available, they will be posted on http://www.lenovo.com/spm Restoring the factory contents by using Product Recovery discs When the hard disk drive is replaced because of a failure, no Product Recovery program is on the new hard disk. In this - Lenovo 0768 | User Manual - Page 26
is complete, the Welcome to Microsoft® Windows® screen is displayed. Follow the instructions on the screen to complete the Windows setup. Passwords As many as three passwords may be needed for any Lenovo 3000 computer: the power-on password (POP), the hard-disk password (HDP), and the supervisor - Lenovo 0768 | User Manual - Page 27
DIMM and the DIMM slot cover. 7. Reinstall the battery pack. 8. Turn on the computer and wait servicer: 1. Turn on the computer; then, while the initial screen is displayed, press the Lenovo CareSM button. The Rescue and Recovery screen opens. 2. Click Access BIOS. The System Restart Required window - Lenovo 0768 | User Manual - Page 28
Rescue and Recovery screen opens. 2. Click Access BIOS. The System Restart Required window is displayed. 3. Click Yes. The computer restarts, and the BIOS Setup Utility screen opens. 4. Select Security, using the cursor directional keys to move down the menu. 5. Select Password. 6. Select Hard-disk - Lenovo 0768 | User Manual - Page 29
the timer conditions are satisfied in suspend mode. When the power is turned on, the computer returns from hibernation mode and resumes operation. The hibernation file in the boot record on the hard disk drive is read, and system status is restored from the hard disk drive. General descriptions 23 - Lenovo 0768 | User Manual - Page 30
you test one of these devices, you will need to enable it by using Configuration utility for DOS. The utility is available on the following Web site: http://www.lenovo.com/support Creating the PC-Doctor diagnostics diskette To create the PC-Doctor disk from the Rescue and Recovery workspace , do as - Lenovo 0768 | User Manual - Page 31
Fixed Disks v Diskette Drives v Memory Test - Full v Memory Test - Quick v Keyboard v Video v Mouse v System Load Notes: v In the Keyboard test in Interactive Tests, the Fn key should be held down with M key for at least 2 seconds; otherwise, it cannot be sensed. v Video Adapter test supports only - Lenovo 0768 | User Manual - Page 32
v CHECK SYSTEM HEALTH v SYSTEM AND DEVICE TESTS v LENOVO TROUBLESHOOTING v CENTER v SYSTEM REPORTS v UPDATES AND SUPPORT Power system checkout To verify a symptom, do the following: 1. Turn off the computer. 2. Remove the battery pack. 3. Connect the ac adapter. 4. Check that power is supplied when - Lenovo 0768 | User Manual - Page 33
Note: Output voltage of pin no.2 of the ac adapter may be different from the one you are servicing. 3. If the voltage is not correct, replace the ac adapter. 4. If the voltage is acceptable, do the following: v Replace the system board. v If the problem persists, go to "Product overview" on page 30 - Lenovo 0768 | User Manual - Page 34
Checkout guide Note: If the battery pack becomes hot, it may not be able to charge. Remove it from the computer and leave it at room temperature for a while. After it cools down, reinstall and recharge it. To check the battery pack, do the following: 1. Power off the computer. 2. Remove the battery - Lenovo 0768 | User Manual - Page 35
147 Windows Vista Ultimate (32 bit) DVDs . . . 148 Corel software CDs 149 AC adapters 149 Power cords 150 Power cords for MT 0689 and 0768 . . . . 150 Power cords for MT 0769 151 Miscellaneous parts 152 Common parts list 154 Tools 154 Notices 155 Trademarks 156 © Copyright Lenovo 2007 29 - Lenovo 0768 | User Manual - Page 36
), 2-MB L2 cache (667 MHz) v Intel Core Solo processor T1350 (1.86 GHz), 2-MB L2 cache (533 MHz) v Intel Core Solo processor T1400 (1.83 GHz), 2-MB L2 cache (667 MHz) v Intel Core Duo processor T2050 (1.60 GHz), 2-MB L2 cache (533 MHz) v Intel Core Duo processor T2060 (1.60 GHz), 2-MB L2 cache (533 - Lenovo 0768 | User Manual - Page 37
memory chip Display Standard memory Optional memory CMOS RAM (continued) Product overview Description • Intel Celeron processor 530 (1.73GHz 533MHz 1MBL2) • Intel Celeron processor 550 (2.0GHz 533MHz 1MBL2) • Intel Core 2 Duo processor T5550 (1.83GHz 667MHz 2MBL2) • Intel Core 2 Duo processor - Lenovo 0768 | User Manual - Page 38
slot Bluetooth wireless (some models) • Bluetooth daughter card Modem • MDC-1.5, 56 kbps V.92 Touch pad Yes Battery • Li-ion battery (6 cells) 2.2 Ah • Li-ion battery (9 cells) 2.2 Ah AC adapter • 65-watt (20 V) slim type • 90-watt (20 V) type Preinstalled operating system • Windows XP - Lenovo 0768 | User Manual - Page 39
Product overview Status indicators The system status indicators show the status of the computer, as follows: 12 34 56 7 8 Indicator 1 Caps lock 2 Num lock 3 Drive in use 4 Power on 5 Wireless status Meaning Caps Lock mode is enabled. You can enter all alphabetic characters (A-Z) in uppercase - Lenovo 0768 | User Manual - Page 40
The following table shows the test for each FRU. FRU System board LCD unit Keyboard Hard disk drive Diskette drive Memory Applicable test 1. Diagnostics --> CPU/Coprocessor 2. Diagnostics --> Systemboard 1. Diagnostics --> Video Adapter 2. Interactive Tests --> Video 1. Diagnostics --> Systemboard - Lenovo 0768 | User Manual - Page 41
or disable the built-in wireless networking features and the Bluetooth features. If you press Fn+F5, a list of wireless features is displayed. You can quickly change the power state of each feature in the list. Fn+F6 Reserved. Fn+F7 Open the window for Choose Presentation or Display scheme - Lenovo 0768 | User Manual - Page 42
3. Hard disk drive. 4. System board. 1. Keyboard. 2. System board. Load Setup Defaults in BIOS Setup Utility. System board. 1. DIMM. 2. System board. 1. DIMM. 2. System board. 1. Charge the backup battery for more than 8 hours by connecting the ac adapter. 2. Replace the backup battery and run BIOS - Lenovo 0768 | User Manual - Page 43
test failed 02F6 Software NMI failed 02F7 Fail-safe timer NMI failed Symptom-to-FRU index FRU or action, in sequence 1. Charge the backup battery for more than 8 hours by connecting the ac adapter. 2. Replace the backup battery and run BIOS Setup Utility to reset the time and date. 3. System board - Lenovo 0768 | User Manual - Page 44
. Thermal sensing error. Authentication of system services failed. Press to resume. Cannot boot from any device. FRU or action, in sequence DIMM. Make sure to use supported memory. 1. Load "Setup Defaults" in the BIOS Setup Utility. 2. Backup battery. 3. System board. 1. Load "Setup Defaults - Lenovo 0768 | User Manual - Page 45
POST. 1. Reseat DIMM. 2. System board. The power-on password prompt appears. A power-on password or a supervisor password is set. Type the password and press Enter. The hard-disk password prompt appears. A hard-disk password is set. Type the password and press Enter. Lenovo 3000 N100 and N200 - Lenovo 0768 | User Manual - Page 46
problems can cause viewing concerns. The LCD should be replaced if the number System board. 1. Reseat the LCD connectors. 2. LCD assembly. 3. System board. 1. See important note for "LCD-related symptoms." 2. Reseat all LCD connectors. 3. LCD assembly. 4. System board. LCD assembly. 40 MT 0689, 0768 - Lenovo 0768 | User Manual - Page 47
the adapter or device that has failed, if wrong devices are installed, or if the system simply is not operating, follow these procedures to isolate the failing FRU (do not isolate FRUs that have no defects). Verify that all attached devices are supported by the computer. Verify that the power supply - Lenovo 0768 | User Manual - Page 48
that all of the screws are tightened firmly. v Ensure torque screwdrivers are calibrated correctly following country specifications. Retaining serial numbers This section includes the following descriptions: v "Restoring the serial number of the system unit" on page 43 42 MT 0689, 0768, and 0769 - Lenovo 0768 | User Manual - Page 49
replaced the system board, restore the serial number by doing the following: 1. Install the CE Utility Diskette for Lenovo 3000 notebooks and restart the computer. 2. From the main menu, select 1. Set System Identification. 3. Select 1. Add S/N data from EEPROM. Follow the instructions on the screen - Lenovo 0768 | User Manual - Page 50
date from EEPROM, and follow the instruction on the screen. After an ECA has been applied to the machine, the EEPROM must be updated to reflect the ECA's application. Use the CE Utility Diskette for Lenovo 3000 notebooks to update the EEPROM. Note: Only the ECA number is stored in the EEPROM. The - Lenovo 0768 | User Manual - Page 51
any FRU, turn off the computer, unplug all power cords from electrical outlets, remove the battery pack, and then disconnect any interconnecting cables. listening for rattling sounds. Metallic parts or metal flakes can cause electrical short circuits. Attention: The system board is sensitive to - Lenovo 0768 | User Manual - Page 52
only the battery specified in the parts list for your computer. Any other battery could ignite or explode. Unlock the battery release lever 1 and holding the battery release lever in the unlocked position 2 , remove the battery pack in the direction shown by arrow 3. 1 2 3 46 MT 0689, 0768, and - Lenovo 0768 | User Manual - Page 53
1020 Hard disk drive slot cover For access, remove this FRU: v "1010 Battery pack" on page 46 Removing and replacing a FRU 2 1 1 For MT 0689 and 0768 Step 1 Screw (quantity) M2.5 × 4 mm, flat-head, nylon-coated (2) For MT 0769 Step 1 Screw (quantity) M2.5 × 4 mm, pan-head, nylon-coated (2) - Lenovo 0768 | User Manual - Page 54
data. v Before removing the drive, have the user make a backup copy of all the information on it if possible. v Never remove the drive while the system is operating or is in suspend mode. 1 When installing: Make sure that the hard disk drive connector is attached firmly. 48 MT 0689, 0768, and 0769 - Lenovo 0768 | User Manual - Page 55
.11 a/b/g wireless LAN For access, remove these FRUs in order: v "1010 Battery pack" on page 46 v "1020 Hard disk drive slot cover" on page 47 For MT 0689 and 0768 1 1 and gently unplug them in direction of the arrow. When installing: Plug the white cable into the jack labeled MAIN on the card, - Lenovo 0768 | User Manual - Page 56
using the removal tool antenna RF connector (P/N: 08K7159) or pick the connectors with your fingers and gently unplug them in direction of the arrow. When installing: Plug the black cable into the jack labeled MAIN on the card, and the white cable into the jack labeled AUX. 50 MT 0689 - Lenovo 0768 | User Manual - Page 57
a/b/g/n wireless LAN For access, remove these FRUs in order: v "1010 Battery pack" on page 46 v "1020 Hard disk drive slot cover" on page 47 For MT 0689 and 0768 1 fingers and gently unplug them in direction of the arrow. When installing: Plug the white cable (MAIN) into the jack labeled on the - Lenovo 0768 | User Manual - Page 58
using the removal tool antenna RF connector (P/N: 08K7159) or pick the connectors with your fingers and gently unplug them in direction of the arrow. When installing: Plug the black cable (MAIN) into the jack labeled 1 on the card, the white cable (AUX) into the jack labeled 2, and the gray cable - Lenovo 0768 | User Manual - Page 59
1060 DIMM slot cover For access, remove this FRU: v "1010 Battery pack" on page 46 1 2 Removing and replacing a FRU For MT 0689 and 0768 Step 1 Screw (quantity) M2.5 × 4 mm, flat-head, nylon-coated (1) For MT 0769 Step 1 Screw (quantity) M2.5 × 4 mm, pan-head, nylon-coated (1) Color Silver - Lenovo 0768 | User Manual - Page 60
Removing and replacing a FRU 1070 DIMM For access, remove these FRUs in order: v "1010 Battery pack" on page 46 v "1060 DIMM slot cover" on page 53 2 1 1 When installing: Insert the notched end of the DIMM into the socket. Press the DIMM firmly, and pivot it until it snaps into the place. Make sure - Lenovo 0768 | User Manual - Page 61
1080 Optical drive For access, remove these FRUs in order: v "1010 Battery pack" on page 46 v "1060 DIMM slot cover" on page 53 (only for MT 0689) For MT 0689 1 2 3 Step 1 Screw (quantity) M2.5 × 4 mm, flat-head, nylon-coated (1) (continued) Color Silver Torque 0.392 Nm (4 kgfcm) Lenovo 3000 - Lenovo 0768 | User Manual - Page 62
Removing and replacing a FRU For MT 0768 and 0769 1 2 3 For MT 0768 Step 1 Screw (quantity) M2.5 × 4 mm, flat-head, nylon-coated (1) For MT 0769 Step 1 Screw (quantity) M2.5 × 4 mm, pan-head, nylon-coated (1) Color Silver Torque 0.392 - Lenovo 0768 | User Manual - Page 63
1090 Thermal module slot cover For access, remove this FRU: v "1010 Battery pack" on page 46 Removing and replacing a FRU 1 1 2 For MT 0689 and 0768 Step 1 Screw (quantity) M2.5 × 4 mm, flat-head, nylon-coated (2) For MT 0769 Step 1 Screw (quantity) M2.5 × 4 mm, pan-head, nylon-coated (2) - Lenovo 0768 | User Manual - Page 64
For access, remove this FRU: v "1010 Battery pack" on page 46 v "1090 Thermal module slot cover" on page 57 12 1 1 3 For MT 0689 Step 1 Screw (quantity) M2.5 × 5 mm, flat-head, nylon-coated (3) Color Black Torque 0.392 Nm (4 kgfcm) For MT 0768 Step 1 Screw (quantity) M2.5 × 6 mm, flat - Lenovo 0768 | User Manual - Page 65
FRUs in order: v "1010 Battery pack" on page 46 v "1090 Thermal module slot cover" on page 57 v "1100 Fan" on page 58 For MT 0689 and 0768 1 1 1 1 2 Step 1 Screw (quantity) CPU thermal screw, nylon-coated (4) Color Silver Torque 0.392 Nm (4 kgfcm) When installing: Make sure that the connector - Lenovo 0768 | User Manual - Page 66
Removing and replacing a FRU For MT 0769 1 2 1 1 When installing: Make sure that the connector is attached firmly. 3 (continued) 60 MT 0689, 0768, and 0769 - Lenovo 0768 | User Manual - Page 67
Removing and replacing a FRU When installing: Before you attach a new thermal module to the computer, peel off the covering film of thermal grease. Then attach the thermal module to the computer. Lenovo 3000 N100 and N200 61 - Lenovo 0768 | User Manual - Page 68
is extremely sensitive. When you service the CPU, avoid any kind of rough handling. Rotate the head of the screw in the direction shown by arrow 1 to release the lock; then remove the CPU in the direction shown by arrow 2 . 1 b a 2 When installing: Place the CPU on the CPU socket a , and then rotate - Lenovo 0768 | User Manual - Page 69
1130 Cover, strip (E cover) For access, remove this FRU: v "1010 Battery pack" on page 46 Removing and replacing a FRU 1 2 3 3 Lenovo 3000 N100 and N200 63 - Lenovo 0768 | User Manual - Page 70
a FRU 1140 Bluetooth daughter card (BDC) for MT 0769 For access, remove this FRU: v "1010 Battery pack" on page 46 v "1130 Cover, strip (E cover)" on page 63 2 1 3 Step 1 Screw (quantity) M2.5 × 3 mm, pan-head, nylon-coated (1) Color Silver Torque 0.392 Nm (4 kgfcm) When installing: Make sure - Lenovo 0768 | User Manual - Page 71
1150 Keyboard For access, remove these FRUs in order: v "1010 Battery pack" on page 46 v "1130 Cover, strip (E cover)" on page 63 Removing and replacing a FRU 1 1 For MT 0689 and 0768 Step 1 Screw (quantity) M2.5 × 3 mm, flat-head, nylon-coated (2) For MT 0769 Step 1 Screw (quantity) M2.5 × - Lenovo 0768 | User Manual - Page 72
and replacing a FRU In step 2 , unlatch the keyboard. 2 When installing: Make sure that the latch is attached firmly. Then secure the screws. Lift the keyboard a little in the direction shown by arrow 4 . Then unlock the connector 5 and detach the connector. (continued) 66 MT 0689, 0768, and 0769 - Lenovo 0768 | User Manual - Page 73
Removing and replacing a FRU 3 54 4 When installing: 1. Make sure that the keyboard connector is attached firmly. Then lock the connector. 2. Make sure that the front side of the keyboard is under the frame. Lenovo 3000 N100 and N200 67 - Lenovo 0768 | User Manual - Page 74
replacing a FRU 1160 Function board For access, remove these FRUs in order: v "1010 Battery pack" on page 46 v "1130 Cover, strip (E cover)" on page 63 v "1150 Keyboard" on page 65 1 1 3 2 2 For MT 0689 and 0768 Step 1 Screw (quantity) M2.5 × 3 mm, flat-head, nylon-coated (2) For MT 0769 Step - Lenovo 0768 | User Manual - Page 75
unit For access, remove these FRUs in order: v "1010 Battery pack" on page 46 v "1020 Hard disk drive slot cover" on page 47 v "1040 PCI Express Mini Card for 802.11 a/b/g wireless LAN" on page 49 v "1050 PCI Express Mini Card for 802.11 a/b/g/n wireless LAN" on page 51 v "1060 DIMM slot cover" on - Lenovo 0768 | User Manual - Page 76
and 0769 Note: Step 1a is only for MT 0769. 1a 1 For MT 0768 Step 1 Screw (quantity) M2.5 × 6 mm, flat-head, nylon-coated (1) Color pan-head, nylon-coated (1) Color Silver Torque 0.392 Nm (4 kgfcm) When installing: Make sure that the connector is attached firmly. (continued) 70 MT 0689 - Lenovo 0768 | User Manual - Page 77
a FRU Pull out the wireless LAN antenna cables from the guide hole of the system board 2 , and release them from the cable guides of the frame 3 . For MT 0689 and 0768 5 6 4 3 2 When installing: Make sure that the connectors 4 , 5 , and 6 are attached firmly. (continued) Lenovo 3000 N100 and N200 71 - Lenovo 0768 | User Manual - Page 78
a FRU For MT 0769 Pull out the wireless LAN antenna cables from the guide hole of the system board 2 , and release them from the cable guides of the frame 3 . Pull out the LCD cable from the hole of the system board 6 . 5 6 4 3 2 2 When installing: Make sure that the connectors 4 and 5 are - Lenovo 0768 | User Manual - Page 79
along the cable guides. When you route the cables, do not tense them. To do so, the cables may get damaged by the cable guides of the frame, and may cause a broken wire. Make sure that you do not pinch the antenna cables when you attach the LCD assembly. (continued) Lenovo 3000 N100 and - Lenovo 0768 | User Manual - Page 80
the cable guides. When you route the cables, do not tense them. To do so, the cables may get damaged by the cable guides of the frame, and may cause a broken wire. Make sure that you do not pinch the antenna cables when you attach the LCD assembly. 74 MT 0689, 0768, and 0769 - Lenovo 0768 | User Manual - Page 81
a FRU 1180 Top cover assembly (C cover) with speakers and Bluetooth daughter card (BDC) for MT 0689 and 0768 For access, remove these FRUs in order: v "1010 Battery pack" on page 46 v "1020 Hard disk drive slot cover" on page 47 v "1040 PCI Express Mini Card for 802.11 a/b/g wireless LAN" on page 49 - Lenovo 0768 | User Manual - Page 82
: Step 3a is only for MT 0689. 3a 3a Step 3a Screw (quantity) M2.5 × 6 mm, flat-head, nylon-coated (2) For MT 0768 Note: Step 1b is only for MT 0768 Color Black Torque 0.392 Nm (4 kgfcm) 1b Step 1b Screw (quantity) M2.5 × 6 mm, flat-head, nylon-coated (1) (continued) Color Black Torque - Lenovo 0768 | User Manual - Page 83
Removing and replacing a FRU Note: Steps 2b and 3b are only for MT 0768. 2b 2b 2b 2b 2b 2b 2b 2b 2b 2b Step 2b Screw (quantity) M2.5 × 6 mm, 3b Screw (quantity) M2.5 × 6 mm, flat-head, nylon-coated (2) (continued) Color Black Torque 0.392 Nm (4 kgfcm) Lenovo 3000 N100 and N200 77 - Lenovo 0768 | User Manual - Page 84
Removing and replacing a FRU 4 When installing: Make sure that the connectors are attached firmly. 5 5 5 5 5 5 (continued) 78 MT 0689, 0768, and 0769 - Lenovo 0768 | User Manual - Page 85
underside of the top cover assembly. To remove the Bluetooth daughter card, do as follows: 1 1 2 Step 1 Screw (quantity) M2 × 4 mm, flat-head, nylon-coated (2) Color Black Torque 0.245 Nm (2.5 kgfcm) When installing: Make sure that the connector is attached firmly. Lenovo 3000 N100 and N200 79 - Lenovo 0768 | User Manual - Page 86
Removing and replacing a FRU 1190 Top cover assembly (C cover) for MT 0769 For access, remove these FRUs in order: v "1010 Battery pack" on page 46 v "1020 Hard disk drive slot cover" on page 47 v "1040 PCI Express Mini Card for 802.11 a/b/g wireless LAN" on page 49 v "1050 PCI Express Mini Card for - Lenovo 0768 | User Manual - Page 87
Removing and replacing a FRU 2 2 2 2 2 3 2 2 2 2 2 Step 2 3 Screw (quantity) M2.5 × 8 mm, pan-head, nylon-coated (16) M2.5 × 10 mm, pan-head, nylon-coated (1) 4 Color Silver Silver Torque 0.392 Nm (4 kgfcm) 0.392 Nm (4 kgfcm) Step 4 Screw (quantity) M2.5 × 3 mm, pan-head, nylon- - Lenovo 0768 | User Manual - Page 88
Removing and replacing a FRU 5 When installing: Make sure that the connectors are attached firmly. 6 6 6 6 6 6 82 MT 0689, 0768, and 0769 - Lenovo 0768 | User Manual - Page 89
Removing and replacing a FRU 1200 USB/Audio connector card For access, remove these FRUs in order: v "1010 Battery pack" on page 46 v "1020 Hard disk drive slot cover" on page 47 v "1040 PCI Express Mini Card for 802.11 a/b/g wireless LAN" on page 49 v "1050 PCI Express Mini Card for 802.11 a/b/g/n - Lenovo 0768 | User Manual - Page 90
: v "1010 Battery pack" on page 46 v "1020 Hard disk drive slot cover" on page 47 v "1040 PCI Express Mini Card for 802.11 a/b/g wireless LAN" on page 49 v "1050 PCI Express Mini Card for 802.11 a/b/g/n wireless LAN" on page 51 v "1130 Cover, strip (E cover)" on page 63 v "1150 Keyboard" on page 65 - Lenovo 0768 | User Manual - Page 91
For MT 0769 Removing and replacing a FRU 1 3 2 Step 1 Screw (quantity) M2.5 × 4 mm, pan-head, nylon-coated (1) Color Silver Torque 0.392 Nm (4 kgfcm) When installing: Make sure that the connector is attached firmly. Lenovo 3000 N100 and N200 85 - Lenovo 0768 | User Manual - Page 92
Removing and replacing a FRU 1220 System board, MDC, PC Card slot, and bottom cover assembly (D cover) for MT 0689 and 0768 For access, remove these FRUs, in order: v "1010 Battery pack" on page 46 v "1020 Hard disk drive slot cover" on page 47 v "1030 Hard disk drive" on page 48 v "1040 PCI Express - Lenovo 0768 | User Manual - Page 93
Removing and replacing a FRU 3 2 Step 2 Screw (quantity) M2.5 × 3 mm, flat-head, nylon-coated (1) Color Black Torque 0.392 Nm (4 kgfcm) In step 3 , remove the system board, the MDC, and the PC Card slot together from the bottom cover. To remove the MDC, do as follows: 1 1 2 Step 1 Screw - Lenovo 0768 | User Manual - Page 94
, do as follows: 1 1 1 1 2 Step 1 Screw (quantity) M2 × 4 mm, flat-head, nylon-coated (4) Color Silver Torque 0.245 Nm (2.5 kgfcm) When installing: Make sure that the connectors of PC Card slot assembly is attached to the system board firmly, and then fasten the screws. (continued) 88 MT 0689 - Lenovo 0768 | User Manual - Page 95
the computer when it is shipped. a MAC label (802.11 a/b/g) b Product label c Windows license label (COA) d MAC label (802.3) e Serial number label f Bluetooth label g Homologation label For MT 0698 ab c d g f e For MT 0768 ab c d g f e For some models, you also need to apply one or two - Lenovo 0768 | User Manual - Page 96
slot, heat sink assembly, and bottom cover assembly (D cover) for MT 0769 For access, remove these FRUs, in order: v "1010 Battery pack" on page 46 v "1020 Hard disk drive slot cover" on page 47 v "1030 Hard disk drive" on page 48 v "1040 PCI Express Mini Card for 802.11 a/b/g wireless LAN" on page - Lenovo 0768 | User Manual - Page 97
Removing and replacing a FRU 2 4 2 3 3 Step 2 Screw (quantity) M2.5 × 4 mm, pan-head, nylon-coated (2) Color Silver Torque 0.392 Nm (4 kgfcm) When installing: Make sure that the connectors are attached firmly. (continued) Lenovo 3000 N100 and N200 91 - Lenovo 0768 | User Manual - Page 98
Removing and replacing a FRU 5 In step 5 , remove the system board, the MDC, the ExpressCard slot and the heat sink assembly together from the bottom cover. To remove the MDC, do as follows: 1 1 2 Step 1 Screw (quantity) M2.5 × 3 mm, pan-head, nylon-coated (2) (continued) Color Silver - Lenovo 0768 | User Manual - Page 99
follows: 1 1 Step 1 Screw (quantity) M2 × 4 mm, pan-head, nylon-coated (2) Color Black Torque 0.245 Nm (2.5 kgfcm) 2 When installing: Make sure that the connectors of ExpressCard slot is attached to the system board firmly, and then fasten the screws. (continued) Lenovo 3000 N100 and N200 93 - Lenovo 0768 | User Manual - Page 100
Removing and replacing a FRU To remove the heat sink assembly, do as follows: For discrete models 3 2 1 1 Step 1 2 Screw (quantity) Thermal screw, nylon-coated (4) M2.5 × 3 .5 × 3 mm, pan-head, nylon-coated (1) (continued) Color Silver Torque 0.392 Nm (4 kgfcm) 94 MT 0689, 0768, and 0769 - Lenovo 0768 | User Manual - Page 101
label (802.11 a/b/g) b Product label c Windows license label (COA) d MAC label (802.3) e Serial number label f Bluetooth label g Homologation label ab c d g f e For some models, you also need to apply one or two FCC labels or the other types of labels. Check the old base cover; if it has one or - Lenovo 0768 | User Manual - Page 102
Removing and replacing a FRU 2010 LCD front bezel (B cover) For access, remove this FRU: v "1010 Battery pack" on page 46 For MT 0698 and 0768 1a 1a 1b 1b Note: Screws 1a are only for MT0768. Step 1a 1b Screw cap Screw (quantity) M2.5 × 5 mm, flat-head, nylon-coated (2) M2.5 × 5 - Lenovo 0768 | User Manual - Page 103
Removing and replacing a FRU In step 2 , while sliding the LCD latch lever in the direction shown by the arrow, remove the bezel in the direction shown by arrow 3 . 2 3 3 Lenovo 3000 N100 and N200 97 - Lenovo 0768 | User Manual - Page 104
Removing and replacing a FRU 2020 Inverter card For access, remove these FRUs in order: v "1010 Battery pack" on page 46 v "2010 LCD front bezel (B cover)" on page 96 1 4 3 2 For MT 0698 and 0768 Step 1 Screw (quantity) M2.5 × 5 mm, flat-head, nylon-coated (1) Color Black Torque 0.392 Nm (4 - Lenovo 0768 | User Manual - Page 105
: v "1010 Battery pack" on page 46 v "1020 Hard disk drive slot cover" on page 47 v "1040 PCI Express Mini Card for 802.11 a/b/g wireless LAN" on page 49 v "1050 PCI Express Mini Card for 802.11 a/b/g/n wireless LAN" on page 51 v "1130 Cover, strip (E cover)" on page 63 v "1150 Keyboard" on page 65 - Lenovo 0768 | User Manual - Page 106
Removing and replacing a FRU For MT 0769 1 2 1 Step 1 Screw (quantity) M2.5 × 5 mm, pan-head, nylon-coated (2) (continued) Color Black Torque 0.392 Nm (4 kgfcm) 100 MT 0689, 0768, and 0769 - Lenovo 0768 | User Manual - Page 107
3a 3b 3a a4 3a 3b 3a Note: Screws 3b are only for MT 0768 and 0769. For MT 0689 and 0768 Step 3a Screw (quantity) M2 × 3 mm, flat-head, nylon-coated (4) the LCD cable assembly ( b ) from the LCD panel. Torque 0.245 Nm (2.5 kgfcm) 0.245 Nm (2.5 kgfcm) 5 6 b Lenovo 3000 N100 and N200 101 - Lenovo 0768 | User Manual - Page 108
Removing and replacing a FRU 2040 Camera and LCD rear cover assembly (A cover) For access, remove these FRUs in order: v "1010 Battery pack" on page 46 v "1020 Hard disk drive slot cover" on page 47 v "1040 PCI Express Mini Card for 802.11 a/b/g wireless LAN" on page 49 v "1050 PCI Express Mini Card - Lenovo 0768 | User Manual - Page 109
For MT 0768 and 0769 1 Removing and replacing a FRU Lenovo 3000 N100 and N200 103 - Lenovo 0768 | User Manual - Page 110
Locations Locations Front view 1 Lenovo Care button 2 Volume control buttons 3 Built-in stereo speaker (right)*1 4 Keyboard 5 Fingerprint reader (for some models) 6 Touch pad 7 Touch pad buttons 8 System and power status indicators Note: For the description of each indicator, see - Lenovo 0768 | User Manual - Page 111
jack 8 Stereo headphone jack Locations 1 2 8 7 6 5 43 Bottom view 1 Battery pack latch 2 Battery pack 3 Battery pack latch 4 Memory card slot 5 Thermal module slot 6 Wireless radio switch 7 Hard disk drive slot 8 LCD cover latch 3 2 1 4 5 6 7 8 Lenovo 3000 N100 and N200 105 - Lenovo 0768 | User Manual - Page 112
keyboard, a mouse, a power cord, a port replicator, a USB device, and an external bay device adapter. External CRUs with latches These CRUs have a latch to help you to remove and replace the part. Examples of these types of CRUs include a battery pack, a cover such as a memory slot cover and a hard - Lenovo 0768 | User Manual - Page 113
Overall 24 23 22 21 c b 20 19 18 17 Parts list 1 2 3 4 5 6 7 8 9 a 10 11 12 13 14 16 15 Lenovo 3000 N100 and N200 107 - Lenovo 0768 | User Manual - Page 114
strip (E cover) for MT 0689 and 0768 41W2115 Cover, strip for MT 0769 41R7807 3 Keyboard (see "Keyboard" on page 136.) 4 Function board for MT 0689 and 0768 41W1314 Function board for MT 0769 41R7790 5 Top cover assembly, 14W (C cover) without fingerprint 42W3129 reader v 0689-2Ex, 2Lx, 2Mx - Lenovo 0768 | User Manual - Page 115
Parts list No. FRU FRU no. 5 Top cover assembly, 15W (C cover) without fingerprint 42W3131 reader for MT 0768 v 0768-2Ax, 34x, 35x, 36x, 37x, 38x, 3Fx, 3Gx, 3Hx, 3Jx, 3Kx, 3Lx, 3Mx, 3Nx, 3Px, 3Qx, 3Rx, 3Sx, 3Tx, 3Ux, 3Vx, 3Wx, 4Mx, 4Px, 4Rx, - Lenovo 0768 | User Manual - Page 116
Parts list No. FRU FRU no. RoHS CRU ID ID 6 System board assembly, 14W 41W1199 R N v 0689- 2xx, 3xx, 4xx, 5xx, 6xx, 7xx, 8xx, K2x, Axx, Bxx, Cxx, Dxx System board assembly, 14W v 0689-Exx, Fxx, Gxx 41W8031 R N System board assembly, 15W integrated 41W1200 R N v 0768-25x, 26x, 2Ax, 31x, - Lenovo 0768 | User Manual - Page 117
Parts list No. FRU FRU no. 6 System board assembly, 15W integrated 41W8032 • 0768-E5x, E6x, EGx, EHx, EJx, ELx, F3x, F4x, F6x, F7x, FBx, FGx, FHx, G2x, G3x, GFx, GGx, GHx, GJx, GKx, GLx, GRx, GSx, GTx, GUx System board assembly 41R7886 System board assembly, 15W integrated Support Penryn - Lenovo 0768 | User Manual - Page 118
Parts list No. FRU FRU no. 6 System board assembly EQx, EHx, Ejx, Ewx, EXx, 41R7887 System board assembly, 15W discrete support Penryn CPU • 0769-CZx, A8x, A9x, Adx drive assembly, 12.7 mm • 0689-CTO • 0768-CTO TEAC (CD224E-Nxx) 27R2322 TSST (TS-L162C) 27R2316 DVD/CD-RW combo drive assembly - Lenovo 0768 | User Manual - Page 119
Parts list No. FRU FRU no. RoHS CRU ID ID 8 DVD/CD-RW combo drive assembly 7Sx, 7Tx, 7Ux, 7Vx, 7Wx, 82x, 86x • 0768-2Ax, 34x, 35x, 37x, 38x, 3Fx, 3Gx, 3Mx HLDS 42T2014 R ** Panasonic 42T2037 R ** DVD-RAM/RW drive assembly, 12.7 mm, HLDS 27R2360 R ** (GMA- Lenovo 3000 N100 and N200 113 - Lenovo 0768 | User Manual - Page 120
Parts list No. FRU FRU no. RoHS CRU ID ID 8 DVD-RAM/RW drive assembly, 12.7 mm, TSST 27R2331 R ** (TS-L632C) • 0689-22x, 6Nx, 6Rx, 6Sx, 6Ux, 6Vx, 6Wx, 6Zx, 75x, 7Mx, 7Nx, 7Px, 7Qx, 83x, 84x, 85x, K2x • 0768-21x, 22x, 25x, 26x, 27x, 28x, 2Cx, 31x, 33x, 36x, 3Bx, 3Cx, 3Dx, 3Ex, 3Hx, 3Hx, 3Jx - Lenovo 0768 | User Manual - Page 121
Parts list No. FRU FRU no. RoHS CRU ID ID 10 USB/Audio connector card for MT 0689 and 0768 41W1316 R N USB/Audio connector card for MT 0689 and 0768 (updated) 41R7813 R N USB/Audio connector card • 0768-Axx, Bxx, Cxx, Dxx, Exx, Fxx, Gxx • 0769-all 41W1439 R N 11 Bottom cover assembly for - Lenovo 0768 | User Manual - Page 122
Parts list No. FRU FRU no. 12 SATA hard disk drive, 80 GB, 9.5 mm, 5,400 rpm, Toshiba 27R2305 • 0689-22x, 27x, 28x, , CVx, CXx, D4x, D8x, D9x, E2x, E4x, F2x, F4x, F8x, G3x, G4x, G8x, GHx, GNx, GQx, GRx • 0768-25x, 26x, 31x, 34x, 35x, 36x, 3Bx, 3Cx, 3Dx, 3Ex, 3Gx, 3Hx, 3Px, 3Qx, 3Rx, 3Ux, 3Vx, 3Wx, - Lenovo 0768 | User Manual - Page 123
Parts list No. FRU FRU no. RoHS CRU ID ID 12 SATA hard disk drive, 80 GB, 9.5 mm, 5, CBx, CGx, CHx, CYx, D5x, DBx, DCx, F3x G7x, GBx, GCx, GDx, GEx, GFx • 0768-21x, 22x, 27x, 28x, 2Cx, 33x, 3Fx, 3Jx, 3Kx, 4Gx, 52x, 55x, 57x, 59x Toshiba 27R2311 R ** (continued) Lenovo 3000 N100 and N200 117 - Lenovo 0768 | User Manual - Page 124
Parts list No. FRU FRU no. RoHS CRU ID ID 12 SATA hard disk drive, 100 GB, 9.5 mm, 5,400 rpm, 42T1607 R ** Fujitsu • 0689-A5x, A7x, B7x, BCx, C7x, C8x, C9x, CBx, CGx, CHx, CYx, D5x, DBx, DCx, F3x G7x, GBx, GCx, GDx, GEx, GFx • 0768-AHx, B2x, BBx, BDx, BGx, BHx, BJx, BKx, BLx, BSx, C6x - Lenovo 0768 | User Manual - Page 125
Parts list No. FRU FRU no. RoHS CRU ID ID 13 Intel PRO Wireless 3945ABG Mini-PCI Express Adapter • 0689 F8x, G3x, G4x, G9x, GAx, GDx, GGx, GHx, GKx, GPx, GQx, GTx, GUx • 0768-21x, 22x, 25x, 26x, 27x, 28x, 2Ax, 2Cx, 34x, 35x, 36x, 38x, 3Bx, 41W1303 R ** (continued) Lenovo 3000 N100 and N200 119 - Lenovo 0768 | User Manual - Page 126
Intel Wireless WiFi Link 4965AGN • 0769-A8x, A9x, B2x, B3x, B4x, C3x, C4x, CEx, CFx, CLx, CMx, CWx, CZx, D5x, G2x, G6x xxA, xxB, xxF, xxH, xxL, xxM, xxP, xxQ, xxS, xxU, 42T0865 R ** xxV, xxY xxG 42T0867 R ** xxE, xxJ 42T0871 R ** 14 Hard disk drive slot cover for MT 0689 and 0768 41W5233 - Lenovo 0768 | User Manual - Page 127
Parts list No. FRU FRU no. 15 512 CFx, CHx, CJx, CKx, CQx, CRx, CVx, CWx, CXx, D2x, D3x, D4x, D8x, D9x, Exx, Fxx, Gxx • 0768-21x, 22x, 25x, 26x, 27x, 28x, 2Cx, 31x, 33x, 34x, 35x, 36x, 3Bx, 3Cx, 3Dx, 3Ex, 3Fx, , D6x, D7x, G4x, G5x RoHS CRU ID ID R ** (continued) Lenovo 3000 N100 and N200 121 - Lenovo 0768 | User Manual - Page 128
5300) card • 0769-G2x 40Y8404 16 DIMM slot cover for MT 0689 and 0768 41W5227 DIMM slot cover for MT 0769 42W2824 17 Thermal module slot cover 41W5232 18 Thermal module for MT 0689 and 0768 41W5226 CPU thermal module for MT 0769 41R7796 19 Fan for 14W/15W, integrated 41W5225 • 0769-AAx - Lenovo 0768 | User Manual - Page 129
, D6x, D7x, G4x, G5x VGA thermal module, discrete 41R7798 R N • 0769-A8x, A9x, ACx, ADx, B2x, B3x, B4x, CVx, CWx, CXx, CZx, D2x, D4x, D5x, G2x, G3x, G6x 22 PC Card slot for MT 0689 and 0768 41W5224 R N ExpressCard slot for MT 0769 41R7789 R N (continued) Lenovo 3000 N100 and N200 123 - Lenovo 0768 | User Manual - Page 130
3Ex, 3Tx, 3Ux, 3Wx, 4Cx, 4Dx, 4Rx 41W1140 CPU assembly, Intel Core Solo processor T1350 (1.86 GHz) • 0689-84x • 0768-84x 41W1459 CPU assembly, Intel Core Solo processor T1400 (1.83 GHz) • 0768-CWx 41W1328 RoHS CRU ID ID R N R N R N R D R D R D R N R N R N (continued) 124 MT - Lenovo 0768 | User Manual - Page 131
Parts list No. FRU FRU no. 23 CPU assembly, Intel Core Duo processor T2050 (1.60 GHz) • 0689-85x • 0768-85x 41W1461 CPU assembly, Intel Core Duo processor T2060 (1.60 GHz) • 0689-GGx, E2x, E4x • 0768-EGx, EJx, EKx, ELx, GFx, GHx, GJx, GKx, GRx, GSx, GTx 42W7659 CPU assembly, Intel Core Duo - Lenovo 0768 | User Manual - Page 132
Parts list No. FRU FRU no. 23 CPU assembly, Intel Core 2 Duo processor T5500 41W1409 (1.66 GHz) • 0689-A4x, A5x, A6x, ACx, AHx, B3x, B4x, B5x, B6x, B9x, BBx, C7x, C9x, CDx, CJx, CKx, CQx, CXx, D3x, D5x, D8x, D9x, F2x, F4x, GBx, GCx, GDx, GFx, GKx • 0768-A7x, AFx, AGx, AHx, B6x, B7x, B8x, - Lenovo 0768 | User Manual - Page 133
-All 43N7743 CPU assembly, Intel Pentium Dual Core processor T2410 43N7395 (2.0 GHz) • 0769-ESx, Etx, FHx, FJx, EWx CPU assembly, Intel Celeron Dual Core T1500 (1.86 GHz) 42W8047 • 0769-All RoHS CRU ID ID R D R D R D R D R D R D R D R D R D R D (continued) Lenovo 3000 N100 - Lenovo 0768 | User Manual - Page 134
Parts list No. FRU FRU no. 24 Bluetooth daughter card (BDC) 41W1163 • 0689-22x, 25x, 26x, 27x, 28x, A8x, A9x, AAx, AGx, AHx, B7x, BDx, D4x, D8x, DAx, G8x - Video card nVidia 128 MB for MT 0768 41W1208 • 0768-21x, 27x, 2Cx, 4Ex, 52x, 53x, 57x, 58x, 59x, 5Ax, 5Bx, 5Cx, 5Dx, 5Ex, 5Fx, 5Lx, - Lenovo 0768 | User Manual - Page 135
LCD FRUs Parts list 1 2 3 7 4 6 5 14.1-in. WXGA TFT No. FRU FRU no. RoHS CRU ID ID 1 LCD front bezel, 14W without a camera 41W5209 R N v E4x, E5x, EAx, GGx, GHx, GLx, GMx, GNx, GRx LCD front bezel, 14W with a camera 41W5210 R N v 0689-4xx, 5xx, 66x, 6Jx, 6Lx, 6Mx, 6Nx, 6Tx, 6Ux, 6Vx, - Lenovo 0768 | User Manual - Page 136
Parts list No. FRU FRU no. RoHS YEC 41W1204 R N Sumida 41W1317 R N 4 LCD cable assembly, 14W for MT 0689 91P7020 R N 5 LCD rear cover (A cover), 14W for MT 0689 41W5207 R N 6 Camera v 0689-4xx, 5xx, 66x, 6Jx, 6Lx, 6Mx, 7 Hinges, 14W for MT 0689 41W5213 R N 130 MT 0689, 0768, and 0769 - Lenovo 0768 | User Manual - Page 137
Parts list 15.4-in. WXGA TFT No. FRU FRU no. RoHS CRU ID ID 1 LCD front bezel for MT 0768, 15W without a camera 41W5211 R N v 0768-2xx, 3xx, 4Jx, 4Mx, 4Px, 4Rx, 65x, 67x, 68x, 6Bx, 6Cx, 6Dx, 6Ex, 6Fx, 6Gx, 6Hx, 6Jx, 6Mx, 6Sx, 6Tx, 77x, 78x, 79x, 7Gx, 7Mx, - Lenovo 0768 | User Manual - Page 138
Parts list No. FRU FRU no. RoHS CRU ID ID 2 LCD panel, 15.4-in. WXGA glare F6x, F7x, FBx, FGx, FHx, GFx, GGx, GHx, GJx, GKx, GLx, GRx, GSx, GTx, GUx LCD cable assembly, 15W, long for MT 0768 91P7022 R N v 0768-3Yx, 46x, 4Ex, 4Fx, 4Gx, 4Hx, 4Lx, 4Sx, 6Mx, 6Wx, 6Zx, 72x, 7Bx, 7Hx, CCx, AGx, - Lenovo 0768 | User Manual - Page 139
Parts list No. FRU FRU no. RoHS CRU ID ID 5 LCD rear cover, 15W (A cover) v 0768-all except CCx 41W5208 R N LCD rear cover, 15W (A cover) v 0768 CKx, CNx, CPx, CQx, CRx, CUx, CVx, CYx, D2x, D4x, G4x, G5x 6 Camera for MT 0768 v 0768-41x, 45x, 46x, 46x, 47x, 48x, 49x, 4Ax, 4Bx, 4Cx, 4Dx, 4Ex, - Lenovo 0768 | User Manual - Page 140
Parts list 15.4-in. WSXGA+ TFT No. FRU FRU no. RoHS CRU ID ID 1 LCD front bezel for MT 0768, 15W (B cover) without a 41W5211 R N camera v 0768-21x, 22x, 25x, 26x, 27x, 28x, 2Cx, 6Kx, 6Lx, 6Nx, 6Px, 6Qx, 6Rx, 7Kx, 7Lx, 7Sx, 7Tx, 7Yx, A3x, A4x, A5x, A6x, A7x, A8x, A9x, - Lenovo 0768 | User Manual - Page 141
Parts list No. FRU FRU no. RoHS CRU ID ID 3 Inverter card, 15W, Sumida 41W1393 R N v 0768 CTx, DFx, G2x, G3x LCD cable assembly for MT 0768, 15W, long 91P7022 R N v 0768-21x, 22x, 27x, 28x, 2Cx, D3x, D6x, D7x, G3x 41R7781 R N 6 Camera for MT 0768 v 0768-52x, 53x, 54x, 55x, 56x, 57x, 58x - Lenovo 0768 | User Manual - Page 142
Parts list Keyboard Keyboard for MT 0689 and 0768 Language Arabic Belgian Chinese, Traditional Czech Danish Dutch English, U.K. English, U.S. English, U.S. (International, with a Euro symbol 39T7433 39T7441 39T7440 39T7428 39T7445 39T7430 39T7446 39T7436 136 MT 0689, 0768, and 0769 - Lenovo 0768 | User Manual - Page 143
Parts list Keyboard for MT 0769 Language Arabic Belgian Chinese, Traditional Czech Danish Dutch English, U.K. English, U.S. English, U.S. (International, with 42T3411 42T3421 42T3417 42T3434 42T3419 42T3427 42T3426 42T3414 42T3431 42T3416 42T3432 42T3422 Lenovo 3000 N100 and N200 137 - Lenovo 0768 | User Manual - Page 144
Parts list Recovery discs Windows XP Professional CDs Windows XP Professional is preinstalled as the operating system in the following models: v , C5x, C9x, CDx, CFx, CGx, CHx, CKx, CMx, CPx, CWx, CXx, CYx, D9x, DCx v 0768-21x, 22x, 26x, 2Cx, 35x, 36x, 3Cx, 3Ex, 3Fx, 3Kx, 3Rx, 3Sx, 3Wx, 3Yx, 41x, - Lenovo 0768 | User Manual - Page 145
Parts list · 0769‐AHx, AKx, D8x Language Arabic Chinese, Simplified Chinese, Traditional Chinese, Traditional (Hong Kong , Brazilian Russian Russian, English enabled Slovenian Spanish Swedish Turkish MT 0689, 0768, and 0769 P/N 44Y1149 N/A 44Y1143 44Y1144 44Y1148 44Y1138 44Y1141 44Y1131 44Y1130 - Lenovo 0768 | User Manual - Page 146
Parts list Windows XP Home Edition CDs Windows XP Home Edition is preinstalled as the operating system in the following C7x, CBx, CCx, CJx, CLx, CNx, CRx, CVx, D4x, D5x, D8x, DAx, DBx v 0768-25x, 27x, 28x, 2Ax, 31x, 33x, 34x, 37x, 38x, 3Bx, 3Dx, 3Gx, 3Hx, 3Jx, , DKx, DLx Lenovo 3000 N100 and N200 139 - Lenovo 0768 | User Manual - Page 147
Parts list Language Arabic Chinese, Simplified Chinese, Traditional Chinese, Traditional (Hong Kong S.A.R.) Czech Danish Dutch English, (UD) U.K. with disabled modem 43T4477 43T4486 43T4472 43T4479 43T4468 43T4482 43T4487 43T4466 43T4469 43T4483 RoHS CRU ID ID R * 140 MT 0689, 0768, and 0769 - Lenovo 0768 | User Manual - Page 148
Parts list Windows Vista Home Premium (32 bit) DVDs for MT 0689 and 0768 Windows Vista Home Premium is preinstalled as the operating system in the following models: v 0689-E3x, F5x, GAx, GBx, GCx, GDx, GFx, GHx, GKx v 0768-E2x 43T7676 43T7683 RoHS CRU ID ID R * Lenovo 3000 N100 and N200 141 - Lenovo 0768 | User Manual - Page 149
Parts list Windows Vista Home Premium (32 bit) DVDs for MT 0769 Windows Vista Home Premium is preinstalled as the operating system in the following models: v 0769-AAx, ACx, ADx, B3x, C4x, C7x, C9x, CAx, CZx 44X9757 44X9738 44X9743 44X9750 44X9764 RoHS CRU ID ID R * 142 MT 0689, 0768, and 0769 - Lenovo 0768 | User Manual - Page 150
Parts list Windows Vista Home Basic (32 bit) DVDs for MT 0689 and 0768 Windows Vista Home Basic is preinstalled as the operating system in the following models: v 0689-EAx, F2x, F3x, F8x, G3x, G8x, G9x, GGx, GLx, GTx, GUx v 0768-EHx, 43T7631 RoHS CRU ID ID R * Lenovo 3000 N100 and N200 143 - Lenovo 0768 | User Manual - Page 151
Parts list Windows Vista Home Basic (32 bit) DVDs for MT 0769 Windows Vista Home Basic is preinstalled as the operating system in the following models: v 0769-C8x, CBx, CEx, CGx, CJx, CLx, CNx, CQx, CUx, CXx 44X9799 44X9822 44X9803 44X9808 44X9815 RoHS CRU ID ID R * 144 MT 0689, 0768, and 0769 - Lenovo 0768 | User Manual - Page 152
Parts list Windows Vista Business (32 bit) DVDs for MT 0689 and 0768 Windows Vista Business is preinstalled as the operating system in the following models: v 0689-E2x, E4x, E5x, F4x, F7x, G4x, G7x, GEx, GNx, GPx, GQx, GSx v 0768-E6x, 43T7578 RoHS CRU ID ID R * Lenovo 3000 N100 and N200 145 - Lenovo 0768 | User Manual - Page 153
Parts list Windows Vista Business (32 bit) DVDs for MT 0769 Windows Vista Business is preinstalled as the operating system in the following models: v 0769-A7x, A8x, ABx, B2x, C3x, C5x, C6x, CDx, CFx, CHx, CKx 44X9771 44X9776 44X9783 44X9796 RoHS CRU ID ID R * 146 MT 0689, 0768, and 0769 - Lenovo 0768 | User Manual - Page 154
Parts list Windows Vista Business (64 bit) DVDs Windows Vista Business is preinstalled as the operating system in the following models: v 0769-G4x Language Brazilian Portuguese Chinese, Traditional 44X9850 44X9873 44X9854 44X9859 44X9866 RoHS CRU ID ID R * Lenovo 3000 N100 and N200 147 - Lenovo 0768 | User Manual - Page 155
Parts list Windows Vista Ultimate (32 bit) DVDs Windows Vista Ultimate is preinstalled as the operating system in the following models: v 0769-A9x, B4x, G2x Language Brazilian Portuguese Chinese, Traditional 44X9848 44X9829 44X9834 44X9841 RoHS CRU ID ID R * 148 MT 0689, 0768, and 0769 - Lenovo 0768 | User Manual - Page 156
Corel software CDs Language English, U.S. French Japanese Portuguese, Brazilian Spanish Parts list P/N 41X0440 41X0443 41X0608 41X0449 41X0446 RoHS CRU ID ID R * AC adapters FRU P/N RoHS ID 2-pin (90 W, 20 V) adapter (models xxE, xxF, xxJ, xxL, xxP, xxS, xxU, xxY) OP CRU ID ASTEC for - Lenovo 0768 | User Manual - Page 157
Parts list Power cords Power cords for MT 0689 and 0768 A Lenovo 3000 power cord for a specific country or region is usually available only in that country or region: For 2-pin power cords: Region Canada, U.S. (models xxF, xxL, xxS, xxU) Japan (models Exx, Jxx) Argentina (models CTO, xxY) Brazil - Lenovo 0768 | User Manual - Page 158
Parts list Power cords for MT 0769 A Lenovo 3000 power cord for a specific country or region is usually available only in that country or region: For 2-pin power cords: Region Argentina Brazil Canada, U.S. Japan P/N P/N (Volex) RoHS (Longwell) ID 42T5020 42T5105 R 42T5026 42T5111 42T5008 - Lenovo 0768 | User Manual - Page 159
pan head (21) v M2.5 × 8 mm (silver), pan head (17) v M2.5 ×10 mm (silver), pan head (1) v M3 × 3 mm (black), pan head (4) v VGA thermal screw (silver) (4) v Hex stud (2) Bottom miscellaneous parts for MT 0689 and 0768 : v RJ11 cable v Bluetooth cable v USB cable, 14W v USB cable, 15W v TV-out cable - Lenovo 0768 | User Manual - Page 160
Bluetooth cable v USB cable v TV-out cable v Speakers v USB EMI tape v Blank bezel for ExpressCard slot v Rubber foot, front (2) v Rubber foot, rear (2) LCD miscellaneous parts spring v LCD knob v LCD latch wire v Camera cable LCD miscellaneous parts for MT 0768: v LCD rubber, upper (4) v LCD rubber, - Lenovo 0768 | User Manual - Page 161
set 00P7033 1/4" drive spinner handle 1650840 1/4" Sq. to 1/4" hex torx adapter 93F2838 TR7-TR-10 tamper resistant torx bits 00P6967 Removal tool antenna RF connector 08K7159 PCI-Express/USB wrap card 27K9813 CE Utility Diskette for Lenovo 3000 notebooks - Note: Download the file from - Lenovo 0768 | User Manual - Page 162
are not intended for use in implantation or other life support applications where malfunction may result in injury or death to persons. The information contained in this document does not affect or change Lenovo product specifications or warranties. Nothing in this document shall operate as an - Lenovo 0768 | User Manual - Page 163
of this document should verify the applicable data for their specific environment. The following terms are trademarks of Lenovo in the United States, other countries or both: Lenovo Lenovo Care Rescue and Recovery The following terms are trademarks of the International Business Machines Corporation - Lenovo 0768 | User Manual - Page 164
Trademarks Lenovo 3000 N100 and N200 157 - Lenovo 0768 | User Manual - Page 165
Part Number: 42X3553 (1P) P/N: 42X3553
-
 1
1 -
 2
2 -
 3
3 -
 4
4 -
 5
5 -
 6
6 -
 7
7 -
8
-
9
-
10
-
11
-
12
-
13
-
14
-
15
-
16
-
17
-
18
-
19
-
20
-
21
-
22
-
23
-
24
-
25
-
26
-
27
-
28
-
29
-
30
-
31
-
32
-
33
-
34
-
35
-
36
-
37
-
38
-
39
-
40
-
41
-
42
-
43
-
44
-
45
-
46
-
47
-
48
-
49
-
50
-
51
-
52
-
53
-
54
-
55
-
56
-
57
-
58
-
59
-
60
-
61
-
62
-
63
-
64
-
65
-
66
-
67
-
68
-
69
-
70
-
71
-
72
-
73
-
74
-
75
-
76
-
77
-
78
-
79
-
80
-
81
-
82
-
83
-
84
-
85
-
86
-
87
-
88
-
89
-
90
-
91
-
92
-
93
-
94
-
95
-
96
-
97
-
98
-
99
-
100
-
101
-
102
-
103
-
104
-
105
-
106
-
107
-
108
-
109
-
110
-
111
-
112
-
113
-
114
-
115
-
116
-
117
-
118
-
119
-
120
-
121
-
122
-
123
-
124
-
125
-
126
-
127
-
128
-
129
-
130
-
131
-
132
-
133
-
134
-
135
-
136
-
137
-
138
-
139
-
140
-
141
-
142
-
143
-
144
-
145
-
146
-
147
-
148
-
149
-
150
-
151
-
152
-
153
-
154
-
155
-
156
-
157
-
158
-
159
-
160
-
161
-
162
-
163
-
164
-
165
 |
 |

Lenovo
3000
N100
and
N200
Hardware
Maintenance
Manual
June
2007
This
manual
supports:
Lenovo
3000
N100
(MT
0689
and
0768)
Lenovo
3000
N200
(MT
0769)