Lenovo 42962YU User Manual - Page 96
PCI Express Mini Card for wireless LAN/WiMAX
 |
View all Lenovo 42962YU manuals
Add to My Manuals
Save this manual to your list of manuals |
Page 96 highlights
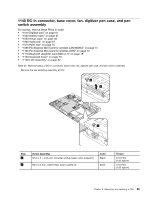
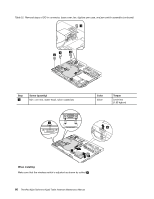
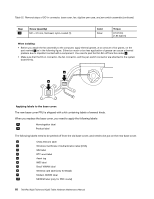
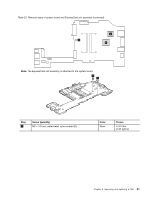
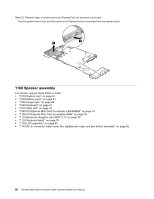
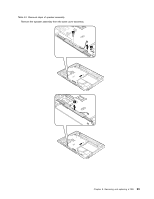
• Be careful not to drop the system board on a bench top that has a hard surface, such as metal, wood, or composite. • If a system board is dropped, you must test it, using PC-Doctor for DOS, to make sure that the HDD Active Protection System™ still functions. Note: If the test shows that the HDD Active Protection System is not functioning, be sure to document the drop in a reject report, and replace the system board. • Avoid rough handling of any kind. • At every point in the process, be sure not to drop or stack the system board. • If you put a system board down, be sure to put it only on a padded surface such as an ESD mat or a corrugated conductive surface. After replacing the system board, run PC-Doctor for DOS to make sure that the HDD Active Protection System still functions. The procedure is as follows: 1. Place the computer on a horizontal surface. 2. Run Diagnostics ➙ ThinkPad Devices ➙ HDD Active Protection Test. Attention: Do not apply physical shock to the computer while the test is running. For access, remove these FRUs in order: • "1010 Digitizer pen" on page 61 • "1020 Battery pack" on page 61 • "1050 Hinge caps" on page 66 • "1060 Keyboard" on page 67 • "1070 Palm rest" on page 70 • "1090 PCI Express Mini Card for wireless LAN/WiMAX" on page 74 • "1100 PCI Express Mini Card for wireless WAN" on page 76 • "1110 Bluetooth daughter card (BDC-2.1)" on page 78 • "1120 Keyboard bezel" on page 79 • "1130 LCD assembly" on page 82 • "1140 DC-in connector, base cover, fan, digitizer pen case, and pen switch assembly" on page 85 Table 23. Removal steps of system board and ExpressCard slot assembly The following components soldered on the system board are extremely sensitive. When you service the system board, avoid any kind of rough handling. a Platform Controller Hub (PCH) b CPU c Accelerometer chip for the HDD Active Protection System 90 ThinkPad X220 Tablet and X220i Tablet Hardware Maintenance Manual
-
 1
1 -
2
-
3
-
4
-
5
-
6
-
7
-
8
-
9
-
10
-
11
-
12
-
13
-
14
-
15
-
16
-
17
-
18
-
19
-
20
-
21
-
22
-
23
-
24
-
25
-
26
-
27
-
28
-
29
-
30
-
31
-
32
-
33
-
34
-
35
-
36
-
37
-
38
-
39
-
40
-
41
-
42
-
43
-
44
-
45
-
46
-
47
-
48
-
49
-
50
-
51
-
52
-
53
-
54
-
55
-
56
-
57
-
58
-
59
-
60
-
61
-
62
-
63
-
64
-
65
-
66
-
67
-
68
-
69
-
70
-
71
-
72
-
73
-
74
-
75
-
76
-
77
-
78
-
79
-
80
-
81
-
82
-
83
-
84
-
85
-
86
-
87
-
88
-
89
-
90
-
 91
91 -
 92
92 -
 93
93 -
 94
94 -
 95
95 -
 96
96 -
 97
97 -
 98
98 -
 99
99 -
 100
100 -
 101
101 -
102
-
103
-
104
-
105
-
106
-
107
-
108
-
109
-
110
-
111
-
112
-
113
-
114
-
115
-
116
-
117
-
118
-
119
-
120
-
121
-
122
-
123
-
124
-
125
-
126
-
127
-
128
-
129
-
130
-
131
-
132
-
133
-
134
-
135
-
136
-
137
-
138
-
139
-
140
-
141
-
142
-
143
-
144
 |
 |