Lenovo 81713GU User Manual - Page 33
Removing, replacing, optical, drive
 |
View all Lenovo 81713GU manuals
Add to My Manuals
Save this manual to your list of manuals |
Page 33 highlights
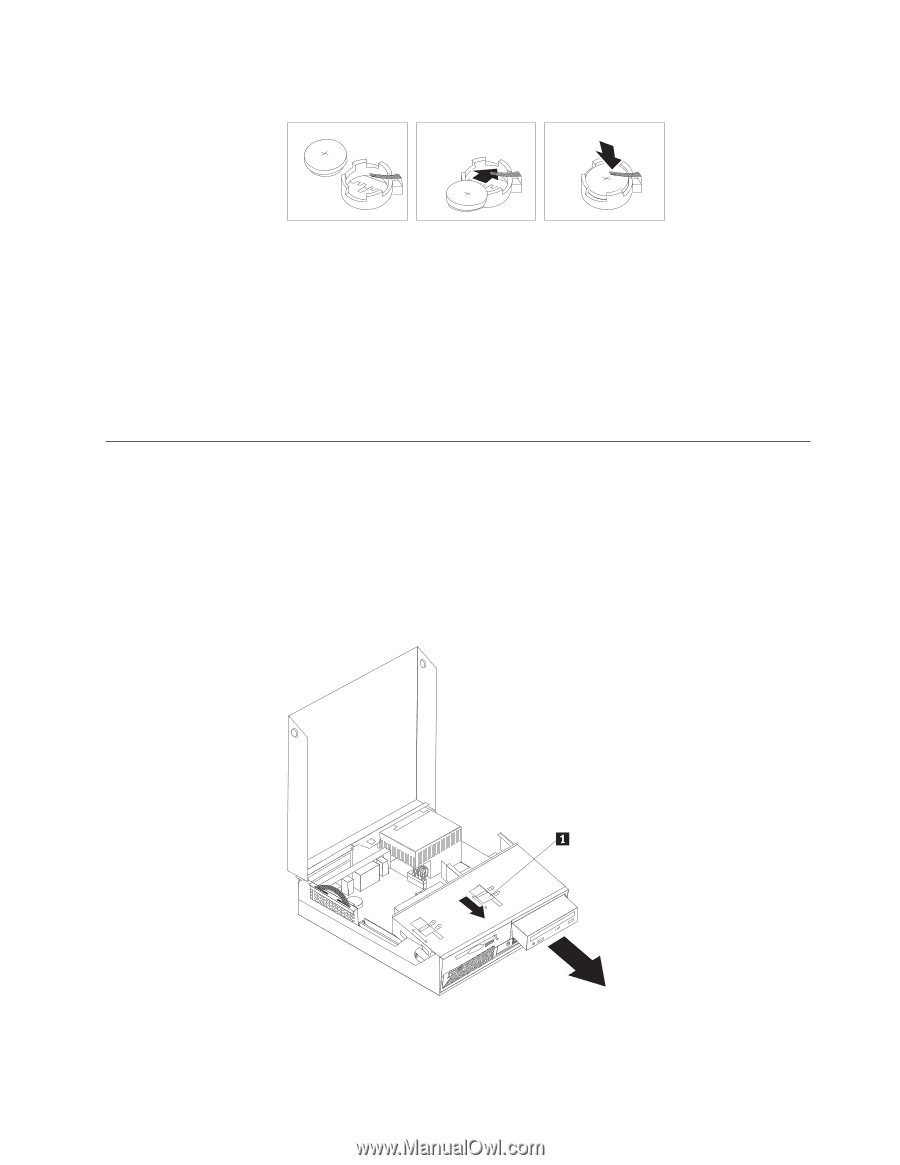
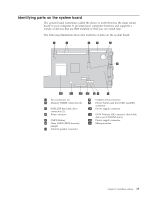
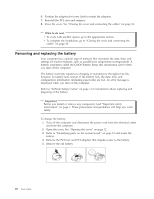
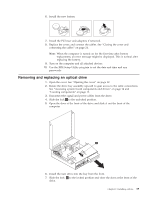
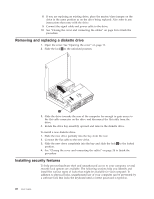
6. Install the new battery. 7. Install the PCI riser and adapters if removed. 8. Replace the cover, and connect the cables. See "Closing the cover and connecting the cables" on page 24. Note: When the computer is turned on for the first time after battery replacement, an error message might be displayed. This is normal after replacing the battery. 9. Turn on the computer and all attached devices. 10. Use the IBM Setup Utility program to set the date and time and any passwords. Removing and replacing an optical drive 1. Open the cover. See "Opening the cover" on page 12. 2. Rotate the drive bay assembly upward to gain access to the cable connections. See "Accessing system board components and drives" on page 14 and "Locating components" on page 13. 3. Disconnect the signal and power cables from the drive. 4. Slide the lock 1 to the unlocked position. 5. Open the door at the front of the drive and slide it out the front of the computer. 6. Install the new drive into the bay from the front. 7. Slide the lock 1 to the locked position and close the door at the front of the drive. Chapter 2. Installing options 19
-
 1
1 -
2
-
3
-
4
-
5
-
6
-
7
-
8
-
9
-
10
-
11
-
12
-
13
-
14
-
15
-
16
-
17
-
18
-
19
-
20
-
21
-
22
-
23
-
24
-
25
-
26
-
27
-
 28
28 -
 29
29 -
 30
30 -
 31
31 -
 32
32 -
 33
33 -
 34
34 -
 35
35 -
 36
36 -
 37
37 -
 38
38 -
39
-
40
-
41
-
42
-
43
-
44
-
45
-
46
-
47
-
48
-
49
-
50
-
51
-
52
-
53
-
54
-
55
-
56
-
57
-
58
-
59
-
60
 |
 |