Lenovo 9935B3U User Manual
Lenovo 9935B3U - ThinkCentre A62 - 9935 Manual
 |
UPC - 884343247403
View all Lenovo 9935B3U manuals
Add to My Manuals
Save this manual to your list of manuals |
Lenovo 9935B3U manual content summary:
- Lenovo 9935B3U | User Manual - Page 1
ThinkCentre User Guide Machine Types: 3658, 7057, 7062, 7092, 9342, 9344, 9354, 9426, 9486, 9624, 9707, 9804, and 9945. - Lenovo 9935B3U | User Manual - Page 2
- Lenovo 9935B3U | User Manual - Page 3
ThinkCentre User Guide - Lenovo 9935B3U | User Manual - Page 4
and the product it supports, be sure to read and understand the ThinkCentre Safety and Warranty Guide and "Notices," on page 69. First Edition (December 2008) © Copyright Lenovo 2008. All rights reserved. LENOVO products, data, computer software, and services have been developed exclusively - Lenovo 9935B3U | User Manual - Page 5
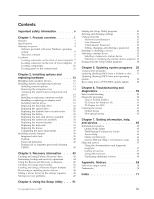
and diagnostics 59 Basic troubleshooting 59 Diagnostic programs 60 Lenovo System Toolbox 61 PC-Doctor for Windows PE 61 PC-Doctor for DOS 62 Cleaning the mouse 63 Optical mouse 63 Non-optical mouse 63 Chapter 7. Getting information, help, and service 65 Information resources 65 - Lenovo 9935B3U | User Manual - Page 6
iv User Guide - Lenovo 9935B3U | User Manual - Page 7
manual, be sure to read and understand all the related safety information for this product. Refer to the ThinkCentre Safety and Warranty Guide Guide, you can obtain a Portable Document Format (PDF) version from the Lenovo® Support Web site at: http://www.lenovo.com/support © Copyright Lenovo 2008 - Lenovo 9935B3U | User Manual - Page 8
vi User Guide - Lenovo 9935B3U | User Manual - Page 9
instructions that come with the option. Important: Before you install or replace any option, be sure to read and understand the "Important safety information" first. These precautions and guidelines will help you work safely. Note: Use only computer parts provided by Lenovo Memory v Supports up to - Lenovo 9935B3U | User Manual - Page 10
adapter card slot Power v 280-watt auto-sensing power supply (some models) v Automatic 50/60 Hz input frequency switching v Advanced Configuration and Power Interface (ACPI) support 2 User Guide - Lenovo 9935B3U | User Manual - Page 11
computer might come with preinstalled software. If it does, an operating system, device drivers to support built-in features, and other support press. Additional operating systems might be identified by Lenovo as compatible with your computer following the publication of this booklet. Corrections and - Lenovo 9935B3U | User Manual - Page 12
Specifications This section lists the physical specifications for your computer. Dimensions Width: 331 mm (13.0 inches) Height: 104 mm (4.1 inches) Depth: 412 mm (16.2 inches) Weight Maximum AC Maximum: 240 V AC Input frequency range: 50/60 Hz Voltage-selection switch setting: 230 V AC 4 User Guide - Lenovo 9935B3U | User Manual - Page 13
(TVT applications, device drivers, BIOS flashes, and computers that support this option. Lenovo System Toolbox The Lenovo System Toolbox diagnostic program is preinstalled on your hard disk drive. This diagnostic program works through the Windows operating system to diagnose hardware problems - Lenovo 9935B3U | User Manual - Page 14
the online books and the Lenovo Web site. Antivirus software Your computer comes with antivirus software that you can use to detect and eliminate viruses. Lenovo provides a full version of antivirus system. See "Access Help" on page 66 for instructions on how to open the online help system. 6 User - Lenovo 9935B3U | User Manual - Page 15
Locations Locating connectors on the front of your computer Figure 1 shows the location of the connectors on the front of your computer. Note: Not all computer models have the following connectors. Figure 1. Front connector locations 1 USB connector 2 Headphone connector 3 Microphone connector 4 - Lenovo 9935B3U | User Manual - Page 16
the connectors on the rear of your computer. Some connectors on the rear of your computer are color-coded to help you determine where to connect the cables on your computer. Figure 2. Rear connector locations 1 monitor connector 16 DVI monitor connector 17 Standard keyboard connector 8 User Guide - Lenovo 9935B3U | User Manual - Page 17
when you want to record sound or if you use speech-recognition software. This connector might be located on the front of the computer. Parallel port Used to attach a parallel printer, a parallel scanner, or other devices that use a 25-pin parallel port. Serial port Used to attach an external - Lenovo 9935B3U | User Manual - Page 18
cover" on page 14. Figure 3 shows the location of the various components in your computer. Figure 3. Component locations 1 System fan plenum, system fan and heat sink assembly 2 Microprocessor 3 Optical drive 4 Hard Express x1 adapter card slot 12 Cover presence (Intrusion) switch 10 User Guide - Lenovo 9935B3U | User Manual - Page 19
Locating parts on the system board Figure 4 shows the location of the parts on the system board. Figure 4. System board parts locations 1 4-pin power connector 2 System fan connector 3 Microprocessor fan connector 4 Microprocessor and heat sink assembly 5 Memory slots (4) 6 24-pin power connector 7 - Lenovo 9935B3U | User Manual - Page 20
12 User Guide - Lenovo 9935B3U | User Manual - Page 21
the "Important safety information" in the ThinkCentre Safety and Warranty Guide that came with your computer. To obtain a copy of the ThinkCentre Safety and Warranty Guide, go to: http://www.lenovo.com/support Note: Use only computer parts provided by Lenovo. © Copyright Lenovo 2008 13 - Lenovo 9935B3U | User Manual - Page 22
in the ThinkCentre Safety and Warranty Guide that came with your computer. To obtain a copy of the ThinkCentre Safety and Warranty Guide, go to: http://www.lenovo.com/support This section provides instructions on how to remove the computer cover. CAUTION: Turn off the computer and wait three to five - Lenovo 9935B3U | User Manual - Page 23
the "Important safety information" in the ThinkCentre Safety and Warranty Guide that came with your computer. To obtain a copy of the ThinkCentre Safety and Warranty Guide, go to: http://www.lenovo.com/support This section provides instructions on how to access the system board components and drives - Lenovo 9935B3U | User Manual - Page 24
2. Remove the front bezel by releasing the three tabs and pivoting the front bezel outward from the top. Figure 6. Removing the front bezel 3. In some models, you might have to remove the adapter cards to gain access to the system board components. Figure 7. Removing the adapter card 16 User Guide - Lenovo 9935B3U | User Manual - Page 25
the "Important safety information" in the ThinkCentre Safety and Warranty Guide that came with your computer. To obtain a copy of the ThinkCentre Safety and Warranty Guide, go to: http://www.lenovo.com/support This section provides instructions on how to install or replace a memory module. Your - Lenovo 9935B3U | User Manual - Page 26
the system board. Push the memory module straight down into the slot until the retaining clips close. Figure 11. Installing the memory module 18 User Guide - Lenovo 9935B3U | User Manual - Page 27
the "Important safety information" in the ThinkCentre Safety and Warranty Guide that came with your computer. To obtain a copy of the ThinkCentre Safety and Warranty Guide, go to: http://www.lenovo.com/support This section provides instructions on how to install or replace an adapter card. Your - Lenovo 9935B3U | User Manual - Page 28
. 3. Remove the new adapter card from its static-protective package. 4. Install the new adapter card into the appropriate slot on the system board. 20 User Guide - Lenovo 9935B3U | User Manual - Page 29
5. Close the adapter card latch to secure the adapter card. Figure 14. Installing the new adapter card What to do next: v To work with another option, go to the appropriate section. v To complete the installation, go to "Completing the parts replacement" on page 37. Chapter 2. Installing options and - Lenovo 9935B3U | User Manual - Page 30
instructions on how to install the internal drives. Internal drives are devices that your computer uses to read and store data. You can add drives to your computer to increase storage capacity and to enable your computer are installed in bays. In this manual, the bays are referred to as bay Guide - Lenovo 9935B3U | User Manual - Page 31
) 3 Bay 3 - Maximum height: 12.7 mm (0.5 inch) 3.5-inch diskette drive (preinstalled in some models) * You can obtain a Universal Adapter Bracket, 5.25 to 3.5-inch, from a local computer retailer or by contacting the Customer Support Center. Chapter 2. Installing options and replacing hardware 23 - Lenovo 9935B3U | User Manual - Page 32
and understanding the "Important safety information" in the ThinkCentre Safety and Warranty Guide that came with your computer. To obtain a copy of the ThinkCentre Safety and Warranty Guide, go to: http://www.lenovo.com/support To install an optical drive or an additional hard disk drive in bay - Lenovo 9935B3U | User Manual - Page 33
" in the ThinkCentre Safety and Warranty Guide that came with your computer. To obtain a copy of the ThinkCentre Safety and Warranty Guide, go to: http://www.lenovo.com/support To install a diskette drive in bay 3: 1. Remove the computer cover. See "Removing the computer cover" on page 14. 2. Access - Lenovo 9935B3U | User Manual - Page 34
the "Important safety information" in the ThinkCentre Safety and Warranty Guide that came with your computer. To obtain a copy of the ThinkCentre Safety and Warranty Guide, go to: http://www.lenovo.com/support This section provides instructions on how to replace the hard disk drive. Important When - Lenovo 9935B3U | User Manual - Page 35
3. Use the blue handle to pivot the hard disk drive and bracket upward, slide the hard disk drive to the left until it is free from the retaining clips in the bottom of the chassis, and then completely remove it from the chassis. Figure 21. Removing the hard disk drive 4. Disconnect the signal and - Lenovo 9935B3U | User Manual - Page 36
the "Important safety information" in the ThinkCentre Safety and Warranty Guide that came with your computer. To obtain a copy of the ThinkCentre Safety and Warranty Guide, go to: http://www.lenovo.com/support This section provides instructions on how to replace the optical drive. To replace the - Lenovo 9935B3U | User Manual - Page 37
the "Important safety information" in the ThinkCentre Safety and Warranty Guide that came with your computer. To obtain a copy of the ThinkCentre Safety and Warranty Guide, go to: http://www.lenovo.com/support This section provides instructions on how to replace the diskette drive or card reader - Lenovo 9935B3U | User Manual - Page 38
in the ThinkCentre Safety and Warranty Guide that came with your computer. To obtain a copy of the ThinkCentre Safety and Warranty Guide, go to: http://www.lenovo.com/support 30 User Guide This section provides instructions on how to replace the battery. Your computer has a special type of memory - Lenovo 9935B3U | User Manual - Page 39
for the first time after replacing the battery, an error message might be displayed. This is normal after replacing the battery. 7. Turn on the computer and all attached devices. 8. Use the Setup Utility program to set the date, time, and any passwords. See Chapter 4, "Using the Setup Utility," on - Lenovo 9935B3U | User Manual - Page 40
the "Important safety information" in the ThinkCentre Safety and Warranty Guide that came with your computer. To obtain a copy of the ThinkCentre Safety and Warranty Guide, go to: http://www.lenovo.com/support This section provides instructions on how to replace the heat sink and fan assembly - Lenovo 9935B3U | User Manual - Page 41
the "Important safety information" in the ThinkCentre Safety and Warranty Guide that came with your computer. To obtain a copy of the ThinkCentre Safety and Warranty Guide, go to: http://www.lenovo.com/support This section provides instructions on how to replace the system fan assembly. To replace - Lenovo 9935B3U | User Manual - Page 42
the "Important safety information" in the ThinkCentre Safety and Warranty Guide that came with your computer. To obtain a copy of the ThinkCentre Safety and Warranty Guide, go to: http://www.lenovo.com/support This section provides instructions on how to replace the internal speaker. To replace the - Lenovo 9935B3U | User Manual - Page 43
6. Push upward on the clip that secures the internal speaker, pivot the internal speaker outward, and then completely remove it from the chassis. Figure 34. Removing the internal speaker 7. Position the bottom of the new internal speaker into the bracket and then pivot the top of the internal - Lenovo 9935B3U | User Manual - Page 44
the "Important safety information" in the ThinkCentre Safety and Warranty Guide that came with your computer. To obtain a copy of the ThinkCentre Safety and Warranty Guide, go to: http://www.lenovo.com/support This section provides instructions on how to replace the keyboard. To replace the keyboard - Lenovo 9935B3U | User Manual - Page 45
the "Important safety information" in the ThinkCentre Safety and Warranty Guide that came with your computer. To obtain a copy of the ThinkCentre Safety and Warranty Guide, go to: http://www.lenovo.com/support This section provides instructions on how to replace the mouse. To replace the mouse - Lenovo 9935B3U | User Manual - Page 46
removed. 6. Position the computer cover on the chassis so that the rail guides on the sides of lenovo.com/support Installation instructions are provided in readme files with the device driver files. Installing security features To help prevent hardware theft and unauthorized access to your computer - Lenovo 9935B3U | User Manual - Page 47
also locks the buttons used to open the computer cover. This is the same type of lock used with many notebook computers. You can order a security cable directly from Lenovo by searching on Kensington at: http://www.lenovo.com/support Figure 38. Integrated cable lock Chapter 2. Installing options - Lenovo 9935B3U | User Manual - Page 48
on page 37. Erasing lost or forgotten passwords (clearing CMOS) This section contains instructions on erasing some lost or forgotten passwords, such as a user password. For erase lost or forgotten passwords: 1. Remove the computer cover. See "Removing the computer cover" on page 14. 40 User Guide - Lenovo 9935B3U | User Manual - Page 49
. 6. Repeat step 1 and step 2 on page 41. 7. Move the Clear CMOS/Recovery jumper back to the standard position (pin 1 and pin 2). 8. Reinstall the computer cover and connect the power cord. See "Completing the parts replacement" on page 37. Chapter 2. Installing options and replacing hardware 41 - Lenovo 9935B3U | User Manual - Page 50
42 User Guide - Lenovo 9935B3U | User Manual - Page 51
recovery solutions provided by Lenovo. This chapter explains drivers v Setting a rescue device in the startup sequence v Solving recovery problems Recovery Media. 2. Follow the instructions on the screen. The following list Recovery discs to restore your computer to the factory-installed contents - Lenovo 9935B3U | User Manual - Page 52
guided Start Recovery disc into your optical drive. 2. Restart your computer. 3. After a short delay, the Rescue and Recovery sequence" on page 48. 3. Follow the instructions on the screen. Insert the appropriate Product have to reinstall some software or drivers. See "Using the Rescue and Recovery - Lenovo 9935B3U | User Manual - Page 53
opens. 2. From the Rescue and Recovery main window, click Back up your hard disk drive to select backup operation options. 3. Follow the instructions on the screen. To perform a restore operation using the Rescue and Recovery program, do the following: 1. From the Windows desktop, click Start - Lenovo 9935B3U | User Manual - Page 54
Recovery workspace fails to open, see "Solving recovery problems" on page 49. 6. Do one of the from a backup, click Rescue files and follow the instructions on the screen. v To restore your hard drivers for some devices. See "Recovering or installing device drivers" on page 48. 2. Some computers Guide - Lenovo 9935B3U | User Manual - Page 55
drive, or a second internal hard disk drive. 3. Click OK. 4. Follow the instructions on the screen. Note: For Windows Vista, use rescue media to restore to the your computer and operating system. 2. Using an Internet browser, go to the following Web address: http://www.lenovo.com/think/support/site. - Lenovo 9935B3U | User Manual - Page 56
factory-installed devices also are available at: http://www.lenovo.com/think/support To reinstall a device driver for a factory-installed device, do the following: 1. Start your computer and operating system. 2. Use Windows Explorer or My Computer to display the directory structure of your hard disk - Lenovo 9935B3U | User Manual - Page 57
you are using an external device, you first must turn off your computer before connecting the external device. For more information on Setup Utility, see Chapter 4, "Using the Setup Utility," on page 51. Solving recovery problems If you are unable to access the Rescue and Recovery workspace or the - Lenovo 9935B3U | User Manual - Page 58
50 User Guide - Lenovo 9935B3U | User Manual - Page 59
press and release the F1 key rather than leaving it pressed when turning on the computer. b. If a user password or an administrator password has been set, the any passwords to use your computer. However, if you decide to set any passwords, read the following sections. © Copyright Lenovo 2008 51 - Lenovo 9935B3U | User Manual - Page 60
name v Be significantly different from your previous password User Password When a User Password is set, the computer cannot be used until a valid password is typed in. Administrator Password When an Administrator Password is set set to Disable, the diskette drive cannot be accessed. 52 User Guide - Lenovo 9935B3U | User Manual - Page 61
select Discard Changes or Discard Changes and Exit. Selecting a startup device If your computer does not start up from a device such as the CD-ROM, diskette, the F12 key rather than leaving it pressed when turning on the computer. 3. Select the desired startup device from the Startup Device Menu and - Lenovo 9935B3U | User Manual - Page 62
Esc several times). If you want to save the new settings, select Save Changes and Exit. Otherwise, your changes will not be saved. 54 User Guide - Lenovo 9935B3U | User Manual - Page 63
from a diskette or disc This section provides instructions on how to update (flash) BIOS using a diskette or disc. System program updates are available at: http://www.lenovo.com/support 1. To update (flash) BIOS: v From a diskette, make sure the computer is turned off and insert a system-program - Lenovo 9935B3U | User Manual - Page 64
computer and then press Enter. 8. Follow the instructions to: http://www.lenovo.com/support 2. Locate the drivers. c. Under the BIOS category, click the Flash BIOS update. d. Click the TXT file that contains the installation instructions outlets and remove the computer cover. See "Removing the computer - Lenovo 9935B3U | User Manual - Page 65
any cables that were disconnected. See "Completing the parts replacement" on page 37. 14. Reinstall the computer cover and reconnect the power cords for the computer and monitor to electrical outlets. 15. Turn on the computer to restart the operating system. Chapter 5. Updating system programs 57 - Lenovo 9935B3U | User Manual - Page 66
58 User Guide - Lenovo 9935B3U | User Manual - Page 67
"Connecting your computer" in the ThinkCentre Safety and Warranty Guide. If you cannot correct the problem, have the computer serviced. Refer to the safety and warranty information that is provided with your computer for a list of service and support telephone numbers. © Copyright Lenovo 2008 59 - Lenovo 9935B3U | User Manual - Page 68
problem, have the computer serviced. Refer to the safety and warranty information that is provided with your computer for a list of service and support diagnostic programs preinstalled on your computer: v Lenovo System Toolbox (used to diagnose problems while running the Windows operating system - Lenovo 9935B3U | User Manual - Page 69
symptoms and solutions for computer problems, access the Lenovo troubleshooting center, update system drivers, and review system information. To run the Lenovo System Toolbox, click Start → All Programs → Lenovo Services → Lenovo System Toolbox. Follow the instructions on the screen. For additional - Lenovo 9935B3U | User Manual - Page 70
lenovo.com/support Lenovo System Toolbox and the PC-Doctor for Windows PE have not been successful in isolating a possible problem ://www.lenovo.com/support After Restart the computer. Note: instructions on how to change the startup device. 5. When the diagnostics program opens, follow the instructions - Lenovo 9935B3U | User Manual - Page 71
computer will restart. 6. When the computer restarts, the diagnostic program opens automatically. Select the diagnostic test you want to run. Press the F1 key for additional help. Cleaning the mouse This section provides instructions mouse cable to the computer. 6. Turn your computer back on. Non- - Lenovo 9935B3U | User Manual - Page 72
illustration might be slightly different from your mouse. 1. Turn off your computer. 2. Disconnect the mouse cable from the computer. 3. Turn the mouse upside down. Twist the retainer ring 1 to position. 11. Reconnect the mouse cable to the computer. 12. Turn your computer back on. 64 User Guide - Lenovo 9935B3U | User Manual - Page 73
your computer and easy access to various technologies, such as: v Rescue and Recovery v Productivity Center v Client Security Solution v Factory Recovery v System Update v Service and support Note: ThinkVantage Technologies are only available on select Lenovo computers. © Copyright Lenovo 2008 - Lenovo 9935B3U | User Manual - Page 74
latest device drivers and software updates for your computer model. v Access the online manuals for your products. v Access the Lenovo Limited Warranty. v Access troubleshooting and support information for your computer model and other supported products. v Find the service and support phone number - Lenovo 9935B3U | User Manual - Page 75
to help you troubleshoot your computer problem, see "Information resources" on page 65. If you suspect a software problem, see the and download device drivers and updates. To access these pages, follow the instructions at: http://www.lenovo.com/support Calling for service During the warranty - Lenovo 9935B3U | User Manual - Page 76
might apply at the time of service. To determine whether your computer is eligible for International Warranty Service and to view a list of the countries where service is available, go to http://www.lenovo.com/support, click Warranty, and follow the instructions on the screen. For technical - Lenovo 9935B3U | User Manual - Page 77
and verify the operation of any other product, program, or service. Lenovo may have patents or pending patent applications covering subject matter described document are not intended for use in implantation or other life support applications where malfunction may result in injury or death to - Lenovo 9935B3U | User Manual - Page 78
following terms are trademarks of Lenovo in the United States, other countries, or both: Lenovo Rescue and Recovery The Lenovo logo ThinkCentre ThinkVantage Wake on States, other countries, or both. Other company, product, or service names may be trademarks or service marks of others. 70 User Guide - Lenovo 9935B3U | User Manual - Page 79
computer cover support center 67 D deleting password 52 device drivers 38 installing 48 recovering 48 devices, handling static-sensitive 13 diagnostics Rescue and Recovery workspace 62 diagnostics programs, using 67 diagnostics, troubleshooting 59 © Copyright Lenovo information 65 service 65 H hard disk - Lenovo 9935B3U | User Manual - Page 80
keyboard, replacing 36 L Lenovo System Toolbox 61 locating Guide power Advanced Configuration and Power Interface (ACPI) support services 68 R rear connectors 8 recovering device drivers 48 from a POST/BIOS update failure 56 software 43 recovery Boot-block 56 operations, backup and 44 problems - Lenovo 9935B3U | User Manual - Page 81
43 software overview 5 solving recovery problems 49 starting the Setup Utility program 51 troubleshooting, diagnostics 59 U updating (flashing) BIOS 55 system programs 55 updating (flashing) BIOS 56 USB connector 9 user, password 52 using diagnostic programs 67 documentation 67 other services - Lenovo 9935B3U | User Manual - Page 82
74 User Guide - Lenovo 9935B3U | User Manual - Page 83
- Lenovo 9935B3U | User Manual - Page 84
Part Number: 53Y6559 Printed in USA (1P) P/N: 53Y6559
-
 1
1 -
 2
2 -
 3
3 -
 4
4 -
 5
5 -
 6
6 -
 7
7 -
8
-
9
-
10
-
11
-
12
-
13
-
14
-
15
-
16
-
17
-
18
-
19
-
20
-
21
-
22
-
23
-
24
-
25
-
26
-
27
-
28
-
29
-
30
-
31
-
32
-
33
-
34
-
35
-
36
-
37
-
38
-
39
-
40
-
41
-
42
-
43
-
44
-
45
-
46
-
47
-
48
-
49
-
50
-
51
-
52
-
53
-
54
-
55
-
56
-
57
-
58
-
59
-
60
-
61
-
62
-
63
-
64
-
65
-
66
-
67
-
68
-
69
-
70
-
71
-
72
-
73
-
74
-
75
-
76
-
77
-
78
-
79
-
80
-
81
-
82
-
83
-
84
 |
 |
Machine Types:
3658, 7057, 7062, 7092, 9342, 9344, 9354, 9426, 9486,
9624, 9707, 9804, and 9945.
ThinkCentre
User Guide