Lenovo A600 Lenovo IdeaCentre A600 Hardware Replacement Guide V1.1
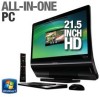
Lenovo A600 - IdeaCentre 3011 6DU All-in-One PC Manual
 |
UPC - 884942547713
View all Lenovo A600 manuals
Add to My Manuals
Save this manual to your list of manuals |
Lenovo A600 manual content summary:
- Lenovo A600 | Lenovo IdeaCentre A600 Hardware Replacement Guide V1.1 - Page 1
Version 1.1 2009.7 31037963B 31037963B_A6_HRG_FM_EN_V1.1.indd1 1 Hardware Replacement Guide 2009.7.20 4:37:49 PM - Lenovo A600 | Lenovo IdeaCentre A600 Hardware Replacement Guide V1.1 - Page 2
Hardware Replacement Guide 31037963_A6_HRG_EN_V1.1.indd 31 2009.4.10 3:38:56 PM - Lenovo A600 | Lenovo IdeaCentre A600 Hardware Replacement Guide V1.1 - Page 3
the CPU fan 20 Replacing the MXM fan 22 Replacing the keyboard and mouse 23 Replacing the power cord or power adapter 24 Replacing the remote control 25 Completing the installation 25 Appendix 29 31037963_A6_HRG_EN_V1.1.indd 32 2009 - Lenovo A600 | Lenovo IdeaCentre A600 Hardware Replacement Guide V1.1 - Page 4
Safety and Warranty Guide that was included with your computer. If you no longer have this copy of the Safety and Warranty Guide, you can obtain one online from the Support Web site at http://consumersupport.lenovo.com. Hardware Replacement Guide 1 31037963_A6_HRG_EN_V1.1.indd 1 2009.4.10 3:37:23 - Lenovo A600 | Lenovo IdeaCentre A600 Hardware Replacement Guide V1.1 - Page 5
CRU removal and installation information • Publications • Troubleshooting information • Parts information • Links to other useful access this information, go to: http://consumersupport.lenovo.com. Tools required To disassemble the computer, Guide 31037963_A6_HRG_EN_V1.1.indd 2 2009.4.10 3:37:23 PM - Lenovo A600 | Lenovo IdeaCentre A600 Hardware Replacement Guide V1.1 - Page 6
, level surface and place the part on it. • Do not place the part on the computer cover or other metal surface. 31037963_A6_HRG_EN_V1.1.indd 3 Hardware Replacement Guide 3 2009.4.10 3:37:24 PM - Lenovo A600 | Lenovo IdeaCentre A600 Hardware Replacement Guide V1.1 - Page 7
Locations This chapter provides illustrations to help locate the various connectors, controls and components of the computer. To remove the computer cover, refer illustration shows the components inside your computer. 4 Hardware Replacement Guide 31037963_A6_HRG_EN_V1.1.indd 4 2009.4.10 3:37:25 PM - Lenovo A600 | Lenovo IdeaCentre A600 Hardware Replacement Guide V1.1 - Page 8
(Mobile PCI block any air vents on the computer. Blocked air vents can cause thermal problems. 8 13 1 2 3 4 5 6 Power button IEEE 1394 connector Headphone connector Microphone connector Memory card reader Optical drive slot 12 11 10 9 7 Camera Brightness down touch button Brightness up touch button LCD - Lenovo A600 | Lenovo IdeaCentre A600 Hardware Replacement Guide V1.1 - Page 9
routing clip Identifying parts on the system board The system board (sometimes called the planar or motherboard) is the main circuit board in your computer. It provides basic computer functions and supports a variety of devices that are factory-installed or that you can install later. 6 Hardware - Lenovo A600 | Lenovo IdeaCentre A600 Hardware Replacement Guide V1.1 - Page 10
disk drive SATA cable connector Onboard LVDS MXM LVDS Camera cable connector Power switch or hard disk drive LED cable connector Memory card reader IEEE 1394 connector USB power connector TV tuner module connector Hardware Replacement Guide 7 31037963_A6_HRG_EN_V1.1.indd 7 2009.4.10 3:37:40 PM - Lenovo A600 | Lenovo IdeaCentre A600 Hardware Replacement Guide V1.1 - Page 11
Manual (HMM) for the computer. To obtain copies of the Safety and Warranty Guide or HMM, go to the Support Web site at: http://consumersupport.lenovo.com. Note: Use only parts provided by Lenovo. General information Pre-disassembly instructions a soft flat surface. Lenovo recommends that you use a - Lenovo A600 | Lenovo IdeaCentre A600 Hardware Replacement Guide V1.1 - Page 12
to "Locating connectors on the rear of the computer." 4. Remove the five rubber caps covering the screws on the system cover. 31037963_A6_HRG_EN_V1.1.indd 9 Hardware Replacement Guide 9 2009.4.10 3:37:42 PM - Lenovo A600 | Lenovo IdeaCentre A600 Hardware Replacement Guide V1.1 - Page 13
, then pull each side of the cover out slightly , release the top tabs from the connector housing, then lift the cover away from the computer . 10 Hardware Replacement Guide 31037963_A6_HRG_EN_V1.1.indd 10 2009.4.10 3:37:43 PM - Lenovo A600 | Lenovo IdeaCentre A600 Hardware Replacement Guide V1.1 - Page 14
safety information" in the Safety and Warranty Guide that was included with your computer or in the Hardware Maintenance Manual (HMM) for the computer. To obtain copies of the Safety and Warranty Guide or HMM, go to the Support Web site at http://consumersupport.lenovo.com. To replace the hard disk - Lenovo A600 | Lenovo IdeaCentre A600 Hardware Replacement Guide V1.1 - Page 15
12 Hardware Replacement Guide 31037963_A6_HRG_EN_V1.1.indd 12 2009.4.10 3:37:51 PM - Lenovo A600 | Lenovo IdeaCentre A600 Hardware Replacement Guide V1.1 - Page 16
3 Press the release latch in toward the drive carrier, then pull the drive carrier up slightly and slide it out of the drive bay. 31037963_A6_HRG_EN_V1.1.indd 13 Hardware Replacement Guide 13 2009.4.10 3:38:00 PM - Lenovo A600 | Lenovo IdeaCentre A600 Hardware Replacement Guide V1.1 - Page 17
4. Disconnect the data and power cables from the hard disk drive. 5. Remove the hard disk drive from the drive carrier. Gently pry open the side rails. Remove the hard disk drive from the drive carrier. 14 Hardware Replacement Guide 31037963_A6_HRG_EN_V1.1.indd 14 2009.4.10 3:38:09 PM - Lenovo A600 | Lenovo IdeaCentre A600 Hardware Replacement Guide V1.1 - Page 18
the drive carrier into the drive bay and press the carrier down into the bay until it snaps into place . 31037963_A6_HRG_EN_V1.1.indd 15 Hardware Replacement Guide 15 2009.4.10 3:38:14 PM - Lenovo A600 | Lenovo IdeaCentre A600 Hardware Replacement Guide V1.1 - Page 19
8. Connect one end of the power and data cables to the hard disk drive and the other end of the cables to the system board. 9. Close the system bay. 16 Hardware Replacement Guide 31037963_A6_HRG_EN_V1.1.indd 16 2009.4.10 3:38:20 PM - Lenovo A600 | Lenovo IdeaCentre A600 Hardware Replacement Guide V1.1 - Page 20
bay. Refer to step 2 of the "Replacing the hard disk drive" section. 3. Disconnect one end of the ODD data and power cable from the rear of the optical drive and the other end of the cables from the system board. 31037963_A6_HRG_EN_V1.1.indd 17 Hardware Replacement Guide 17 2009.4.10 3:38:33 PM - Lenovo A600 | Lenovo IdeaCentre A600 Hardware Replacement Guide V1.1 - Page 21
new optical drive into the drive bay. 8. Connect the ODD data and power cable to the optical drive and the system board. 18 Hardware Replacement Guide 31037963_A6_HRG_EN_V1.1.indd 18 2009.4.10 3:38:37 PM - Lenovo A600 | Lenovo IdeaCentre A600 Hardware Replacement Guide V1.1 - Page 22
or in the Hardware Maintenance Manual (HMM) for the computer. To obtain copies of the Safety and Warranty Guide or HMM, go to the Support Web site at http://consumersupport.lenovo.com. To replace a from its socket . 31037963_A6_HRG_EN_V1.1.indd 19 Hardware Replacement Guide 19 2009.4.10 3:38:41 PM - Lenovo A600 | Lenovo IdeaCentre A600 Hardware Replacement Guide V1.1 - Page 23
that was included with your computer or in the Hardware Maintenance Manual (HMM) for the computer. To obtain copies of the Safety and Warranty Guide or HMM, go to the Support Web site at http://consumersupport.lenovo.com. To replace the CPU fan 1. Remove the computer cover. Refer to "Removing the - Lenovo A600 | Lenovo IdeaCentre A600 Hardware Replacement Guide V1.1 - Page 24
3. Remove the two screws that secure the CPU fan to the system bay. 4. Disconnect the CPU fan cable from the system board and remove the CPU fan from the system bay . 31037963_A6_HRG_EN_V1.1.indd 21 Hardware Replacement Guide 21 2009.4.10 3:38:43 PM - Lenovo A600 | Lenovo IdeaCentre A600 Hardware Replacement Guide V1.1 - Page 25
in the Hardware Maintenance Manual (HMM) for the computer. To obtain copies of the Safety and Warranty Guide or HMM, go to the Support Web site at http://consumersupport.lenovo.com. To replace fan to the system bay. 22 Hardware Replacement Guide 31037963_A6_HRG_EN_V1.1.indd 22 2009.4.10 3:38:47 PM - Lenovo A600 | Lenovo IdeaCentre A600 Hardware Replacement Guide V1.1 - Page 26
included with your computer or in the Hardware Maintenance Manual (HMM) for the computer. To obtain copies of the Safety and Warranty Guide or HMM, go to the Support Web site at http://consumersupport.lenovo.com. Hardware Replacement Guide 23 31037963_A6_HRG_EN_V1.1.indd 23 2009.4.10 3:38:49 PM - Lenovo A600 | Lenovo IdeaCentre A600 Hardware Replacement Guide V1.1 - Page 27
that was included with your computer or in the Hardware Maintenance Manual (HMM) for the computer. To obtain copies of the Safety and Warranty Guide or HMM, go to the Support Web site at http://consumersupport.lenovo.com. To replace the power cord and power adapter: 1. Remove any media (diskettes - Lenovo A600 | Lenovo IdeaCentre A600 Hardware Replacement Guide V1.1 - Page 28
control Note: Remove the batteries from the failing remote control before you return it to Lenovo for a replacement. Completing the installation After replacing the parts, you need to install the computer cover and reconnect Hardware Replacement Guide 25 31037963_A6_HRG_EN_V1.1.indd 25 2009.4.10 - Lenovo A600 | Lenovo IdeaCentre A600 Hardware Replacement Guide V1.1 - Page 29
Utility program. Refer to "Starting the Setup Utility" in the User Guide or in the Hardware Maintenance Manual. 1. Ensure that all components have been reassembled correctly and that no tools slots of the chassis. 26 Hardware Replacement Guide 31037963_A6_HRG_EN_V1.1.indd 26 2009.4.10 3:38:52 PM - Lenovo A600 | Lenovo IdeaCentre A600 Hardware Replacement Guide V1.1 - Page 30
5. Carefully install the cover as shown, until it securely snaps into place. 6. Install and tighten the five screws on the system cover. 31037963_A6_HRG_EN_V1.1.indd 27 Hardware Replacement Guide 27 2009.4.10 3:38:54 PM - Lenovo A600 | Lenovo IdeaCentre A600 Hardware Replacement Guide V1.1 - Page 31
below. 8. Reconnect the external cables and power cords into the computer. Refer to "Locating components and connectors". Note: In most areas of the world, Lenovo requires the return of the defective CRU. Information about this will come with the CRU or will come a few days after the CRU arrives - Lenovo A600 | Lenovo IdeaCentre A600 Hardware Replacement Guide V1.1 - Page 32
any inconsistency between the product and the manuals included with your computer. For the latest information or any questions or comments, please visit consumer support website at: http://consumersupport.lenovo.com Hardware Replacement Guide 29 31037963_A6_HRG_EN_V1.1.indd 29 2009.4.10 3:38:55 PM - Lenovo A600 | Lenovo IdeaCentre A600 Hardware Replacement Guide V1.1 - Page 33
registered trademark of Lenovo. Microsoft, Windows, and Windows Vista are trademarks language without prior written permission of Lenovo. Names or marks of certain companies mentioned in the manuals included with your computer or this Guide 31037963_A6_HRG_EN_V1.1.indd 30 2009.4.10 3:38:55 PM
-
 1
1 -
 2
2 -
 3
3 -
 4
4 -
 5
5 -
 6
6 -
 7
7 -
8
-
9
-
10
-
11
-
12
-
13
-
14
-
15
-
16
-
17
-
18
-
19
-
20
-
21
-
22
-
23
-
24
-
25
-
26
-
27
-
28
-
29
-
30
-
31
-
32
-
33
 |
 |
Version 1.1
2009.7
Hardware Replacement Guide
31037963B
31037963B_A6_HRG_FM_EN_V1.1.indd1
1
2009.7.20
4:37:49 PM