Lenovo B575 Lenovo B575 User Guide V1.0 - Page 34
socket are pushed into the closed position
 |
View all Lenovo B575 manuals
Add to My Manuals
Save this manual to your list of manuals |
Page 34 highlights
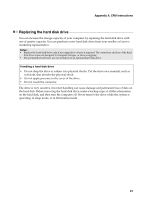
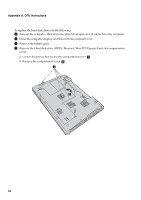
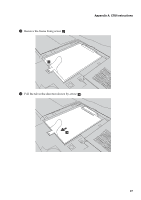
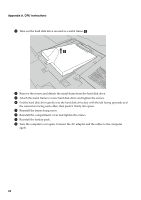
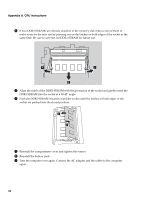
Appendix A. CRU instructions 6 If two DDR3 SDRAMs are already installed in the memory slot, remove one of them to make room for the new one by pressing out on the latches on both edges of the socket at the same time. Be sure to save the old DDR3 SDRAM for future use. a a b 7 Align the notch of the DDR3 SDRAM with the protrusion of the socket and gently insert the DDR3 SDRAM into the socket at a 30-45° angle. 8 Push the DDR3 SDRAM inward toward the socket until the latches on both edges of the socket are pushed into the closed position. 9 Reinstall the compartment cover and tighten the screws. 0 Reinstall the battery pack. A Turn the computer over again. Connect the AC adapter and the cables to the computer again. 30
-
 1
1 -
2
-
3
-
4
-
5
-
6
-
7
-
8
-
9
-
10
-
11
-
12
-
13
-
14
-
15
-
16
-
17
-
18
-
19
-
20
-
21
-
22
-
23
-
24
-
25
-
26
-
27
-
28
-
 29
29 -
 30
30 -
 31
31 -
 32
32 -
 33
33 -
 34
34 -
 35
35 -
 36
36 -
 37
37 -
 38
38 -
 39
39 -
40
-
41
 |
 |

30
Appendix A. CRU instructions
6
If two DDR3 SDRAMs are already installed in the memory slot, remove one of them to
make room for the new one by pressing out on the latches on both edges of the socket at the
same time. Be sure to save the old DDR3 SDRAM for future use.
7
Align the notch of the DDR3 SDRAM with the protrusion of the socket and gently insert the
DDR3 SDRAM into the socket at a 30-45° angle.
8
Push the DDR3 SDRAM inward toward the socket until the latches on both edges of the
socket are pushed into the closed position.
9
Reinstall the compartment cover and tighten the screws.
0
Reinstall the battery pack.
A
Turn the computer over again. Connect the AC adapter and the cables to the computer
again.
b
a
a