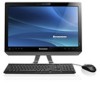
Lenovo C325 Lenovo C225\C320\C325 User Guide V1.0
Lenovo C325 Manual
 |
View all Lenovo C325 manuals
Add to My Manuals
Save this manual to your list of manuals |
Lenovo C325 manual content summary:
- Lenovo C325 | Lenovo C225\C320\C325 User Guide V1.0 - Page 1
Machine type: 10075/3078 10076/3079 10077/3094 10078/3095 Version 1.0 2011.06 31500064 Lenovo C2/C3 Series User Guide - Lenovo C325 | Lenovo C225\C320\C325 User Guide V1.0 - Page 2
Before using this manual, it is important that you read and understand all of the related safety information for this product. Refer to the Safety and Warranty Guide that you received with programs, devices, or data. Note: Pay attention to this important information. © Copyright Lenovo 2011. - Lenovo C325 | Lenovo C225\C320\C325 User Guide V1.0 - Page 3
- Lenovo C325 | Lenovo C225\C320\C325 User Guide V1.0 - Page 4
2 Touch screen user instruction 11 2.1 Touch Screen Calibration 12 2.2 User Gesture Instructions for the Touch screen 13 2.3 Attentions when using the Touch Screen 21 Chapter 3 Using the Rescue System 23 3.1 OneKey Recovery 24 3.2 Driver and Application Installation 24 3.3 System Setup 25 - Lenovo C325 | Lenovo C225\C320\C325 User Guide V1.0 - Page 5
Chapter 5 Troubleshooting and Confirming Setup 31 5.1 Troubleshooting Display Problems 32 5.2 Troubleshooting Audio Problems 33 5.3 Troubleshooting Software Problems 33 5.4 Troubleshooting Problems with Optical Drives and Hard Disks 34 5.5 Special considerations for troubleshooting Windows 35 - Lenovo C325 | Lenovo C225\C320\C325 User Guide V1.0 - Page 6
: Computer hardware introduction 2 Information on computer connections Note: The descriptions in this chapter might vary from your computer, depending on computer models and configurations. 3 4 5 User Guide 1 - Lenovo C325 | Lenovo C225\C320\C325 User Guide V1.0 - Page 7
Built-in microphone Camera Power button Built-in IR receiver (Only functional on models equipped with a IR receiver module) Hard disk drive indicator Wireless LAN card indicator LCD ON/OFF indicator (When turning on the LCD, the indicator light will be off; when turning off the LCD, the indicator - Lenovo C325 | Lenovo C225\C320\C325 User Guide V1.0 - Page 8
Be sure not to block any air vents on the computer. Blocked air vents may cause thermal problems. Memory card reader USB ports (2) Headphone connector Microphone connector* Optical drive * Microphone connector: 5mm audio cable. You can adjust the volume on the external audio device. User Guide 3 - Lenovo C325 | Lenovo C225\C320\C325 User Guide V1.0 - Page 9
to your preference.It can be adjusted from 5˚ forward to 25˚ backward. The stand provides stability to the computer; it is not a removable part. 4 User Guide - Lenovo C325 | Lenovo C225\C320\C325 User Guide V1.0 - Page 10
outlet to ensure that the required voltage and frequency match the available power source. If your computer uses an AC adapter: Note: Use only the Lenovo provided AC adapter approved for use with this device. Use of another AC adapter may cause a fire or explosion. 1.5.2 Connect the USB keyboard and - Lenovo C325 | Lenovo C225\C320\C325 User Guide V1.0 - Page 11
If you have audio devices, attach them using the following instructions: 1 2 Microphone Use this connector to attach a microphone attach the computer to an ethernet-type local area network TV-Tuner connector Only supported on systems with optional TV (IEC type) tuner card (Some models are - Lenovo C325 | Lenovo C225\C320\C325 User Guide V1.0 - Page 12
your computer is equipped with a Memory Card Reader Connector, it is able to read/write data from: MS/MS Pro/MMC/SD/SDHC/SDXC User Guide 7 - Lenovo C325 | Lenovo C225\C320\C325 User Guide V1.0 - Page 13
1.6 Important information about using the computer Press the power button on the bottom left of the screen to turn on the computer. Hold the computer tightly when you carry it. 8 User Guide - Lenovo C325 | Lenovo C225\C320\C325 User Guide V1.0 - Page 14
1.7 Wired keyboard LVT -- After entering Windows, press this key to launch the LVT (Lenovo Vantage Technology) program, Lenovo's pre-loaded Home PC software. In addition to its own functions, the LVT program will allow you to start other Windows compatible software, specially configured to run on - Lenovo C325 | Lenovo C225\C320\C325 User Guide V1.0 - Page 15
10 User Guide - Lenovo C325 | Lenovo C225\C320\C325 User Guide V1.0 - Page 16
Touch screen user instruction This chapter contains the following topics: 1 Touch Screen Calibration User Gesture Instructions for the Touch screen 2 Attentions when using the Touch Screen Attention: Only some selected models are equipped with touch screens. 3 4 5 User Guide - Lenovo C325 | Lenovo C225\C320\C325 User Guide V1.0 - Page 17
In Control Panel, select "Hardware and Sound". 3. In "Hardware and Sound" window, select "Tablet PC Settings". 4. In "Tablet PC Settings" dialogue, click "Calibrate" button. 5. Use your finger or the touch pen of 6-7mm diameter to touch each of the calibration points that are shown in sequence, to - Lenovo C325 | Lenovo C225\C320\C325 User Guide V1.0 - Page 18
Instructions for the Touch screen The Touch screen supports single touches and rotational movements, enlargement and reduction multi-touch operations, and the user can transmit position information to the computer via touch. The touch on the touch screen, with one finger touch it one or two times - Lenovo C325 | Lenovo C225\C320\C325 User Guide V1.0 - Page 19
2. Single Finger Right Click For the item selected on the touch screen, press and hold your finger on the screen until a circle appears. After lifting your finger from the touch screen, a menu bar will pop up, completing the single finger right click operation. This is similar to the action - Lenovo C325 | Lenovo C225\C320\C325 User Guide V1.0 - Page 20
to select the desired item and hold it there, then touch another finger anywhere nearby on the screen and quickly lift be used to show the right-click menu or perform related operations. 12 4. Dragging Movement First touch your finger on the desired item on the screen and hold it there, then make a - Lenovo C325 | Lenovo C225\C320\C325 User Guide V1.0 - Page 21
operations for the IE browser; or Previous and Next slide operations in Windows Photo Viewer slideshow mode. about 5 FP 6. Rolling Movement When you move your finger one time vertically (or horizontally) on the touch screen, this is called a Rolling Operation. For example: This operation is similar - Lenovo C325 | Lenovo C225\C320\C325 User Guide V1.0 - Page 22
a zoom out (or zoom in) operation. For example: you can enlarge or reduce the picture size in Windows Photo Viewer. 8. Rotation Operation Use two figures to touch the desired item on the touch screen, then rotate them in the desired direction. For example: you can rotate the picture which is being - Lenovo C325 | Lenovo C225\C320\C325 User Guide V1.0 - Page 23
2.2.2 Related Touch Screen Settings 1. Flicks: In the notification area of the taskbar at the bottom of the screen, click on the Flicks icon, and the current Flicks window will appear. Click once anywhere in this window to enter Flicks Training. The user can perform operations according to the - Lenovo C325 | Lenovo C225\C320\C325 User Guide V1.0 - Page 24
screen, then click on "Customize your flicks setting" in the Flicks pop-up window. In the "Pen and Touch" window, the user can adjust more settings related to "Pen and Touch" according to their specific preferences. On the Flicksmenu you can: • Select commonly used Flicks operation groups • Adjust - Lenovo C325 | Lenovo C225\C320\C325 User Guide V1.0 - Page 25
as "Use your finger as an input device" and "Enable multi-touch gestures and inking". • Select touch actions which you wish to adjust. By clicking on "Settings", you • Enable / disable touch points. Note: Users can access more help information from the Windows "Help and Support" menu. 20 User Guide - Lenovo C325 | Lenovo C225\C320\C325 User Guide V1.0 - Page 26
of the touch screen, please touch screen, please avoid handling or touching the glass frame of the touch screen by your hands when you are carrying out touching affecting the touch operations, do 's touch localization touch screen process will not affect the running of other computer processes. User - Lenovo C325 | Lenovo C225\C320\C325 User Guide V1.0 - Page 27
. Note: To learn accurate hand gesture operations, the user can consult this manual and also the related Windows help content. 8. The touch screen does not function in Rescue System mode. 9. The touch screen also does not function during the startup process, and in Sleep mode or Safe mode. 22 User - Lenovo C325 | Lenovo C225\C320\C325 User Guide V1.0 - Page 28
Rescue System This chapter contains the following topics: 1 OneKey Recovery Driver and Application Installation System Setup System Backup 2 System Recovery Create Recovery Disc Attention: Using the C partition. Otherwise, the OneKey Recovery system cannot run. User Guide 23 - Lenovo C325 | Lenovo C225\C320\C325 User Guide V1.0 - Page 29
computer and enter the system. 3.2 Driver and Application Installation The Driver and Application Installation function in the rescue system provides a way for the user to conveniently re-install all of the Lenovo applications and drivers that were shipped with your Lenovo hardware. 24 User Guide - Lenovo C325 | Lenovo C225\C320\C325 User Guide V1.0 - Page 30
process will continue until completion. Method 2: Manual Installation In the Windows system, Click Start → All Programs → Lenovo → Lenovo Drivers and Application Installation. After starting the procedure, install all the drivers and software manually according to the prompts. Notes: 1. It - Lenovo C325 | Lenovo C225\C320\C325 User Guide V1.0 - Page 31
disc from current system. These recovery discs are used to boot your computer and will guide you through the entire restoration process. In the Windows system, click Start → All Programs → Lenovo → Lenovo Rescue System. After starting the procedure, click Create Recovery Disc to create a bootable - Lenovo C325 | Lenovo C225\C320\C325 User Guide V1.0 - Page 32
Using the Computer Software This chapter contains the following 1 topics: Computer software instructions 2 Note: The interface and function of each of these features are subject to the actual software that was shipped with the computer model that you purchased. 3 4 5 User Guide 27 - Lenovo C325 | Lenovo C225\C320\C325 User Guide V1.0 - Page 33
Lenovo PC camera and is available only after the camera is installed. Before using this software, do the following: 1) Click Start → All Programs → Lenovo USB2.0 UVC Camera → vmcap. 2) Select Options → Preview from the pop-up window to display the image in the video capture window - Lenovo C325 | Lenovo C225\C320\C325 User Guide V1.0 - Page 34
Lenovo USB2.0 UVC Camera" device, and the window should display the camera image. An image, which is caught by Lenovo PC camera, will be displayed in the video capture window . 4.2 Lenovo Eye Distance System Lenovo Eye Distance computer equipped with a Lenovo PC camera and is available only after - Lenovo C325 | Lenovo C225\C320\C325 User Guide V1.0 - Page 35
): Elevation angle: 20 degrees Depression angle: 30 degrees The horizontal rotary angle (the face rotary angle scope in the horizontal): -20 ~ +20 degrees 30 User Guide - Lenovo C325 | Lenovo C225\C320\C325 User Guide V1.0 - Page 36
and Chapter Confirming Setup This chapter contains the following 1 topics: Troubleshooting and Problem Resolution 2 Note: The description of the TV-Tuner card in this manual is only used for the machines which have the TV-Tuner card. It does not apply to those machines that do - Lenovo C325 | Lenovo C225\C320\C325 User Guide V1.0 - Page 37
default view, so they may not apply if you set your Lenovo® computer to the Windows Classic view. 5.1 Troubleshooting Display Problems Problem: Blank screen or no image is displayed on the monitor. Troubleshooting and problem resolution: Check that the LCD screen has been turned on; If not, press - Lenovo C325 | Lenovo C225\C320\C325 User Guide V1.0 - Page 38
any interfering devices away from the computer. 3. If the problem persists, consult with Lenovo Service. 5.2 Troubleshooting Audio Problems Problem: No sound from integrated speakers. Troubleshooting and problem resolution: • Adjust the windows volume control - Double-click the speaker icon in the - Lenovo C325 | Lenovo C225\C320\C325 User Guide V1.0 - Page 39
is unable to read a CD/DVD. Troubleshooting and problem resolution: 1. Check to determine if there is an optical drive icon in the resource manager of the operating system. If not, restart your computer. If there is still no icon, contact Lenovo Service. Otherwise, continue with the next step of - Lenovo C325 | Lenovo C225\C320\C325 User Guide V1.0 - Page 40
Service troubleshooting system problems: 1. The serial number of the software. The serial number was shipped with the computer and was provided separately by the manufacturer. The Help Center is unable to retrieve this number. 2. The drivers for this computer model only support the Windows Guide 35 - Lenovo C325 | Lenovo C225\C320\C325 User Guide V1.0 - Page 41
the display. Only use products specifically designed for cleaning displays, and follow the instructions that are included with the product it is dry. Do not do any of the following: • Allow water to enter the computer • Use a heavily dampened cloth • Spray water directly onto the surface Guide
-
 1
1 -
 2
2 -
 3
3 -
 4
4 -
 5
5 -
 6
6 -
 7
7 -
8
-
9
-
10
-
11
-
12
-
13
-
14
-
15
-
16
-
17
-
18
-
19
-
20
-
21
-
22
-
23
-
24
-
25
-
26
-
27
-
28
-
29
-
30
-
31
-
32
-
33
-
34
-
35
-
36
-
37
-
38
-
39
-
40
-
41
 |
 |

Version 1.0
Machine type: 10075/3078
10076/3079
10077/3094
10078/3095
2011.06
Lenovo
C2/C3 Series
User Guide
31500064