Lenovo C340 User Guide
Lenovo C340 Manual
 |
View all Lenovo C340 manuals
Add to My Manuals
Save this manual to your list of manuals |
Lenovo C340 manual content summary:
- Lenovo C340 | User Guide - Page 1
Machine type: 10102/4773 [C340] 10103/4751 [C345] 10104/6595 [C440] 10105/6596 [C445] 10110/6267 [C540] Lenovo C3/C4/C5 Series User Guide Version 2.0 2012.08 31502285 - Lenovo C340 | User Guide - Page 2
aware of possible damage to programs, devices, or data. Note: Pay attention to this important information. © Copyright Lenovo 2012. All rights reserved. LIMITED AND RESTRICTED RIGHTS NOTICE: If data or software is delivered pursuant a General Services Administration "GSA" contract, use, reproduction - Lenovo C340 | User Guide - Page 3
- Lenovo C340 | User Guide - Page 4
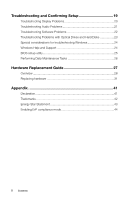
Internet 10 Using Windows 8 11 Switching between the main Windows 8 interfaces 12 The Charms Bar 12 Shutting down the computer 12 Switching between apps 12 Closing an app 13 Opening other system programs 13 Windows Help and Support 13 Using the Rescue System 15 OneKey Recovery 16 Driver - Lenovo C340 | User Guide - Page 5
Audio Problems 21 Troubleshooting Software Problems 22 Troubleshooting Problems with Optical Drives and Hard Disks 23 Special considerations for troubleshooting Windows 24 Windows Help and Support 24 BIOS setup utility 25 Performing Daily Maintenance Tasks 26 Hardware Replacement Guide 27 - Lenovo C340 | User Guide - Page 6
the Computer Hardware This chapter contains the following topics: Introduction to the computer hardware Information on computer connections Note: The descriptions in this chapter might be different from what you see on your computer, depending on the computer model and configuration. User Guide - Lenovo C340 | User Guide - Page 7
Attention: Be careful not to block any air vents on the computer. Blocked air vents can cause overheating. 12 10 3 45 Built-in microphone Hard disk drive indicator Monitor On/Off indicator Direction button Monitor On/Off button 6 7 8 9 Built-in camera Wi-Fi status indicator Menu button - Lenovo C340 | User Guide - Page 8
on the computer. Blocked air vents may cause thermal problems. 7 8 1 2 3 4 5 6 USB connector Microphone connector Memory card reader Optical drive eject button Headphone connector USB connector Power button Optical drive Attention: Do not insert 3-inch discs into the optical drive. User Guide 3 - Lenovo C340 | User Guide - Page 9
Rear view of the computer 9 8 1 2 3 4 56 7 TV tuner connector (selected models only, 2 connectors for Japan) Power connector USB connector HDMI-out connector ( TV tuner connector (selected models only, 2 connectors for Japan) Ethernet connector USB connector Security cable slot 4 User Guide - Lenovo C340 | User Guide - Page 10
Installing the computer stand 1. Raise the stand holder. 2. Line up the stand base with the mounting holes in the stand holder, then push the stand base into position. 2 1 3. Pull the hand screw ring up, then secure the stand base to the - Lenovo C340 | User Guide - Page 11
Computer stand Use the stand to position the display to your preference. It can be rotated 5° forward and 25° backward. 6 User Guide - Lenovo C340 | User Guide - Page 12
the HDMI connector on your display or TV. Connects to an external antenna to view programs using the optional TV tuner card. Note: If your computer is equipped with a wireless keyboard or mouse, follow the installation instructions for those devices. User Guide 7 - Lenovo C340 | User Guide - Page 13
Connecting the power cord 8 User Guide - Lenovo C340 | User Guide - Page 14
Important information about using the computer Press the power button on the side of the computer to turn on the computer. Hold the computer tightly when you carry it. User Guide 9 - Lenovo C340 | User Guide - Page 15
computer to other devices. Wired network connection For wired networks, connect one end of an Ethernet cable (purchased separately) to the Ethernet connector on your computer, and then connect the other end to the network router or broadband modem. Consult your ISP for detailed setup instructions - Lenovo C340 | User Guide - Page 16
the following topics: Switching between the main Windows 8 interfaces The Charms Bar Shutting down the computer Switching between apps Closing an app Opening other system programs Windows Help and Support Attention: The Windows 8 operating system is provided by Microsoft Corporation - Lenovo C340 | User Guide - Page 17
main user interfaces: the Start Screen and the Windows desktop. To switch from the Start Screen to the Windows desktop, do one of the following: • Select the Windows desktop tile on the Start Screen. • Press the Windows key + D. To switch from the desktop to the Start Screen, do one of the following - Lenovo C340 | User Guide - Page 18
have a problem with the operating system, see the Windows Help and Support file. To open the Windows Help and Support file, do one of the following: • Select the Settings charm, then select Help. • Press the Windows key + F1. You can read the Windows Help and Support file on your computer. You can - Lenovo C340 | User Guide - Page 19
14 User Guide - Lenovo C340 | User Guide - Page 20
Rescue System This chapter contains the following topics: OneKey Recovery Driver and Application Installation Attention: Using OneKey Recovery will result in loss of data. • You can restore the C: drive of the computer to factory default settings or to the last system backup status using OneKey - Lenovo C340 | User Guide - Page 21
turning on the computer until the Lenovo Rescue System opens, then select OneKey Recovery. Note: System Recovery will overwrite all of the data on the C: drive. To prevent loss of data, be sure to back up relevant data before performing system recovery. 2. Follow the on-screen instructions to select - Lenovo C340 | User Guide - Page 22
and application installation process will continue until it has completed. Method 2: Manual Installation In the Windows system, Click Lenovo Rescue System icon on the Windows desktop or Start screen. Then select Drivers and Application Installation in the pop-up dialog box. After starting the - Lenovo C340 | User Guide - Page 23
18 User Guide - Lenovo C340 | User Guide - Page 24
Confirming Setup This chapter contains the following topic: Ø Troubleshooting and Problem Resolution Note: The description of the TV tuner card in this manual is only applicable to machines which have the TV tuner card. It does not apply to machines that do not have a TV tuner card. User Guide 19 - Lenovo C340 | User Guide - Page 25
on the monitor. Troubleshooting and problem resolution: Check that the LCD screen has been turned on; If not, press the LCD On/Off button to turn on the LCD. If still cannot solve the problem, contact Lenovo Customer Service. Problem: You need to change the display property settings. Setting display - Lenovo C340 | User Guide - Page 26
interference. 2. Move any interfering devices away from the computer. 3. If the problem persists, contact Lenovo Service. Troubleshooting Audio Problems Problem: No sound from the integrated speakers. Troubleshooting and problem resolution: • Adjust the Windows volume control - select the speaker - Lenovo C340 | User Guide - Page 27
Troubleshooting Software Problems Problem: You are unable to exit a running program normally. Troubleshooting and problem resolution: 1. Open the Task Manager window by pressing Ctrl, Alt and Delete at the same time. 2. Select the problem program, then click the End Task button. Problem settings - Lenovo C340 | User Guide - Page 28
and Hard Disks Problem: The Optical drive is unable to read a CD/DVD. Troubleshooting and problem resolution: 1. Check to determine if there is an optical drive icon in the resource manager of the operating system. If not, restart your computer. If there is still no icon, contact Lenovo Service - Lenovo C340 | User Guide - Page 29
rounding of totals. Special considerations for troubleshooting Windows Record the following information as it may be useful later when troubleshooting system problems: 1. The drivers for this computer model only support the Windows 8 system. 2. When you use the Windows Media Center to watch TV, be - Lenovo C340 | User Guide - Page 30
To change the boot mode, start the BIOS setup utility and set boot mode to UEFI or Legacy support on the boot menu. When do I need to change the boot mode? The default boot mode for your computer is the UEFI mode. If you need to install a legacy Windows operating system (any operating system before - Lenovo C340 | User Guide - Page 31
computer, disconnect the computer from the electrical outlet. Clean your computer computer or display, do not spray cleaning solution directly onto the display. Only use products specifically designed for cleaning displays, and follow the instructions , shut down the computer and scrub it gently - Lenovo C340 | User Guide - Page 32
Hardware Replacement Guide This chapter contains the following topics: Ø Removing the stand base Ø Removing the foot cover Ø Replacing a memory module Ø Replacing the hard disk drive Ø Replacing the optical drive Ø Replacing the adapter Ø Replacing the keyboard and mouse User Guide 27 - Lenovo C340 | User Guide - Page 33
in this manual applies only to those computer models that have the TV-Tuner card installed. It does not apply to those computer models that do not have the TV-Tuner card installed. This guide contains procedures for replacing the following parts: • Memory modules • Hard disk drive • Optical drive - Lenovo C340 | User Guide - Page 34
: • CRU removal and installation information • Publications • Troubleshooting information • Parts information • Links to other useful sources of information To access this information, go to: http://support.lenovo.com Tools required To disassemble the computer, you need the following tools: • Wrist - Lenovo C340 | User Guide - Page 35
computer components carefully. Handle adapters, memory modules, system boards, and microprocessors by the edges. Never touch any exposed circuitry. • Prevent others from touching the parts and other computer components. • Before you replace a new part, touch in the computer without setting the part - Lenovo C340 | User Guide - Page 36
or in the Hardware Maintenance Manual (HMM) for the computer. To obtain copies of the Safety and Warranty Guide or HMM, go to the Support Web site at: http://support.lenovo.com Note: Use only parts provided by Lenovo. General information Pre-disassembly instructions Before proceeding with the - Lenovo C340 | User Guide - Page 37
procedure. Lenovo recommends that you use a blanket, towel, or other soft cloth to protect the touch screen from scratches or other damage. 1. Remove any media (disks, CDs, or memory cards) from the drives, shut down the operating system, and turn off the computer and all attached devices. 2. Unplug - Lenovo C340 | User Guide - Page 38
procedure. Lenovo recommends that you use a blanket, towel, or other soft cloth to protect the touch screen from scratches or other damage. 1. Remove any media (disks, CDs, or memory cards) from the drives, shut down the operating system, and turn off the computer and all attached devices. 2. Unplug - Lenovo C340 | User Guide - Page 39
procedure. Lenovo recommends that you use a blanket, towel, or other soft cloth to protect the touch screen from scratches or other damage. 1. Remove any media (disks, CDs, or memory cards) from the drives, shut down the operating system, and turn off the computer and all attached devices. 2. Unplug - Lenovo C340 | User Guide - Page 40
as shown. 1 1 7. Push the lock pins outward to release the hard disk drive from the bracket. 8. To install the new hard disk drive: a. Line up the new hard disk drive with the bracket and secure it with the pins. b. Slide the hard disk drive and bracket back into position. 9. Reattach the foot cover - Lenovo C340 | User Guide - Page 41
procedure. Lenovo recommends that you use a blanket, towel, or other soft cloth to protect the touch screen from scratches or other damage. 1. Remove any media (disks, CDs, or memory cards) from the drives, shut down the operating system, and turn off the computer and all attached devices. 2. Unplug - Lenovo C340 | User Guide - Page 42
cover so that the disk springs out as shown. 8. Remove the two screws that secure the optical drive to the metal bracket. 9. Use a small flat head screwdriver to press and push out the pins that secure the cover to the disk. 10. Separate the cover from the defective optical drive. User Guide 37 - Lenovo C340 | User Guide - Page 43
base. Replacing the adapter Attention: Turn off the computer and wait 3 to 5 minutes to let it cool down before removing the cover. 1. Remove any media (disks, CDs, or memory cards) from the drives, shut down the operating system, and turn off the computer and all attached devices. 2. Disconnect - Lenovo C340 | User Guide - Page 44
3. Connect the new adapter as shown. User Guide 39 - Lenovo C340 | User Guide - Page 45
to a USB connector at either side or at the rear of the computer. To replace the keyboard: 1. Remove any media (disks, CDs, or memory cards) from the drives, shut down the computer, and turn off all attached devices. 2. Unplug all power cords from electrical outlets. 3. Locate the connector for the - Lenovo C340 | User Guide - Page 46
exactly the actual configuration of the computer that you purchase.You are welcome to contact us about the manuals included with your computer. For the latest information or any questions or comments, contact or visit the Lenovo Web site: Service Web site: http://support.lenovo.com User Guide 41 - Lenovo C340 | User Guide - Page 47
of Advanced Micro Devices, Inc. Other company, product, or service names referred to herein or in other Lenovo publications may be trademarks or service marks of others. All rights reserved. Names or marks of certain companies mentioned in the manuals included with your computer or this document - Lenovo C340 | User Guide - Page 48
-management features, by operating system. Microsoft Windows Vista, Windows 7 and Windows 8 Power plan: Balanced • Turn off the display: After 10 minutes • Put the computer to sleep: After 25 minutes • Advanced power settings: - Turn off hard disk drives: After 20 minutes - Hibernate: Never User - Lenovo C340 | User Guide - Page 49
these settings, refer to your Windows Help and Support information system. Enabling ErP compliance mode You can enable the energy-related products directive (ErP) compliance mode through the Power menu in the Setup Utility program. This mode reduces electricity consumption when your computer is
-
 1
1 -
 2
2 -
 3
3 -
 4
4 -
 5
5 -
 6
6 -
 7
7 -
8
-
9
-
10
-
11
-
12
-
13
-
14
-
15
-
16
-
17
-
18
-
19
-
20
-
21
-
22
-
23
-
24
-
25
-
26
-
27
-
28
-
29
-
30
-
31
-
32
-
33
-
34
-
35
-
36
-
37
-
38
-
39
-
40
-
41
-
42
-
43
-
44
-
45
-
46
-
47
-
48
-
49
 |
 |

Version 2.0
Machine type: 10102/4773 [C340]
10103/4751 [C345]
10104/6595 [C440]
10105/6596 [C445]
10110/6267 [C540]
2012.08
Lenovo
C3/C4/C5 Series
User Guide
31502285