Lenovo G460e Laptop User Guide - Lenovo G460e, G560e
Lenovo G460e Laptop Manual
 |
View all Lenovo G460e Laptop manuals
Add to My Manuals
Save this manual to your list of manuals |
Lenovo G460e Laptop manual content summary:
- Lenovo G460e Laptop | User Guide - Lenovo G460e, G560e - Page 1
Lenovo G460e/ G560e User Guide Read the safety notices and important tips in the included manuals before using your computer. - Lenovo G460e Laptop | User Guide - Lenovo G460e, G560e - Page 2
the product, be sure to read Lenovo Safety and General Information Guide first. • Some instructions in this guide may assume that you are using lenovo.com/ and click User guides and manuals. First Edition (December 2010) © Copyright Lenovo 2010. LENOVO products, data, computer software, and services - Lenovo G460e Laptop | User Guide - Lenovo G460e, G560e - Page 3
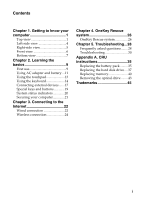
22 Wireless connection 24 Chapter 4. OneKey Rescue system 26 OneKey Rescue system 26 Chapter 5. Troubleshooting...28 Frequently asked questions........ 28 Troubleshooting 30 Appendix A. CRU instructions 35 Replacing the battery pack ......... 35 Replacing the hard disk drive.... 37 Replacing - Lenovo G460e Laptop | User Guide - Lenovo G460e, G560e - Page 4
- Lenovo G460e Laptop | User Guide - Lenovo G460e, G560e - Page 5
Chapter 1. Getting to know your computer Top view „ G460e a b c d e f g h 1 - Lenovo G460e Laptop | User Guide - Lenovo G460e, G560e - Page 6
Chapter 1. Getting to know your computer „ G560e a b c d e i f g h Notes: • Only the G560e have a numeric keypad. • The illustrations in this manual may differ from the actual product. Please refer to the actual product. Attention: • Do NOT open the display panel beyond 130 degrees. When - Lenovo G460e Laptop | User Guide - Lenovo G460e, G560e - Page 7
Chapter 1. Getting to know your computer a Integrated camera Use the camera for video communication. b Wireless module antennas (on select models) The built-in antennas ensure optimal reception of wireless radio. c Computer display The computer display with LED backlight provides brilliant - Lenovo G460e Laptop | User Guide - Lenovo G460e, G560e - Page 8
Chapter 1. Getting to know your computer Left-side view a b c d e a Kensington slot Attach a security lock (not supplied) here. Note: For details, see "Attaching a security lock (not supplied)" on page 21. b Fan louvers Dissipate internal heat. Note: Make sure that none of the fan - Lenovo G460e Laptop | User Guide - Lenovo G460e, G560e - Page 9
Chapter 1. Getting to know your computer Right-side view ab c de a Microphone jack Connects to external microphones. b Headphone jack Connects to external headphones. Attention: • Listening to music at high volume over extended periods of time may damage your hearing. c Optical drive d USB - Lenovo G460e Laptop | User Guide - Lenovo G460e, G560e - Page 10
Chapter 1. Getting to know your computer Front view a b c a Integrated wireless device Slide this switch to turn on or turn off the wireless radio of all wireless devices on your computer. switch (on select models) b System status indicators For details, see "System status indicators" on - Lenovo G460e Laptop | User Guide - Lenovo G460e, G560e - Page 11
Chapter 1. Getting to know your computer Bottom view „ G460e a b c d 7 - Lenovo G460e Laptop | User Guide - Lenovo G460e, G560e - Page 12
b Battery pack c Battery latch spring loaded d Hard disk drive/ Memory/Central processing unit/ Mini PCI Express Card slot compartment The manual battery latch is used to keep the battery pack secured in place. For details, see "Using AC adapter and battery" on page 11. The spring- - Lenovo G460e Laptop | User Guide - Lenovo G460e, G560e - Page 13
Chapter 2. Learning the basics First use „ Reading the manuals Read the supplied manuals before using your computer. „ Connecting to the power The supplied battery pack is not fully charged at purchase. To charge the battery and begin using - Lenovo G460e Laptop | User Guide - Lenovo G460e, G560e - Page 14
Chapter 2. Learning the basics „ Putting your computer into sleep state or shutting it down When you finish working with your computer, you can put it into sleep state or shut it down. Putting your computer into sleep state If you will be away from your computer for only a short time, put the - Lenovo G460e Laptop | User Guide - Lenovo G460e, G560e - Page 15
Chapter 2. Learning the basics Using AC adapter and battery „ Checking battery status You can determine the percentage of battery power remaining by checking the battery icon in the notification area. Note: As each computer user has different habits and needs, it is difficult to predict how long a - Lenovo G460e Laptop | User Guide - Lenovo G460e, G560e - Page 16
extended period of time, or if you need to send your computer to Lenovo for service, etc. remove the battery pack from the computer. Before removing the the following points: • Replace only with a battery of the type recommended by Lenovo. • Keep the battery pack away from fire. • Do not expose the - Lenovo G460e Laptop | User Guide - Lenovo G460e, G560e - Page 17
Chapter 2. Learning the basics Using the touchpad a bc a Touchpad b Left click button c Right click button To move the cursor on the screen, slide your fingertip over the pad in the direction in which you want the cursor to move. The function corresponds to that of the left mouse button on a - Lenovo G460e Laptop | User Guide - Lenovo G460e, G560e - Page 18
Chapter 2. Learning the basics Using the keyboard Your computer has a numeric keypad and function keys incorporated in its standard keyboard. „ Numeric keypad G460e The keyboard has keys that, when enabled, work as a 10-key numeric keypad. To enable or disable the numeric keypad, press Fn + F8. - Lenovo G460e Laptop | User Guide - Lenovo G460e, G560e - Page 19
Chapter 2. Learning the basics „ Function key combinations Through the use of the function keys, you can change operational features instantly. To use this function, press and hold Fn a; then press one of the function keys b . b CapsLK a b 15 - Lenovo G460e Laptop | User Guide - Lenovo G460e, G560e - Page 20
+ F3: Open the interface for the display device switch to select this notebook or an external display. Fn + F4: Open the interface for display F12: Skip to the next track. Fn + Insert (G560e): Fn + PgUp (G460e): Enable/Disable the scroll lock. Fn + PrtSc: Activate the system request. Fn + - Lenovo G460e Laptop | User Guide - Lenovo G460e, G560e - Page 21
Memory Stick PRO (MS PRO) • xD-Picture (xD) card Notes: • Insert ONLY one card in the slot at a time. • This card reader does not support SDIO devices (e.g., SDIO Bluetooth, etc.). Inserting a memory card 1 Push the dummy card until you hear a click. Gently pull the dummy card out of the memory - Lenovo G460e Laptop | User Guide - Lenovo G460e, G560e - Page 22
) If your computer has an integrated Bluetooth adapter card, it can connect to and transfer data wirelessly with other Bluetooth enabled devices, such as notebook computers, PDAs and cell phones. You can transfer data between these devices without cables and up to 10 meters range in open space. Note - Lenovo G460e Laptop | User Guide - Lenovo G460e, G560e - Page 23
keys and buttons a „ OneKey Rescue system button a • When the computer is powered-off, press this button to start Lenovo OneKey Rescue system. • In Windows operating system, press this button to start Lenovo OneKey Recovery system. Note: For details, see "OneKey Rescue system" on page 26. 19 - Lenovo G460e Laptop | User Guide - Lenovo G460e, G560e - Page 24
System status indicators These indicators inform you of the computer status. G460e G560e CapsLK ab c d e f abcd ef a Power status indicator b Battery status indicator c Wireless communication indicator d Hard disk drive indicator e Caps lock indicator G460e: G560e: f Num lock indicator - Lenovo G460e Laptop | User Guide - Lenovo G460e, G560e - Page 25
permission. For details on installing the security lock, please refer to the instructions shipped with the security lock that you have purchased. Refer to the " , and implementing the locking devices and security features. Lenovo offers no comment judgement or warranty regarding the function, - Lenovo G460e Laptop | User Guide - Lenovo G460e, G560e - Page 26
: connect without wiring. Wired connection Wired connections are a reliable and safe way to connect the computer to the Internet. Cable Cable Internet services use a cable modem connected to the residential cable TV line. DSL DSL is a family of related technologies that bring high- speed - Lenovo G460e Laptop | User Guide - Lenovo G460e, G560e - Page 27
Telephone line Splitter * * DSL modem * * * * Not supplied. Note: The above diagrams are for reference only. Actual connection method may vary. „ Software configuration Consult your Internet Service Provider (ISP) for details on how to configure your computer. 23 - Lenovo G460e Laptop | User Guide - Lenovo G460e, G560e - Page 28
. WiMAX networks connect several Wireless LAN systems to cover a metropolitan area, providing highspeed broadband access without the need for cables. Note: Your computer may not support all wireless connection methods. 24 - Lenovo G460e Laptop | User Guide - Lenovo G460e, G560e - Page 29
device switch from to . 2 Press Fn + F5 to make configuration. Hardware connection Wi-Fi/WiMAX network Access point * * Not supplied Software configuration Consult your Internet Service Provider (ISP) and search Windows Help and Support Center for details on how to configure your computer. 25 - Lenovo G460e Laptop | User Guide - Lenovo G460e, G560e - Page 30
that you can use them in the correct order. • Computers without an integrated optical drive support the creation of recovery discs; however an appropriate external optical drive is needed to physically create the recovery discs. For more instructions, see the Help file of Lenovo OneKey Recovery. 26 - Lenovo G460e Laptop | User Guide - Lenovo G460e, G560e - Page 31
Chapter 4. OneKey Rescue system „ Using Lenovo OneKey Rescue system (without Windows operating system) In the event that the operating system cannot be loaded, follow the steps below to access OneKey Rescue - Lenovo G460e Laptop | User Guide - Lenovo G460e, G560e - Page 32
consumersupport.lenovo.com. How can I upgrade or replace a customer replaceable unit (CRU)? See "Appendix A. CRU instructions" on page 35 of this guide. driver. How can I contact the customer support center? See " Chapter 3. Getting help and service" of Lenovo Safety and General Information Guide - Lenovo G460e Laptop | User Guide - Lenovo G460e, G560e - Page 33
5. Troubleshooting Where can I find warranty information? For the warranty applicable to your computer, including the warranty period and type of warranty service, see the Lenovo limited warranty flyer that came with your computer. How can I install the device drivers? A compatible device driver is - Lenovo G460e Laptop | User Guide - Lenovo G460e, G560e - Page 34
Troubleshooting Troubleshooting If you do not find your problem here, see Chapter 2. The following section only describes problems that might negate the need to refer to the more comprehensive information in Chapter 2. Display problems screen, have the computer serviced. My screen goes blank - Lenovo G460e Laptop | User Guide - Lenovo G460e, G560e - Page 35
Chapter 5. Troubleshooting Password problems I forgot my password. • If you forget your user password, you must take your computer to a Lenovo authorized servicer or a marketing representative to have the password changed. • If you forget your HDD password, a Lenovo authorized servicer cannot - Lenovo G460e Laptop | User Guide - Lenovo G460e, G560e - Page 36
Chapter 5. Troubleshooting The computer does not problem "The screen is unreadable or distorted." - Press Fn + F2 to confirm whether the LCD screen has been turned off. The screen is unreadable or distorted. • Make sure that: - The display device driver correctly, have the computer serviced. 32 - Lenovo G460e Laptop | User Guide - Lenovo G460e, G560e - Page 37
Chapter 5. Troubleshooting Sound problems No sound can be heard from • Make sure that: the speaker even when the volume is turned up. - The Mute function is off. - The headphone jack is not used. - Speakers are selected as the playback device. Battery problems Your computer shuts down • - Lenovo G460e Laptop | User Guide - Lenovo G460e, G560e - Page 38
Chapter 5. Troubleshooting Other problems Your computer does not respond. • To turn off your computer, make sure that the device is included in the Boot priority order list. • Press F12 when the Lenovo logo appears on the screen while the computer is starting up to select the device you want the - Lenovo G460e Laptop | User Guide - Lenovo G460e, G560e - Page 39
A. CRU instructions Notes: • The illustrations used in this chapter are of the Lenovo G560e, unless otherwise stated. • The following steps about upgrading and replacing devices are the same for the G460e and G560e. Replacing the battery pack Note: Use only the battery provided by Lenovo. Any - Lenovo G460e Laptop | User Guide - Lenovo G460e, G560e - Page 40
Appendix A. CRU instructions 4 Install a fully charged battery pack. 5 Slide the manual battery latch to the locked position. 6 Turn the computer over and reconnect the AC adapter. 36 - Lenovo G460e Laptop | User Guide - Lenovo G460e, G560e - Page 41
Appendix A. CRU instructions Replacing the hard disk drive You can increase the storage capacity of your computer by replacing the hard disk drive with one of greater capacity. You can purchase a new hard disk drive from your reseller or Lenovo marketing representative. Notes: • Replace the hard - Lenovo G460e Laptop | User Guide - Lenovo G460e, G560e - Page 42
Appendix A. CRU instructions 4 Remove the Hard disk drive/Memory/Central processing unit/Mini PCI Express Card slot compartment cover. a.Loosen a and remove a' the screws that secure the compartment cover. b.Remove the compartment cover b . a a' b 5 Remove the frame fixing screws c . c c 38 - Lenovo G460e Laptop | User Guide - Lenovo G460e, G560e - Page 43
Appendix A. CRU instructions 6 Pull the tab in the direction shown by arrow d . d 7 Take out the hard disk drive secured in a metal frame e. e 8 Remove the screws and detach the - Lenovo G460e Laptop | User Guide - Lenovo G460e, G560e - Page 44
Appendix A. CRU instructions Replacing memory You can increase the amount of memory of your computer. DDR3 SDRAMs are available in various capacities. Note: Use only the memory types supported by your computer. If you incorrectly install the optional memory or install an unsupported memory type, - Lenovo G460e Laptop | User Guide - Lenovo G460e, G560e - Page 45
Appendix A. CRU instructions 6 If two DDR3 SDRAMs are already installed in the memory slot, remove one of them to make room for the new one by pressing out - Lenovo G460e Laptop | User Guide - Lenovo G460e, G560e - Page 46
Appendix A. CRU instructions Note: If only one DDR3 SDRAM is used on the computer you are servicing, the card must be installed in SLOT-0 ( a : lower slot), but not in SLOT-1 ( b : upper slot). b a To make sure that the DDR3 SDRAM is installed correctly, - Lenovo G460e Laptop | User Guide - Lenovo G460e, G560e - Page 47
Appendix A. CRU instructions Removing the optical drive To remove the optical drive, do the following: 1 Remove the Hard disk drive/Memory/Central processing unit/Mini PCI Express Card - Lenovo G460e Laptop | User Guide - Lenovo G460e, G560e - Page 48
The following table provides a list of CRUs for your computer, and informs you of where to find replacement instructions. Setup Poster User Guide AC adapter O Power cord for AC adapter O Battery pack O O Bottom access doors O Hard disk drive O Memory O Optical drive O 44 - Lenovo G460e Laptop | User Guide - Lenovo G460e, G560e - Page 49
The following terms are trademarks or registered trademarks of Lenovo in the United States, other countries, or both. Lenovo OneKey Microsoft and Windows are trademarks of Microsoft Corporation on the PC. Other company, products, or service names may be trademarks or service marks of others. 45 - Lenovo G460e Laptop | User Guide - Lenovo G460e, G560e - Page 50
- Lenovo G460e Laptop | User Guide - Lenovo G460e, G560e - Page 51
©Lenovo China 2010 New World. New Thinking.TM www.lenovo.com V1.0_en-US Rev. RB01
-
 1
1 -
 2
2 -
 3
3 -
 4
4 -
 5
5 -
 6
6 -
 7
7 -
8
-
9
-
10
-
11
-
12
-
13
-
14
-
15
-
16
-
17
-
18
-
19
-
20
-
21
-
22
-
23
-
24
-
25
-
26
-
27
-
28
-
29
-
30
-
31
-
32
-
33
-
34
-
35
-
36
-
37
-
38
-
39
-
40
-
41
-
42
-
43
-
44
-
45
-
46
-
47
-
48
-
49
-
50
-
51
 |
 |

Lenovo G460e/
G560e
Read the safety notices and important tips in the
included manuals before using your computer.
User Guide