Lenovo H430 Lenovo H4 Series Hardware Maintenance Manual V2.0 - Page 58
Replacing the power supply
 |
View all Lenovo H430 manuals
Add to My Manuals
Save this manual to your list of manuals |
Page 58 highlights
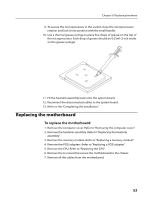
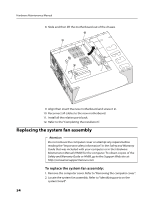
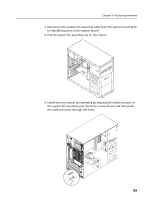
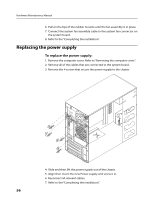
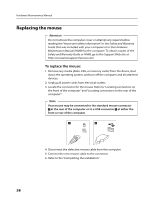
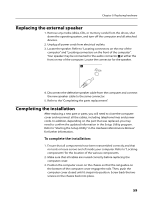
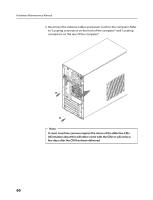
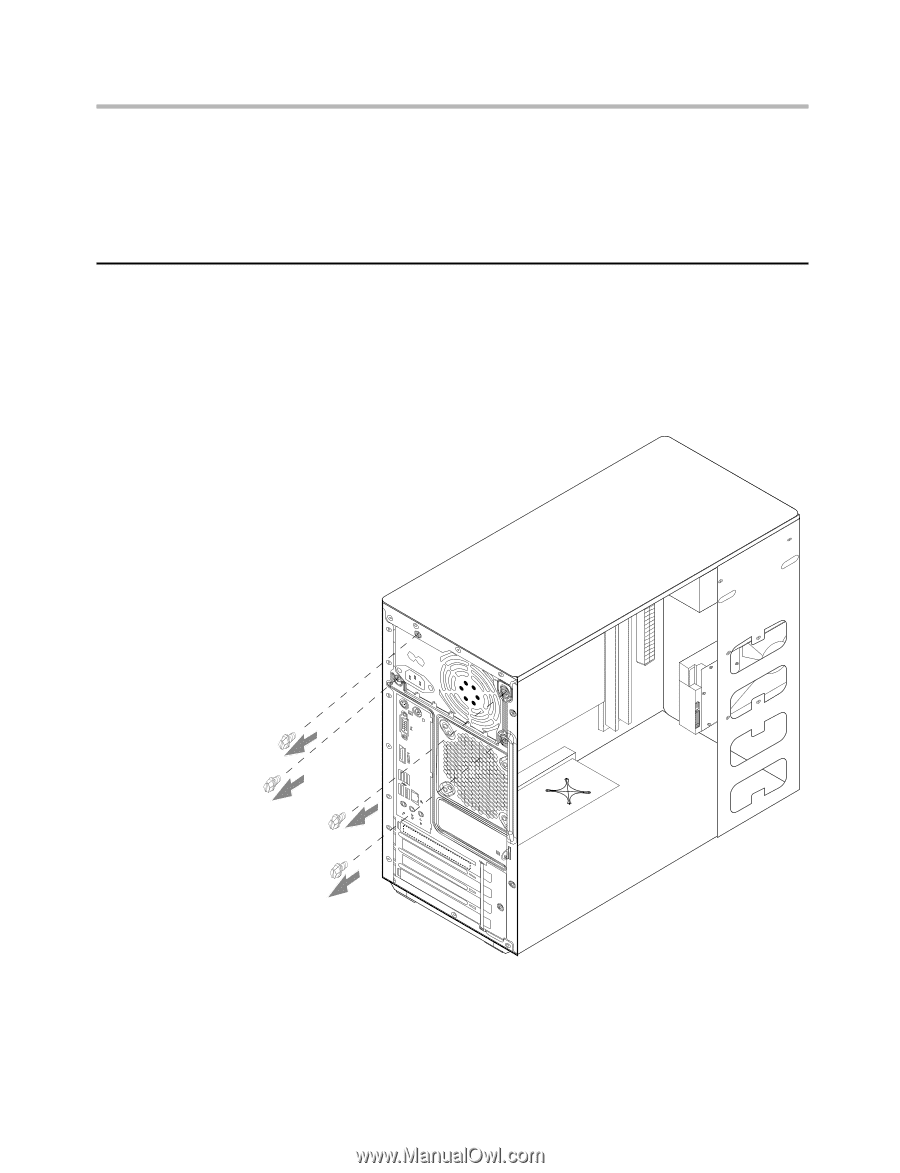
Hardware Maintenance Manual 6. Pull on the tips of the rubber mounts until the fan assembly is in place. 7. Connect the system fan assembly cable to the system fan connector on the system board. 8. Refer to the "Completing the installation". Replacing the power supply To replace the power supply: 1. Remove the computer cover. Refer to "Removing the computer cover". 2. Remove all of the cables that are connected to the system board.. 3. Remove the 4 screws that secure the power supply to the chassis. 4. Slide and then lift the power supply out of the chassis. 5. Align then insert the new Power supply and screw it in. 6. Reconnect all relevant cables. 7. Refer to the "Completing the installation". 56
-
 1
1 -
2
-
3
-
4
-
5
-
6
-
7
-
8
-
9
-
10
-
11
-
12
-
13
-
14
-
15
-
16
-
17
-
18
-
19
-
20
-
21
-
22
-
23
-
24
-
25
-
26
-
27
-
28
-
29
-
30
-
31
-
32
-
33
-
34
-
35
-
36
-
37
-
38
-
39
-
40
-
41
-
42
-
43
-
44
-
45
-
46
-
47
-
48
-
49
-
50
-
51
-
52
-
 53
53 -
 54
54 -
 55
55 -
 56
56 -
 57
57 -
 58
58 -
 59
59 -
 60
60 -
 61
61 -
 62
62 -
 63
63 -
64
-
65
-
66
 |
 |
Hardware Maintenance Manual
56
6. Pull on the tips of the rubber mounts until the fan assembly is in place.
7. Connect the system fan assembly cable to the system fan connector on
the system board.
8. Refer to the “Completing the installation”.
Replacing the power supply
To replace the power supply:
1. Remove the computer cover. Refer to “Removing the computer cover”.
2. Remove all of the cables that are connected to the system board..
3. Remove the 4 screws that secure the power supply to the chassis.
4. Slide and then lift the power supply out of the chassis.
5. Align then insert the new Power supply and screw it in.
6. Reconnect all relevant cables.
7. Refer to the “Completing the installation”.