Lenovo IdeaCentre B325 Lenovo IdeaCentre B325 Hardware Replacement Guide V3.0
Lenovo IdeaCentre B325 Manual
 |
View all Lenovo IdeaCentre B325 manuals
Add to My Manuals
Save this manual to your list of manuals |
Lenovo IdeaCentre B325 manual content summary:
- Lenovo IdeaCentre B325 | Lenovo IdeaCentre B325 Hardware Replacement Guide V3.0 - Page 1
Machine type: 10069/7760 10074/3076 Lenovo IdeaCentre B3 Series Hardware Replacement Guide Version 3.0 2011.06 31500146 - Lenovo IdeaCentre B325 | Lenovo IdeaCentre B325 Hardware Replacement Guide V3.0 - Page 2
Guide © Copyright Lenovo 2011. All rights reserved. LIMITED AND RESTRICTED RIGHTS NOTICE: If data or software is delivered pursuant a General Services Administration "GSA" contract, use, reproduction, or disclosure is subject to restrictions set forth in Contract No. GS-35F-05925. © 2011. Lenovo - Lenovo IdeaCentre B325 | Lenovo IdeaCentre B325 Hardware Replacement Guide V3.0 - Page 3
- Lenovo IdeaCentre B325 | Lenovo IdeaCentre B325 Hardware Replacement Guide V3.0 - Page 4
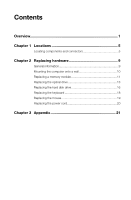
components and connectors 5 Chapter 2 Replacing hardware 9 General information 9 Mounting the computer onto a wall 10 Replacing a memory module 11 Replacing the optical drive 13 Replacing the hard disk drive 16 Replacing the keyboard 18 Replacing the mouse 19 Replacing the power cord 20 - Lenovo IdeaCentre B325 | Lenovo IdeaCentre B325 Hardware Replacement Guide V3.0 - Page 5
- Lenovo IdeaCentre B325 | Lenovo IdeaCentre B325 Hardware Replacement Guide V3.0 - Page 6
before reading the "Important safety information" in the Safety and Warranty Guide that was included with your computer. If you no longer have this copy of the Safety and Warranty Guide, you can obtain one online from the Support Web site at http://consumersupport.lenovo.com. Hardware Replacement - Lenovo IdeaCentre B325 | Lenovo IdeaCentre B325 Hardware Replacement Guide V3.0 - Page 7
Troubleshooting information • Parts information • Links to other useful sources of information To access this information, go to: http://consumersupport.lenovo.com Tools required To disassemble the computer harmless to you, can seriously damage computer components. When you are replacing a part - Lenovo IdeaCentre B325 | Lenovo IdeaCentre B325 Hardware Replacement Guide V3.0 - Page 8
computer components carefully. Handle adapters, memory modules, system boards, and microprocessors by the edges. Never touch any exposed circuitry. • Prevent others from touching the parts and other computer surface on the computer for at least it directly in the computer without setting the - Lenovo IdeaCentre B325 | Lenovo IdeaCentre B325 Hardware Replacement Guide V3.0 - Page 9
4 Hardware Replacement Guide - Lenovo IdeaCentre B325 | Lenovo IdeaCentre B325 Hardware Replacement Guide V3.0 - Page 10
following illustrations will help you to locate the various components and connectors in your computer. Font view The following illustrations show the location of connectors on the front of the computer. Built-in microphone TV indicator Camera Hard Disk Drive Indicator Hardware Replacement Guide 5 - Lenovo IdeaCentre B325 | Lenovo IdeaCentre B325 Hardware Replacement Guide V3.0 - Page 11
following illustrations show the location of connectors on the left and right side of the computer. Attention: Be sure not to block any air vents on the computer. Blocked air vents may cause thermal problems. Optical drive Card reader Headphone port USB port TV buttons (Selected models only) USB - Lenovo IdeaCentre B325 | Lenovo IdeaCentre B325 Hardware Replacement Guide V3.0 - Page 12
TV buttons (Selected models only) Channel Up Volume Up TV mode menu button TV power On/Off Channel Down Volume Down Signal source choice button Hardware Replacement Guide 7 - Lenovo IdeaCentre B325 | Lenovo IdeaCentre B325 Hardware Replacement Guide V3.0 - Page 13
of connectors on the rear of the computer. Ethernet port USB ports (5) AV-IN ports (Selected models only) Power connector TV tuner port (Selected models only) Bluetooth reset button (Only functional on models equipped with a Bluetooth module) PS/2 keyboard port 8 Hardware Replacement Guide - Lenovo IdeaCentre B325 | Lenovo IdeaCentre B325 Hardware Replacement Guide V3.0 - Page 14
in the Hardware Maintenance Manual (HMM) for the computer. To obtain copies of the Safety and Warranty Guide or HMM, go to the Support Web site at: http://consumersupport.lenovo.com Note: Use only parts provided by Lenovo. General information Pre-disassembly instructions Before proceeding with the - Lenovo IdeaCentre B325 | Lenovo IdeaCentre B325 Hardware Replacement Guide V3.0 - Page 15
you will first need to install a UL listed VESA wall mount* (to be purchased separately) onto the back of the computer. To install a VESA wall mount Note: It may be helpful to place the computer face-down on a soft flat surface for this procedure. Lenovo recommends that you use a blanket, towel, or - Lenovo IdeaCentre B325 | Lenovo IdeaCentre B325 Hardware Replacement Guide V3.0 - Page 16
for this procedure. Lenovo recommends that you use a blanket, towel, or other soft cloth to protect the touch screen from scratching or other damage. 1. Remove any media (disks, CDs, or memory cards) from the drives, shut down the operating system, and turn off the computer and all attached devices - Lenovo IdeaCentre B325 | Lenovo IdeaCentre B325 Hardware Replacement Guide V3.0 - Page 17
and push down on the top edge of the memory module. Make sure the latches lock the memory module in place. 7. Align then slide the computer cover back into position. 12 Hardware Replacement - Lenovo IdeaCentre B325 | Lenovo IdeaCentre B325 Hardware Replacement Guide V3.0 - Page 18
for this procedure. Lenovo recommends that you use a blanket, towel, or other soft cloth to protect the screen from scratching or other damage. 1. Remove any media (disks, CDs, or memory cards) from the drives, shut down the operating system, and turn off the computer and all attached devices - Lenovo IdeaCentre B325 | Lenovo IdeaCentre B325 Hardware Replacement Guide V3.0 - Page 19
it slides out of the drive bay. 7. Push a small iron stick (paper clip) into the small hole on the optical drive cover so that the disk springs out as shown. 8. Remove the 2 screws that secure the optical drive to the metal bracket. 9. Use a small flat head screwdriver to press and push - Lenovo IdeaCentre B325 | Lenovo IdeaCentre B325 Hardware Replacement Guide V3.0 - Page 20
new optical drive. (3) Slide the new optical drive into the drive bay. 12. Screw the new optical drive back onto the chassis. 13. Slide the computer cover back into position. Hardware Replacement Guide 15 - Lenovo IdeaCentre B325 | Lenovo IdeaCentre B325 Hardware Replacement Guide V3.0 - Page 21
and wait 3 to 5 minutes to let the computer cool down before replacing the hard disk drive. To replace the hard disk drive: Note: It may be helpful to place the computer face-down on a soft flat surface for this procedure. Lenovo recommends that you use a blanket, towel, or other soft cloth to - Lenovo IdeaCentre B325 | Lenovo IdeaCentre B325 Hardware Replacement Guide V3.0 - Page 22
the new hard disk drive into the drive bay. (2) Screw the 4 screws back onto the drive bay. 6. Slide the hard disk drive bay back into position. 7. Secure the hard disk drive bay to the chassis with the remaining screw. 8. Install the computer cover back into position. Hardware Replacement Guide 17 - Lenovo IdeaCentre B325 | Lenovo IdeaCentre B325 Hardware Replacement Guide V3.0 - Page 23
Maintenance Manual (HMM) for the computer. To obtain copies of the Safety and Warranty Guide or HMM, go to the Support Web site at: http://consumersupport.lenovo.com To replace the keyboard: 1. Remove any media (disks, CDs, or memory cards) from the drives, shut down the operating system, and - Lenovo IdeaCentre B325 | Lenovo IdeaCentre B325 Hardware Replacement Guide V3.0 - Page 24
Manual (HMM) for the computer. To obtain copies of the Safety and Warranty Guide or HMM, go to the Support Web site at: http://consumersupport.lenovo.com To replace the mouse: 1. Remove any media (disks, CDs, or memory cards) from the drives, shut down the operating system, and turn off the computer - Lenovo IdeaCentre B325 | Lenovo IdeaCentre B325 Hardware Replacement Guide V3.0 - Page 25
Maintenance Manual (HMM) for the computer. To obtain copies of the Safety and Warranty Guide or HMM, go to the Support Web site at: http://consumersupport.lenovo.com To replace the power cord 1. Remove any media (disks, CDs, or memory cards) from the drives, shut down the operating system, and - Lenovo IdeaCentre B325 | Lenovo IdeaCentre B325 Hardware Replacement Guide V3.0 - Page 26
and operations performed by Lenovo professional service personnel. You are responsible if you fail to operate the product according to instructions and requirements in the manuals included with your computer, or operate the product inappropriately. This manual could include technical inaccuracies - Lenovo IdeaCentre B325 | Lenovo IdeaCentre B325 Hardware Replacement Guide V3.0 - Page 27
Devices, Inc. Other company, product, or service names referred to herein or in other Lenovo publications may be trademarks or service marks of others. All rights reserved. Names or marks of certain companies mentioned in the manuals included with your computer or this document do not necessarily
-
 1
1 -
 2
2 -
 3
3 -
 4
4 -
 5
5 -
 6
6 -
 7
7 -
8
-
9
-
10
-
11
-
12
-
13
-
14
-
15
-
16
-
17
-
18
-
19
-
20
-
21
-
22
-
23
-
24
-
25
-
26
-
27
 |
 |

Version 3.0
2011.06
Machine type: 10069/7760
10074/3076
Lenovo
IdeaCentre B3 Series
Hardware Replacement Guide
31500146