Lenovo J200 (English) Hardware replacement guide
Lenovo J200 Manual
 |
View all Lenovo J200 manuals
Add to My Manuals
Save this manual to your list of manuals |
Lenovo J200 manual content summary:
- Lenovo J200 | (English) Hardware replacement guide - Page 1
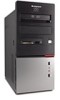
Lenovo 3000 Hardware Installation and Replacement Guide Machine Types 7816, 7817, 7818, 7819, 9686, 9687, 9688, 9689, 9690, 9691 - Lenovo J200 | (English) Hardware replacement guide - Page 2
- Lenovo J200 | (English) Hardware replacement guide - Page 3
Lenovo 3000 - Lenovo J200 | (English) Hardware replacement guide - Page 4
Safety and Warranty Guide for this product and "Notices," on page 53. Third Edition (September 2007) © Copyright Lenovo 2005, 2007. Portions © Copyright International Business Machines Corporation 2005. All rights reserved. LENOVO products, data, computer software, and services have been developed - Lenovo J200 | (English) Hardware replacement guide - Page 5
connectors on the front of your computer 5 Locating connectors on the rear of your computer 6 Locating components 8 Identifying 46 Chapter 4. Completing the parts replacement 47 Obtaining device drivers 48 Chapter 5. Security features . . . . . Lenovo 2005, 2007. Portions © IBM Corp. 2005. iii - Lenovo J200 | (English) Hardware replacement guide - Page 6
iv Hardware Installation and Replacement Guide - Lenovo J200 | (English) Hardware replacement guide - Page 7
. . . 43 42. Replacing the rear fan assembly. . . . . . 44 43. Keyboard connectors, standard and USB 45 44. Mouse connectors, standard and USB . . . . 46 45. Replacing the computer cover 47 46. Integrated cable lock 49 47. Padlock Loop 50 © Lenovo 2005, 2007. Portions © IBM Corp. 2005. v - Lenovo J200 | (English) Hardware replacement guide - Page 8
vi Hardware Installation and Replacement Guide - Lenovo J200 | (English) Hardware replacement guide - Page 9
manual, it is important that you read and understand all the related safety information for this product. Refer to the Safety and Warranty Guide Warranty Guide, you can obtain one online from the Lenovo Support Web site at: http://www.lenovo.com/support. © Lenovo 2005, 2007. Portions © IBM Corp. 2005 - Lenovo J200 | (English) Hardware replacement guide - Page 10
2 Hardware Installation and Replacement Guide - Lenovo J200 | (English) Hardware replacement guide - Page 11
videos v Publications v Troubleshooting information v Parts information v Downloads and drivers v Links to other useful sources of information v Support phone list To access this information, point your browser to: http://www.lenovo.com/support © Lenovo 2005, 2007. Portions © IBM Corp. 2005. 3 - Lenovo J200 | (English) Hardware replacement guide - Page 12
computer components and parts. When you handle parts and other computer and other computer components carefully. the parts and other computer components. v Before unpainted metal surface on the computer for at least two seconds. and install it directly in the computer without setting the part down. - Lenovo J200 | (English) Hardware replacement guide - Page 13
Figure 1 shows the location of the controls and connectors on the front of your computer. Note: Not all computer models have the following controls and connections. Figure 1. Controls and connectors 1 USB connector 2 Headphone connector 3 Microphone connector 4 USB connector Chapter - Lenovo J200 | (English) Hardware replacement guide - Page 14
of your computer. Some connectors on the rear of your computer are color-coded to help you determine where to connect the cables on your computer. Figure 2. Express x1 or PCI Express x16 graphics adapter connector PCI Express x1 or PCI Express x16 graphics adapter connector PCI adapter or PCI - Lenovo J200 | (English) Hardware replacement guide - Page 15
use to connect additional USB devices. Ethernet connector Used to attach an Ethernet cable for a local area network (LAN). Note: To operate the computer within FCC Class B limits, use a Category 5 Ethernet cable. Serial connector Used to attach an external modem, serial printer, or other devices - Lenovo J200 | (English) Hardware replacement guide - Page 16
the location of the various components in your computer. Figure 3. Component locations 1 Microprocessor fan and heat 4 PCI Express and PCI adapter connectors sink 2 Memory modules (2) 5 Rear fan assembly 3 PCI adapter card 6 Power supply 8 Hardware Installation and Replacement Guide - Lenovo J200 | (English) Hardware replacement guide - Page 17
the main circuit board in your computer. It provides basic computer functions and supports a variety of devices. Your computer contains one of the three system Front audio connector 20 CD-IN connector 21 PCI Express x16 graphics adapter connector 22 PCI Express x1 adapter connector 23 System fan connector - Lenovo J200 | (English) Hardware replacement guide - Page 18
Figure 5 shows the locations of parts on the system board for some computer models. Figure 5. System board parts locations 1 Microprocessor and heat sink PCI Express x1 adapter connector Battery PCI Express x16 graphics adapter connector System fan connector 12 V power connector 10 Hardware - Lenovo J200 | (English) Hardware replacement guide - Page 19
Figure 6 shows the locations of parts on the system board for some computer models. Figure 6. System board parts locations 1 Microprocessor and heat sink 2 x1 adapter connectors (2) 19 Battery 20 PCI Express x16 graphics adapter connector 21 System fan connector 22 12 V power connector Chapter - Lenovo J200 | (English) Hardware replacement guide - Page 20
12 Hardware Installation and Replacement Guide - Lenovo J200 | (English) Hardware replacement guide - Page 21
safety information" in the Safety and Warranty Guide that was included with your computer. To obtain a copy of the Safety and Warranty Guide, go to the Support Web site at http://www.lenovo.com/support. Note: Use only parts provided by Lenovo. Installing external options External speakers, a printer - Lenovo J200 | (English) Hardware replacement guide - Page 22
the cover-release button on the side of the cover and slide the computer cover to the rear to and remove. Figure 7. Removing the computer cover Removing and replacing the front bezel To remove and replace the front bezel: 1. Remove the computer cover. See "Removing the cover" on page 13. 14 Hardware - Lenovo J200 | (English) Hardware replacement guide - Page 23
2. Remove the front bezel by releasing the three plastic tabs on the left side and pivoting the bezel outward. Carefully set the bezel to the side without disconnecting the power switch and LED assembly cable. Figure 8. Removing the front bezel 3. To reinstall the bezel, align the plastic tabs on - Lenovo J200 | (English) Hardware replacement guide - Page 24
devices" on page 4 before opening the computer cover. Installing memory Your computer either has two or four connectors for Note: Only DDR2 SDRAM DIMMs can be used. To install a memory module: 1. Remove the computer cover. See "Removing the cover" on page 13. 2. Locate the memory connectors. See " - Lenovo J200 | (English) Hardware replacement guide - Page 25
. This section provides information and instructions for installing adapters. Your computer has four expansion connectors. On some system boards, there are two connectors for PCI adapters, one PCI Express x1 adapter connector, and one for a PCI Express x16 graphics adapter connector. On some system - Lenovo J200 | (English) Hardware replacement guide - Page 26
2. At the rear of the computer, press the release button 1 to open the adapter latch 2 and remove the slot cover. . Figure 11. Opening the adapter latch 18 Hardware Installation and Replacement Guide - Lenovo J200 | (English) Hardware replacement guide - Page 27
3. Remove the adapter from its static-protective package. 4. Install the adapter into the appropriate connector on the system board. 5. Pivot the adapter latch to the closed position to secure the adapters. Figure 12. Closing the adapter latch What to do next: v To work with another option, go to - Lenovo J200 | (English) Hardware replacement guide - Page 28
instructions for installing internal drives. Internal drives are devices that your computer uses to read and store data. You can add drives to your computer to increase storage capacity and to enable your computer the installed drive. Drive specifications Your computer comes with the following Guide - Lenovo J200 | (English) Hardware replacement guide - Page 29
inch SATA hard disk drive (preinstalled) 3.5-inch SATA hard disk drive * You can obtain a Universal Adapter Bracket, 5.25 to 3.5-inch from a local computer retailer or by contacting the Customer Support Center. Installing a drive in bay 1 or bay 2 To install a drive in bay 1 or bay 2: 1. Remove the - Lenovo J200 | (English) Hardware replacement guide - Page 30
it as a master device. Refer to the documentation that comes with your drive for master/slave jumper information. 6. Remove the retainer bracket from the upper driver cage by sliding it downward. 22 Hardware Installation and Replacement - Lenovo J200 | (English) Hardware replacement guide - Page 31
use a Universal Adapter Bracket, 5.25 to 3.5-inch. You can obtain a Universal Adapter Bracket, 5.25 to 3.5-inch from a local computer retailer or by contacting the Customer Support Center. Install a retainer bracket on the side of the Universal adapter bracket. 9. Install the 5.25-inch drive or the - Lenovo J200 | (English) Hardware replacement guide - Page 32
end of the signal cable to the drive and the other to an available SATA connector on the system board. 24 Hardware Installation and Replacement Guide - Lenovo J200 | (English) Hardware replacement guide - Page 33
time, and configuration information (including passwords) are lost. An error message is displayed when you turn on the computer. Refer to the "Lithium battery notice" in the Safety and Warranty Guide for information about replacing and disposing of the battery. To change the battery: 1. Turn off the - Lenovo J200 | (English) Hardware replacement guide - Page 34
the "Important safety information" in the Safety and Warranty Guide that was included with your computer. To obtain a copy of the Safety and Warranty Guide, go to the Support Web site at http://www.lenovo.com/support. This section provides instructions on how to replace the power supply assembly - Lenovo J200 | (English) Hardware replacement guide - Page 35
the "Important safety information" in the Safety and Warranty Guide that was included with your computer. To obtain a copy of the Safety and Warranty Guide, go to the Support Web site at http://www.lenovo.com/support. This section provides instructions on how to replace the heat sink. 1. Remove the - Lenovo J200 | (English) Hardware replacement guide - Page 36
heat sink to free it from the microprocessor. 6. Lift the failing heat sink and fan assembly off the system board. 28 Hardware Installation and Replacement Guide - Lenovo J200 | (English) Hardware replacement guide - Page 37
7. Remove the mylar film that covers the greased side of the new heat sink that will face the processor. 8. Depending on which heat sink you are installing, do one of the following: a. Position the heat sink on the microprocessor socket and then position the clamp on the plastic retention bracket. - Lenovo J200 | (English) Hardware replacement guide - Page 38
or attempt any repair before reading the "Important safety information" in the Safety and Warranty Guide that was included with your computer. To obtain a copy of the Safety and Warranty Guide, go to the Support Web site at http://www.lenovo.com/support. 30 Hardware Installation and Replacement - Lenovo J200 | (English) Hardware replacement guide - Page 39
shipped from the factory. For more information on recovering factory-installed software, refer to "Recovering software" in your User Guide. To replace the hard disk drive: 1. Remove the computer cover. See "Removing the cover" on page 13. 2. Disconnect the signal and power cables from the hard disk - Lenovo J200 | (English) Hardware replacement guide - Page 40
hard disk drive into bracket 8. Slide the new hard disk drive into the drive cage until it snaps into position. 32 Hardware Installation and Replacement Guide - Lenovo J200 | (English) Hardware replacement guide - Page 41
the "Important safety information" in the Safety and Warranty Guide that was included with your computer. To obtain a copy of the Safety and Warranty Guide, go to the Support Web site at http://www.lenovo.com/support. This section provides instructions on how to replace an optical drive. 1. Remove - Lenovo J200 | (English) Hardware replacement guide - Page 42
4. Press the blue release button and remove the optical drive out the front of the computer. Figure 30. Removing the optical drive 5. Remove the retainer bracket from the drive being replaced and install it on the new drive. Figure 31. Retainer - Lenovo J200 | (English) Hardware replacement guide - Page 43
6. Slide the new optical drive into the bay from the front until it snaps into position. Figure 32. Installing a new drive 7. Connect the signal and power cables to the drive. 8. To reinstall the bezel, align the plastic tabs on the right side of the bezel with the corresponding holes in the chassis - Lenovo J200 | (English) Hardware replacement guide - Page 44
the "Important safety information" in the Safety and Warranty Guide that was included with your computer. To obtain a copy of the Safety and Warranty Guide, go to the Support Web site at http://www.lenovo.com/support. This section provides instructions on how to replace the diskette drive. 1. Remove - Lenovo J200 | (English) Hardware replacement guide - Page 45
obtain a copy of the Safety and Warranty Guide, go to the Support Web site at http://www.lenovo.com/support. This section provides instructions on how to replace a memory module. Note: Your computer has support for two or four memory modules. 1. Remove the computer cover. See "Removing the cover" on - Lenovo J200 | (English) Hardware replacement guide - Page 46
the "Important safety information" in the Safety and Warranty Guide that was included with your computer. To obtain a copy of the Safety and Warranty Guide, go to the Support Web site at http://www.lenovo.com/support. This section provides instructions on how to replace a PCI adapter. 1. Remove the - Lenovo J200 | (English) Hardware replacement guide - Page 47
2. At the rear of the computer, press the release button 1 to open the adapter latch 2 and remove the adapter by pulling it straight out of the adapter connector. Figure 37. Removing the PCI adapter Chapter 3. Installing options and replacing hardware 39 - Lenovo J200 | (English) Hardware replacement guide - Page 48
3. Install the new adapter into the same adapter connector. 4. Ensure the adapter is fully seated into the adapter connector. 5. At the rear of the computer, pivot the adapter latch to the closed position to secure the adapter. Figure 38. Install a new PCI adapter 6. Go to Chapter 4, "Completing the - Lenovo J200 | (English) Hardware replacement guide - Page 49
the "Important safety information" in the Safety and Warranty Guide that was included with your computer. To obtain a copy of the Safety and Warranty Guide, go to the Support Web site at http://www.lenovo.com/support. This section provides instructions on how to replace the front fan assembly. The - Lenovo J200 | (English) Hardware replacement guide - Page 50
the "Important safety information" in the Safety and Warranty Guide that was included with your computer. To obtain a copy of the Safety and Warranty Guide, go to the Support Web site at http://www.lenovo.com/support. This section provides instructions on how to replace the rear fan assembly. The - Lenovo J200 | (English) Hardware replacement guide - Page 51
4. Disconnect the rear fan assembly cable from the system fan connector on the system board. See "Identifying parts on the system board" on page 9. 5. Pull the rear fan assembly out of chassis. Figure 41. Removing the rear fan assembly 6. Install the new system fan assembly by aligning the rubber - Lenovo J200 | (English) Hardware replacement guide - Page 52
cable to the system fan connector on the system board. 9. Go to Chapter 4, "Completing the parts replacement," on page 47. 44 Hardware Installation and Replacement Guide - Lenovo J200 | (English) Hardware replacement guide - Page 53
"Important safety information" in the Safety and Warranty Guide that was included with your computer. To obtain a copy of the Safety and Warranty Guide, go to the Support Web site at http://www.lenovo.com/support. This section provides instructions on how to replace a keyboard. 1. Remove any media - Lenovo J200 | (English) Hardware replacement guide - Page 54
the "Important safety information" in the Safety and Warranty Guide that was included with your computer. To obtain a copy of the Safety and Warranty Guide, go to the Support Web site at http://www.lenovo.com/support. This section provides instructions on how to replace a mouse. 1. Remove any media - Lenovo J200 | (English) Hardware replacement guide - Page 55
, lock the cover. 5. Reconnect the external cables and power cords to the computer. See "Locating connectors on the rear of your computer" on page 6. 6. To update your configuration, see ″Using the Setup Utility program″ in your User Guide. © Lenovo 2005, 2007. Portions © IBM Corp. 2005. 47 - Lenovo J200 | (English) Hardware replacement guide - Page 56
arrives. Obtaining device drivers You can obtain device drivers for operating systems that are not preinstalled at http://www.lenovo.com/support/ on the World Wide Web. Installation instructions are provided in README files with the device-driver files. 48 Hardware Installation and Replacement Guide - Lenovo J200 | (English) Hardware replacement guide - Page 57
used to open the computer cover. This is the same type of lock used with many laptop computers. You can order a security cable directly from Lenovo. Go to http://www.lenovo.com/support/ and search on Kensington. Figure 46. Integrated cable lock © Lenovo 2005, 2007. Portions © IBM Corp. 2005. 49 - Lenovo J200 | (English) Hardware replacement guide - Page 58
section applies to lost or forgotten passwords. For more information about lost or forgotten passwords, go to the Lenovo Care sm program. To erase a forgotten password: 1. Remove the computer cover. See "Removing the cover" on page 13. 2. Locate the Clear CMOS/Recovery jumper on the system board - Lenovo J200 | (English) Hardware replacement guide - Page 59
8. Replace the computer cover and connect the power cord. See Chapter 4, "Completing the parts replacement," on page 47. Chapter 5. Security features 51 - Lenovo J200 | (English) Hardware replacement guide - Page 60
52 Hardware Installation and Replacement Guide - Lenovo J200 | (English) Hardware replacement guide - Page 61
or service. Lenovo may Lenovo support applications where malfunction may result in injury or death to persons. The information contained in this document does not affect or change Lenovo product specifications publication to non-Lenovo Web sites are the materials for this Lenovo product, and use of - Lenovo J200 | (English) Hardware replacement guide - Page 62
their specific Lenovo Lenovo Care Lenovo logo IBM is a trademark of International Business Machines Corporation in the United States, other countries, or both. Other company, product, or service names may be trademarks or service marks of others. 54 Hardware Installation and Replacement Guide - Lenovo J200 | (English) Hardware replacement guide - Page 63
drive, replacing 36 drivers, device 48 drives bays 20 connecting 23 internal 20 specifications 20 E Ethernet connector 7 external options, installing 13 F front bezel bezel, removing 14 front connectors 5 front fan assembly, replacing 41 © Lenovo 2005, 2007. Portions © IBM Corp. 2005. H hard - Lenovo J200 | (English) Hardware replacement guide - Page 64
connector 7 static-sensitive devices, handling 4 system board connectors 9, 10 identifying parts 9 location 9 T television output notice 54 trademarks 54 U USB connectors 7 56 Hardware Installation and Replacement Guide - Lenovo J200 | (English) Hardware replacement guide - Page 65
- Lenovo J200 | (English) Hardware replacement guide - Page 66
Part Number: 43C3153 Printed in USA (1P) P/N: 43C3153
-
 1
1 -
 2
2 -
 3
3 -
 4
4 -
 5
5 -
 6
6 -
 7
7 -
8
-
9
-
10
-
11
-
12
-
13
-
14
-
15
-
16
-
17
-
18
-
19
-
20
-
21
-
22
-
23
-
24
-
25
-
26
-
27
-
28
-
29
-
30
-
31
-
32
-
33
-
34
-
35
-
36
-
37
-
38
-
39
-
40
-
41
-
42
-
43
-
44
-
45
-
46
-
47
-
48
-
49
-
50
-
51
-
52
-
53
-
54
-
55
-
56
-
57
-
58
-
59
-
60
-
61
-
62
-
63
-
64
-
65
-
66
 |
 |

Lenovo 3000
Hardware Installation and Replacement Guide
Machine Types
7816, 7817, 7818, 7819, 9686, 9687, 9688, 9689, 9690, 9691