Lenovo Q700 Lenovo IdeaCentre Q700 Hardware Maintenance Manual - Page 41
with the tabs in the microprocessor socket.
 |
UPC - 884942316395
View all Lenovo Q700 manuals
Add to My Manuals
Save this manual to your list of manuals |
Page 41 highlights
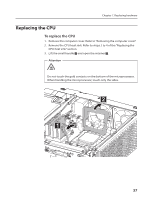
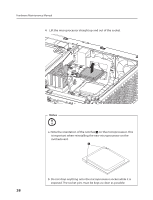
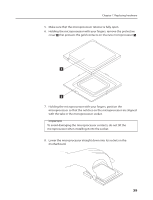
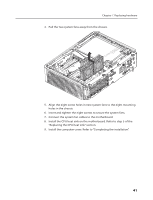
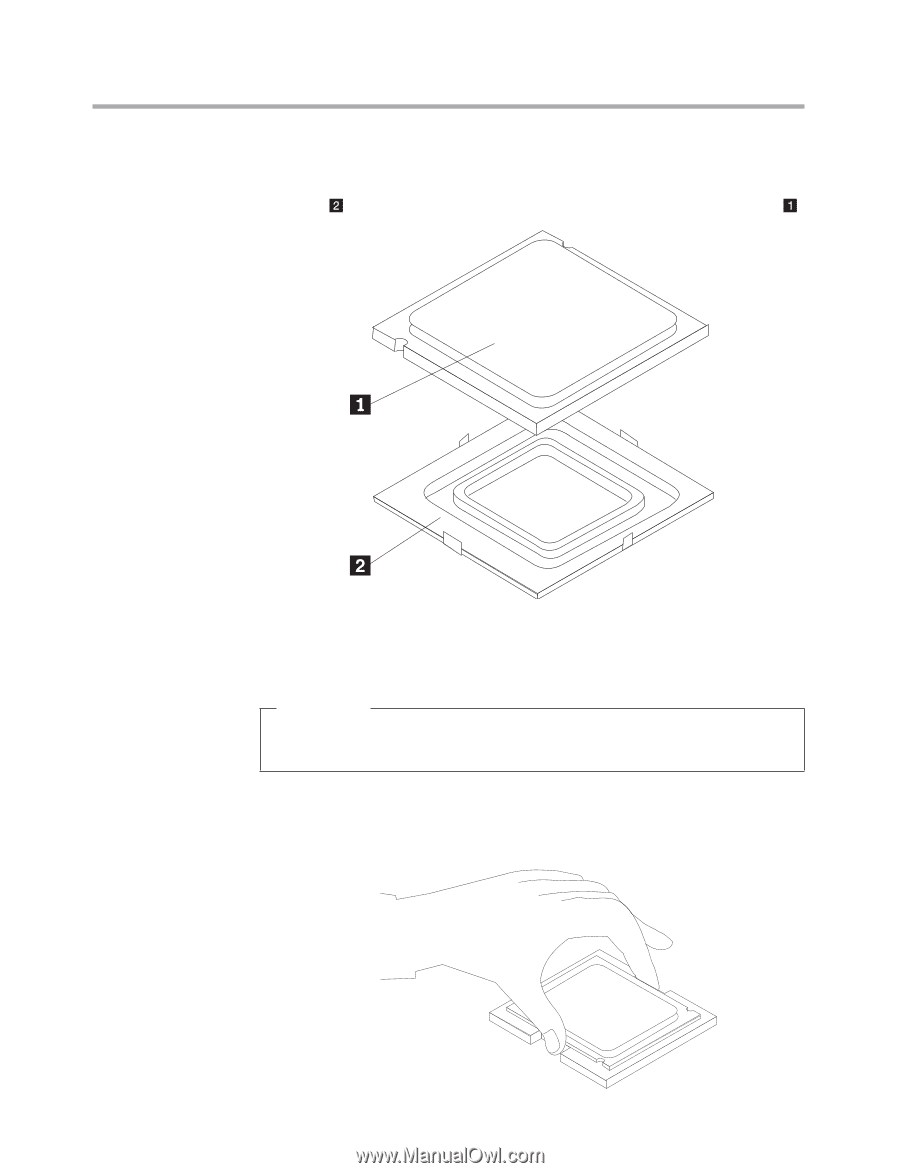
Chapter 7. Replacing hardware 5. Make sure that the microprocessor retainer is fully open. 6. Holding the microprocessor with your fingers, remove the protective cover that protects the gold contacts on the new microprocessor . 7. Holding the microprocessor with your fingers, position the microprocessor so that the notches on the microprocessor are aligned with the tabs in the microprocessor socket. Important To avoid damaging the microprocessor contacts, do not tilt the microprocessor when installing it into the socket. 8. Lower the microprocessor straight down into its socket on the motherboard. 39
-
 1
1 -
2
-
3
-
4
-
5
-
6
-
7
-
8
-
9
-
10
-
11
-
12
-
13
-
14
-
15
-
16
-
17
-
18
-
19
-
20
-
21
-
22
-
23
-
24
-
25
-
26
-
27
-
28
-
29
-
30
-
31
-
32
-
33
-
34
-
35
-
 36
36 -
 37
37 -
 38
38 -
 39
39 -
 40
40 -
 41
41 -
 42
42 -
 43
43 -
 44
44 -
 45
45 -
 46
46 -
47
-
48
-
49
-
50
-
51
-
52
-
53
-
54
-
55
-
56
-
57
-
58
-
59
-
60
 |
 |
Chapter 7. Replacing hardware
39
5.
Make sure that the microprocessor retainer is fully open.
6.
Holding the microprocessor with your fingers, remove the protective
cover
that protects the gold contacts on the new microprocessor
.
7.
Holding the microprocessor with your fingers, position the
microprocessor so that the notches on the microprocessor are aligned
with the tabs in the microprocessor socket.
Important
To avoid damaging the microprocessor contacts, do not tilt the
microprocessor when installing it into the socket.
8.
Lower the microprocessor straight down into its socket on the
motherboard.