Lenovo Q700 Lenovo IdeaCentre Q700 Hardware Maintenance Manual - Page 56
Replacing the remote control, Completing the installation - user manual
 |
UPC - 884942316395
View all Lenovo Q700 manuals
Add to My Manuals
Save this manual to your list of manuals |
Page 56 highlights
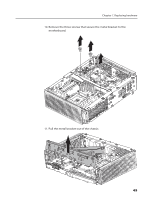
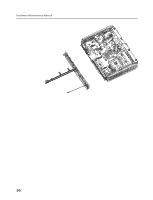
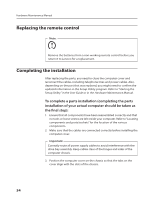
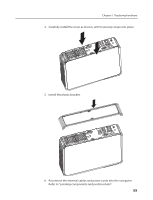
Hardware Maintenance Manual Replacing the remote control Note: Remove the batteries from a non-working remote control before you return it to Lenovo for a replacement. Completing the installation After replacing the parts, you need to close the computer cover and reconnect the cables, including telephone lines and power cables. Also, depending on the part that was replaced, you might need to confirm the updated information in the Setup Utility program. Refer to "Starting the Setup Utility" in the User Guide or in the Hardware Maintenance Manual. To complete a parts installation (completing the parts installation of your actual computer should be taken as the final step): 1. Ensure that all components have been reassembled correctly and that no tools or loose screws are left inside your computer. Refer to "Locating components and ports/sockets" for the location of the various components. 2. Make sure that the cables are connected correctly before installing the computer cover. Important Correctly route all power supply cables to avoid interference with the drive bay assembly. Keep cables clear of the hinges and sides of the computer chassis. 3. Position the computer cover on the chassis so that the tabs on the cover align with the slots of the chassis. 54
-
 1
1 -
2
-
3
-
4
-
5
-
6
-
7
-
8
-
9
-
10
-
11
-
12
-
13
-
14
-
15
-
16
-
17
-
18
-
19
-
20
-
21
-
22
-
23
-
24
-
25
-
26
-
27
-
28
-
29
-
30
-
31
-
32
-
33
-
34
-
35
-
36
-
37
-
38
-
39
-
40
-
41
-
42
-
43
-
44
-
45
-
46
-
47
-
48
-
49
-
50
-
 51
51 -
 52
52 -
 53
53 -
 54
54 -
 55
55 -
 56
56 -
 57
57 -
 58
58 -
 59
59 -
 60
60
 |
 |