Lenovo R500 Troubleshooting Guide
Lenovo R500 - ThinkPad 2717 - Core 2 Duo 2.26 GHz Manual
 |
UPC - 884343063324
View all Lenovo R500 manuals
Add to My Manuals
Save this manual to your list of manuals |
Lenovo R500 manual content summary:
- Lenovo R500 | Troubleshooting Guide - Page 1
ThinkPad® R500 Service and Troubleshooting Guide - Lenovo R500 | Troubleshooting Guide - Page 2
- Lenovo R500 | Troubleshooting Guide - Page 3
ThinkPad® R500 Service and Troubleshooting Guide - Lenovo R500 | Troubleshooting Guide - Page 4
to them, go to http://www.lenovo.com/think/support, click Troubleshooting, and then click User's guides and manuals. Second Edition (June 2008) © Copyright Lenovo 2008. All rights reserved. LENOVO products, data, computer software, and services have been developed exclusively at private expense - Lenovo R500 | Troubleshooting Guide - Page 5
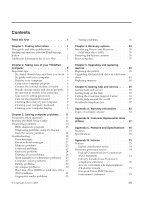
Lenovo 2008 Startup problems 33 Chapter 4. Recovery options 35 Introducing Rescue and Recovery . . . . . 35 Solid state drive (SSD 35 Restoring the factory contents 36 Recovering data 37 Chapter 5. Upgrading and replacing devices 39 Replacing the battery 39 Upgrading the hard disk drive - Lenovo R500 | Troubleshooting Guide - Page 6
EU WEEE Statements 77 Notice for users in the U.S.A 77 ENERGY STAR model information . . . . 78 Notice for Regulatory information . . . . 80 Trademarks 81 Index 83 iv ThinkPad® R500 Service and Troubleshooting Guide - Lenovo R500 | Troubleshooting Guide - Page 7
is charging, the base, the palm rest, and some other parts may become hot. The temperature they reach depends on the amount of system activity and the level of charge in the battery. Extended contact with your body, even through clothing, could cause discomfort or even a skin burn. v Avoid keeping - Lenovo R500 | Troubleshooting Guide - Page 8
, or place heavy objects on your computer, display, or external devices. Carry your computer carefully. v Use a quality carrying case that provides adequate cushioning and protection. v Do not pack your computer in a tightly packed suitcase or bag. vi ThinkPad® R500 Service and Troubleshooting Guide - Lenovo R500 | Troubleshooting Guide - Page 9
procedures, help and service information, and warranty information for your computer. The troubleshooting information in this Guide applies only to problems that might prevent you from accessing the comprehensive online manual, called Access Help, preinstalled on your ThinkPad computer. Access Help - Lenovo R500 | Troubleshooting Guide - Page 10
instructions for getting started and staying productive. You can also use the ThinkVantage button to interrupt the startup sequence of your computer and start the Rescue and Recovery™ workspace, which runs independently of the Windows® operating system and is hidden from it. 2 ThinkPad® R500 Service - Lenovo R500 | Troubleshooting Guide - Page 11
them in a safe place. If you forget your passwords, you must take your computer to a Lenovo reseller or a marketing representative. Disabling the integrated fingerprint reader Add the following items to the tables for I/O Port Access in the Security menu of the BIOS Setup Utility. You can find the - Lenovo R500 | Troubleshooting Guide - Page 12
4 ThinkPad® R500 Service and Troubleshooting Guide - Lenovo R500 | Troubleshooting Guide - Page 13
instructions for using your computer, see "Read this first" on page v. Important tips Be careful about where and how you work v Store packing materials safely such as certain portable desktop fans or air purifiers, can keyboard or other parts of the computer, or through connectors on I/O devices - Lenovo R500 | Troubleshooting Guide - Page 14
tray. v Wait until you hear the CD or DVD click into the center pivot of an optical drive before closing the tray. v On your ThinkPad computer, use only optical drives designed for use with the Serial Ultrabay™ Slim or the Serial Ultrabay Enhanced™. 6 ThinkPad® R500 Service and Troubleshooting Guide - Lenovo R500 | Troubleshooting Guide - Page 15
latches to keep the display open or closed. Take care in setting passwords v Remember your passwords. If you forget a supervisor or hard disk password, Lenovo authorized service provider cannot reset it, and you will have to replace your system board, or HDD or SSD. Care for the fingerprint reader - Lenovo R500 | Troubleshooting Guide - Page 16
or between the keys. 3. Allow to dry. 4. To remove any crumbs and dust from beneath the keys, you can use keyboard or the TrackPoint® pointing stick when the cover was pressed from the outside. 2. Wipe or dust the stain gently with a soft, dry cloth. 8 ThinkPad® R500 Service and Troubleshooting Guide - Lenovo R500 | Troubleshooting Guide - Page 17
display again; do not let any liquid drip into the computer. 6. Be sure to dry the display before closing it. Chapter 2. Taking care of your ThinkPad computer 9 - Lenovo R500 | Troubleshooting Guide - Page 18
10 ThinkPad® R500 Service and Troubleshooting Guide - Lenovo R500 | Troubleshooting Guide - Page 19
problems v Troubleshooting What are the main hardware features of my new ThinkPad computer? See "About your computer" in Access Help. Where can I find the detailed specifications for my ThinkPad computer? See http://www.lenovo.com/think/support. I need to upgrade a device or I need to replace - Lenovo R500 | Troubleshooting Guide - Page 20
configuration of your computer. v Date/Time: Set the date and time. v Security: Set security features. v Startup: Set the startup device. v Restart: Restart the system. v HDD diagnostic program: Run the diagnostic test of the HDD or SSD. To enter the BIOS Setup Utility, do as follows: 1. To protect - Lenovo R500 | Troubleshooting Guide - Page 21
. For more information about PC-Doctor for Windows, see the Help for the program. Attention: v If you need help or further information about the problem, choose any of the following: - Lenovo Troubleshooting Center - Update System Drivers - System Information v Running any tests may take up to - Lenovo R500 | Troubleshooting Guide - Page 22
: http://www.lenovo.com/support/site.wss/ document.do?sitestyle=lenovo&lndocid=tpad-matrix. Diagnosing problems using PC-Doctor from the service partition By using PC-Doctor from the Rescue and Recovery workspace in the service partition of the hard disk drive, you can diagnose your system without - Lenovo R500 | Troubleshooting Guide - Page 23
Setup defaults. Checksum of the startup sequence setting in the EEPROM is not correct. Press F1 to enter the BIOS Setup Utility. Press F9 and then Enter to load the default setting. Press F10 and then Enter to restart the system. 0190: Critical low-battery error The computer turned off because - Lenovo R500 | Troubleshooting Guide - Page 24
the configuration information, such as the date and time, while the computer is turned off, is depleted. Replace the battery and run the BIOS Setup Utility to verify the configuration. If you still have a problem, have the computer serviced. 16 ThinkPad® R500 Service and Troubleshooting Guide - Lenovo R500 | Troubleshooting Guide - Page 25
. Run the BIOS Setup Utility to reconfigure the settings. If you still see the same error code, have the computer serviced. 0271: Date and time Neither the date nor the time is set in the computer. Set the error date and time, using the BIOS Setup Utility. 0280: Previous boot Your computer was - Lenovo R500 | Troubleshooting Guide - Page 26
has been changed, re-create the hibernation file. Verify the following: v The HDD or SSD is correctly installed. v A startable disc is in the drive If you still see the same error message, check the boot sequence, using the BIOS Setup Utility. 18 ThinkPad® R500 Service and Troubleshooting Guide - Lenovo R500 | Troubleshooting Guide - Page 27
from device=C:\WINDOWS\EMM386.EXE RAM to device=C:\WINDOWS\EMM386.EXE NOEMS and save this file. CardBus Enter the BIOS Setup Utility. Press F9 and then Enter to load Configuration Error - the default setting. Device Disabled Press F10 and then Enter to restart the system. Cannot boot from - Lenovo R500 | Troubleshooting Guide - Page 28
hardware tamper detected. 0260: System timer error 0270: Real time clock error 02D0: System cache error 02F4: EISA CMOS not writable 02F5: DMA test failed 02F6: Software NMI failed 02F7: Fail-safe timer NMI failed Fan error Thermal sensing error 20 ThinkPad® R500 Service and Troubleshooting Guide - Lenovo R500 | Troubleshooting Guide - Page 29
to display the prompt for the power-on password. If the brightness level of the screen is low, increase it by pressing the Fn+Home. b. Type the correct password and press Enter. 3. If these items are set properly, and the screen remains blank, have the computer serviced. Problem: When I turn on the - Lenovo R500 | Troubleshooting Guide - Page 30
still does not respond, remove and reinstall the AC adapter and the battery. Your computer might lock when it enters sleep (standby) mode during a communication operation. Disable the sleep (standby) timer when you are working on the network. 22 ThinkPad® R500 Service and Troubleshooting Guide - Lenovo R500 | Troubleshooting Guide - Page 31
, refer to the instructions in "Replacing memory" on page 48. 5. Run PC-Doctor for Windows. If you cannot startup Windows, use PC-Doctor from the service partition on your hard disk drive. Password problems Problem: You forgot your password. Solution: v If you forget your power-on password, you must - Lenovo R500 | Troubleshooting Guide - Page 32
the computer. Pointing device problems Problem: The scrolling or magnifying glass function does not work. Solution: Check the mouse driver in the Device Manager window, and make sure that the ThinkPad UltraNav® Pointing Device driver is installed. 24 ThinkPad® R500 Service and Troubleshooting Guide - Lenovo R500 | Troubleshooting Guide - Page 33
computer serviced. Problem: The critical low-battery error message is displayed, and the computer immediately turns off. Solution: The battery power is getting low. Do either of the following: v Connect the AC adapter to the computer and plug it into an electrical outlet. v Replace the battery with - Lenovo R500 | Troubleshooting Guide - Page 34
internal components. a. Allow the computer to cool. b. Press Fn to return from sleep (standby) mode. 3. If the computer still enters sleep (standby) mode unexpectedly, the internal fan or other parts may have failed. Have the computer serviced. 26 ThinkPad® R500 Service and Troubleshooting Guide - Lenovo R500 | Troubleshooting Guide - Page 35
Incorrect characters appear on the screen. Solution: 1. Make sure that the operating system and the application program are installed correctly. 2. If they are installed and configured correctly, have the computer serviced. Problem: Missing, discolored, or bright dots appear on the screen every time - Lenovo R500 | Troubleshooting Guide - Page 36
the Properties button. If you are prompted for an administrator password or confirmation, type the password or provide confirmation. Check the ″Device status″ box and make sure the device is working properly. If not, click the Troubleshoot button. 28 ThinkPad® R500 Service and Troubleshooting Guide - Lenovo R500 | Troubleshooting Guide - Page 37
Windows XP: 1. Right-click on the desktop, click Properties to open the Display Properties window, then click the Settings tab. 2. Check whether the screen resolution and color quality are correctly set. 3. Click Advanced. 4. Click the Adapter tab. 5. Make sure that the correct device driver name - Lenovo R500 | Troubleshooting Guide - Page 38
. 3. Reinstall the battery and reconnect the AC adapter, then turn on the computer. 4. If the power adapter icon still does not appear on the task bar and the AC power indicator does not light up, have the AC adapter and your computer serviced. 30 ThinkPad® R500 Service and Troubleshooting Guide - Lenovo R500 | Troubleshooting Guide - Page 39
(HDD) or solid state drive (SSD) problems Problem: After setting a hard disk password on the HDD or SSD of the computer, you moved the drive to another computer. Now you cannot unlock the hard disk password. Solution: Your computer supports an enhanced password algorithm. Computers older than yours - Lenovo R500 | Troubleshooting Guide - Page 40
change or remove a hard disk password in the BIOS Setup Utility. Solution: A hard disk password can be changed or removed only if the setting of Using Passphrase in the BIOS Setup Utility - enabled or disabled - is the same as it was when you set the password. If the Hard Disk x Password menu in the - Lenovo R500 | Troubleshooting Guide - Page 41
dry, apply lotion to them. v Clean or wipe your hands to remove any excess dirt or moisture from the fingers. v Enroll and use a different finger for authentication. Startup problems Problem: The Microsoft® Windows operating system will not start. Solution: Use the Rescue and Recovery workspace or - Lenovo R500 | Troubleshooting Guide - Page 42
select it. 7. Press the x key. Now, the device is included in the ″Boot priority order″ list. 8. Configure the boot priority order to enable the device to start up the operating system. 9. To save the change, press F10. Select Yes and press Enter. 34 ThinkPad® R500 Service and Troubleshooting Guide - Lenovo R500 | Troubleshooting Guide - Page 43
your system settings and passwords. v Communicate using the Internet and link to the support site. v Troubleshoot and diagnose problems using diagnostics. For more information about using Rescue and Recovery features, see "Problem solving" in Access Help. Solid state drive (SSD) With Lenovo - Lenovo R500 | Troubleshooting Guide - Page 44
system. 2. Turn off the computer, and then turn it on again. 3. When the ThinkPad logo comes up, immediately press the ThinkVantage button. The Rescue and Recovery workspace opens. 4. Click Full Restore and follow the instructions on the screen. 36 ThinkPad® R500 Service and Troubleshooting Guide - Lenovo R500 | Troubleshooting Guide - Page 45
the BIOS Setup Utility the startup sequence is set so that the system starts up from the recovery discs. 2. Insert the Rescue and Recovery disc into the DVD drive. 3. Restart the computer. After a short wait, the Rescue and Recovery workspace opens. 4. Click Full Restore and follow the instructions - Lenovo R500 | Troubleshooting Guide - Page 46
38 ThinkPad® R500 Service and Troubleshooting Guide - Lenovo R500 | Troubleshooting Guide - Page 47
Chapter 5. Upgrading and replacing devices Replacing the battery Important: Read Safety and Warranty Guide before replacing the battery. To replace the battery, do the following: 1. Turn off the computer, or enter hibernation mode. Then disconnect the AC adapter and all cables from the computer. 2. - Lenovo R500 | Troubleshooting Guide - Page 48
4. Install a fully charged battery. 5. Slide the battery latch to the locked position. 6. Turn the computer over again. Connect the AC adapter and the cables to the computer. 40 ThinkPad® R500 Service and Troubleshooting Guide - Lenovo R500 | Troubleshooting Guide - Page 49
damage and permanent loss of data on the drive. Before removing the HDD or SSD, make a backup copy of all the data on the drive, and turn the computer off. Never remove the drive while the system is operating, in standby mode, or in hibernation mode. Chapter 5. Upgrading and replacing devices 41 - Lenovo R500 | Troubleshooting Guide - Page 50
1. Turn off the computer; then disconnect the AC adapter and all cables from the computer. 2. Close the computer display, and turn the computer over. 3. Remove the battery. 4. Remove the screw that secures the slot cover. 5. Remove the slot cover. 42 ThinkPad® R500 Service and Troubleshooting Guide - Lenovo R500 | Troubleshooting Guide - Page 51
6. Remove the HDD by pulling out the tab. 7. Detach the side rubber rails form the HDD. 8. Attach the side rubber rails to a new HDD. Chapter 5. Upgrading and replacing devices 43 - Lenovo R500 | Troubleshooting Guide - Page 52
9. Insert the HDD into the slot; then press it firmly into place. 10. Reinstall the slot cover. 11. Reinstall the screw. 12. Reinstall the battery. 13. Turn the computer over again. Connect the AC adapter and the cables to the computer. 44 ThinkPad® R500 Service and Troubleshooting Guide - Lenovo R500 | Troubleshooting Guide - Page 53
: 1. Turn off the computer; then disconnect the AC adapter and all cables from the computer. 2. Close the computer display, and turn the computer over. 3. Remove the battery. 4. Remove the screw that secures the slot cover. 5. Remove the slot cover. Chapter 5. Upgrading and replacing devices 45 - Lenovo R500 | Troubleshooting Guide - Page 54
finger in the direction shown by the arrow 1 , and lift up the bar 2 . Note: Do not remove the rubbers attached to the side of the adapter. To do so requires pulling hard, possibly damaging or breaking them. 1 2 8. Remove the SSD from the adapter. 46 ThinkPad® R500 Service and Troubleshooting Guide - Lenovo R500 | Troubleshooting Guide - Page 55
9. Insert a new SSD into the adapter 1 . Put the bar back in place and set the latch 2 . 2 1 10. Insert the SSD into the slot; then press it firmly into place. 11. Reinstall the slot cover. Chapter 5. Upgrading and replacing devices 47 - Lenovo R500 | Troubleshooting Guide - Page 56
Use only the memory types supported by your computer. If you incorrectly install the optional memory or install an unsupported memory type, a warning beep will sound when , and turn the computer over. 4. Remove the battery. 5. Remove the palm rest. 48 ThinkPad® R500 Service and Troubleshooting Guide - Lenovo R500 | Troubleshooting Guide - Page 57
a. Remove the four screws that secure the palm rest. b. Turn the computer over and open the display. Open up the palm rest in the direction shown by arrow 1 by picking up the sides, and then release the palm rest from the computer 2 . 1 2 2 Chapter 5. Upgrading and replacing devices 49 - Lenovo R500 | Troubleshooting Guide - Page 58
the palm rest has been removed. 6. If the two SO-DIMMs are already installed in the memory slots, remove an SO-DIMM to make Find the notch on the contact edge of the SO-DIMM. Attention: To avoid damaging the SO-DIMM, do not touch its contact edge. 50 ThinkPad® R500 Service and Troubleshooting Guide - Lenovo R500 | Troubleshooting Guide - Page 59
: If you install a memory module in only one of the two memory slots, install it in the lower slot. 2 1 2 1 9. Pivot the SO-DIMM downward until it snaps into place. 10. Make sure that the card is firmly fixed in the slot and does not move easily. Chapter 5. Upgrading and replacing devices 51 - Lenovo R500 | Troubleshooting Guide - Page 60
11. Reinstall the palm rest. a. If your model has a touch pad or a fingerprint reader, attach the connector of the palm rest cable. b. Press the left and right top edges of the palm rest to fit it into place. 52 ThinkPad® R500 Service and Troubleshooting Guide - Lenovo R500 | Troubleshooting Guide - Page 61
for the palm rest. 12. Reinstall the battery. 13. Turn the computer over, and reconnect ThinkPad logo comes up, immediately press F1 to enter the BIOS Setup Utility. 3. The "Installed memory" item shows the total amount of memory installed in your computer. Chapter 5. Upgrading and replacing devices - Lenovo R500 | Troubleshooting Guide - Page 62
54 ThinkPad® R500 Service and Troubleshooting Guide - Lenovo R500 | Troubleshooting Guide - Page 63
-to-date information about ThinkPad computers and support. The address for the Personal Computing home page is http://www.lenovo.com/think. You can find support information for your ThinkPad computer at http://www.lenovo.com/think/support. Research this Web site to learn how to solve problems, find - Lenovo R500 | Troubleshooting Guide - Page 64
and Warranty Guide included with your Lenovo hardware product. If possible, be near your computer when you make your call in case the technical assistance representative needs to help you resolve a computer problem. Please ensure that you have downloaded the most current drivers and system updates - Lenovo R500 | Troubleshooting Guide - Page 65
. To determine whether your computer is eligible for International Warranty Service and to view a list of the countries where service is available, go to http://www.lenovo.com/think/support, click Warranty, and follow the instructions on the screen. Worldwide telephone list Phone numbers are - Lenovo R500 | Troubleshooting Guide - Page 66
+420-2-7213-1316 Denmark 7010-5150 (Warranty service and support) (Danish) Dominican Republic 1-866-434-2080 (Spanish) Ecuador 1-800-426911 (Spanish) Egypt +202-35362525 El Salvador 800-6264 (Spanish) Estonia +372 66 00 800 +372 6776793 58 ThinkPad® R500 Service and Troubleshooting Guide - Lenovo R500 | Troubleshooting Guide - Page 67
-140-3555 (English) 62-21-251-2955 (Bahasa Indonesian) 01-881-1444 (Warranty service and support) (English) Givat Shmuel Service Center: +972-3-531-3900 (Hebrew, English) +39-800-820094 (Warranty service and support) (Italian) ThinkPad Products Toll Free: 0120-20-5550 International: +81-46-266-4716 - Lenovo R500 | Troubleshooting Guide - Page 68
2493547 +9411 2493548 (English) 077-117-1040 (Warranty service and support) (Swedish) 0800-55-54-54 (Warranty service and support) (German, French, Italian) 886-2-8723-9799 or 0800-000-700 (Mandarin) 1-800-299-229 (Thai) 00800-4463-2041 (Turkish) 60 ThinkPad® R500 Service and Troubleshooting Guide - Lenovo R500 | Troubleshooting Guide - Page 69
Country or Region United Kingdom United States Uruguay Venezuela Vietnam Telephone Number 08705-500-900 (Standard warranty support) (English) 1-800-426-7378 (English) 000-411-005-6649 (Spanish) 0-800-100-2011 (Spanish) For northern area and Hanoi: 84-4-843-6675 For southern area - Lenovo R500 | Troubleshooting Guide - Page 70
62 ThinkPad® R500 Service and Troubleshooting Guide - Lenovo R500 | Troubleshooting Guide - Page 71
Information in the Safety and Warranty Guide included with your Lenovo hardware product. Machine Country or Region of Purchase Warranty period Type 2713 US, China, Hong Kong, Europe, Parts and Labor - 1 year Middle East and Africa Battery pack - 1 year 2714 US, New Zealand, Australia, India - Lenovo R500 | Troubleshooting Guide - Page 72
with shipping arranged by your Service Provider. You are responsible for disconnecting the product. A shipping container will be provided to you for you to return your product to a designated service center. A courier will pick up your product and 64 ThinkPad® R500 Service and Troubleshooting Guide - Lenovo R500 | Troubleshooting Guide - Page 73
the product as it sees fit. For Mail-in Service, the product will be returned to you at Lenovo's expense, unless your Service Provider specifies otherwise. 5. Product Exchange Service Under Product Exchange Service, Lenovo will ship a replacement product to your location. You are responsible for its - Lenovo R500 | Troubleshooting Guide - Page 74
66 ThinkPad® R500 Service and Troubleshooting Guide - Lenovo R500 | Troubleshooting Guide - Page 75
type of CRU are the AC adapter, the power cord, the battery, and the hard drive. In some products, such components as memory, wireless cards, notebook keyboards, and palm rests with fingerprint reader and touchpad may also be CRUs. v Optional-service CRUs: these CRUs are isolated parts within the - Lenovo R500 | Troubleshooting Guide - Page 76
find the replacement instructions. Service and Setup Troubleshooting Instructions Guide Access Help AC adapter Power cord for AC adapter TrackPoint cap Battery Storage device (HDD or SSD) Ultrabay device Memory Palm rest PCI Express Mini Card for wireless LAN Intel® Turbo Memory card Keyboard - Lenovo R500 | Troubleshooting Guide - Page 77
Start, right-click Computer (in Windows XP, My Computer); then from the pull down menu select Properties. Memory v Double data rate (DDR) 3 synchronous dynamic random access memory Storage device v 1.8-inch (46 mm) solid state drive or 2.5-inch (64 mm) hard disk drive Display The color display uses - Lenovo R500 | Troubleshooting Guide - Page 78
ft) Maximum temperature when operating under the unpressurized condition: 31.3°C (88°F) Note: When you charge the battery pack, its temperature must be at least 10°C (50°F). v Relative humidity: - Operating: 8% to 80% - Non-operating: 5% to 95% 70 ThinkPad® R500 Service and Troubleshooting Guide - Lenovo R500 | Troubleshooting Guide - Page 79
-240 V AC, 50 to 60 Hz Battery pack v Lithium-ion (Li-Ion) battery pack - Nominal voltage: 10.8 V DC - Capacity: 4.8 AH or 7.8 AH, depending on the model Battery life v For percentage of remaining battery power, see the Power Manager Gauge on the task bar. Appendix C. Features and Specifications 71 - Lenovo R500 | Troubleshooting Guide - Page 80
72 ThinkPad® R500 Service and Troubleshooting Guide - Lenovo R500 | Troubleshooting Guide - Page 81
services, or features discussed in this document in all countries. Consult your local Lenovo representative for information on the products and services currently available in your area. Any reference to a Lenovo product, program, or service change Lenovo product specifications or warranties. Nothing - Lenovo R500 | Troubleshooting Guide - Page 82
Lenovo may use or distribute any of the information you supply in any way it believes appropriate without incurring any obligation to you. Any references in this publication to non-Lenovo in accordance with the instructions, may cause harmful ThinkPad® R500 Service and Troubleshooting Guide - Lenovo R500 | Troubleshooting Guide - Page 83
connected. v Consult an authorized dealer or service representative for help. Properly shielded and grounded device may not cause harmful interference, and (2) this device must accept any interference received, including interference that may cause undesired operation. Responsible party: Lenovo - Lenovo R500 | Troubleshooting Guide - Page 84
environments to provide reasonable protection against interference with licensed communication devices. EU-EMC Directive (2004/108/EC) EN 55022 class nach Paragraf 5 des EMVG ist die Lenovo (Deutschland) GmbH, Gropiusplatz 10, D-70563 Stuttgart. 76 ThinkPad® R500 Service and Troubleshooting Guide - Lenovo R500 | Troubleshooting Guide - Page 85
substances. For additional WEEE information go to: http://www.lenovo.com/lenovo/environment. Notice for users in the U.S.A. California Perchlorate Information: Products containing CR (manganese dioxide) lithium coin cell batteries may contain perchlorate. Perchlorate Material - special handling may - Lenovo R500 | Troubleshooting Guide - Page 86
to make efficient use of energy an integral part of your day-to-day operations. To help in this endeavor, Lenovo has preset the following power-management features to take effect when your computer has been inactive for a specified length of time: 78 ThinkPad® R500 Service and Troubleshooting Guide - Lenovo R500 | Troubleshooting Guide - Page 87
Advanced power settings: - Turn off hard disks: After 15 minutes - Hibernate: Never To awaken your computer from Sleep (Windows Vista) or System Standby (Windows XP) mode, press Fn key on your keyboard. For more information about these settings, see your Windows Help and Support information system - Lenovo R500 | Troubleshooting Guide - Page 88
. 8. Click OK. Notice for Regulatory information The latest Regulatory Notice has been uploaded on the Web site. To refer to it, go to http://www.lenovo.com/think/support, click Troubleshooting, and then click User's guides and manuals. 80 ThinkPad® R500 Service and Troubleshooting Guide - Lenovo R500 | Troubleshooting Guide - Page 89
United States and other countries. Microsoft, Windows and Windows Vista are trademarks or registered trademarks of Microsoft Corporation in the United States, other countries, or both. Other company, product, or service names may be trademarks or service marks of others. © Copyright Lenovo 2008 81 - Lenovo R500 | Troubleshooting Guide - Page 90
82 ThinkPad® R500 Service and Troubleshooting Guide - Lenovo R500 | Troubleshooting Guide - Page 91
and Warranty Guide 1 service and help 55 service partition diagnosing the storage device 13 diagnosing the system 14 restoring the factory contents 36 Setup Instructions 1 sleep mode troubleshooting 25 solid state drive (SSD) 35 diagnosing 13 troubleshooting 31 upgrading 41 specifications hardware - Lenovo R500 | Troubleshooting Guide - Page 92
messages 21 fingerprint reader 33 keyboard 24 memory 23 password 23 pointing device 24 sleep or hibernation 25 startup problems 33 storage device 31 U upgrading devices 39 W warranty information 63 Web help 55 worldwide support telephone list 57 84 ThinkPad® R500 Service and Troubleshooting Guide - Lenovo R500 | Troubleshooting Guide - Page 93
- Lenovo R500 | Troubleshooting Guide - Page 94
Part Number: 44C9829 Printed in China (1P) P/N: 44C9829
-
 1
1 -
 2
2 -
 3
3 -
 4
4 -
 5
5 -
 6
6 -
 7
7 -
8
-
9
-
10
-
11
-
12
-
13
-
14
-
15
-
16
-
17
-
18
-
19
-
20
-
21
-
22
-
23
-
24
-
25
-
26
-
27
-
28
-
29
-
30
-
31
-
32
-
33
-
34
-
35
-
36
-
37
-
38
-
39
-
40
-
41
-
42
-
43
-
44
-
45
-
46
-
47
-
48
-
49
-
50
-
51
-
52
-
53
-
54
-
55
-
56
-
57
-
58
-
59
-
60
-
61
-
62
-
63
-
64
-
65
-
66
-
67
-
68
-
69
-
70
-
71
-
72
-
73
-
74
-
75
-
76
-
77
-
78
-
79
-
80
-
81
-
82
-
83
-
84
-
85
-
86
-
87
-
88
-
89
-
90
-
91
-
92
-
93
-
94
 |
 |

ThinkPad
®
R500
Service and Troubleshooting Guide