Lenovo ThinkCentre M58p Hardware Maintenance Manual - Page 568
Updating (flashing) BIOS from a disc, Recovering from a POST/BIOS update failure
 |
View all Lenovo ThinkCentre M58p manuals
Add to My Manuals
Save this manual to your list of manuals |
Page 568 highlights
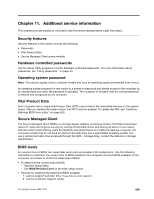
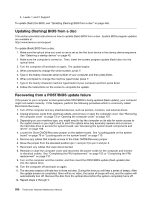
3. Levels 1 and 2 Support To update (flash) the BIOS, see "Updating (flashing) BIOS from a disc" on page 560. Updating (flashing) BIOS from a disc This section provides instructions on how to update (flash) BIOS from a disc. System BIOS program updates are available at: http://www.lenovo.com/support To update (flash) BIOS from a disc: 1. Make sure the optical drive you want to use is set as the first boot device in the startup device sequence. See "Selecting a startup device" on page 45. 2. Make sure the computer is turned on. Then, insert the system program update (flash) disc into the optical drive. 3. Turn the computer off and back on again. The update begins. 4. When prompted to change the serial number, press Y. 5. Type in the twenty character serial number of your computer and then press Enter. 6. When prompted to change the machine type/model, press Y. 7. Type in the twenty character machine type/model of your computer and then press Enter. 8. Follow the instructions on the screen to complete the update. Recovering from a POST/BIOS update failure If the power to your computer is interrupted while POST/BIOS is being updated (flash update), your computer might not restart correctly. If this happens, perform the following procedure which is commonly called Boot-block Recovery. 1. Turn off the computer and any attached devices, such as printers, monitors, and external drives. 2. Unplug all power cords from electrical outlets, and remove or open the computer cover. See "Removing the computer cover" on page 73 or "Opening the computer cover" on page 107. 3. Depending on your machine type, you might need to lay the computer on its side for easier access to the system board or you might need to pivot the optical drive bay assembly upward and or remove the hard disk drive to access the system board, see "Accessing the system board components and drives" on page 108. 4. Locate the Clear CMOS/Recovery jumper on the system board. See "Locating parts on the system board" on page 76 or "Locating parts on the system board" on page 110. 5. Remove any cables that impede access to the Clear CMOS/Recovery jumper. 6. Move the jumper from the standard position (pin 1 and pin 2) to pin 2 and pin 3. 7. Reconnect any cables that were disconnected. 8. Reinstall or close the computer cover and reconnect the power cords for the computer and monitor to electrical outlets. See "Completing the FRU replacement" on page 103 or "Completing the FRU replacement" on page 131. 9. Turn on the computer and the monitor, and then insert the POST/BIOS update (flash update) disc into the optical drive. 10. Turn the computer off and back on again. 11. The recovery session will take two to three minutes. During this time you will hear a series of beeps. After the update session is completed, there will be no video, the series of beeps will end, and the system will automatically turn off. Remove the disc from the optical drive before the system completely turns off. 12. Repeat steps 2 through 5. 560 ThinkCentre Hardware Maintenance Manual
-
 1
1 -
2
-
3
-
4
-
5
-
6
-
7
-
8
-
9
-
10
-
11
-
12
-
13
-
14
-
15
-
16
-
17
-
18
-
19
-
20
-
21
-
22
-
23
-
24
-
25
-
26
-
27
-
28
-
29
-
30
-
31
-
32
-
33
-
34
-
35
-
36
-
37
-
38
-
39
-
40
-
41
-
42
-
43
-
44
-
45
-
46
-
47
-
48
-
49
-
50
-
51
-
52
-
53
-
54
-
55
-
56
-
57
-
58
-
59
-
60
-
61
-
62
-
63
-
64
-
65
-
66
-
67
-
68
-
69
-
70
-
71
-
72
-
73
-
74
-
75
-
76
-
77
-
78
-
79
-
80
-
81
-
82
-
83
-
84
-
85
-
86
-
87
-
88
-
89
-
90
-
91
-
92
-
93
-
94
-
95
-
96
-
97
-
98
-
99
-
100
-
101
-
102
-
103
-
104
-
105
-
106
-
107
-
108
-
109
-
110
-
111
-
112
-
113
-
114
-
115
-
116
-
117
-
118
-
119
-
120
-
121
-
122
-
123
-
124
-
125
-
126
-
127
-
128
-
129
-
130
-
131
-
132
-
133
-
134
-
135
-
136
-
137
-
138
-
139
-
140
-
141
-
142
-
143
-
144
-
145
-
146
-
147
-
148
-
149
-
150
-
151
-
152
-
153
-
154
-
155
-
156
-
157
-
158
-
159
-
160
-
161
-
162
-
163
-
164
-
165
-
166
-
167
-
168
-
169
-
170
-
171
-
172
-
173
-
174
-
175
-
176
-
177
-
178
-
179
-
180
-
181
-
182
-
183
-
184
-
185
-
186
-
187
-
188
-
189
-
190
-
191
-
192
-
193
-
194
-
195
-
196
-
197
-
198
-
199
-
200
-
201
-
202
-
203
-
204
-
205
-
206
-
207
-
208
-
209
-
210
-
211
-
212
-
213
-
214
-
215
-
216
-
217
-
218
-
219
-
220
-
221
-
222
-
223
-
224
-
225
-
226
-
227
-
228
-
229
-
230
-
231
-
232
-
233
-
234
-
235
-
236
-
237
-
238
-
239
-
240
-
241
-
242
-
243
-
244
-
245
-
246
-
247
-
248
-
249
-
250
-
251
-
252
-
253
-
254
-
255
-
256
-
257
-
258
-
259
-
260
-
261
-
262
-
263
-
264
-
265
-
266
-
267
-
268
-
269
-
270
-
271
-
272
-
273
-
274
-
275
-
276
-
277
-
278
-
279
-
280
-
281
-
282
-
283
-
284
-
285
-
286
-
287
-
288
-
289
-
290
-
291
-
292
-
293
-
294
-
295
-
296
-
297
-
298
-
299
-
300
-
301
-
302
-
303
-
304
-
305
-
306
-
307
-
308
-
309
-
310
-
311
-
312
-
313
-
314
-
315
-
316
-
317
-
318
-
319
-
320
-
321
-
322
-
323
-
324
-
325
-
326
-
327
-
328
-
329
-
330
-
331
-
332
-
333
-
334
-
335
-
336
-
337
-
338
-
339
-
340
-
341
-
342
-
343
-
344
-
345
-
346
-
347
-
348
-
349
-
350
-
351
-
352
-
353
-
354
-
355
-
356
-
357
-
358
-
359
-
360
-
361
-
362
-
363
-
364
-
365
-
366
-
367
-
368
-
369
-
370
-
371
-
372
-
373
-
374
-
375
-
376
-
377
-
378
-
379
-
380
-
381
-
382
-
383
-
384
-
385
-
386
-
387
-
388
-
389
-
390
-
391
-
392
-
393
-
394
-
395
-
396
-
397
-
398
-
399
-
400
-
401
-
402
-
403
-
404
-
405
-
406
-
407
-
408
-
409
-
410
-
411
-
412
-
413
-
414
-
415
-
416
-
417
-
418
-
419
-
420
-
421
-
422
-
423
-
424
-
425
-
426
-
427
-
428
-
429
-
430
-
431
-
432
-
433
-
434
-
435
-
436
-
437
-
438
-
439
-
440
-
441
-
442
-
443
-
444
-
445
-
446
-
447
-
448
-
449
-
450
-
451
-
452
-
453
-
454
-
455
-
456
-
457
-
458
-
459
-
460
-
461
-
462
-
463
-
464
-
465
-
466
-
467
-
468
-
469
-
470
-
471
-
472
-
473
-
474
-
475
-
476
-
477
-
478
-
479
-
480
-
481
-
482
-
483
-
484
-
485
-
486
-
487
-
488
-
489
-
490
-
491
-
492
-
493
-
494
-
495
-
496
-
497
-
498
-
499
-
500
-
501
-
502
-
503
-
504
-
505
-
506
-
507
-
508
-
509
-
510
-
511
-
512
-
513
-
514
-
515
-
516
-
517
-
518
-
519
-
520
-
521
-
522
-
523
-
524
-
525
-
526
-
527
-
528
-
529
-
530
-
531
-
532
-
533
-
534
-
535
-
536
-
537
-
538
-
539
-
540
-
541
-
542
-
543
-
544
-
545
-
546
-
547
-
548
-
549
-
550
-
551
-
552
-
553
-
554
-
555
-
556
-
557
-
558
-
559
-
560
-
561
-
562
-
 563
563 -
 564
564 -
 565
565 -
 566
566 -
 567
567 -
 568
568 -
 569
569 -
 570
570 -
 571
571 -
 572
572
 |
 |