Lenovo ThinkPad A31p ThinkPad A30/p, A31/p Hardware Maintenance Manual (Septem - Page 130
Installation of clear plate, If the computer has the Bluetooth feature, you also
 |
View all Lenovo ThinkPad A31p manuals
Add to My Manuals
Save this manual to your list of manuals |
Page 130 highlights
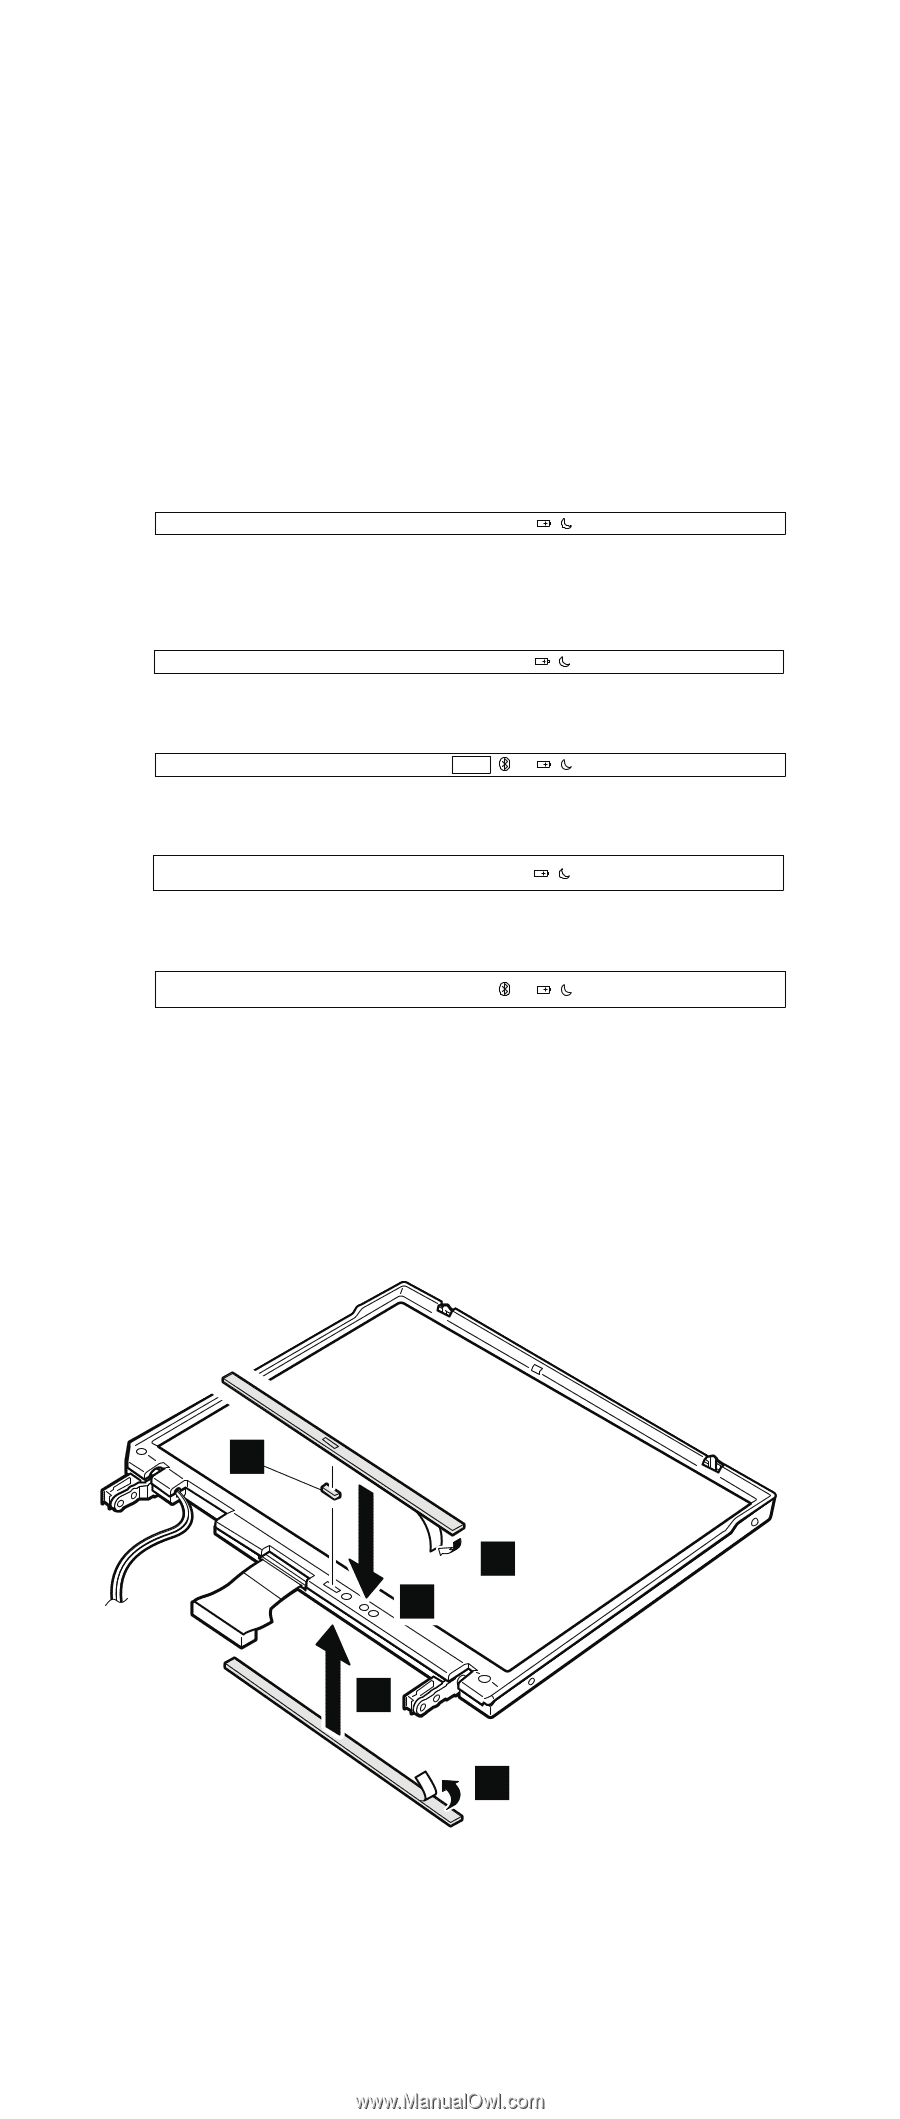
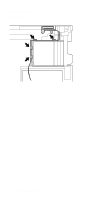
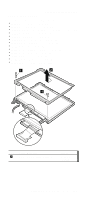
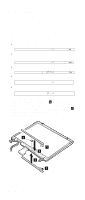
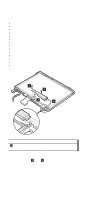
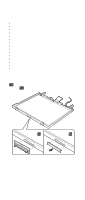
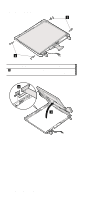
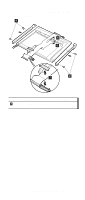
Removing and replacing a FRU Installation of clear plate When the front bezel is replaced to with a new one, clear plate set must also be installed. The procedure is as follows: 1. There are several clear plates in the clear plate set. Confirm the model name, such as "A30" first, and pick the plate suitable for the computer you are servicing. Check the shape of each plate; there are plates for the front bezel and the LCD rear cover, as follows: v Clear plate A3*, for the front bezel A30 v Clear plate A3*p without Bluetooth feature, for the front bezel A30p v Clear plate with Bluetooth feature, for the front bezel TM A30p v Clear plate, rear cover, without Bluetooth feature v Clear plate, rear cover, with Bluetooth feature TM 2. If the computer has the Bluetooth feature, you also need to install Bluetooth button a , which is contained in the FRU. It is attached to the front bezel side only. 3. Strip off the protection sheet of the insulation tape 1 of the clear plate, and then stick the plate on the front bezel and the rear cover. a 1 2 2 1 126 MT 2652/2653/2654
-
 1
1 -
2
-
3
-
4
-
5
-
6
-
7
-
8
-
9
-
10
-
11
-
12
-
13
-
14
-
15
-
16
-
17
-
18
-
19
-
20
-
21
-
22
-
23
-
24
-
25
-
26
-
27
-
28
-
29
-
30
-
31
-
32
-
33
-
34
-
35
-
36
-
37
-
38
-
39
-
40
-
41
-
42
-
43
-
44
-
45
-
46
-
47
-
48
-
49
-
50
-
51
-
52
-
53
-
54
-
55
-
56
-
57
-
58
-
59
-
60
-
61
-
62
-
63
-
64
-
65
-
66
-
67
-
68
-
69
-
70
-
71
-
72
-
73
-
74
-
75
-
76
-
77
-
78
-
79
-
80
-
81
-
82
-
83
-
84
-
85
-
86
-
87
-
88
-
89
-
90
-
91
-
92
-
93
-
94
-
95
-
96
-
97
-
98
-
99
-
100
-
101
-
102
-
103
-
104
-
105
-
106
-
107
-
108
-
109
-
110
-
111
-
112
-
113
-
114
-
115
-
116
-
117
-
118
-
119
-
120
-
121
-
122
-
123
-
124
-
 125
125 -
 126
126 -
 127
127 -
 128
128 -
 129
129 -
 130
130 -
 131
131 -
 132
132 -
 133
133 -
 134
134 -
 135
135 -
136
-
137
-
138
-
139
-
140
-
141
-
142
-
143
-
144
-
145
-
146
-
147
-
148
-
149
-
150
-
151
-
152
-
153
-
154
-
155
-
156
-
157
-
158
-
159
-
160
-
161
-
162
-
163
-
164
-
165
-
166
-
167
-
168
-
169
-
170
-
171
-
172
-
173
-
174
-
175
-
176
-
177
-
178
-
179
-
180
-
181
-
182
-
183
-
184
-
185
-
186
-
187
-
188
-
189
-
190
-
191
-
192
 |
 |