Lenovo ThinkPad A31p ThinkPad A30/p, A31/p Hardware Maintenance Manual (Septem - Page 41
Diagnostics, Interactive Tests, Notes, Keyboard, Video Adapter, ZIP Drive, LS-120/240 Drive - memory
 |
View all Lenovo ThinkPad A31p manuals
Add to My Manuals
Save this manual to your list of manuals |
Page 41 highlights
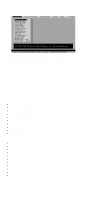
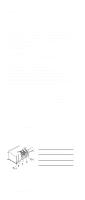
Checkout guide If an error code appears, go to "Symptom-to-FRU index" on page 53. On the first screen, select the model and press Enter. Follow the instructions on the screen. 2. The main panel of PC-Doctor appears. 3. Select Diagnostics with the arrow keys, and press Enter. A pull-down menu appears. (Its exact form depends on the model.) The options on the test menu are as follows: Diagnostics v Run Normal Test v Run Quick Test v CPU/Coprocessor v Systemboard v Video Adapter v Serial Ports v Parallel Ports v Fixed Disks v Diskette Drives v Other Devices v ZIP Drive v LS-120/240 Drive v Communication v Wireless LAN v Memory Test - Full v Memory Test - Quick Interactive Tests v Keyboard v Video v Internal Speaker v Mouse v Diskette v System Load v CD-ROM/DVD Test v Actiontec Wireless Radio Notes: v In the Keyboard test in Interactive Tests, the Fn key is scanned only once. Each key should be held down for at least 2 seconds; otherwise, it cannot be sensed. v Video Adapter test supports only the LCD display on the ThinkPad computer. Before running PC-Doctor DOS, detach the external Monitor. v To test ZIP Drive or LS-120/240 Drive, each media is needed to be inserted before start testing. v To test Digital Signature Chip, the chip must be enabled and initialized. v When Legacy Floppy Drives is enabled in the IBM BIOS Setup Utility, Diskette Drives test is activated even if no legacy diskette drive is attached to the ThinkPad computer. General descriptions 37
-
 1
1 -
2
-
3
-
4
-
5
-
6
-
7
-
8
-
9
-
10
-
11
-
12
-
13
-
14
-
15
-
16
-
17
-
18
-
19
-
20
-
21
-
22
-
23
-
24
-
25
-
26
-
27
-
28
-
29
-
30
-
31
-
32
-
33
-
34
-
35
-
 36
36 -
 37
37 -
 38
38 -
 39
39 -
 40
40 -
 41
41 -
 42
42 -
 43
43 -
 44
44 -
 45
45 -
 46
46 -
47
-
48
-
49
-
50
-
51
-
52
-
53
-
54
-
55
-
56
-
57
-
58
-
59
-
60
-
61
-
62
-
63
-
64
-
65
-
66
-
67
-
68
-
69
-
70
-
71
-
72
-
73
-
74
-
75
-
76
-
77
-
78
-
79
-
80
-
81
-
82
-
83
-
84
-
85
-
86
-
87
-
88
-
89
-
90
-
91
-
92
-
93
-
94
-
95
-
96
-
97
-
98
-
99
-
100
-
101
-
102
-
103
-
104
-
105
-
106
-
107
-
108
-
109
-
110
-
111
-
112
-
113
-
114
-
115
-
116
-
117
-
118
-
119
-
120
-
121
-
122
-
123
-
124
-
125
-
126
-
127
-
128
-
129
-
130
-
131
-
132
-
133
-
134
-
135
-
136
-
137
-
138
-
139
-
140
-
141
-
142
-
143
-
144
-
145
-
146
-
147
-
148
-
149
-
150
-
151
-
152
-
153
-
154
-
155
-
156
-
157
-
158
-
159
-
160
-
161
-
162
-
163
-
164
-
165
-
166
-
167
-
168
-
169
-
170
-
171
-
172
-
173
-
174
-
175
-
176
-
177
-
178
-
179
-
180
-
181
-
182
-
183
-
184
-
185
-
186
-
187
-
188
-
189
-
190
-
191
-
192
 |
 |