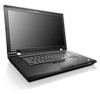
Lenovo ThinkPad L520 (English) User Guide - Page 100
Creating recovery media, Office or Microsoft Works.
 |
View all Lenovo ThinkPad L520 manuals
Add to My Manuals
Save this manual to your list of manuals |
Page 100 highlights
Creating recovery media This section provides instructions on how to create recovery media on the Windows 7 operating system. Note: On the Windows 7 operating system, you can create recovery media using discs or external USB storage devices. On the Windows Vista and Windows XP operating systems, you can create recovery media using only discs, so this operation is also called "creating Product Recovery discs". • To create recovery media on the Windows 7 operating system, click Start ➙ All Programs ➙ Lenovo ThinkVantage Tools ➙ Factory Recovery Disks. Then, follow the instructions on the screen. • To create Product Recovery discs on the Windows Vista operating system, click Start ➙ All Programs ➙ ThinkVantage ➙ Create Product Recovery Media. Then, follow the instructions on the screen. • To create Product Recovery discs on the Windows XP operating system, click Start ➙ All Programs ➙ ThinkVantage ➙ Create Recovery Media. Then, follow the instructions on the screen. Using recovery media This section provides instructions on how to use recovery media on different operating systems. • On the Windows 7 operating system and the Windows Vista operating system, you can use recovery media to restore the computer to the factory default settings only. You can use recovery media to put the computer in an operational state after all other methods of recovery have failed. Attention: When you use recovery media to restore the computer to the factory default settings, all the files currently on the hard disk drive will be deleted and replaced by the factory default settings. To use recovery media on the Windows 7 operating system or the Windows Vista operating system, do the following: 1. Depending on the type of your recovery media, connect the boot medium (memory key or other USB storage device) to the computer, or insert the boot disc into the optical drive. 2. Repeatedly press and release the F12 key when turning on the computer. When the Startup Device Menu opens, release the F12 key. 3. Select the desired startup device and press Enter. The restore process begins. 4. Follow the instructions on the screen to complete the operation. Notes: 1. After restoring your computer to the factory default settings, you might have to reinstall device drivers for some devices. See "Reinstalling preinstalled applications and device drivers" on page 86. 2. Some computers come with Microsoft Office or Microsoft Works preinstalled. If you need to recover or reinstall your Microsoft Office or Microsoft Works applications, you must use the Microsoft Office CD or Microsoft Works CD. These discs are provided only with computers preinstalled with Microsoft Office or Microsoft Works. • On the Windows XP operating system, you can use Product Recovery discs to restore your computer to the factory default settings, perform a custom factory recovery, or perform other rescue and recovery operations such as rescuing individual files. You will be given the option to enter the Rescue and Recovery workspace and choose from a variety of recovery operations. Attention: When you use Product Recovery discs to restore the computer to the factory default settings, all the files currently on the hard disk drive will be deleted and replaced by the factory default settings. During the restore process, you will be given the option to save one or more files currently on the hard disk drive to other media before the data is deleted. 82 User Guide
-
 1
1 -
2
-
3
-
4
-
5
-
6
-
7
-
8
-
9
-
10
-
11
-
12
-
13
-
14
-
15
-
16
-
17
-
18
-
19
-
20
-
21
-
22
-
23
-
24
-
25
-
26
-
27
-
28
-
29
-
30
-
31
-
32
-
33
-
34
-
35
-
36
-
37
-
38
-
39
-
40
-
41
-
42
-
43
-
44
-
45
-
46
-
47
-
48
-
49
-
50
-
51
-
52
-
53
-
54
-
55
-
56
-
57
-
58
-
59
-
60
-
61
-
62
-
63
-
64
-
65
-
66
-
67
-
68
-
69
-
70
-
71
-
72
-
73
-
74
-
75
-
76
-
77
-
78
-
79
-
80
-
81
-
82
-
83
-
84
-
85
-
86
-
87
-
88
-
89
-
90
-
91
-
92
-
93
-
94
-
 95
95 -
 96
96 -
 97
97 -
 98
98 -
 99
99 -
 100
100 -
 101
101 -
 102
102 -
 103
103 -
 104
104 -
 105
105 -
106
-
107
-
108
-
109
-
110
-
111
-
112
-
113
-
114
-
115
-
116
-
117
-
118
-
119
-
120
-
121
-
122
-
123
-
124
-
125
-
126
-
127
-
128
-
129
-
130
-
131
-
132
-
133
-
134
-
135
-
136
-
137
-
138
-
139
-
140
-
141
-
142
-
143
-
144
-
145
-
146
-
147
-
148
-
149
-
150
-
151
-
152
-
153
-
154
-
155
-
156
-
157
-
158
-
159
-
160
-
161
-
162
-
163
-
164
-
165
-
166
-
167
-
168
-
169
-
170
-
171
-
172
-
173
-
174
-
175
-
176
-
177
-
178
-
179
-
180
-
181
-
182
-
183
-
184
-
185
-
186
-
187
-
188
-
189
-
190
-
191
-
192
-
193
-
194
-
195
-
196
-
197
-
198
-
199
-
200
-
201
-
202
-
203
-
204
-
205
-
206
-
207
-
208
-
209
-
210
-
211
-
212
-
213
-
214
-
215
-
216
-
217
-
218
-
219
-
220
-
221
-
222
-
223
-
224
-
225
 |
 |
