Lenovo ThinkPad L520 (English) User Guide - Page 110
the removed memory for future use., Find the notch on the contact edge side of the SO-DIMM.
 |
View all Lenovo ThinkPad L520 manuals
Add to My Manuals
Save this manual to your list of manuals |
Page 110 highlights
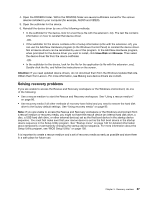
4. Loosen the screws, and then remove the cover. Attention: Do not touch any exposed parts other than those referred to in this procedure. Unnecessary contacts with the electric and electronic components might cause your computer to malfunction. 5. If the two SO-DIMMs are already in the memory slots, release the latches on both edges of the socket at the same time, and then remove the SO-DIMM to make room for the new one. Be sure to save the removed memory for future use. 6. Find the notch on the contact edge side of the SO-DIMM. Attention: To avoid damaging the SO-DIMM, do not touch its contact edge. 92 User Guide
-
 1
1 -
2
-
3
-
4
-
5
-
6
-
7
-
8
-
9
-
10
-
11
-
12
-
13
-
14
-
15
-
16
-
17
-
18
-
19
-
20
-
21
-
22
-
23
-
24
-
25
-
26
-
27
-
28
-
29
-
30
-
31
-
32
-
33
-
34
-
35
-
36
-
37
-
38
-
39
-
40
-
41
-
42
-
43
-
44
-
45
-
46
-
47
-
48
-
49
-
50
-
51
-
52
-
53
-
54
-
55
-
56
-
57
-
58
-
59
-
60
-
61
-
62
-
63
-
64
-
65
-
66
-
67
-
68
-
69
-
70
-
71
-
72
-
73
-
74
-
75
-
76
-
77
-
78
-
79
-
80
-
81
-
82
-
83
-
84
-
85
-
86
-
87
-
88
-
89
-
90
-
91
-
92
-
93
-
94
-
95
-
96
-
97
-
98
-
99
-
100
-
101
-
102
-
103
-
104
-
 105
105 -
 106
106 -
 107
107 -
 108
108 -
 109
109 -
 110
110 -
 111
111 -
 112
112 -
 113
113 -
 114
114 -
 115
115 -
116
-
117
-
118
-
119
-
120
-
121
-
122
-
123
-
124
-
125
-
126
-
127
-
128
-
129
-
130
-
131
-
132
-
133
-
134
-
135
-
136
-
137
-
138
-
139
-
140
-
141
-
142
-
143
-
144
-
145
-
146
-
147
-
148
-
149
-
150
-
151
-
152
-
153
-
154
-
155
-
156
-
157
-
158
-
159
-
160
-
161
-
162
-
163
-
164
-
165
-
166
-
167
-
168
-
169
-
170
-
171
-
172
-
173
-
174
-
175
-
176
-
177
-
178
-
179
-
180
-
181
-
182
-
183
-
184
-
185
-
186
-
187
-
188
-
189
-
190
-
191
-
192
-
193
-
194
-
195
-
196
-
197
-
198
-
199
-
200
-
201
-
202
-
203
-
204
-
205
-
206
-
207
-
208
-
209
-
210
-
211
-
212
-
213
-
214
-
215
-
216
-
217
-
218
-
219
-
220
-
221
-
222
-
223
-
224
-
225
 |
 |
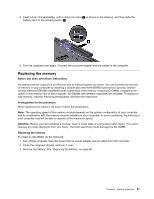
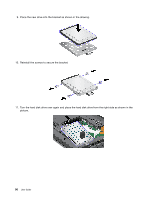
4. Loosen the screws, and then remove the cover.
Attention:
Do not touch any exposed parts other than those referred to in this procedure. Unnecessary
contacts with the electric and electronic components might cause your computer to malfunction.
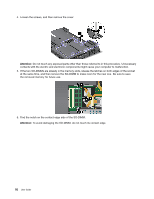
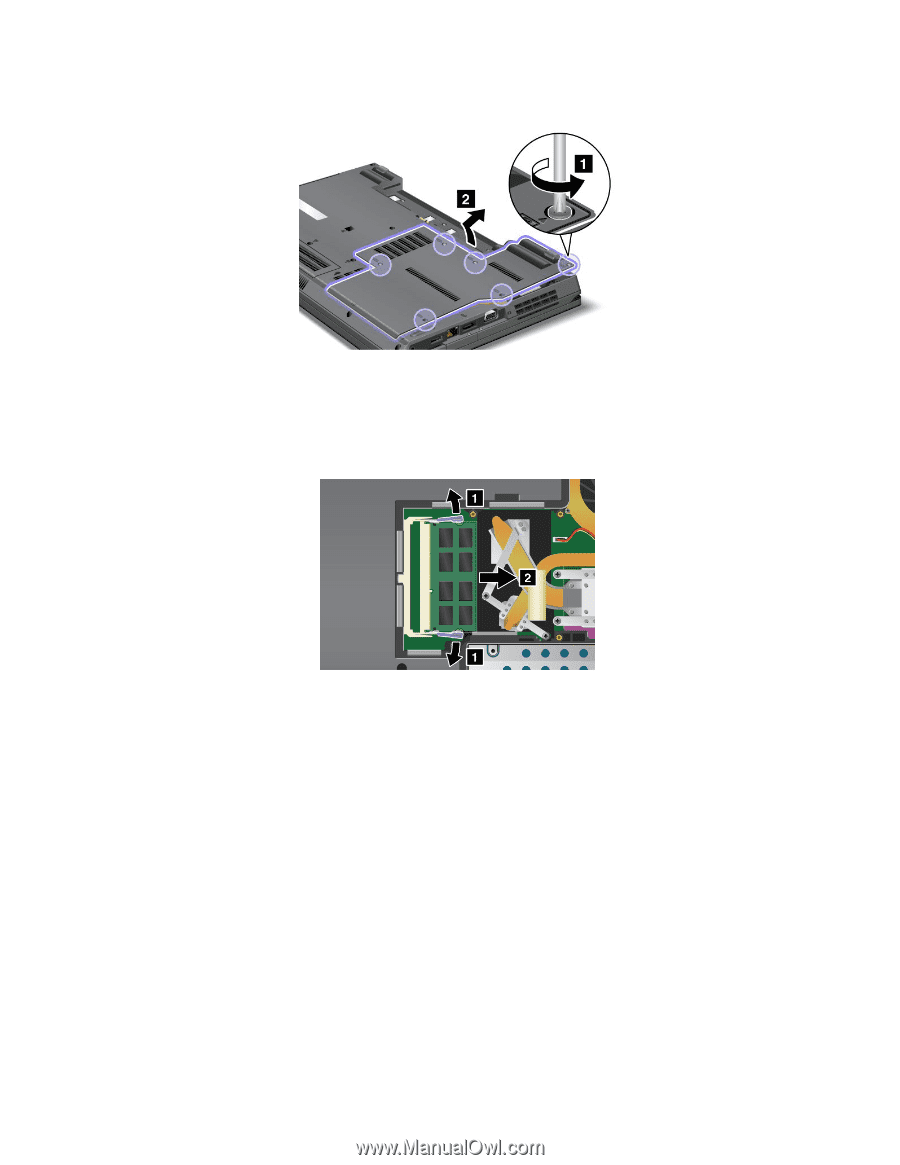
5. If the two SO-DIMMs are already in the memory slots, release the latches on both edges of the socket
at the same time, and then remove the SO-DIMM to make room for the new one. Be sure to save
the removed memory for future use.
6. Find the notch on the contact edge side of the SO-DIMM.
Attention:
To avoid damaging the SO-DIMM, do not touch its contact edge.
92
User Guide