Lenovo ThinkPad L520 (English) User Guide - Page 120
the mSATA solid state drive until you can snap it into place. Secure the mSATA solid state drive
 |
View all Lenovo ThinkPad L520 manuals
Add to My Manuals
Save this manual to your list of manuals |
Page 120 highlights
2. Close the computer display, and turn the computer over. 3. Remove the battery. See "Replacing the battery" on page 89. 4. Loosen the screw on the slot cover and remove the slot cover. 5. Remove the screw and the mSATA solid state drive pops up. Remove the mSATA solid state drive. 6. Align the contact edge of the new mSATA solid state drive with the corresponding socket and pivot the mSATA solid state drive until you can snap it into place. Secure the mSATA solid state drive with the screw. 102 User Guide
-
 1
1 -
2
-
3
-
4
-
5
-
6
-
7
-
8
-
9
-
10
-
11
-
12
-
13
-
14
-
15
-
16
-
17
-
18
-
19
-
20
-
21
-
22
-
23
-
24
-
25
-
26
-
27
-
28
-
29
-
30
-
31
-
32
-
33
-
34
-
35
-
36
-
37
-
38
-
39
-
40
-
41
-
42
-
43
-
44
-
45
-
46
-
47
-
48
-
49
-
50
-
51
-
52
-
53
-
54
-
55
-
56
-
57
-
58
-
59
-
60
-
61
-
62
-
63
-
64
-
65
-
66
-
67
-
68
-
69
-
70
-
71
-
72
-
73
-
74
-
75
-
76
-
77
-
78
-
79
-
80
-
81
-
82
-
83
-
84
-
85
-
86
-
87
-
88
-
89
-
90
-
91
-
92
-
93
-
94
-
95
-
96
-
97
-
98
-
99
-
100
-
101
-
102
-
103
-
104
-
105
-
106
-
107
-
108
-
109
-
110
-
111
-
112
-
113
-
114
-
 115
115 -
 116
116 -
 117
117 -
 118
118 -
 119
119 -
 120
120 -
 121
121 -
 122
122 -
 123
123 -
 124
124 -
 125
125 -
126
-
127
-
128
-
129
-
130
-
131
-
132
-
133
-
134
-
135
-
136
-
137
-
138
-
139
-
140
-
141
-
142
-
143
-
144
-
145
-
146
-
147
-
148
-
149
-
150
-
151
-
152
-
153
-
154
-
155
-
156
-
157
-
158
-
159
-
160
-
161
-
162
-
163
-
164
-
165
-
166
-
167
-
168
-
169
-
170
-
171
-
172
-
173
-
174
-
175
-
176
-
177
-
178
-
179
-
180
-
181
-
182
-
183
-
184
-
185
-
186
-
187
-
188
-
189
-
190
-
191
-
192
-
193
-
194
-
195
-
196
-
197
-
198
-
199
-
200
-
201
-
202
-
203
-
204
-
205
-
206
-
207
-
208
-
209
-
210
-
211
-
212
-
213
-
214
-
215
-
216
-
217
-
218
-
219
-
220
-
221
-
222
-
223
-
224
-
225
 |
 |
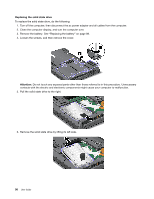
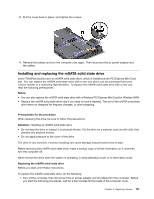
2. Close the computer display, and turn the computer over.
3. Remove the battery. See “Replacing the battery” on page 89.
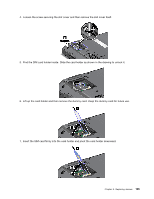
4. Loosen the screw on the slot cover and remove the slot cover.
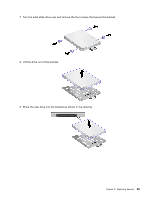
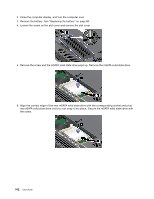
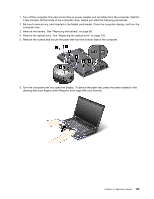
5. Remove the screw and the mSATA solid state drive pops up. Remove the mSATA solid state drive.
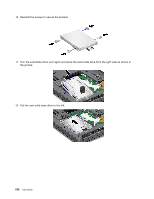
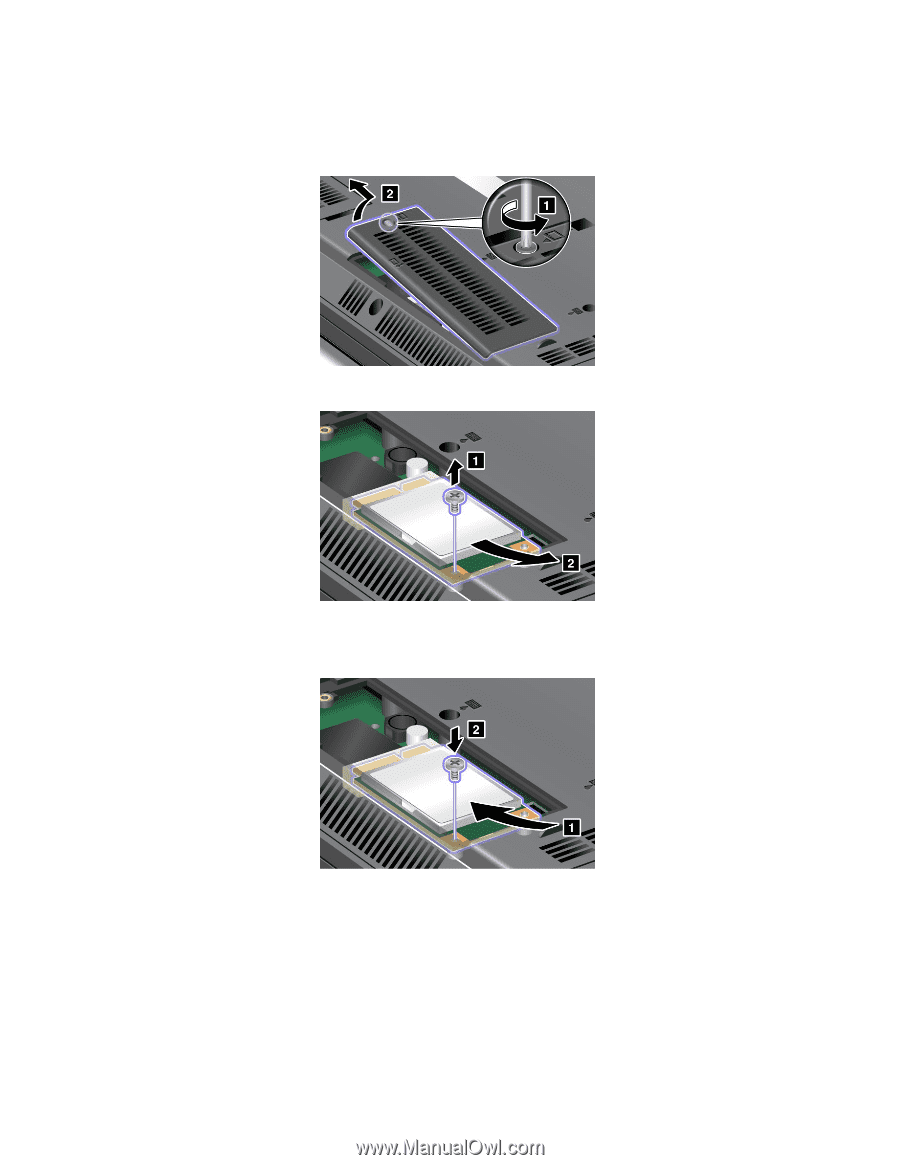
6. Align the contact edge of the new mSATA solid state drive with the corresponding socket and pivot
the mSATA solid state drive until you can snap it into place. Secure the mSATA solid state drive with
the screw.
102
User Guide