Lenovo ThinkPad L520 (English) User Guide - Page 153
Installing device drivers, Installing driver for the 4-in-1 Media card reader
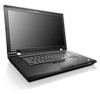 |
View all Lenovo ThinkPad L520 manuals
Add to My Manuals
Save this manual to your list of manuals |
Page 153 highlights
8. Complete the Windows XP Service Pack 2 installation. 9. Install Windows XP Service Pack 3. You can install the Windows XP Service Pack 3 using the Windows XP Service Pack 3 Installation CD or download it from either Microsoft Download Center or Microsoft Windows update Web site. 10. Go to C:\DRIVERS\WIN\IRST\PREPARE\PREPARE and double-click install.cmd to run Intel Rapid Storage Manager Driver. Note: If you can not find the Intel Rapid Storage Manager Driver, you can download it from the Lenovo Web site: http://www.lenovo.com/support/site.wss/document.do?sitestyle=lenovo&lndocid=tpad-matrix. 11. Turn the computer off and then on again. 12. Start the BIOS Setup Utility menu. 13. Select Config. 14. Select Serial ATA (SATA). 15. Select AHCI. 16. Start Windows XP. The Welcome to the Found New Hardware Wizard appears. 17. Click No, not this time, and then click Next. 18. Select Install from a list or specific location (Advanced), and then click Next. 19. Select Search for the best driver in these locations. Then select Include this location in the search:, specify the path, C:\DRIVERS\WIN\IRST\PREPARE, and click Next. The Completing the Found New Hardware Wizard appears. 20. Click Finish. 21. When the System Settings Change window appears, click Yes. The computer restarts. 22. In the device listing on the Device Manager window, a yellow mark may appear at the left side of the Universal Serial Bus (USB) controller. If it does appear, open its properties and click the Reinstall driver button to install the USB2.0 driver. 23. Restore C:\SWTOOLS from the backup copy you made before starting the installation. 24. Apply the PCMCIA Power Policy Registry Patch. To do this, go to C:\SWTOOLS\OSFIXES\PCMCIAPW\, double-click install.bat, and then follow the instructions that appear on the screen. 25. Installing Intel Chipset Support for Windows 2000/XP/Vista/7. See "Installing Intel Chipset Support for Windows 2000/XP/Vista/7" on page 137. 26. Install device drivers. See "Installing other device drivers" on page 137. Note: If you remove the hard disk drive from the computer with a single-core processor and install it on a computer with a dual-core processor, you can get access to the hard disk drive. The opposite, however, is not true: If you remove the hard disk drive from a computer with a dual-core processor and install it on a computer with a single-core processor, you cannot get access to the hard disk drive. Installing device drivers To install device drivers, go to the web site http://www.lenovo.com/support. Installing driver for the 4-in-1 Media card reader To use the 4-in-1 Media card reader, you need to download and install the Realtek PCIE Card Reader Driver for Windows XP/Vista x86/x64. To download it, go to Lenovo Web site at: http://www.lenovo.com/support/site.wss/document.do?sitestyle=lenovo&lndocid=tpad-matrix To install the driver, do as follows: Chapter 8. Advanced configuration 135
-
 1
1 -
2
-
3
-
4
-
5
-
6
-
7
-
8
-
9
-
10
-
11
-
12
-
13
-
14
-
15
-
16
-
17
-
18
-
19
-
20
-
21
-
22
-
23
-
24
-
25
-
26
-
27
-
28
-
29
-
30
-
31
-
32
-
33
-
34
-
35
-
36
-
37
-
38
-
39
-
40
-
41
-
42
-
43
-
44
-
45
-
46
-
47
-
48
-
49
-
50
-
51
-
52
-
53
-
54
-
55
-
56
-
57
-
58
-
59
-
60
-
61
-
62
-
63
-
64
-
65
-
66
-
67
-
68
-
69
-
70
-
71
-
72
-
73
-
74
-
75
-
76
-
77
-
78
-
79
-
80
-
81
-
82
-
83
-
84
-
85
-
86
-
87
-
88
-
89
-
90
-
91
-
92
-
93
-
94
-
95
-
96
-
97
-
98
-
99
-
100
-
101
-
102
-
103
-
104
-
105
-
106
-
107
-
108
-
109
-
110
-
111
-
112
-
113
-
114
-
115
-
116
-
117
-
118
-
119
-
120
-
121
-
122
-
123
-
124
-
125
-
126
-
127
-
128
-
129
-
130
-
131
-
132
-
133
-
134
-
135
-
136
-
137
-
138
-
139
-
140
-
141
-
142
-
143
-
144
-
145
-
146
-
147
-
 148
148 -
 149
149 -
 150
150 -
 151
151 -
 152
152 -
 153
153 -
 154
154 -
 155
155 -
 156
156 -
 157
157 -
 158
158 -
159
-
160
-
161
-
162
-
163
-
164
-
165
-
166
-
167
-
168
-
169
-
170
-
171
-
172
-
173
-
174
-
175
-
176
-
177
-
178
-
179
-
180
-
181
-
182
-
183
-
184
-
185
-
186
-
187
-
188
-
189
-
190
-
191
-
192
-
193
-
194
-
195
-
196
-
197
-
198
-
199
-
200
-
201
-
202
-
203
-
204
-
205
-
206
-
207
-
208
-
209
-
210
-
211
-
212
-
213
-
214
-
215
-
216
-
217
-
218
-
219
-
220
-
221
-
222
-
223
-
224
-
225
 |
 |