Lenovo ThinkPad L520 (English) User Guide - Page 154
Installing ThinkPad Monitor File for Windows 2000/XP/Vista/7
 |
View all Lenovo ThinkPad L520 manuals
Add to My Manuals
Save this manual to your list of manuals |
Page 154 highlights
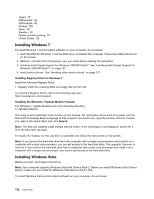
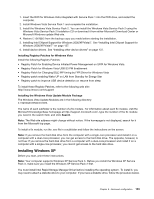
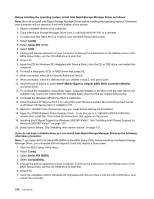
• Click Start ➙ All Programs ➙ Accessories ➙ Command Prompt. The DOS prompt window appears. • Type setup.exe at the DOS prompt. The Welcome to the Device Driver Installation Wizard for the Realtek Media Driver opens. • Click Next. If the device driver is already installed, click No. Otherwise, follow the instructions on the screen. Installing ThinkPad Monitor File for Windows 2000/XP/Vista/7 ThinkPad Monitor File for Windows 2000/XP/Vista/7 is usually in the default directory C:\SWTOOLS\DRIVERS\MONITOR. Note: If you cannot find this directory on your hard disk drive or solid state drive, download the ThinkPad Monitor File for Windows 2000/XP/Vista/7 from the ThinkPad Web site at: http://www.lenovo.com/support/site.wss/document.do?sitestyle=lenovo&lndocid=tpad-matrix Note: Before you install this file, make sure that the correct video driver has been installed. For Windows 7 1. Right-click on the desktop, and click Personalize. 2. Click Display at the left. 3. Click Change display settings. 4. Click Advanced Settings. 5. Click the Monitor tab. 6. Click Properties. 7. Click the Driver tab. 8. Click Update Driver. 9. Select Browse my computer for driver software, and then click Let me pick from a list of device drivers on my computer. 10. Click Have Disk. 11. Specify the path where the monitor INF file is saved, then click Open. 12. Click OK. 13. Confirm the correct display type, then click Next. 14. Windows has finished installing. Click Close. 15. Click Close for Display Properties. 16. Click OK in the Monitor tab. 17. Click OK and close the Display Settings window. For Windows Vista 1. Right-click on the desktop, and click Personalize. 2. Click Display Settings. The Display Settings window opens. 3. Click Advanced Settings. 4. Click the Monitor tab. 5. Click Properties. (For Windows Vista, also click Continue.) 6. Click the Driver tab. 7. Click Update Driver. 136 User Guide
-
 1
1 -
2
-
3
-
4
-
5
-
6
-
7
-
8
-
9
-
10
-
11
-
12
-
13
-
14
-
15
-
16
-
17
-
18
-
19
-
20
-
21
-
22
-
23
-
24
-
25
-
26
-
27
-
28
-
29
-
30
-
31
-
32
-
33
-
34
-
35
-
36
-
37
-
38
-
39
-
40
-
41
-
42
-
43
-
44
-
45
-
46
-
47
-
48
-
49
-
50
-
51
-
52
-
53
-
54
-
55
-
56
-
57
-
58
-
59
-
60
-
61
-
62
-
63
-
64
-
65
-
66
-
67
-
68
-
69
-
70
-
71
-
72
-
73
-
74
-
75
-
76
-
77
-
78
-
79
-
80
-
81
-
82
-
83
-
84
-
85
-
86
-
87
-
88
-
89
-
90
-
91
-
92
-
93
-
94
-
95
-
96
-
97
-
98
-
99
-
100
-
101
-
102
-
103
-
104
-
105
-
106
-
107
-
108
-
109
-
110
-
111
-
112
-
113
-
114
-
115
-
116
-
117
-
118
-
119
-
120
-
121
-
122
-
123
-
124
-
125
-
126
-
127
-
128
-
129
-
130
-
131
-
132
-
133
-
134
-
135
-
136
-
137
-
138
-
139
-
140
-
141
-
142
-
143
-
144
-
145
-
146
-
147
-
148
-
 149
149 -
 150
150 -
 151
151 -
 152
152 -
 153
153 -
 154
154 -
 155
155 -
 156
156 -
 157
157 -
 158
158 -
 159
159 -
160
-
161
-
162
-
163
-
164
-
165
-
166
-
167
-
168
-
169
-
170
-
171
-
172
-
173
-
174
-
175
-
176
-
177
-
178
-
179
-
180
-
181
-
182
-
183
-
184
-
185
-
186
-
187
-
188
-
189
-
190
-
191
-
192
-
193
-
194
-
195
-
196
-
197
-
198
-
199
-
200
-
201
-
202
-
203
-
204
-
205
-
206
-
207
-
208
-
209
-
210
-
211
-
212
-
213
-
214
-
215
-
216
-
217
-
218
-
219
-
220
-
221
-
222
-
223
-
224
-
225
 |
 |
