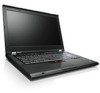
Lenovo ThinkPad T420si (English) User Guide
Lenovo ThinkPad T420si Manual
 |
View all Lenovo ThinkPad T420si manuals
Add to My Manuals
Save this manual to your list of manuals |
Lenovo ThinkPad T420si manual content summary:
- Lenovo ThinkPad T420si | (English) User Guide - Page 1
User Guide ThinkPad T420s and T420si - Lenovo ThinkPad T420si | (English) User Guide - Page 2
site. To refer to them, go to http://www.lenovo.com/support, and then click User guides & manuals. Third Edition (May 2012) © Copyright Lenovo 2012. LIMITED AND RESTRICTED RIGHTS NOTICE: If data or software is delivered pursuant a General Services Administration "GSA" contract, use, reproduction, or - Lenovo ThinkPad T420si | (English) User Guide - Page 3
39 Using the ac power adapter 39 Charging the battery 40 Maximizing battery life 40 Managing your battery power 40 Power-saving modes 40 Handling the battery 42 Connecting to the network 43 Ethernet connections 43 Wireless connections 43 Using a projector or external display 51 Changing - Lenovo ThinkPad T420si | (English) User Guide - Page 4
driver for USB 3.0 155 Installing ThinkPad Monitor File for Windows 2000/XP/Vista/7 155 ThinkPad Setup 157 Config menu 158 Date and time menu 159 Security menu 159 Startup menu 160 Restart menu 162 ThinkPad Setup items 162 Updating your system UEFI BIOS . . . . . 172 Using system management - Lenovo ThinkPad T420si | (English) User Guide - Page 5
Bus problems 209 A docking station or port replicator problem 209 Chapter 11. Getting support . . . . 211 Before you contact Lenovo 211 Register your computer 211 Download system updates 211 Record information 211 Getting help and service 212 Using diagnostic programs 212 Lenovo Support Web - Lenovo ThinkPad T420si | (English) User Guide - Page 6
iv User Guide - Lenovo ThinkPad T420si | (English) User Guide - Page 7
on or the battery is charging, the base, amount of system activity and the level of charge in the battery. Extended ac power adapter. When the ac power adapter is . • Do not place the ac power adapter in contact with any part of your or the cables of an ac power adapter, a mouse, a keyboard, - Lenovo ThinkPad T420si | (English) User Guide - Page 8
batteries. In addition to notebook computers, some products (such as speakers and monitors) ship with external power adapters. If you have such a product, this information applies to your product. In addition, computer products contain a coin-sized internal battery that provides power to the system - Lenovo ThinkPad T420si | (English) User Guide - Page 9
. For more information, see the Safety and Warranty Guide came with your computer. Service and upgrades Do not attempt to service a product yourself unless instructed to do so by the Customer Support Center or your documentation. Only use a Service Provider who is approved to repair your particular - Lenovo ThinkPad T420si | (English) User Guide - Page 10
or shows signs of overheating (such as deformed plastic) at the AC input or anywhere on the power adapter. Do not use any power cords where the electrical contacts on either end show signs of corrosion or overheating or where the power cord appears to have been damaged in any way. viii User Guide - Lenovo ThinkPad T420si | (English) User Guide - Page 11
approved outlet adapter or to replace the outlet with one that enables this safety feature. Never overload an electrical outlet. The overall system load serviceable parts inside these components. If you suspect a problem with one of these parts, contact a service technician. © Copyright Lenovo - Lenovo ThinkPad T420si | (English) User Guide - Page 12
, such as notebook computers, utilize a rechargeable battery pack to provide system power when in portable mode. Batteries supplied by Lenovo for use with your product have been tested for compatibility and should only be replaced with approved parts. Never attempt to open or service any battery. Do - Lenovo ThinkPad T420si | (English) User Guide - Page 13
power adapters, and many accessories can generate heat when turned on and when batteries are charging. Notebook depends on the amount of system activity and the battery charge level. Extended contact the battery near flammable materials or in explosive environments. • Ventilation slots, fans and/or - Lenovo ThinkPad T420si | (English) User Guide - Page 14
or structural damage. • Disconnect the attached power cords, battery pack, and all the cables before you open the device covers, unless instructed otherwise in the installation and configuration procedures. • Do not use you computer until all internal parts enclosures are fastened into place. Never - Lenovo ThinkPad T420si | (English) User Guide - Page 15
are installed, note no serviceable parts liquid crystal display contains mercury; breaks and the internal fluid gets into Lenovo computer came with headphones or earphones in the package, as a set, the combination of the headphones or earphones and the computer already complies with the specifications - Lenovo ThinkPad T420si | (English) User Guide - Page 16
not connect phone line while using tablet mode. Notice for users in the U.S.A. Many PC products and accessories contain cords, cables or wires, such as power cords or cords to connect the accessory to a PC. other reproductive harm. Wash hands after handling. Save these instructions. xiv User Guide - Lenovo ThinkPad T420si | (English) User Guide - Page 17
• "Locating important product information" on page 13 • "Features" on page 15 • "Specifications" on page 17 • "Operating environment" on page 17 • "ThinkVantage Technologies and software" • "Rear View" on page 9 • "Bottom view" on page 7 • "Status indicators" on page 10 © Copyright Lenovo 2012 1 - Lenovo ThinkPad T420si | (English) User Guide - Page 18
view Figure 1. ThinkPad T420s/T420si front view 1 Computer display 3 ThinkVantage button 5 TrackPoint pointing stick 7 System and power-status indicators 9 Built-in microphone (left) 11 ThinkLight 13 UltraConnect™ wireless antennas (right) 15 Forward and Back keys 17 Bluetooth antenna 19 Touch - Lenovo ThinkPad T420si | (English) User Guide - Page 19
System-status indicators and Power-status indicators. 8 UltraConnect™ wireless antennas (left) 13 UltraConnect wireless antennas (right) The built-in antennas for the wireless communication are located at the top left and the top right portions of your computer display. For the specific locations - Lenovo ThinkPad T420si | (English) User Guide - Page 20
the UEFI Setup Utility. For details, refer to the instructions in "Using a fingerprint reader" on page 79. 17 Bluetooth antenna Your computer has Bluetooth Integrated Bluetooth features. 20 Fn key Use the Fn key to take advantage of ThinkPad® functions, such as turning on the ThinkLight. To use - Lenovo ThinkPad T420si | (English) User Guide - Page 21
ThinkPad T420s/T420si right side view 1 Security keyhole 3 Wireless installed in the bay. Note: You can install only a 9.5-mm-thick Serial Ultrabay Slim device in the Serial Ultrabay Slim. You cannot install a Serial Ultrabay Enhanced device. 3 Wireless radio switch You can quickly turn the wireless - Lenovo ThinkPad T420si | (English) User Guide - Page 22
Left-side view Figure 3. ThinkPad T420s/T420si left-side view 1 Fan louvers (left) 3 Combo audio jack 5 Smart card slot 2 USB connector (left) 4 Media card reader slot or ExpressCard slot 1 Fan louvers (left) The internal fan and louvers enable air to circulate in the computer and cool the - Lenovo ThinkPad T420si | (English) User Guide - Page 23
to the instructions in "Using the media card reader" on page 61. Bottom view Figure 4. ThinkPad T420s/T420si bottom view 1 PCI Express Mini Card slot for wireless LAN/WiMAX 3 Docking connector 5 Hard disk drive or solid state drive 7 Battery 2 PCI Express Mini Card slot for wireless WAN or mSATA - Lenovo ThinkPad T420si | (English) User Guide - Page 24
. By installing a second battery, available as an option, in the Serial Ultrabay Slim, you can extend the operating time of the computer. You can also use Power Manager to adjust your power setting as needed. For details, refer to the instructions in "Power Manager" on page 22. 8 User Guide - Lenovo ThinkPad T420si | (English) User Guide - Page 25
View Figure 5. ThinkPad T420s/T420si rear view 1 Power jack 3 USB connector (rear) 5 DisplayPort connector 7 Fan louvers (rear) 2 Ethernet connector 4 Always On USB connector 6 Monitor connector 1 Power jack The ac power adapter cable connects to the computer power jack to provide power to the - Lenovo ThinkPad T420si | (English) User Guide - Page 26
Replicator Series 3, ThinkPad Mini Dock Series 3, ThinkPad Mini Dock Plus Series 3, or ThinkPad Mini Dock Plus Series 3 (170 W), not the one on the computer. For details, refer to the instructions in "Attaching an external monitor" on page 52. 7 Fan louvers (rear) The internal fan and louvers enable - Lenovo ThinkPad T420si | (English) User Guide - Page 27
is displayed on the screen. To change the settings of the numeric lock indicator, see "Changing display settings" support this function. Power-status indicators The computer has status indicators that show the mode (sleep/standby, hibernation, or normal), ac power status, the status of the battery - Lenovo ThinkPad T420si | (English) User Guide - Page 28
or hibernation mode. • Quick blinking orange: An error has been occurred in the battery. • The battery status indicator blinks three times: The ac power adapter is attached to the computer. • The battery status indicator is off: The battery is fully charged or the battery is detached. 12 User Guide - Lenovo ThinkPad T420si | (English) User Guide - Page 29
(COA) label. Machine type and model label The machine type and model label identifies your computer. If you contact Lenovo for help, the machine type and model number will enable support technicians to identify your computer and provide the highest level of service. Chapter 1. Product overview 13 - Lenovo ThinkPad T420si | (English) User Guide - Page 30
ID and IC Certification number label There is no FCC ID or IC Certification number for the PCI Express Mini Card shown on the enclosure of your computer. The FCC ID and IC Certification number label is affixed on the card installed in the PCI Express Mini Card slot of your computer. 14 User Guide - Lenovo ThinkPad T420si | (English) User Guide - Page 31
If no integrated wireless PCI Express Mini Card has been preinstalled in your computer, you can install one. To do this, follow the procedure in "Replacing the PCI Express Mini Card for wireless LAN/WiMAX connection" on page 110 or "Replacing the PCI Express Mini Card for Wireless WAN " on page 119. - Lenovo ThinkPad T420si | (English) User Guide - Page 32
Docking connector Combination card slot for ExpressCard or flash media card • 34mm ExpressCard or 4-in-1 digital media card reader Optical drive • Multi-Burner drive Wireless features • Integrated wireless LAN • Integrated Bluetooth (on some models) • Integrated wireless WAN (on some models) 16 User - Lenovo ThinkPad T420si | (English) User Guide - Page 33
Hz • Input rating of the ac power adapter: 100 to 240 V AC, 50 to 60 Hz Battery pack • Lithium-ion (Li-Ion) battery pack Battery life • For percentage of remaining battery power, see the Power Manager Battery Gauge in the task bar. • The Power Manager also displays a green, yellow and red indication - Lenovo ThinkPad T420si | (English) User Guide - Page 34
window is dimmed, it indicates that you need to install the application manually. To install the application manually, double-click the application icon. Then, follow the instructions on the screen. When the installation process completes, the application icon will be activated. 18 User Guide - Lenovo ThinkPad T420si | (English) User Guide - Page 35
Tools Application Access Connections Active Protection System Fingerprint Software Lenovo ThinkVantage Toolbox or Lenovo Solution Center Mobile Broadband Activate Password Manager Power Manager Recovery Media Rescue and Recovery SimpleTap System Update ThinkVantage GPS Icon name Internet Connection - Lenovo ThinkPad T420si | (English) User Guide - Page 36
System and Security Green text on the Control Panel Lenovo - Factory Recovery Disks Lenovo - SimpleTap Lenovo - Update and Drivers Lenovo - Enhanced Backup and Restore Lenovo - GPS Access Connections Access Connections™ is a connectivity assistant program for creating and managing location - Lenovo ThinkPad T420si | (English) User Guide - Page 37
" on page 21. The Lenovo Solution Center program enables you to troubleshoot and resolve computer problems. It combines diagnostic tests, system information collection, security status, and support information, along with hints and tips for maximum system performance. For detailed information, see - Lenovo ThinkPad T420si | (English) User Guide - Page 38
help information system of the program. Message Center Plus The Message Center Plus displays messages to inform you about helpful software that has been preinstalled on your computer. The software enables you to manage wired and wireless connections, protect your data in the event of a problem and - Lenovo ThinkPad T420si | (English) User Guide - Page 39
you can download it from http://support.lenovo.com. System Update The System Update program helps you keep the software on your computer up-to-date by downloading and installing software packages (ThinkVantage applications, device drivers, UEFI BIOS updates, and other third party applications). Some - Lenovo ThinkPad T420si | (English) User Guide - Page 40
integrated user interface to help you set up, understand, and enhance your computer. It enables you to access other ThinkVantage Technologies, view messages from Lenovo, and perform the most frequently used tasks such as device configuration, wireless network configuration, and computer management - Lenovo ThinkPad T420si | (English) User Guide - Page 41
: http://www.lenovo.com/support/faq Can I get my user guide in another language? • To download the user guide in another language, go to http://www.lenovo.com/support. Then follow the instructions on the screen. On the go and need to use battery power more effectively? © Copyright Lenovo 2012 25 - Lenovo ThinkPad T420si | (English) User Guide - Page 42
battery power from draining by removing the battery. See "Power management troubleshoot a wireless networking issue, go to: http://www.lenovo.com/support wireless radio switch to enable or disable the wireless display output on both the computer display problems" on page 175. • You can diagnose problems - Lenovo ThinkPad T420si | (English) User Guide - Page 43
Installing a new operating system" on page 149. • "Computer stops responding" on page 182. • "Power problems have the Lenovo ThinkVantage Toolbox program • Configure your computer or start the ThinkPad Setup. To access the Rescue and blue ThinkVantage button" message is displayed at the lower-left of - Lenovo ThinkPad T420si | (English) User Guide - Page 44
keys, you can change operational features instantly. To use this function, press and hold the Fn key (1); then press one of the function keys (2). 28 User Guide - Lenovo ThinkPad T420si | (English) User Guide - Page 45
hard drive. - To use Fn+F3, Fn+F4, and Fn+F12 key combinations, you must have the ThinkPad PM device driver installed on your computer. For information on the power management function, refer to "Power management" on page 38. Applying a presentation scheme • Fn+F7 Chapter 2. Using your computer 29 - Lenovo ThinkPad T420si | (English) User Guide - Page 46
change the power state of each feature in the list. Note: If you want to use Fn+F5 to enable or disable the wireless features, the following device drivers must be installed on your computer beforehand: - Power Management driver - OnScreen Display Utility - Wireless device drivers 30 User Guide - Lenovo ThinkPad T420si | (English) User Guide - Page 47
appears if your computer has an integrated camera. For more information, see "Using an integrated camera" on page 60. Other functions • Fn+PgUp: Turn the ThinkLight on. To turn it off, press Fn+PgUp again. Note: This function is supported only on the ThinkPad notebooks that have the ThinkLight. The - Lenovo ThinkPad T420si | (English) User Guide - Page 48
the built-in speakers by using the following three buttons: 1 Speaker mute button 2 Volume control button 3 Microphone mute If you mute the sound and then turn off your computer, the sound will remain muted when you turn the Volume Control window, click the volume icon. To control the 32 User Guide - Lenovo ThinkPad T420si | (English) User Guide - Page 49
Manage Settings button. The Communications Utility window opens. 3. On the VoIP Call Settings tab, click Microphone mute button settings. The Setting for Microphone menu of Windows is displayed or hidden. If you press this key and another key at the same time, the System Properties window or the - Lenovo ThinkPad T420si | (English) User Guide - Page 50
and the UltraNav Device Settings window is displayed. In this window click Manage Settings. A mouse properties window is displayed. Click the UltraNav tab. • Use the on the system tray. To display the UltraNav icon on the system tray, see "Adding the UltraNav icon to the system tray" on User Guide - Lenovo ThinkPad T420si | (English) User Guide - Page 51
you are not familiar with the TrackPoint, these instructions will help you get started: 1. Place your hands as follows: 1. Press Fn+F8. A panel for UltraNav Device Settings pops up. 2. Click Manage Settings to open the Mouse properties window. 3. Click the UltraNav tab. Under TrackPoint, proceed to - Lenovo ThinkPad T420si | (English) User Guide - Page 52
right mouse buttons on a conventional mouse. Using the multi-touch touch pad The touch pad of your computer supports multi-touch with which you can zoom in, zoom out, scroll or rotate on the screen while browsing the follows: 1. Press Fn+F8. A panel for UltraNav Device Settings pops up. 36 User Guide - Lenovo ThinkPad T420si | (English) User Guide - Page 53
UltraNav properties, you can add the UltraNav icon on the system tray. To enable the display of the UltraNav icon on the system tray, do as follows: 1. Press Fn+F8. A panel headed UltraNav Device Settings pops up. 2. Click Manage Settings to open the Mouse properties window. 3. Click the UltraNav - Lenovo ThinkPad T420si | (English) User Guide - Page 54
management When you need to use your computer away from electrical outlets, you depend on battery power to keep your computer running. Different computer components consume power at different rates. The more you use the power-intensive components, the faster you consume battery power. 38 User Guide - Lenovo ThinkPad T420si | (English) User Guide - Page 55
you go. With ThinkPad batteries, you will be able to work longer without being tied to an electrical outlet. Checking battery status The Power Manager Battery Gauge in the task tray displays the percentage of battery power remaining. The rate at which you use battery power will determine how long - Lenovo ThinkPad T420si | (English) User Guide - Page 56
is fully charged when the ac power adapter is plugged in and the battery indicator is green. 2. Use the battery until the charge is completely depleted-until the battery status indicator starts blinking orange. • Always use power management features such as power modes, screen blank, sleep (standby - Lenovo ThinkPad T420si | (English) User Guide - Page 57
occur: the alarm goes off, a message is displayed, and the LCD is turned off. Do as follows: 1. Start Power Manager. 2. Click the Global Power Settings tab. 3. For Low battery alarm or Critically low battery alarm, set the percentage of the power level and set the action. Chapter 2. Using your - Lenovo ThinkPad T420si | (English) User Guide - Page 58
. To resume normal operation, press OK. Handling the battery This system does not support batteries that are not genuine Lenovo-made or authorized. The system will continue to boot, but may not charge unauthorized batteries. Attention: Lenovo has no responsibility for the performance or safety of - Lenovo ThinkPad T420si | (English) User Guide - Page 59
the network Your computer has one or more network adapters for connecting to the Internet and to your company's wired LAN or wireless LAN network. Note: Some models come with a built-in wireless WAN card enabling you to establish wireless connections over remote public or private networks. For more - Lenovo ThinkPad T420si | (English) User Guide - Page 60
Your computer can be wireless upgradeable. This means that your computer has an antenna that can support wireless LAN access when wireless LAN access points are available. Wireless devices are available from Lenovo. For more information, see "Finding ThinkPad options" on page 129. 44 User Guide - Lenovo ThinkPad T420si | (English) User Guide - Page 61
, such as a city or an entire country, by use of multiple antenna sites or satellite systems maintained by wireless service providers. Some ThinkPad notebooks come with a built-in wireless WAN card integrating some wireless WAN technologies, such as 1xEV-DO, HSPA, 3G or GPRS. You can connect to the - Lenovo ThinkPad T420si | (English) User Guide - Page 62
more about Bluetooth Settings. Using ThinkPad Bluetooth with Enhanced Data Rate Software If ThinkPad Bluetooth with Enhanced Data Rate Software is installed on your computer, two icons are displayed on the screen: • My Bluetooth Places on the desktop • Bluetooth Configuration in the system tray of - Lenovo ThinkPad T420si | (English) User Guide - Page 63
system tray of the task bar, and click Advanced Configuration and then Help. Installing the Microsoft Bluetooth software in Windows XP If you want to use the Microsoft Bluetooth software, do as follows: First uninstall the ThinkPad Bluetooth with Enhanced Data Rate Software. 1. Turn Bluetooth power - Lenovo ThinkPad T420si | (English) User Guide - Page 64
power on before installing ThinkPad Bluetooth with Enhanced Data Rate Software, that is, if you skipped step 1- replace the Bluetooth driver as follows: 1. Click Start ➙ Control Panel. 2. Click Performance and Maintenance; then click System. 3. Click the Hardware tab; then click Device Manager - Lenovo ThinkPad T420si | (English) User Guide - Page 65
802.11 standard) of your computer simultaneously with a Bluetooth option, data transmission speed can be delayed and the performance of the wireless feature can be degraded. Using WiMAX Some ThinkPad notebooks come with a built-in wireless LAN card integrating WiMAX technology. WiMAX, a long-range - Lenovo ThinkPad T420si | (English) User Guide - Page 66
click. You can also enable or disable the feature by the following procedures. To enable the wireless feature, do as follows: 1. Click the Access Connections wireless status icon in the system tray. 2. Click Power On Wireless Radio. To disable the wireless feature, do as follows: 50 User Guide - Lenovo ThinkPad T420si | (English) User Guide - Page 67
icon in the system tray. • Click Power Off Wireless Radio. Notes: • You can use the wireless radio switch to disable the wireless radio of all the wireless devices on your computer. • If your computer is a Windows 7 model, to display the Access Connections status icon and the wireless status icon in - Lenovo ThinkPad T420si | (English) User Guide - Page 68
Follow the instructions on the screen. Connecting a projector or external display Attaching an external monitor Your computer can support a maximum supports that resolution. For more details, refer to the manuals provided with your monitor. You can set any resolution for either the computer display - Lenovo ThinkPad T420si | (English) User Guide - Page 69
mode before you open an MPEG file to play. • If you are attaching an external monitor that supports only VGA mode (640x480 resolution), do not view output on both the computer display and the external monitor. Doing so would cause the external monitor screen to be scrambled and the output not - Lenovo ThinkPad T420si | (English) User Guide - Page 70
monitor. If you cannot find your monitor in the list, stop the installation of this driver and use the driver shipped with your monitor. 15. After updating the driver, click Close. 16. Set Resolution and Colors in the Display Settings window. 17. Click OK. For Windows XP: 1. Connect the external - Lenovo ThinkPad T420si | (English) User Guide - Page 71
than two monitor types are displayed, select Default Monitor. 9. Click Properties. 10. Click the Driver tab. 11. Click Update Driver. The Hardware Update Wizard appears. 12. Click No, not this time, and then click Next. 13. Select Install from a list or specific location (Advanced), and then click - Lenovo ThinkPad T420si | (English) User Guide - Page 72
for ThinkPad Power Manager. display adapter: 1. Press Ctrl+Alt+F12. The Intel Graphics Media Accelerator Driver for mobile window appears. 2. Select Digital Display, Intel Dual Display Clone, or Extended Desktop. If you select Digital Display instructions on the screen. Projecting video To display - Lenovo ThinkPad T420si | (English) User Guide - Page 73
show DOS full-screen while in the Extend desktop mode, only the primary display shows DOS; the other display is blacked out. If your computer has the Intel display adapter, you can designate the other display as the primary display by doing the following: 1. Press Ctrl+Alt+F12. The Intel CUI window - Lenovo ThinkPad T420si | (English) User Guide - Page 74
the external display). 4. Select the color quality and the screen resolution of the secondary display. 5. Place the icons for the monitors so that they touch. Note: You can set the monitors in any relative position, but the icons must touch each other. 6. Click OK to apply the changes. 58 User Guide - Lenovo ThinkPad T420si | (English) User Guide - Page 75
Some ThinkPad notebooks support NVIDIA Optimus Graphics. NVIDIA Optimus Graphics enables a dynamic switch, that is, a switch with no need to restart your computer between High Performance and Energy Saving Graphics. Note: To use the DisplayPort feature or DVI monitor on the docking station, you - Lenovo ThinkPad T420si | (English) User Guide - Page 76
supported Conventional microphone Not supported Not supported Microphone jack of the docking station Microphone function not supported Not supported Not supported Microphone function supported Beam Forming feature A built-in dual array digital microphone is mounted at the top of the display - Lenovo ThinkPad T420si | (English) User Guide - Page 77
the camera settings, do the following: 1. Press Fn+F6. The Communications settings window opens. 2. Click the Manage Settings button is bad for your eyes. Using the optical drive Note: Your computer support only the MultiBurner driver. MultiBurner drive This drive can read DVD-ROM discs, DVD-R discs - Lenovo ThinkPad T420si | (English) User Guide - Page 78
Vista and Windows XP: - Open Control Panel and switch to Classic view. - Double-click the Add Hardware icon. The Add Hardware Wizard starts. - Follow the instructions on the screen. Removing an ExpressCard, a flash media card or a smart card Attention: 62 User Guide - Lenovo ThinkPad T420si | (English) User Guide - Page 79
XP: • Click the Safely Remove Hardware icon in the task bar • Select corresponding item to eject the card from the Windows operating system. • Press the card to eject it from your computer. • Remove the card from your computer and store it safely for future use. Note: If you do not remove the - Lenovo ThinkPad T420si | (English) User Guide - Page 80
64 User Guide - Lenovo ThinkPad T420si | (English) User Guide - Page 81
performance and achieve greater comfort. Lenovo is committed to providing the latest Working in the virtual office may mean adapting to frequent changes in your environment. discomfort associated with your working posture. Display: Position the display to maintain a comfortable viewing distance of 510 - Lenovo ThinkPad T420si | (English) User Guide - Page 82
services/index.html. Explore your options for docking solutions and external products that can provide the adjustability and features that you want. ThinkPad features that promote comfort: There are easy to use ThinkPad features that can help make your computer more comfortable to use. 66 User Guide - Lenovo ThinkPad T420si | (English) User Guide - Page 83
users might require larger fonts or high-contrast display modes supports the accessibility features provided by your Windows operating system, screen readers designed to operate in the Windows environment, and Windows keyboard navigation. For a complete listing of Microsoft Windows Keyboard Guide - Lenovo ThinkPad T420si | (English) User Guide - Page 84
things to consider packing when you are going to be away from the office: Travel Essentials • ThinkPad ac power adapter • External mouse, if you are accustomed to using one • Ethernet cable • Extra battery, charged • A quality carrying case that provides adequate cushion and protection 68 User Guide - Lenovo ThinkPad T420si | (English) User Guide - Page 85
country you might want to consider these items • An ac power adapter for the country that you are traveling to • An adapter to connect to a phone line in that country Other items you may wish to consider • ThinkPad AC/DC Combo Adapter • External storage device Chapter 3. You and your computer 69 - Lenovo ThinkPad T420si | (English) User Guide - Page 86
70 User Guide - Lenovo ThinkPad T420si | (English) User Guide - Page 87
to a stationary object. Refer to the instructions shipped with the mechanical lock. Note: locking devices and security features. Lenovo makes no comments, judgments, or Power-on password or Supervisor password. If this icon appears, enter Hard disk password. Note: If this icon appears, type a user - Lenovo ThinkPad T420si | (English) User Guide - Page 88
to start using the computer. Setting a power-on password 1. Print these instructions. 2. Save all open files, and exit all applications. 3. Turn your computer off and then turn it on again. 4. When the logo screen is displayed, press F1. The ThinkPad Setup opens. 5. Select Security, using the - Lenovo ThinkPad T420si | (English) User Guide - Page 89
master password. Setting a hard disk password 1. Print these instructions. 2. Save all open files, and exit all applications. 3. Turn your computer off and then on again. 4. When the logo screen is displayed, press F1. The ThinkPad Setup opens. 5. Select Security, using the cursor directional keys - Lenovo ThinkPad T420si | (English) User Guide - Page 90
password to memory and press Enter. A Setup Notice window is displayed. Attention: You might want to note your passwords and keep them in a safe place. Otherwise, if you forget the user-only password, or both user and master passwords, Lenovo cannot reset your passwords or recover data from the hard - Lenovo ThinkPad T420si | (English) User Guide - Page 91
- Enabling or disabling the Flash BIOS Updating by End-Users feature - Enabling or disabling the Internal Network device - Enabling or disabling the Internal Wireless device - Enabling or disabling the Internal Bluetooth device - Enabling or disabling the Internal Wireless WAN device - Enabling or - Lenovo ThinkPad T420si | (English) User Guide - Page 92
password Only a system administrator will be able to apply this procedure. 1. Print these instructions. 2. Save all open files, and exit all applications. 3. Turn your computer off and then turn it on again. 4. When the logo screen is displayed, press F1. The ThinkPad Setup opens. 5. Select - Lenovo ThinkPad T420si | (English) User Guide - Page 93
attacks, several of the latest technologies and algorithms are integrated into UEFI BIOS and hardware design of ThinkPad notebooks. To maximize security, do the following: 1. Set a power-on password as well as a hard disk password for your internal solid state drive or hard disk drive. Refer to - Lenovo ThinkPad T420si | (English) User Guide - Page 94
system instructions. To set the Security Chip, you must turn your computer off and then on again. • Save all open files, and exit all applications. • Turn your computer off and then turn it on again. • When the logo screen is displayed, press F1. The ThinkPad instructions on the screen. 78 User Guide - Lenovo ThinkPad T420si | (English) User Guide - Page 95
Solution, go to http://www.lenovo.com/support. Then follow the instructions on the screen. Using a fingerprint reader Depending on the options you ordered, your computer may have an integrated fingerprint reader. By enrolling your fingerprint and associating it with a power-on password, a hard disk - Lenovo ThinkPad T420si | (English) User Guide - Page 96
motion. Logging on to the system After you enroll your fingerprint, log on to the system as follows: 1. Set a power-on password or a hard disk power-on password, you must take your computer to a Lenovo authorized servicer or a marketing representative to have the password canceled. 80 User Guide - Lenovo ThinkPad T420si | (English) User Guide - Page 97
: 1. Print these instructions. To configure the fingerprint reader, you must turn your computer off and then on again. 2. Save all open files, and exit all applications. 3. Turn your computer off and then on again. 4. When the logo screen is displayed, press F1. The ThinkPad Setup opens. 5. Using - Lenovo ThinkPad T420si | (English) User Guide - Page 98
make use of the software (payware) or service (pay service) specifically developed for the purpose. For disposing of data on the hard disk drive, Lenovo provides the Secure Data Disposal tool. To download the application, go to: http://www.lenovo.com/support Note: Running the application will take - Lenovo ThinkPad T420si | (English) User Guide - Page 99
antivirus program is designed to help you detect and eliminate viruses. Lenovo provides a full version of antivirus software on your computer with a the antivirus software updates. For more information about how to use your antivirus software, refer to the help system of your antivirus software - Lenovo ThinkPad T420si | (English) User Guide - Page 100
84 User Guide - Lenovo ThinkPad T420si | (English) User Guide - Page 101
the recovery solutions provided by Lenovo. This chapter contains the following • "Reinstalling preinstalled applications and device drivers" on page 90 • "Solving recovery problems" on page 91 Notes: 1. recovery media vary depending on the operating system from which the recovery media were created - Lenovo ThinkPad T420si | (English) User Guide - Page 102
operating system, click Start ➙ All Programs ➙ Lenovo ThinkVantage Tools ➙ Factory Recovery Disks. Then, follow the instructions on have to reinstall device drivers for some devices. See "Reinstalling preinstalled applications and device drivers" on page 90. system, do the following: 86 User Guide - Lenovo ThinkPad T420si | (English) User Guide - Page 103
On the Rescue and Recovery menu, click Restore your system. 5. Follow the instructions on the screen. Insert the appropriate Product Recovery disc on the Windows 7 operating system, do the following: 1. From the Windows desktop, click Start ➙ All Programs ➙ Lenovo ThinkVantage Tools ➙ Enhanced Backup - Lenovo ThinkPad T420si | (English) User Guide - Page 104
Lenovo ThinkVantage Tools ➙ Enhanced Backup and Restore. The Rescue and Recovery program opens. 2. In the Rescue and Recovery main window, click the Launch advanced Rescue and Recovery arrow. 3. Click the Restore your system from a backup icon. 4. Follow the instructions a short delay. 88 User Guide - Lenovo ThinkPad T420si | (English) User Guide - Page 105
rescue medium This section provides instructions on how to create a rescue medium on different operating systems. • To create a rescue medium on the Windows 7 operating system, do the following: 1. From the Windows desktop, click Start ➙ All Programs ➙ Lenovo ThinkVantage Tools ➙ Enhanced Backup and - Lenovo ThinkPad T420si | (English) User Guide - Page 106
with your computer. To reinstall a device driver for a factory-installed device, do the following: 1. Turn on your computer. 2. Use Windows Explorer or Computer (in Windows XP, My Computer) to display the directory structure of your hard disk drive. 3. Open the C:\SWTOOLS folder. 90 User Guide - Lenovo ThinkPad T420si | (English) User Guide - Page 107
instructions on the screen. Attention: If you need updated device drivers, do not download them from the Windows Update Web site. Obtain them from Lenovo. For more information, see "Making sure device drivers are current" on page 176. Solving recovery problems device (an internal hard disk "ThinkPad - Lenovo ThinkPad T420si | (English) User Guide - Page 108
92 User Guide - Lenovo ThinkPad T420si | (English) User Guide - Page 109
Mini Card for wireless LAN/WiMAX connection" on page 110 • "Replacing the PCI Express Mini Card for Wireless WAN " on page 119 • "Replacing the SIM card" on the static-protective package containing the part until the instructions direct you to install it. When you handle options or CRUs, or perform - Lenovo ThinkPad T420si | (English) User Guide - Page 110
disconnect the ac power adapter and all cables from the computer. 2. Close the computer display, and turn it over. 3. Remove the battery. Refer to "Replacing the battery" on page 97 SO-DIMM you are installing. Attention: To avoid damaging the SO-DIMM, do not touch its contact edge. 94 User Guide - Lenovo ThinkPad T420si | (English) User Guide - Page 111
(2), and tighten the screws (3). 10. Put the battery back in place, turn the computer over again, and reconnect the cables. For information about how to replace the battery, refer to "Replacing the battery" on page 97. To make sure that the SO-DIMM is installed correctly, do as follows: 1. Turn the - Lenovo ThinkPad T420si | (English) User Guide - Page 112
2. When the logo screen is displayed, press the F1 key. The ThinkPad Setup opens. The "Installed memory" item shows the total amount of memory installed in your computer. Replacing the backup battery Before you start, print these instructions. Prerequisites for the procedure DANGER If the backup - Lenovo ThinkPad T420si | (English) User Guide - Page 113
the computer over again. Connect the ac power adapter and cables to the computer; then turn it on. Replacing the battery Before you start, print these instructions. This system does not support batteries that are not genuine Lenovo-made or authorized. The system will continue to boot, but may not - Lenovo ThinkPad T420si | (English) User Guide - Page 114
hibernation mode. Then disconnect the ac power adapter and all cables from the computer. 2. Close the computer display, and turn the computer over. 3. Unlock the battery latch by sliding it to the unlock position(1). Holding the latch in the unlocked position, remove the battery (2). 98 User Guide - Lenovo ThinkPad T420si | (English) User Guide - Page 115
it until it clicks into place. 5. Slide the battery latch to the locked position. 6. Turn the computer over again. Connect the ac power adapter and the cables to the computer. Replacing the hard disk drive Before you start, print these instructions. You can replace the hard disk drive with a new - Lenovo ThinkPad T420si | (English) User Guide - Page 116
mode. Replacement instructions To replace the hard disk drive, do as follows: 1. Turn off the computer; then disconnect the ac power adapter and all cables from the computer. 2. Close the computer display, and turn the computer over. 3. Remove the battery. Refer to "Replacing the battery" on page - Lenovo ThinkPad T420si | (English) User Guide - Page 117
6. Detach the side rubber rails from the hard disk drive. 7. Attach the side rubber rails to a new hard disk drive. 8. Insert the hard disk drive into the hard disk drive bay, then press it firmly into place. Chapter 6. Replacing devices 101 - Lenovo ThinkPad T420si | (English) User Guide - Page 118
information about how to reinstall the battery. refer to "Replacing the battery" on page 97. 11. Turn the computer over again. Connect the ac power adapter and the cables to the computer. Replacing the keyboard Before you start, print these instructions. Prerequisites for the procedure DANGER During - Lenovo ThinkPad T420si | (English) User Guide - Page 119
4. Loosen the screws on the memory slot cover (1), then remove the cover (2). 5. Remove the two screws. 6. Turn the computer over and open the display. Chapter 6. Replacing devices 103 - Lenovo ThinkPad T420si | (English) User Guide - Page 120
until you can see how it's connected. Hold the keyboard above the computer, and then detach the connector (1). Now the keyboard has been removed (2). 104 User Guide - Lenovo ThinkPad T420si | (English) User Guide - Page 121
Installing the keyboard 1. Attach the connector. 2. Insert the keyboard. Make sure that the front edges of the keyboard are under the frame, as shown by the arrows, and press down the keyboard. Chapter 6. Replacing devices 105 - Lenovo ThinkPad T420si | (English) User Guide - Page 122
3. Slide the keyboard as shown by the arrows. 4. Close the computer display, and turn the computer over. Reinstall two screws. 5. Put the memory slot cover back in place (1), close the cover (2), and then tighten the screws (3). 106 User Guide - Lenovo ThinkPad T420si | (English) User Guide - Page 123
how to reinstall the battery, refer to "Replacing the battery" on page 97. 7. Turn the computer over again. Connect the ac power adapter and cables to the computer; then turn it on. Replacing the mSATA solid state drive Before you start, print these instructions. Some ThinkPad models have an mSATA - Lenovo ThinkPad T420si | (English) User Guide - Page 124
5. Remove the screw (1). The card pops up (2). 6. Remove the card. 108 User Guide - Lenovo ThinkPad T420si | (English) User Guide - Page 125
You can also replace the mSATA solid state drive with a Wireless PCI Express Mini Card for Wireless WAN. • To install a new PCI Express Mini Card, refer to "Replacing the PCI Express Mini Card for Wireless WAN " on page 119. 8. Pivot the card downward (1) until you can snap it into place. Secure the - Lenovo ThinkPad T420si | (English) User Guide - Page 126
about how to reinstall the battery, refer to the instructions in "Replacing the battery" on page 97. 11. Turn the computer over again. Connect the ac power adapter and cables to the computer; then turn it on. Replacing the PCI Express Mini Card for wireless LAN/WiMAX connection Before you - Lenovo ThinkPad T420si | (English) User Guide - Page 127
memory slot cover (1), then remove the cover (2). 5. If a tool for removing connectors is included in the package with the new card, use it to disconnect the cables from the card. If no such tool is included, disconnect the cables by picking up the connectors with your fingers and gently unplugging - Lenovo ThinkPad T420si | (English) User Guide - Page 128
6. Remove the screw (1). The card pops up (2). 7. Remove the card. 112 User Guide - Lenovo ThinkPad T420si | (English) User Guide - Page 129
8. Align the contact edge of the new PCI Express Mini Card with the corresponding socket contact of the computer. Note: If the new PCI Express Mini Card has two connectors, as in the next drawing, put the white cable in the cable protection tube. Chapter 6. Replacing devices 113 - Lenovo ThinkPad T420si | (English) User Guide - Page 130
card with the screw (2). 10. Connect the cables to the new PCI Express Mini Card. Be sure to attach the gray cable to the connector marked "MAIN" or "M" on the card PCI Express Mini Card has three connectors, be sure to attach the gray cable to the connector marked "TR1" on the card, and the black - Lenovo ThinkPad T420si | (English) User Guide - Page 131
. For more information about how to reinstall the battery, refer to "Replacing the battery" on page 97. 13. Turn the computer over again. Connect the ac power adapter and cables to the computer; then turn it on. Replacing a PCI Express Mini Card with three connectors If your computer has a MIMO - Lenovo ThinkPad T420si | (English) User Guide - Page 132
removing connectors is included in the package with the new card, use it to disconnect the cables from the card. If no such tool is included, disconnect the cables by picking up the connectors with your fingers and gently unplugging them. 6. Remove the screw (1). The card pops up (2). 116 User Guide - Lenovo ThinkPad T420si | (English) User Guide - Page 133
7. Remove the card. 8. Align the contact edge of the new card with the corresponding socket contact of the computer. Note: If the new PCI Express Mini Card has two connectors, as in the next drawing, put the white cable in the cable protection tube. Chapter 6. Replacing devices 117 - Lenovo ThinkPad T420si | (English) User Guide - Page 134
secure the card with the screw (2). 10. Connect the cables to the new PCI Express Mini Card. Be sure to attach the gray cable to the connector marked "TR1" on the card, the white cable to the connector marked "RO" or "TR3" (center), and the black cable to the connector marked "TR2". 118 User Guide - Lenovo ThinkPad T420si | (English) User Guide - Page 135
to reinstall the battery, refer to "Replacing the battery" on page 97. 13. Turn the computer over again. Connect the ac power adapter and cables to the computer; then turn it on. Replacing the PCI Express Mini Card for Wireless WAN Before you start, print these instructions. Prerequisites for the - Lenovo ThinkPad T420si | (English) User Guide - Page 136
new card, use it to disconnect the cables from the card. If no such tool is included, disconnect the cables by picking up the connectors with your fingers and gently unplugging them. Note: Depending on the system configuration of your computer, the card may have only one connector. 120 User Guide - Lenovo ThinkPad T420si | (English) User Guide - Page 137
6. Remove the screw (1). The card pops up (2). 7. Remove the card. 8. Align the contact edge of the new PCI Express Mini Card with the corresponding socket. Chapter 6. Replacing devices 121 - Lenovo ThinkPad T420si | (English) User Guide - Page 138
the card until you can snap it into place by pressing the upper side of each connector (1). Secure the card with the screw (2). 10. Connect the cables to the new PCI Express Mini Card. Note: Depending on the system configuration of your computer, the card may have only one connector. 122 User Guide - Lenovo ThinkPad T420si | (English) User Guide - Page 139
mounted on one side of the card. Replacement instructions To replace the SIM card, do as follows: 1. Turn off the computer; then disconnect the ac power adapter and all cables from the computer. 2. Close the computer display, and turn it over. 3. Remove the battery. For more information about how to - Lenovo ThinkPad T420si | (English) User Guide - Page 140
SIM card firmly into the slot. 6. Put the battery back in place, turn the computer over again, and reconnect the cables. For more information about how to reinstall the battery, refer to "Replacing the battery" on page 97. Replacing the solid state drive Before you start, print these instructions - Lenovo ThinkPad T420si | (English) User Guide - Page 141
hibernation mode. Replacement instructions To replace the solid state drive, do as follows: 1. Turn off the computer; then disconnect the ac power adapter and all cables from the computer. 2. Close the computer display, and turn the computer over. 3. Remove the battery. For more information, refer - Lenovo ThinkPad T420si | (English) User Guide - Page 142
6. Detach the side spacer rails from the solid state drive. 7. Attach the side spacer rails to a new solid state drive. 8. Insert the solid state drive into the solid state drive bay, then press it firmly into place. 126 User Guide - Lenovo ThinkPad T420si | (English) User Guide - Page 143
the bay (1), then reinstall the screw (2). 10. Reinstall the battery. For more information about how to reinstall the battery, refer to "Replacing the battery" on page 97. 11. Turn the computer over again. Connect the ac power adapter and the cables to the computer. Chapter 6. Replacing devices 127 - Lenovo ThinkPad T420si | (English) User Guide - Page 144
128 User Guide - Lenovo ThinkPad T420si | (English) User Guide - Page 145
on page 136 Finding ThinkPad options If you want to expand the capabilities of your computer, Lenovo has a number of hardware accessories and upgrades to meet your needs. Options include memory, storage, networking adapters, docking stations and port replicators, batteries, power adapters, printers - Lenovo ThinkPad T420si | (English) User Guide - Page 146
a device while the computer is operating. To hot-swap the Ultrabay device, do as follows: Note: Hot-swap is not supported when your computer is docked or has slice battery. 1. Click the Show hidden icons in the task bar, then click Safely Remove Hardware and Eject Media icon (in Windows Vista - Lenovo ThinkPad T420si | (English) User Guide - Page 147
2. Unlock the bay lock latch (1) by sliding it to the top. While holding the bay lock latch in the unlocked position, slide the bay eject latch (2) to the left, then pull out the Ultrabay device (3). 3. Insert the replaceable device into the bay; then press the device firmly into the connector. Note - Lenovo ThinkPad T420si | (English) User Guide - Page 148
(standby) mode and the pop-up window appears; then the computer automatically goes into sleep (standby) mode again. The bay status indicator (1) turns off. 132 User Guide - Lenovo ThinkPad T420si | (English) User Guide - Page 149
by installing a secondary hard disk drive. Note: The ThinkPad Serial Hard Drive Bay Adapter III supports only 2.5 inch (7 mm height) hard disk drive. To install your computer. To remove the drive, refer to the instructions given in "Replacing the device" on page 129. 2. Open the hard - Lenovo ThinkPad T420si | (English) User Guide - Page 150
3. Insert the hard disk drive with the label facing upward as shown: Note: If your hard disk drive has a strap, be sure not to leave it under the drive. 4. Connect the hard disk drive to its connector. 134 User Guide - Lenovo ThinkPad T420si | (English) User Guide - Page 151
ThinkPad notebook, copy the files to a removable storage device. Inserting the hard disk drive adapter into the bay Notes: • Use the ThinkPad Serial Hard Drive Bay Adapter III designed specifically for use with your computer. • The ThinkPad Serial Hard Drive Bay Adapter III supports the power switch - Lenovo ThinkPad T420si | (English) User Guide - Page 152
W)" on page 144 • "Security feature" on page 146 • "Using the system lock key" on page 148 Front view ThinkPad Port Replicator Series 3 1 The power switch turns the computer on and off. 2 The eject button releases the computer from the ThinkPad Port Replicator Series 3 when pressed. 136 User Guide - Lenovo ThinkPad T420si | (English) User Guide - Page 153
is a guide up the docking connector on your computer as you attach the ThinkPad Port Replicator Series 3. 4 The docking connector is where you attach your computer. ThinkPad Mini Dock Series 3 1 The power switch turns the computer on and off. 2 The key lock indicator lights when the system lock key - Lenovo ThinkPad T420si | (English) User Guide - Page 154
W) when pressed. 5 The sliding adjuster is a guide up the docking connector on your computer as you attach the ThinkPad Mini Dock Plus Series 3 or the ThinkPad Mini Dock Plus Series 3 (170 W). 6 The docking connector is where you attach your computer. 7 The system lock key is for locking the eject - Lenovo ThinkPad T420si | (English) User Guide - Page 155
Port Replicator Series 3 1 The power jack is for connecting the ac power adapter. 2 The Ethernet connector is for connecting the ThinkPad Port Replicator Series 3 to an Ethernet LAN. The indicator on the connector is the same as that on the computer. Notes: • You cannot use the - Lenovo ThinkPad T420si | (English) User Guide - Page 156
ThinkPad Mini Dock Series 3 1 The power jack is for connecting the ac power adapter. 2 The DisplayPort is for connecting a display device. 3 The digital visual interface connector is for connecting a monitor that supports Single-Link DVI. Note: The DVI connector provides a digital interface only. - Lenovo ThinkPad T420si | (English) User Guide - Page 157
supports DVI via docking only. 3 The DisplayPort is for connecting a display device. 4 The digital visual interface connector is for connecting a monitor that supports power jack is for connecting the ac power adapter. Note: For ThinkPad Mini Dock Plus Series 3 (170 W), use the 170 W ac power adapter - Lenovo ThinkPad T420si | (English) User Guide - Page 158
a ThinkPad Mini Dock Series 3, a ThinkPad Mini Dock Plus Series 3, or a ThinkPad Mini Dock Plus Series 3 (170 W), make sure that the system lock key is in place and in the unlocked (horizontal) position. • For ThinkPad Mini Dock Plus Series 3 (170 W), use the 170 ac power adapter and U.S. power cord - Lenovo ThinkPad T420si | (English) User Guide - Page 159
after you attach the ThinkPad Mini Dock Series 3, the ThinkPad Mini Dock Plus Series 3, or the ThinkPad Mini Dock Plus Series 3 (170 W), your computer is not properly connected to the dock. Check the ac power adapter of the dock, or disconnect and re-attach the ac power adapter. Then attach your - Lenovo ThinkPad T420si | (English) User Guide - Page 160
ac power adapters, your computer goes into battery mode first, and then shifts into ac mode. • If in either of the two preceding situations the battery of your computer is detached, or has no battery charge, your computer shuts down. Connecting an external display to the ThinkPad Mini Dock Plus - Lenovo ThinkPad T420si | (English) User Guide - Page 161
2. Make sure that the system lock key of the ThinkPad Mini Dock Series 3, the ThinkPad Mini Dock Plus Series 3, or the ThinkPad Mini Dock Plus Series 3 (170 W) Make sure that the battery pack is fully charged. 1. Make sure that all ejectable devices connected to the ThinkPad Port Replicator Series 3 - Lenovo ThinkPad T420si | (English) User Guide - Page 162
Series 3. If you use the ThinkPad Mini Dock Series 3, the ThinkPad Mini Dock Plus Series 3, or the ThinkPad Mini Dock Plus Series 3 (170 W), and attach a mechanical lock, the eject button is not locked. To lock the eject button, use the system lock key. Lenovo does not offer a mechanical lock - Lenovo ThinkPad T420si | (English) User Guide - Page 163
Attach a mechanical lock to the ThinkPad Mini Dock Plus Series 3 or the ThinkPad Mini Dock Plus Series 3 (170 W) as follows: Attach a mechanical lock to the ThinkPad Mini Dock Series 3 as follows: Chapter 7. Enhancing your computer 147 - Lenovo ThinkPad T420si | (English) User Guide - Page 164
the key is in the locked position, the eject button of the ThinkPad Mini Dock Series 3, the ThinkPad Mini Dock Plus Series 3, or the ThinkPad Mini Dock Plus Series 3 (170 W) is locked, and you cannot remove your computer. The key lock indicator lights when the eject button is locked. 148 User Guide - Lenovo ThinkPad T420si | (English) User Guide - Page 165
UEFI BIOS, or recover preinstalled software. This information will help you handle your computer with proper care and keep it in top working shape. • "Installing a new operating system" on page 149 • "Installing device drivers" on page 155 • "ThinkPad Setup" on page 157 • "Using system management - Lenovo ThinkPad T420si | (English) User Guide - Page 166
updates and the latest information about them, go to: http://www.lenovo.com/ThinkPadDrivers Installing Registry Patches for Windows 7 Install the following Registry Patches: • Registry patch enabling Wake Up on LAN from Standby for Energy Star • Fix for Issue of HDD with HD Detection 150 User Guide - Lenovo ThinkPad T420si | (English) User Guide - Page 167
these instructions. Note: Your computer supports Windows Vista with Service Pack 2. Before you install Windows Vista Service Pack 2, make sure you install the Windows Vista Service Pack 1 first. To install Windows Vista and its related software on your computer, do as follows: 1. Start ThinkPad - Lenovo ThinkPad T420si | (English) User Guide - Page 168
these instructions. Note: Your computer supports Windows XP with Service Pack 3. Before you install the Windows XP Service Pack 3, make sure you install the Windows XP Service Pack 2 first. You must install Intel Rapid Storage Technology Driver before installing the operating system. To install it - Lenovo ThinkPad T420si | (English) User Guide - Page 169
installation. 19. Install the Intel Chipset Support for Windows 2000/XP/Vista/7. To do this, run infinst_autol.exe in C:\SWTOOLS\DRIVERS\INTELINF. 20. Apply the PCMCIA Power Policy Registry Patch. To do this, go to C:\SWTOOLS\OSFIXES\PCMCIAPW\, double-click install.bat. Then follow the instructions - Lenovo ThinkPad T420si | (English) User Guide - Page 170
the Intel Chipset Support for Windows 2000/XP/Vista/7. To do this, run infinst_autol.exe in C:\SWTOOLS\DRIVERS\INTELINF. 27. Apply the PCMCIA Power Policy Registry Patch. To do this, go to C:\SWTOOLS\OSFIXES\PCMCIAPW\, double-click install.bat, and then follow the instructions that appear on the - Lenovo ThinkPad T420si | (English) User Guide - Page 171
: http://www.lenovo.com/support To install the driver for the 4-in-1 Media Card Reader, refer to "Installing the driver for the 4-in-1 Media Card Reader" on page 155 To install the driver for USB 3.0, refer to: "Installing the driver for USB 3.0" on page 155. To install the ThinkPad Monitor File for - Lenovo ThinkPad T420si | (English) User Guide - Page 172
video driver has been installed. For Windows 7 1. Right-click on the desktop, and click Personalize. 2. Click Display at the left. 3. Click Change display settings. 4. Click Advanced Settings. 5. Click the Monitor tab. 6. Click Properties. 7. Click the Driver tab. 8. Click Update Driver. 9. Select - Lenovo ThinkPad T420si | (English) User Guide - Page 173
specific location (Advanced). 10. Click Next. 11. Select Don't search, I will choose the driver to install. 12. Click Next. 13. Click Have Disk. 14. Click Browse. 15. Specify "C:\SWTOOLS\DRIVERS\MONITOR" as location directory and select TPLCD.INF. 16. Click OK. 17. System will show ThinkPad Display - Lenovo ThinkPad T420si | (English) User Guide - Page 174
. • Power: Set power management related functions. • Beep and Alarm: Enable or disable the audio related functions. • Serial ATA (SATA): Specify the settings for the hard disk drive. • CPU: Specify the settings for the CPU. • Intel AMT: Set the Intel AMT Control related functions. 158 User Guide - Lenovo ThinkPad T420si | (English) User Guide - Page 175
select Date/Time from the ThinkPad Setup menu. The following submenu is displayed: • System Date • System Time To change the date displayed: • Hardware Password Manager • Supervisor Password • Lock UEFI BIOS Settings • Set Minimum Length • Password at unattended boot • Password at restart • Power - Lenovo ThinkPad T420si | (English) User Guide - Page 176
Password Manager, you can manage your power-on password, supervisor password, and your hard disk passwords by the management server. By default, this is set to Enabled. Lock UEFI BIOS Settings enables or disables the function that protects items in the ThinkPad Setup from being changed by a user who - Lenovo ThinkPad T420si | (English) User Guide - Page 177
on all of the computers in a LAN remotely by use of network management software. Other items in the Startup menu The following items are also displayed in the Startup menu of the ThinkPad Setup: • UEFI/Legacy Boot: Select system boot capability. • UEFI/Legacy Boot Priority: Select priority of boot - Lenovo ThinkPad T420si | (English) User Guide - Page 178
"AC and Battery", Wake On LAN is enabled with any power sources. Note: AC is required with magic packet type Wake On LAN. Note: Wake On LAN function does not work when a hard disk password is set. Load the Ethernet LAN Option ROM to enable startup from an integrated network device. 162 User Guide - Lenovo ThinkPad T420si | (English) User Guide - Page 179
BIOS Support support for USB diskette, USB memory key, and USB optical drive. If you select "Enabled", the external USB devices can be charged via USB ports even when the system is in low power mode (standby, hibernate, or power the online help of the Power Manager program. Enable or disable the - Lenovo ThinkPad T420si | (English) User Guide - Page 180
(continued) Fn Key Lock ThinkPad NumLock Power-On NumLock Display Boot Display Device 164 User Guide • Disabled • Enabled • Independent • Synchronized • Automatic • On • Off • ThinkPad LCD • Analog (VGA) • Digital on ThinkPad • Digital 1 on dock • Digital 2 on dock If you select "Enabled", you - Lenovo ThinkPad T420si | (English) User Guide - Page 181
(Intel SpeedStep mounted models only) Adaptive Thermal Management Optical Drive Speed CPU Power Management • Integrated Graphics • Discrete Graphics • NVIDIA Optimus DisplayPort or DVI on docking station. Integrated Graphics will achieve longer battery life, and Discrete Graphics enhances - Lenovo ThinkPad T420si | (English) User Guide - Page 182
sounds when the computer enters a power management mode, when it resumes operational mode, and when the ac power adapter is connected or disconnected. Enable or disable the low battery alarm. Enable this option to have a beep sound when the system is waiting for a power-on, hard disk, or supervisor - Lenovo ThinkPad T420si | (English) User Guide - Page 183
appear. Note: For Core Multi-Processing, refer to the instructions in "Installing Windows XP" on page 152. Enable or disable additional logical processors within a processor core. If you select "Enabled", Intel AMT (Active Management Technology) is configured and additional setup items are provided - Lenovo ThinkPad T420si | (English) User Guide - Page 184
system is loaded. If External ➙ Internal is selected, an external fingerprint reader is used if attached. Otherwise, an internal fingerprint reader is used. If Internal Only is selected, an internal state (ex. Power-on security, LEDs, etc.) As a result, any power-on security features User Guide - Lenovo ThinkPad T420si | (English) User Guide - Page 185
UEFI BIOS Update Option Flash BIOS Updating by End-Users • Disabled • Enabled • Disabled • Enabled Memory Protection Flash Over LAN Execution Prevention • Disabled • Enabled • Disabled • Enabled • BIOS ROM String Reporting: BIOS text string • ESCD Reporting: Extended system configuration - Lenovo ThinkPad T420si | (English) User Guide - Page 186
• Disabled • Enabled I/O Port Access 170 User Guide Intel VT-d Feature • Disabled • Enabled Ethernet LAN Wireless LAN WiMAX Wireless WAN Bluetooth USB Port ExpressCard Slot Ultrabay (HDD/Optical) eSATA Port Memory Card Slot Integrated Camera Microphone Fingerprint Reader • Disabled • Enabled - Lenovo ThinkPad T420si | (English) User Guide - Page 187
select "UEFI Only", system cannot boot from the bootable devices which do not have UEFI enabled OS. Select priority of boot option between UEFI and Legacy. Screen during POST: • Quick: ThinkPad Logo screen is displayed. • Diagnostics: Test messages are displayed. Chapter 8. Advanced configuration - Lenovo ThinkPad T420si | (English) User Guide - Page 188
or a device driver, you may be informed that you need to update your UEFI BIOS in order for the new addition to work properly. To update your UEFI BIOS, visit this Web site at http://www.lenovo.com/ThinkPadDrivers. Then follow the instructions on the screen. Using system management This section is - Lenovo ThinkPad T420si | (English) User Guide - Page 189
Desktop Management Interface The system BIOS (UEFI BIOS) of your computer supports an interface called System Management BIOS Reference Specification(SMBIOS) V2.6.1. SMBIOS provides information about the hardware components of your system. It is the responsibility of the BIOS to supply this database - Lenovo ThinkPad T420si | (English) User Guide - Page 190
-management software must be installed in the remote administrator's computer. To enable or disable the Flash update from the network setting, do the following: 1. On the ThinkPad Setup menu, select Security. The Security submenu appears. 2. Select UEFI BIOS Update Option. The UEFI BIOS Update - Lenovo ThinkPad T420si | (English) User Guide - Page 191
are easily installed. 7. Use or schedule System Restore to take a system snapshot periodically. For more information about System Restore see Chapter 5 "Recovery overview" on page 85. 8. Update device drivers and UEFI BIOS when needed. 9. Profile your machine at http://www.lenovo.com/support to keep - Lenovo ThinkPad T420si | (English) User Guide - Page 192
device drivers, UEFI BIOS flashes, or software updates. When the System Update program connects to the Lenovo Support Web site, the System Update program automatically recognizes the machine type and model of your computer, the installed operating system, and the language of the operating system to - Lenovo ThinkPad T420si | (English) User Guide - Page 193
an angle slightly greater than 90 degrees. Do not open the display beyond 180 degrees, as this might damage the computer hinge. • Do not turn your computer over while the ac power adapter is plugged in. This could break the adapter plug. Carry your computer properly • Before moving your computer, be - Lenovo ThinkPad T420si | (English) User Guide - Page 194
. Be sure not to modify your computer • Only an authorized ThinkPad repair technician should disassemble and repair your computer. • Do not modify or tape the latches to keep the display open or closed. Cleaning the cover of your computer Occasionally clean your computer as follows: 178 User Guide - Lenovo ThinkPad T420si | (English) User Guide - Page 195
crumbs or dust from beneath the keys, you can use a camera blower with a brush or cool air from a hair dryer. Note: Avoid spraying cleaner directly onto the display or the keyboard. Cleaning your computer display 1. Gently wipe the display with a dry, soft lint-free cloth. If you see a scratchlike - Lenovo ThinkPad T420si | (English) User Guide - Page 196
180 User Guide - Lenovo ThinkPad T420si | (English) User Guide - Page 197
program, you can download it from http://www.lenovo.com/diagnose. The Lenovo Solution Center program enables you to troubleshoot and resolve computer problems. It combines diagnostic tests, system information collection, security status, and support information, along with hints and tips for maximum - Lenovo ThinkPad T420si | (English) User Guide - Page 198
When the application is launched, select a diagnostic test to run. If there is any problem, besides the error messages, a guidance also will be displayed to guide you to fix the problem. For additional information, refer to the ThinkVantage Toolbox help system. Note: If you are unable to isolate and - Lenovo ThinkPad T420si | (English) User Guide - Page 199
• Message: 0176: System Security - The System has been tampered with. Solution: This message is displayed if you remove the Security Chip and reinstall it, or install a new one. To clear the error, enter the ThinkPad Setup. If this does not solve the problem, have the computer serviced. • Message - Lenovo ThinkPad T420si | (English) User Guide - Page 200
. Have the computer serviced. • Message: 0190: Critical low-battery error Solution: The computer turned off, because the battery is low. Connect the ac power adapter to the computer and charge the battery, or replace the battery with a fully charged one. • Message: 0191: System Security - Invalid - Lenovo ThinkPad T420si | (English) User Guide - Page 201
: Fan error Solution: Cooling fan has failed. Have the computer serviced. Errors without messages • Problem: My screen keeps blanking when I do not want it to. Solution: You can disable any system timers, such as the LCD turn-off timer or the blank timer 1. Start Power Manager. 2. Click the Power - Lenovo ThinkPad T420si | (English) User Guide - Page 202
. For details about restoring the system to the factory state, see "Creating and using recovery media" on page 85. If the problem persists, have the computer serviced. • Problem: My screen goes blank while the computer is on. Solution: Your screen saver or power management may be enabled. Do either - Lenovo ThinkPad T420si | (English) User Guide - Page 203
the highlighted adapter. 5. Click Update Driver Software, and then follow the instructions on the screen. For Windows XP: 1. Click Start, and then click Control Panel. 2. Click Performance and Maintenance, and then click System. 3. Click the Hardware tab, and click the Device Manager button. 4. If - Lenovo ThinkPad T420si | (English) User Guide - Page 204
-compliant (gigabit over copper). A wireless LAN problem • Problem: You cannot connect using the built-in wireless networking card. Solution: Make sure that your wireless LAN driver is the latest version installed. Check the Web site and confirm the driver version supported by Access Connections is - Lenovo ThinkPad T420si | (English) User Guide - Page 205
power off and then on again, or restart your computer. Then search for the device again. Note: If you are using the ThinkPad Bluetooth with Enhanced Data Rate Software, refer to the following instructions. • Problem: You cannot connect to any Bluetooth-enabled device. Chapter 10. Troubleshooting - Lenovo ThinkPad T420si | (English) User Guide - Page 206
of the serial-based connection and is not a defect. If you need the Bluetooth serial port, just reconnect it. • Problem: PIM Synchronization failed with an error message "The Synchronization with xxx (Bluetooth device name) failed. PIM (Personal Information Manager) Interface failed." 190 User Guide - Lenovo ThinkPad T420si | (English) User Guide - Page 207
device listing, the Microsoft Bluetooth software is installed on your computer. If you want to use ThinkPad Bluetooth with Enhanced Data Rate Software, you have to install it and then replace the Bluetooth driver. For more information, see "Using Bluetooth" on page 45. • Problem: While looking at - Lenovo ThinkPad T420si | (English) User Guide - Page 208
When the temperature changes • Problem: The TrackPoint or touch pad press Fn+F8. Keyboard problems • Problem: All or some keys problem remains, make sure that the correct device driver is installed have the computer serviced. • Problem: A number appears when or Fn +NmLk. • Problem: All or some keys - Lenovo ThinkPad T420si | (English) User Guide - Page 209
and the image is displayed on the computer screen. - If you are using the ac power adapter, or using the battery and the battery status indicator is on support the presentation scheme. • Problem: The screen is unreadable or distorted. Solution: Make sure that: - The display device driver is installed - Lenovo ThinkPad T420si | (English) User Guide - Page 210
properly. If not, click the Troubleshoot button. • Problem: Incorrect characters appear on the screen. Solution: Did you install the operating system or application program correctly? If they are installed and configured correctly, have the computer serviced. • Problem: The screen stays on even - Lenovo ThinkPad T420si | (English) User Guide - Page 211
that has been installed on your computer. 6. Click OK. If the information is incorrect, reinstall the device driver. See below for more information. - Check the monitor type and, if necessary, update the driver by doing the following: For Windows 7: Chapter 10. Troubleshooting computer problems 195 - Lenovo ThinkPad T420si | (English) User Guide - Page 212
do as follows. 7. If more than one monitor type is displayed, select Generic PnP Monitor or Generic Non-PnP Monitor. 8. Click Driver tab. 11. Click Update Driver. 12. Click Browse my computer for driver software, and then click Let me pick from a list of device drivers on my computer. 196 User Guide - Lenovo ThinkPad T420si | (English) User Guide - Page 213
displayed, select Default Monitor. 9. Click Properties. 10. Click the Driver tab. 11. Click Update Driver. The Hardware Update Wizard appears. 12. Click No, not this time, and then click Next. 13. Select Install from a list or specific monitor). Chapter 10. Troubleshooting computer problems 197 - Lenovo ThinkPad T420si | (English) User Guide - Page 214
: Wrong characters appear on the screen. Solution: Did you follow the correct procedure in installing the operating system or application program? If you did, have the external monitor serviced. • Problem: The Extend desktop function does not work. Solution: Enable the Extend desktop function by - Lenovo ThinkPad T420si | (English) User Guide - Page 215
and the color depth to lower settings for the primary display by doing the following: For Windows 7: Change the resolution depth to lower settings for the primary display. Refer to the "Solution" for "The Extend desktop function does not work" above. Chapter 10. Troubleshooting computer problems 199 - Lenovo ThinkPad T420si | (English) User Guide - Page 216
. If it does support the display mode you have set, go to the setup menu for the monitor itself and adjust the settings there. Usually the external monitor has buttons for access to the setup menu. For details, see the reference manual for the monitor. Audio problems • Problem: Wave or MIDI sound - Lenovo ThinkPad T420si | (English) User Guide - Page 217
Microphone Microphone volume control, and then click Advanced. 8. Select the Microphone boost check box. 9. Click Close. Note: For details about controlling volume, refer to your Windows online help. • Problem • Problem: Problem Problem Problem support the control. • Problem • Problem: Sound - Lenovo ThinkPad T420si | (English) User Guide - Page 218
computer is attached to a ThinkPad Mini Dock Plus or a ThinkPad Mini Dock, you can also select a comes from a headphone attached directly to the system. For details, refer to the Help for SmartAudio built-in microphone for a recording device, shows that the device has been selected. • Problem: When - Lenovo ThinkPad T420si | (English) User Guide - Page 219
cools, reinstall it and recharge the battery. If it still cannot be charged, have it serviced. AC power adapter problems • Problem: The ac power adapter is connected to the computer and the working electrical outlet, but the power adapter (power plug) icon is not displayed in the task bar. Also the - Lenovo ThinkPad T420si | (English) User Guide - Page 220
the ThinkPad Mini Dock Plus Series 3 (170 W)" on page 144. 6. Remove all devices and then test for system power with minimal devices attached. a. Disconnect the ac power adapter and all cables from the computer. b. Close the computer display, and turn the computer over. c. Remove the battery. Refer - Lenovo ThinkPad T420si | (English) User Guide - Page 221
ac power adapter and the battery. Startup problems Print these instructions now and keep them with your computer for reference later. If you receive an error message before the operating system loads, check the following item: • Follow the appropriate corrective actions for Power-on self-test. See - Lenovo ThinkPad T420si | (English) User Guide - Page 222
hibernation mode by pressing Fn+F12, you need to install ThinkPad PM driver. • Problem: The battery discharges slightly while the computer is in hibernation mode. Solution: If the wakeup function is enabled, the computer consumes small amount of power. This is not a defect. For details, refer to - Lenovo ThinkPad T420si | (English) User Guide - Page 223
Problem: The hard disk drive does not work. Solution: In the startup menu of ThinkPad supports an enhanced password algorithm. Computers older than yours may not support such a security function. Solid state drive problems • Problem drivers are correctly installed. • Problem kit. Test another CD - Lenovo ThinkPad T420si | (English) User Guide - Page 224
sure that the problem is not being caused by the application. Check that your computer has the minimum required memory to run the application. Refer to the manuals supplied with the application. Check the following: - The application is designed to operate with your operating system. 208 User Guide - Lenovo ThinkPad T420si | (English) User Guide - Page 225
2. Click Performance and Maintenance, and click System. 3. Click the Hardware tab, and click the Device Manager button. Refer to "Diagnosing problems" on page 181 and run a diagnostic test of the USB connector. A docking station or port replicator problem • Problem: The computer does not start when - Lenovo ThinkPad T420si | (English) User Guide - Page 226
210 User Guide - Lenovo ThinkPad T420si | (English) User Guide - Page 227
Register your computer" on page 25. Download system updates Downloading updated software might resolve problems you experience with your computer. To download updated software, go to http://www.lenovo.com/ThinkPadDrivers. Then follow the instructions on the screen. Record information Before you talk - Lenovo ThinkPad T420si | (English) User Guide - Page 228
on the Lenovo Support Web site at: http://support.lenovo.com This Web site is updated with the latest support information such as the following: • Drivers and software • Diagnostic solutions • Product and service warranty • Product and parts details • User guides and manuals • Knowledge base - Lenovo ThinkPad T420si | (English) User Guide - Page 229
Lenovo or nonwarranted parts Note: All warranted parts contain a 7-character identification in the format FRU XXXXXXX. • Identification of software problem sources • Configuration of system BIOS (UEFI BIOS) as part of an installation or upgrade • Changes, modifications, or upgrades to device drivers - Lenovo ThinkPad T420si | (English) User Guide - Page 230
214 User Guide - Lenovo ThinkPad T420si | (English) User Guide - Page 231
Bluetooth product that is compliant to Bluetooth Specification 2.1+EDR as defined by the Bluetooth SIG. Following profiles are supported by Bluetooth device: • Generic Access • Service only) Usage environment and your health Integrated wireless cards emit radio frequency electromagnetic energy like - Lenovo ThinkPad T420si | (English) User Guide - Page 232
a specific organization (e.g., airport or hospital), you are encouraged to ask for authorization to use integrated wireless cards prior to turning on the computer. Location of the UltraConnect wireless antennas ThinkPad models feature an integrated diversity antenna system built into the display for - Lenovo ThinkPad T420si | (English) User Guide - Page 233
more information about the wireless regulatory notices, refer to the ThinkPad Regulatory Notice shipped with your computer. If your computer is shipped without the Regulatory Notice, go to the Lenovo Web site at http://www.lenovo.com/ThinkPadUserGuides. Then follow the instructions on the screen to - Lenovo ThinkPad T420si | (English) User Guide - Page 234
ThinkPad T420s/T420si, machine types 4175, 4176, 4171, 4173 installation. This equipment generates, uses, and can radiate radio frequency energy and, if not installed and used in accordance with the instructions dealer or service representative for help. Lenovo is Lenovo cannot 218 User Guide - Lenovo ThinkPad T420si | (English) User Guide - Page 235
product, including the installation of option cards from other manufacturers. This product has been tested and found to comply Verantwortlich für die Konformitätserklärung nach Paragraf 5 des EMVG ist die Lenovo (Deutschland) GmbH, Gropiusplatz 10, D-70563 Stuttgart. Informationen in Hinsicht EMVG - Lenovo ThinkPad T420si | (English) User Guide - Page 236
Japanese VCCI Class B statement Japan compliance statement for products which connect to the power mains with rated current less than or equal to 20 A per phase Lenovo product service information for Taiwan 220 User Guide - Lenovo ThinkPad T420si | (English) User Guide - Page 237
Lenovo products applies to countries with WEEE and e-waste regulations (for example, European Directive 2002/96/EC, India E-Waste Management & Handling Rules, 2011 systems for reclaiming these end of life products. Users of Lenovo Japan provides, through its PC Collecting and Recycling Services - Lenovo ThinkPad T420si | (English) User Guide - Page 238
battery is installed on the system board of your Lenovo computer to provide power to the computer clock while the computer is off or disconnected from the main power source. If you want to replace it with a new one, contact your place of purchase or ask for a repair service provided by Lenovo - Lenovo ThinkPad T420si | (English) User Guide - Page 239
battery may also include a chemical symbol for the metal concerned in the battery (Pb for lead, Hg for mercury, and Cd for cadmium). Users of batteries and accumulators must not dispose of batteries , go to: http://www.lenovo.com/lenovo/environment Battery recycling information for United States and - Lenovo ThinkPad T420si | (English) User Guide - Page 240
224 User Guide - Lenovo ThinkPad T420si | (English) User Guide - Page 241
that these measurements will be the same on generally available systems. Furthermore, some measurements may have been estimated through extrapolation. Actual results may vary. Users of this document should verify the applicable data for their specific environment. © Copyright Lenovo 2012 225 - Lenovo ThinkPad T420si | (English) User Guide - Page 242
of Lenovo in the United States, other countries, or both: Lenovo Access Connections Active Protection System Rescue and Recovery ThinkLight ThinkPad ThinkVantage from Research In Motion Limited. Other company, product, and service names may be trademarks or service marks of others. 226 User Guide - Lenovo ThinkPad T420si | (English) User Guide - Page 243
Appendix D. Restriction of Hazardous Substances Directive (RoHS) China RoHS Turkish RoHS The Lenovo product meets the requirements of the Republic of Turkey Directive on the Restriction of the Use of Certain Hazardous Substances in Electrical and Electronic Equipment ( - Lenovo ThinkPad T420si | (English) User Guide - Page 244
India RoHS RoHS compliant as per E-Waste (Management & Handling) Rules, 2011. 228 User Guide - Lenovo ThinkPad T420si | (English) User Guide - Page 245
- Lenovo ThinkPad T420si | (English) User Guide - Page 246
Part Number: (1P) P/N: *1P*
-
 1
1 -
 2
2 -
 3
3 -
 4
4 -
 5
5 -
 6
6 -
 7
7 -
8
-
9
-
10
-
11
-
12
-
13
-
14
-
15
-
16
-
17
-
18
-
19
-
20
-
21
-
22
-
23
-
24
-
25
-
26
-
27
-
28
-
29
-
30
-
31
-
32
-
33
-
34
-
35
-
36
-
37
-
38
-
39
-
40
-
41
-
42
-
43
-
44
-
45
-
46
-
47
-
48
-
49
-
50
-
51
-
52
-
53
-
54
-
55
-
56
-
57
-
58
-
59
-
60
-
61
-
62
-
63
-
64
-
65
-
66
-
67
-
68
-
69
-
70
-
71
-
72
-
73
-
74
-
75
-
76
-
77
-
78
-
79
-
80
-
81
-
82
-
83
-
84
-
85
-
86
-
87
-
88
-
89
-
90
-
91
-
92
-
93
-
94
-
95
-
96
-
97
-
98
-
99
-
100
-
101
-
102
-
103
-
104
-
105
-
106
-
107
-
108
-
109
-
110
-
111
-
112
-
113
-
114
-
115
-
116
-
117
-
118
-
119
-
120
-
121
-
122
-
123
-
124
-
125
-
126
-
127
-
128
-
129
-
130
-
131
-
132
-
133
-
134
-
135
-
136
-
137
-
138
-
139
-
140
-
141
-
142
-
143
-
144
-
145
-
146
-
147
-
148
-
149
-
150
-
151
-
152
-
153
-
154
-
155
-
156
-
157
-
158
-
159
-
160
-
161
-
162
-
163
-
164
-
165
-
166
-
167
-
168
-
169
-
170
-
171
-
172
-
173
-
174
-
175
-
176
-
177
-
178
-
179
-
180
-
181
-
182
-
183
-
184
-
185
-
186
-
187
-
188
-
189
-
190
-
191
-
192
-
193
-
194
-
195
-
196
-
197
-
198
-
199
-
200
-
201
-
202
-
203
-
204
-
205
-
206
-
207
-
208
-
209
-
210
-
211
-
212
-
213
-
214
-
215
-
216
-
217
-
218
-
219
-
220
-
221
-
222
-
223
-
224
-
225
-
226
-
227
-
228
-
229
-
230
-
231
-
232
-
233
-
234
-
235
-
236
-
237
-
238
-
239
-
240
-
241
-
242
-
243
-
244
-
245
-
246
 |
 |

User Guide
ThinkPad T420s and T420si