Lenovo ThinkPad T430 (English) User Guide
Lenovo ThinkPad T430 Manual
 |
View all Lenovo ThinkPad T430 manuals
Add to My Manuals
Save this manual to your list of manuals |
Lenovo ThinkPad T430 manual content summary:
- Lenovo ThinkPad T430 | (English) User Guide - Page 1
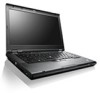
User Guide ThinkPad T430 and T430i - Lenovo ThinkPad T430 | (English) User Guide - Page 2
Web site. To refer to them, go to http://www.lenovo.com/ThinkPadUserGuides. First Edition (May 2012) © Copyright Lenovo 2012. LIMITED AND RESTRICTED RIGHTS NOTICE: If data or software is delivered pursuant a General Services Administration "GSA" contract, use, reproduction, or disclosure is subject - Lenovo ThinkPad T430 | (English) User Guide - Page 3
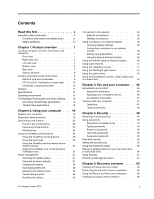
the battery power 29 Power-saving modes 29 Handling the battery 30 Connecting to the network 32 Ethernet connections 32 Wireless connections 32 Using a projector or an external display . . . . . 36 Changing display settings 36 Connecting a projector or an external monitor 36 Setting - Lenovo ThinkPad T430 | (English) User Guide - Page 4
147 Battery and power problems 147 Problems with drives and other storage devices 151 Software problems 152 Problems with ports and connectors . . . . 153 A USB problem 153 A docking station or port replicator problem 153 Chapter 11. Getting support . . . . 155 Before you contact Lenovo 155 - Lenovo ThinkPad T430 | (English) User Guide - Page 5
connect to the power mains with rated current less than or equal to 20 A per phase 163 Lenovo product service information for Taiwan 163 Appendix B. WEEE and recycling statements 165 EU WEEE statements 165 Battery recycling information for Japan . . . . . 165 Battery recycling information for - Lenovo ThinkPad T430 | (English) User Guide - Page 6
iv User Guide - Lenovo ThinkPad T430 | (English) User Guide - Page 7
is turned on or the battery is charging, the base, the level of charge in the battery. Extended contact with your body, the ac power adapter. When the ac power adapter is . • Do not place the ac power adapter in contact with any part of , or the cables of an ac power adapter, a mouse, a keyboard, - Lenovo ThinkPad T430 | (English) User Guide - Page 8
or the Lenovo® Limited Warranty. For more information, see "Warranty Information" in the Safety and Warranty Guide that comes with your computer. Customer safety is important. Our products are developed to be safe and effective. However, personal computers are electronic devices. Power cords, power - Lenovo ThinkPad T430 | (English) User Guide - Page 9
substances on the battery. • A cracking, hissing or popping sound, or strong odor that comes from the product. • Signs that liquid has been spilled or an object has fallen onto the computer product, the power cord or power adapter. • The computer product, power cord, or power adapter has been - Lenovo ThinkPad T430 | (English) User Guide - Page 10
equipped with a power cord, always make sure that the power is turned off and that the product is unplugged from any power source. If you have any questions or concerns, contact the Customer Support Center. Although there minutes to let the computer cool before opening the cover. viii User Guide - Lenovo ThinkPad T430 | (English) User Guide - Page 11
so that they will not be walked on, tripped over, or pinched by objects. Protect power cords and power adapters from liquids. For instance, do not leave your power cord or power adapter near sinks, tubs, toilets, or on floors that are cleaned with liquid cleansers. Liquids can cause a short circuit - Lenovo ThinkPad T430 | (English) User Guide - Page 12
loads and branch circuit ratings. Be sure that the power outlet you are using is properly wired, easily accessible, and located close to the equipment. Do not fully extend power cords in a way that will stress the cords. Be sure that the power outlet provides the correct voltage and current for the - Lenovo ThinkPad T430 | (English) User Guide - Page 13
. In addition, many mobile products, such as notebook computers, utilize a rechargeable battery pack to provide system power when in portable mode. Batteries supplied by Lenovo for use with your product have been tested for compatibility and should only be replaced with approved parts. Never attempt - Lenovo ThinkPad T430 | (English) User Guide - Page 14
or disassemble Dispose of the battery as required by local ordinances or regulations. The following statement applies to users in the state of California , U.S.A. California Perchlorate Information: Products containing CR (manganese dioxide) lithium coin cell batteries - Lenovo ThinkPad T430 | (English) User Guide - Page 15
Heat and product ventilation DANGER Computers, ac power adapters, and many accessories can generate heat when turned on and when batteries are charging. Notebook computers can generate a significant amount temperatures into the computer should not exceed 35°C (95°F). © Copyright Lenovo 2012 xiii - Lenovo ThinkPad T430 | (English) User Guide - Page 16
Connect all power cords to a power cords, battery pack, and all the cables before you open the device covers, unless instructed power cords to outlets. 5. Turn devices ON. To disconnect: 1. Turn everything OFF. 2. First, remove power cords The power cord may There are no serviceable parts inside the - Lenovo ThinkPad T430 | (English) User Guide - Page 17
EN 50332-2 can be dangerous due to excessive sound pressure levels. If your Lenovo computer came with headphones or earphones in the package, as a set, the combination of the headphones or earphones and the computer already complies with the specifications of EN 50332-1. If different headphones or - Lenovo ThinkPad T430 | (English) User Guide - Page 18
: Handling the cord on this product or cords associated with accessories sold with this product will expose you to lead, a chemical known to the State of California to cause cancer, and birth defects or other reproductive harm. Wash hands after handling. Save these instructions. xvi User Guide - Lenovo ThinkPad T430 | (English) User Guide - Page 19
" on page 9 • "Features" on page 11 • "Specifications" on page 13 • "Operating environment" on page 13 • ThinkPad T430 and T430i front view 1 Status indicators 3 Built-in stereo speaker (right) 5 Fingerprint reader 2 Power button 4 TrackPoint® pointing stick 6 Touch pad © Copyright Lenovo - Lenovo ThinkPad T430 | (English) User Guide - Page 20
Windows® operating system. 9 Fn key Use the Fn key to take advantage of ThinkPad® function keys, such as turning on the ThinkLight light, locking the computer, managing the wireless connections, and so on. 11 Volume control buttons The volume control buttons enable you to quickly adjust the sound - Lenovo ThinkPad T430 | (English) User Guide - Page 21
the Fn key and the space key together. To turn it off, press the combination again. CAUTION: Avoid using your computer in dark conditions for prolonged periods. It is bad for your eyes. Right-side view Figure 2. ThinkPad T430 and T430i right-side view 1 Security keyhole 3 Wireless radio switch - Lenovo ThinkPad T430 | (English) User Guide - Page 22
the ThinkPad 12.7 mm Serial Hard Drive Bay Adapter III. 7 Smart card slot Some models have a smart card slot. Left-side view Figure 3. ThinkPad T430 and T430i left-side view 1 Fan louvers (left) 3 Combo audio jack 5 USB 3.0 connectors 2 Monitor connector 4 Mini DisplayPort connector 4 User Guide - Lenovo ThinkPad T430 | (English) User Guide - Page 23
port replicator or a docking station and use a monitor connector, use the monitor connector on the port replicator or docking station, not the one on the computer. For details, refer to "Attaching an external monitor" on page 36. 3 Combo audio jack To listen to the sound from your computer, connect - Lenovo ThinkPad T430 | (English) User Guide - Page 24
Power Manager program. 3 Port replicator or docking station connector Depending on models, your computer might support one of the following port replicators or docking stations: • ThinkPad Port Replicator Series 3 • ThinkPad Mini Dock Series 3 • ThinkPad Mini Dock Plus Series 3 • ThinkPad Mini Dock - Lenovo ThinkPad T430 | (English) User Guide - Page 25
Rear view Figure 5. ThinkPad T430 and T430i rear view. 1 Always On USB connector 3 Power jack 2 Ethernet connector docking station to connect to a LAN, not the one on the computer. 3 Power jack Connect the ac power adapter to the power jack to provide ac power to the computer and charge the battery - Lenovo ThinkPad T430 | (English) User Guide - Page 26
hard disk drive, or turn off the computer. 3 Caps Lock indicator When the indicator is on, the Caps Lock mode is enabled. You can type all alphabetic characters (A-Z) in upper case without pressing the Shift key. 4 Power on status indicator The power button stays lit whenever the computer is on - Lenovo ThinkPad T430 | (English) User Guide - Page 27
battery is 100% charged. • Quick blinking orange: An error has occurred with the battery. • Off: The battery is detached or the computer is powered Lenovo for help, the machine type and model number will enable support technicians to identify your computer and provide the highest level of service. - Lenovo ThinkPad T430 | (English) User Guide - Page 28
. The FCC ID and IC Certification number label is affixed on the card installed in the PCI Express Mini Card slot of your computer. 10 User Guide - Lenovo ThinkPad T430 | (English) User Guide - Page 29
label are the product ID and the product key information for your computer. Record this information your computer or reinstall the operating system. The Windows Certificate of Authenticity of your computer is shown data rate 3 synchronous dynamic random access memory (DDR3 SDRAM) Storage device - Lenovo ThinkPad T430 | (English) User Guide - Page 30
enhanced bay • ExpressCard slot • Media card reader slot • Smart card reader slot (on some models) • Docking station connector Optical drive • MultiBurner drive or DVD-ROM drive (depending on model) Wireless features • Integrated wireless LAN • Integrated Bluetooth (on some models) 12 User Guide - Lenovo ThinkPad T430 | (English) User Guide - Page 31
50 to 60 Hz • Input rating of the ac power adapter: 100 to 240 V ac, 50 to 60 Hz Battery pack • Lithium-ion (Li-Ion) battery pack Battery life • For percentage of remaining battery power, check the Power Manager battery gauge on the taskbar. • The Power Manager also displays a green, yellow and red - Lenovo ThinkPad T430 | (English) User Guide - Page 32
icon in the Lenovo ThinkVantage Tools application navigation window is dimmed, it indicates that you need to install the application manually. To install the application manually, double-click the application icon. Then, follow the instructions on the screen. When the installation process - Lenovo ThinkPad T430 | (English) User Guide - Page 33
and Security Lenovo - Password Vault User Accounts and Family Safety Power Manager Hardware and Sound System and Security Lenovo - Power Controls Recovery Media System and Security Lenovo - Factory Recovery Disks System Update System and Security Lenovo - Update and Drivers Rescue and - Lenovo ThinkPad T430 | (English) User Guide - Page 34
of time. Lenovo Solution Center The Lenovo Solution Center program enables you to troubleshoot and resolve computer problems. It combines diagnostic tests, system information collection, security status, and support information, along with hints and tips for maximum system performance. 16 User Guide - Lenovo ThinkPad T430 | (English) User Guide - Page 35
and securely by providing easy access to various technologies, such as: • Lenovo Solution Center • Power Manager • Rescue and Recovery use the Fn+F7 key combination. Note: If you are using the Windows 7 operating system, the Presentation Director program is not supported because the Windows 7 - Lenovo ThinkPad T430 | (English) User Guide - Page 36
it from http://www.lenovo.com/support. System Update The System Update program helps you keep the software on your computer up-to-date by downloading and installing software packages (ThinkVantage applications, device drivers, UEFI BIOS updates, and other third party applications). 18 User Guide - Lenovo ThinkPad T430 | (English) User Guide - Page 37
troubleshooting and answers to frequently asked questions: http://www.lenovo.com/support Can I get my user guide in another language? • To download the user guide in another language, go to http://www.lenovo.com/support. Then follow the instructions on the screen. On the go and need to use battery - Lenovo ThinkPad T430 | (English) User Guide - Page 38
Power problems" on page 148 Special keys and buttons Your computer has several special keys and buttons to help you work more easily and effectively. Function key combinations To use the Fn function key combinations, press and hold the Fn key 1 , then press one of the function keys 2 . 20 User Guide - Lenovo ThinkPad T430 | (English) User Guide - Page 39
Fn key only. If you want to use the combination to put the computer into hibernation mode or do-nothing mode, change the settings in the Power Manager program. Switching a display output location • Fn+F7 Switch between the computer display and an external monitor. Depending on the Windows operating - Lenovo ThinkPad T430 | (English) User Guide - Page 40
of this combination, see "Config menu" on page 113. • Fn+F3: Lock your computer. • Fn+B: Have the same function as the Break key. • Fn+P: Have the same function as the Pause key. • Fn+S: Have the same function as the SysRq key. • Fn+K: Have the same function as the ScrLK key. 22 User Guide - Lenovo ThinkPad T430 | (English) User Guide - Page 41
➙ Sound. The Sound window opens. 2. Click the Playback tab or Recording tab, and then click a device, which you want to customize. 3. Click the Properties button. 4. Click the Levels tab, and then change the volume by moving the slider. You also can get access to the desktop volume control by using - Lenovo ThinkPad T430 | (English) User Guide - Page 42
Windows operating system by pressing the Windows key 1 : You also can use the Windows key together with another key to achieve other functions. For details, refer to the help information system of the Windows and Sound ➙ Mouse ➙ UltraNav. Then change the settings as you desired. 24 User Guide - Lenovo ThinkPad T430 | (English) User Guide - Page 43
the pointer 5 on the screen, you apply pressure to the nonslip cap on the pointing stick in of the window. If you are not familiar with the TrackPoint, these instructions will help its buttons the following: • Switch the functions of the left Control Panel ➙ Hardware and Sound ➙ Mouse ➙ UltraNav. 2. - Lenovo ThinkPad T430 | (English) User Guide - Page 44
and right mouse buttons on a conventional mouse. Customizing the touch pad To customize the touch pad, do the following: 1. Click Start ➙ Control Panel ➙ Hardware and Sound ➙ Mouse ➙ UltraNav. 2. Under TouchPad, proceed to changing the settings. 26 User Guide - Lenovo ThinkPad T430 | (English) User Guide - Page 45
computer. For example: - How often you access the hard disk drive. - How bright you make the computer display. - How often you use the wireless features. Using the ac power adapter The power to run your computer can come either from the lithium-ion (Li-ion) battery pack provided with it, or from ac - Lenovo ThinkPad T430 | (English) User Guide - Page 46
blinking orange. • Recharge the battery completely before using it. The battery is fully charged if the battery indicator shows green when the ac power adapter is plugged in. • Always use power management features such as power modes, screen blank, sleep (standby), and hibernation. 28 User Guide - Lenovo ThinkPad T430 | (English) User Guide - Page 47
information system of the Power Manager program. • Wireless off When you are not using the wireless features, such as Bluetooth or wireless LAN, turn them off. This will help conserve power. To turn off the wireless features, press Fn+F5 or use the wireless radio switch. Enabling the wakeup function - Lenovo ThinkPad T430 | (English) User Guide - Page 48
resume normal operation, click OK. Handling the battery This system supports only batteries specially designed for this specific system and manufactured by Lenovo or an authorized builder. The system does not support unauthorized batteries or batteries designed for other systems. If an unauthorized - Lenovo ThinkPad T430 | (English) User Guide - Page 49
it away from children. The battery pack is a consumable supply. If your battery begins to discharge too quickly, replace the battery pack with a new one of the type recommended by Lenovo. For more information on replacing the battery pack, contact your Customer Support Center. DANGER Do not drop - Lenovo ThinkPad T430 | (English) User Guide - Page 50
access is provided by a wireless service carrier. Bluetooth Bluetooth is one of a number of technologies used to create a wireless personal area network. Bluetooth WiMAX This long-range wireless data transmission technology based on the 802.16 standard is expected to provide the user a "last mile" - Lenovo ThinkPad T430 | (English) User Guide - Page 51
an antenna that can support wireless LAN access when wireless LAN access points are available. Wireless devices are available from Lenovo. For more information, refer to "Finding ThinkPad options" on page 97. Establishing wireless WAN connections Wireless Wide Area Network (wireless WAN) enables you - Lenovo ThinkPad T430 | (English) User Guide - Page 52
the Windows notification area and select Add a Device. 3. Follow the instructions on the screen to establish the connection. After you add a Bluetooth device, double click the device from the device list to configure the profiles of that device. For details about supported profiles, see "Wireless - Lenovo ThinkPad T430 | (English) User Guide - Page 53
gauge on the taskbar and selecting View Status of Wireless Connection. • Access Connections gauge states: wireless LAN - Power to the wireless radio is off or no signal. - Power to the wireless radio is on. The signal strength of the wireless connection is poor. To improve signal strength, move - Lenovo ThinkPad T430 | (English) User Guide - Page 54
Fn+F5 to bring up the the wireless feature list, such as wireless LAN and Bluetooth. Select a feature to enable or disable it. • Click the Access Connections wireless status icon in the Windows notification area. Then, click Power On Wireless Radio to enable the wireless features or click Power - Lenovo ThinkPad T430 | (English) User Guide - Page 55
display output location by pressing Fn+F7. This enables you to switch between viewing output on the external monitor, the computer monitor, and both monitors. Note: If your computer cannot detect the external monitor, right-click on the desktop, then select Screen resolution. Click the Detect button - Lenovo ThinkPad T430 | (English) User Guide - Page 56
DVI connector of that unit: • ThinkPad Mini Dock Series 3 • ThinkPad Mini Dock Series 3 with USB 3.0 • ThinkPad Mini Dock Plus Series 3 • ThinkPad Mini Dock Plus Series 3 with USB 3.0 Notes: • The screen mode that can be used depends on the specifications of the DVI monitor. • Before you attach the - Lenovo ThinkPad T430 | (English) User Guide - Page 57
, or HDMI connectors. The Mini DisplayPort connector of your computer supports audio as well as video streaming. Setting up a presentation Note: If your computer is a Windows 7 model, it does not support Presentation Director, but the Fn+F7 or Win+P key combination is available for switching display - Lenovo ThinkPad T430 | (English) User Guide - Page 58
switches between High Performance Graphics and Energy Saving Graphics. The dynamic switch allows switching without having to restart your computer, close applications, or intervene manually. Note: The NVIDIA Optimus Graphics feature is only supported in Windows 7 operating system. 40 User Guide - Lenovo ThinkPad T430 | (English) User Guide - Page 59
computer or docking station are supported. Table 3. Audio feature list Combo audio jack Headphone jack of the dock Headset with Sound ➙ Realtek HD Audio Manager. Using the integrated camera If your computer has an integrated camera, when you press Fn+F6 to open the Communications settings window - Lenovo ThinkPad T430 | (English) User Guide - Page 60
1. Open the Communications Utility window. 2. Click Advanced camera settings. The Properties window opens. 3. Configure the You can turn on the ThinkLight light by pressing Fn+Spacebar to illuminate the keyboard. Note: Avoid using supports the following cards: • Secure Digital(SD) cards 42 User Guide - Lenovo ThinkPad T430 | (English) User Guide - Page 61
Notes: • Your computer does not support the CPRM feature for the SD Panel. 2. Click Hardware and Sound. 3. Click Device Manager. If starts. 5. Follow the instructions on the screen. Removing an ExpressCard module from the Windows operating system, the card can no longer be accessed. To access the card, - Lenovo ThinkPad T430 | (English) User Guide - Page 62
44 User Guide - Lenovo ThinkPad T430 | (English) User Guide - Page 63
area, setting up your computer equipment, and establishing healthy work habits. Lenovo is committed to providing the latest information and technology to our customers with disabilities. Refer to our accessibility information which outlines our efforts in this area. Ergonomic information Working in - Lenovo ThinkPad T430 | (English) User Guide - Page 64
your computer to best suit your needs. Access the following Web site to view some of these options: http://www.lenovo.com/accessories/services/index.html. Explore your options for docking solutions and external products that can provide the adjustability and features that you want. 46 User Guide - Lenovo ThinkPad T430 | (English) User Guide - Page 65
. The Microsoft help information system supports the accessibility features provided by your Windows operating system, screen readers designed to operate in the Windows environment, and Windows keyboard navigation. For a complete listing of the Microsoft Windows Keyboard Guide, go to: http://www - Lenovo ThinkPad T430 | (English) User Guide - Page 66
the cord. Note: If you use the ThinkLight light, the battery life is slightly reduced. Travel tips on airplanes If you carry your computer into an airplane, check the travel tips. Notes: • For using onboard computer or wireless (such as Internet and Bluetooth) services, check the services with - Lenovo ThinkPad T430 | (English) User Guide - Page 67
computer; then secure the chain on the lock to a stationary object. Refer to the instructions shipped with the mechanical lock. Note: You are responsible for evaluating, selecting, and implementing the locking devices and security features. Lenovo makes no comments, judgments, or warranties about - Lenovo ThinkPad T430 | (English) User Guide - Page 68
your computer against access by unauthorized users. If you set a power-on password, the password prompt is displayed on the screen whenever you turn on the computer. You must enter the correct password to start using the computer. Setting a power-on password 1. Print these instructions. 2. Save all - Lenovo ThinkPad T430 | (English) User Guide - Page 69
the logo screen is displayed, press F1. the ThinkPad Setup program main menu opens. 5. Select Security, using the cursor directional keys to move down the menu. 6. Select Password. 7. Select Hard Disk 1 Password. 8. A password window opens. You are prompted to select User or User + Master. Select - Lenovo ThinkPad T430 | (English) User Guide - Page 70
password: - Deleting the power-on password - Changing or deleting the supervisor password - Enabling or disabling the Wake on LAN feature - Enabling or disabling the Internal Network Option ROM feature - Changing date and time - Enabling or disabling the Lock UEFI BIOS Settings feature 52 User Guide - Lenovo ThinkPad T430 | (English) User Guide - Page 71
or disabling the Boot Order Lock feature - Enabling or disabling the Flash BIOS Updating by End-Users feature - Enabling or disabling the internal network device - Enabling or disabling the internal wireless device - Enabling or disabling the internal Bluetooth device - Enabling or disabling the - Lenovo ThinkPad T430 | (English) User Guide - Page 72
your computer to a Lenovo reseller or a Lenovo marketing representative to have the system board replaced. Proof of purchase is required, and a fee will be charged for parts and service. 10. Press F10 to exit from the Setup Notice window. The next time you open the ThinkPad Setup program, you will - Lenovo ThinkPad T430 | (English) User Guide - Page 73
do the following: 1. Print these instructions. 2. Save all open files, and exit all applications. 3. Turn your computer off and then turn it on again. 4. When the logo screen is displayed, press F1. the ThinkPad Setup program main menu opens. 5. Using the cursor keys, move to Security. The Security - Lenovo ThinkPad T430 | (English) User Guide - Page 74
.com/support. Enrolling your fingerprint 1. Turn on your computer. 2. To start Lenovo Fingerprint software, refer to "Accessing ThinkVantage applications" on page 14. 3. Follow the instructions on the screen to enroll your fingerprint. For details, refer to the Help for the program. 56 User Guide - Lenovo ThinkPad T430 | (English) User Guide - Page 75
is being authenticated or has been authenticated. The fingerprint reader is ready to swipe in power-on authentication state. The fingerprint could not be authenticated. The power-on authentication feature is disabled after three bad fingerprint swipes. Swiping your finger over the reader - Lenovo ThinkPad T430 | (English) User Guide - Page 76
enroll your fingerprint, log on to the system the following: 1. Set a power-on password or a hard disk password, or both. 2. Turn your computer off request, type your power-on password, your hard disk password, or both. The enrolled fingerprint is now associated with your power-on password, your - Lenovo ThinkPad T430 | (English) User Guide - Page 77
instructions. To configure the fingerprint reader, you must turn your computer off and then on again. 2. Save all open files, and exit all applications. 3. Turn your computer off and then on again. 4. When the logo screen is displayed, press F1. The ThinkPad Setup opens. 5. Using the cursor keys - Lenovo ThinkPad T430 | (English) User Guide - Page 78
or service (pay service) specifically developed for the purpose. For disposing of data on the hard disk drive, Lenovo provides the Secure Data Disposal™ tool. To download either application, go tohttp://www.lenovo.com/support. Note: Running the application will take a couple of hours. 60 User Guide - Lenovo ThinkPad T430 | (English) User Guide - Page 79
supported and installed in your computer, you can logically dispose of all the data on the drive in a very short time by erasing the cryptographic key. The data encrypted with the old key key. This feature is enabled by ThinkPad Setup Menu Extension Utility and is available as a menu item in ThinkPad - Lenovo ThinkPad T430 | (English) User Guide - Page 80
62 User Guide - Lenovo ThinkPad T430 | (English) User Guide - Page 81
media Note: On the Windows 7 operating system, you can create recovery media using discs or external USB storage devices. To create recovery media, click Start ➙ All Programs ➙ Lenovo ThinkVantage Tools ➙ Factory Recovery Disks. Then, follow the instructions on the screen. Using recovery media This - Lenovo ThinkPad T430 | (English) User Guide - Page 82
opens, release the F12 key. 3. Select the desired startup device and press Enter. The restore process begins. 4. Follow the instructions on the screen to complete the operation. Notes: 1. After restoring your computer to the factory default settings, you might have to reinstall device drivers for - Lenovo ThinkPad T430 | (English) User Guide - Page 83
Programs ➙ Lenovo ThinkVantage Tools ➙ Enhanced Backup and Restore. The Rescue and Recovery program opens. 2. In the Rescue and Recovery main window, click the Launch advanced Rescue and Recovery arrow. 3. Click the Restore your system from a backup icon. 4. Follow the instructions on the screen to - Lenovo ThinkPad T430 | (English) User Guide - Page 84
medium using a disc, use the following instructions to use the rescue medium: 1. Turn off your computer. 2. Repeatedly press and release the F12 key when turning on the computer. When the Boot Menu is displayed, release the F12 key. 3. In the Boot Menu window, select the desired optical drive as the - Lenovo ThinkPad T430 | (English) User Guide - Page 85
USB hard disk drive to one of the USB connectors on your computer. 2. Repeatedly press and release the F12 key when turning on the computer. When the Boot Menu window opens, release the F12 key. 3. In the Boot Menu window, select the USB hard disk drive as the first boot device and press Enter. The - Lenovo ThinkPad T430 | (English) User Guide - Page 86
Windows Update Web site. Obtain them from Lenovo. For more information, see "Making sure device drivers are current" on page 130. Solving recovery problems If you are unable to access the Rescue and Recovery workspace or the Windows about the ThinkPad Setup program, see "ThinkPad Setup" on - Lenovo ThinkPad T430 | (English) User Guide - Page 87
print these instructions. This system supports only batteries specially designed for this specific system and manufactured by Lenovo or an authorized builder. The system does not support unauthorized batteries or batteries designed for other systems. If an unauthorized battery or a battery designed - Lenovo ThinkPad T430 | (English) User Guide - Page 88
hibernation mode. Then disconnect the ac power adapter and all cables from the computer. 2. Close the computer display, and turn the computer over. 3. Unlock the battery latch by sliding it to the unlocked position 1 . Holding the latch in the unlocked position, remove the battery 2 . 70 User Guide - Lenovo ThinkPad T430 | (English) User Guide - Page 89
. 5. Slide the battery latch to the locked position. 6. Turn the computer over again. Reconnect the ac power adapter and all cables. Using the extended life battery For longer battery life, an extended life battery is available as an option. You can attach it to the docking station connector of your - Lenovo ThinkPad T430 | (English) User Guide - Page 90
. Reconnect the ac power adapter and all cables. To remove the extended life battery, do the following: 1. Turn off the computer, or enter hibernation mode. Then disconnect the ac power adapter and all cables from the computer. 2. Close the computer display, and turn the computer over. 72 User Guide - Lenovo ThinkPad T430 | (English) User Guide - Page 91
latch. 4. Press the latch as shown and detach the battery. 5. Turn the computer over again. Reconnect the ac power adapter and all cables. Replacing the hard disk drive Before you start, print these instructions. Notes: The hard disk drive or solid state drive is very sensitive. Incorrect handling - Lenovo ThinkPad T430 | (English) User Guide - Page 92
off the computer; then disconnect the ac power adapter and all cables from the computer. 2. Close the computer display, and turn the computer over. 3. Remove the battery. See "Replacing the battery" on page 69. 4. Loosen the drive or the side spacer rails from the solid state drive. 74 User Guide - Lenovo ThinkPad T430 | (English) User Guide - Page 93
8. Attach the side rubber rails to the new hard disk drive or the side spacer rails to the new solid state drive. 9. Insert the hard disk drive or solid state drive into the slot; then press it firmly into place. 10. Reinstall the cover of the slot. Chapter 6. Replacing devices 75 - Lenovo ThinkPad T430 | (English) User Guide - Page 94
battery. See "Replacing the battery" on page 69. 13. Turn the computer over again. Reconnect the ac power adapter and all cables. Replacing the keyboard Before you start, print these instructions. DANGER Electric current from power the ac power adapter and the battery. See "Replacing the battery" on - Lenovo ThinkPad T430 | (English) User Guide - Page 95
6. Turn the computer over and open the display. 7. Push hard in the direction shown by the arrows 1 to unlatch the front side of the keyboard. The keyboard will open up slightly 2 . 8. Carefully lift the keyboard until you can see how it is connected. Hold the keyboard above the computer, and then - Lenovo ThinkPad T430 | (English) User Guide - Page 96
Installing the keyboard To install the keyboard, do the following: 1. Attach the connector. 2. Insert the keyboard. Make sure that the rear edges of the keyboard are under the frame, as shown by the arrows. 78 User Guide - Lenovo ThinkPad T430 | (English) User Guide - Page 97
3. Slide the keyboard in the direction shown by the arrows. 4. Close the computer display, and turn the computer over. Reinstall the screws. Chapter 6. Replacing devices 79 - Lenovo ThinkPad T430 | (English) User Guide - Page 98
battery. See "Replacing the battery" on page 69. 7. Turn the computer over again. Reconnect the ac power adapter and all cables. Replacing the memory module Before you start, print these instructions If you install a memory module that is not supported by your computer, the computer might beep, and - Lenovo ThinkPad T430 | (English) User Guide - Page 99
module, follow the procedure below: 1. Turn off the computer; then disconnect the ac power adapter and all cables from the computer. 2. Close the computer display, and turn it over. 3. Remove the battery. See "Replacing the battery" on page 69. 4. Loosen the screws on the memory slot cover 1 , and - Lenovo ThinkPad T430 | (English) User Guide - Page 100
Turn off the computer; then disconnect the ac power adapter and all cables from the computer. 2. Close the computer display, and turn it over. 3. Remove the battery. See "Replacing the battery" on page 69. 4. Remove the keyboard. room for the new one. Be sure to save it for future use. 82 User Guide - Lenovo ThinkPad T430 | (English) User Guide - Page 101
in the slot and cannot be moved easily. 10. Reinstall the keyboard. See "Replacing the keyboard" on page 76. 11. Reinstall the battery. See "Replacing the battery" on page 69. To make sure that the memory module is installed correctly, do the following: 1. Turn the computer on. Chapter 6. Replacing - Lenovo ThinkPad T430 | (English) User Guide - Page 102
screen is displayed, press the F1 key. The ThinkPad Setup program main menu opens. The Installed memory item shows the total amount of memory installed in your computer. Replacing the wireless LAN/WiMAX card Before you start, print these instructions. DANGER Electric current from power 84 User Guide - Lenovo ThinkPad T430 | (English) User Guide - Page 103
6. Remove the screw 1 . The card pops up 2 . 7. Remove the card. 8. Align the contact edge of the new PCI Express Mini Card with the corresponding socket contact of the computer. Chapter 6. Replacing devices 85 - Lenovo ThinkPad T430 | (English) User Guide - Page 104
Note: If the new PCI Express Mini Card has two connectors, as in the next drawing, put the white cable in the cable protection tube. 9. Pivot the card until you can snap it into place by pressing the upper side of the connectors 1 . Secure the card with the screw 2 . 86 User Guide - Lenovo ThinkPad T430 | (English) User Guide - Page 105
lower. 11. Reinstall the keyboard. See "Replacing the keyboard" on page 76. 12. Reinstall the battery. See "Replacing the battery" on page 69. 13. Turn the computer over again. Reconnect the ac power adapter and all cables. Replacing a PCI Express Mini Card with three connectors If your computer has - Lenovo ThinkPad T430 | (English) User Guide - Page 106
6. Remove the screw 1 . The card pops up 2 . Then remove the card. 7. Remove the card. 8. Align the contact edge of the new card with the corresponding socket contact of the computer 1 . 88 User Guide - Lenovo ThinkPad T430 | (English) User Guide - Page 107
"TR3" (center), and the black cable to the connector marked "TR2". 11. Reinstall the keyboard. See "Replacing the keyboard" on page 76. 12. Reinstall the battery. See "Replacing the battery" on page 69. Chapter 6. Replacing devices 89 - Lenovo ThinkPad T430 | (English) User Guide - Page 108
power adapter and all cables. Installing and replacing the wireless WAN card Before you start, print these instructions. DANGER Electric current from power the battery. See "Replacing the battery" on page 69. 4. Loosen the screws on the memory slot cover 1 , then remove the cover 2 . 90 User Guide - Lenovo ThinkPad T430 | (English) User Guide - Page 109
5. If a tool for removing connectors is included in the package with the new card, use it to disconnect the cables from the card. If no such tool is included, disconnect the cables by picking up the connectors with your fingers and gently unplugging them. 6. Remove the screw 1 . The card pops up 2 . - Lenovo ThinkPad T430 | (English) User Guide - Page 110
7. Remove the card. 92 User Guide - Lenovo ThinkPad T430 | (English) User Guide - Page 111
8. Align the contact edge of the new wireless WAN card with the corresponding socket. 9. Pivot the card until you can snap it into place by pressing the upper side of each connector 1 . Secure - Lenovo ThinkPad T430 | (English) User Guide - Page 112
. Reinstall the battery. See "Replacing the battery" on page 69. 13. Turn the computer over again. Reconnect the ac power adapter and all cables. Replacing the SIM card Before you start, print these instructions. Your computer might require a SIM card to establish wireless WAN connections. Depending - Lenovo ThinkPad T430 | (English) User Guide - Page 113
, refer to "Replacing the battery" on page 69. Replacing the Ultrabay device Before you start, print these instructions. To replace the Ultrabay device, do the following: 1. Turn off the computer; then disconnect the ac power adapter and all cables from the computer. Chapter 6. Replacing devices - Lenovo ThinkPad T430 | (English) User Guide - Page 114
the bay lock latch 1 by sliding it to the top. While holding the bay lock latch in the unlocked position, slide the bay eject latch 2 to the left, then pull out the Ultrabay device 3 . 3. Insert the replaceable device into the bay; then press the device firmly into the connector. 96 User Guide - Lenovo ThinkPad T430 | (English) User Guide - Page 115
docking stations" on page 100 Finding ThinkPad options If you want to expand the capabilities of your computer, Lenovo has a number of hardware accessories and upgrades to meet your needs. Options include memory modules, storage devices, network cards, port replicators, batteries, power supports - Lenovo ThinkPad T430 | (English) User Guide - Page 116
Press the Fn key to return from sleep mode. Installing a secondary hard disk drive You can upgrade the capacity of your computer by installing a secondary hard disk drive using the ThinkPad 12.7 the hard disk drive stopper on the ThinkPad 12.7 mm Serial ATA Hard Drive Bay Adapter III. 98 User Guide - Lenovo ThinkPad T430 | (English) User Guide - Page 117
sure not to leave it under the drive. 4. Ensure that the hard disk drive is connected firmly. 5. Close the hard disk drive stopper. 6. Insert the ThinkPad 12.7 mm Serial ATA Hard Drive Bay Adapter III into the Serial Ultrabay Enhanced bay. Chapter 7. Enhancing your computer 99 - Lenovo ThinkPad T430 | (English) User Guide - Page 118
b. Press the power button to return to normal operation. The hard disk password icon is displayed on the screen. c. Type the password. Now you can get access to the hard disk drive. ThinkPad port replicators and docking stations Depending on the model, your computer might support the following port - Lenovo ThinkPad T430 | (English) User Guide - Page 119
ThinkPad Mini Dock Series 3 with USB 3.0 1 Power button: Press the power button to turn the computer on or off. 2 Key lock indicator: This indicator lights when the system lock key is in the locked position. When the system lock key is in the locked position, the eject button of the docking station - Lenovo ThinkPad T430 | (English) User Guide - Page 120
button to release the computer from the docking station. 5 Sliding adjuster: Use the sliding adjuster as a guide to align the docking station connector on your computer as you attach the docking station. 6 Docking station connector: This is where you attach your computer. 7 System lock key: Use the - Lenovo ThinkPad T430 | (English) User Guide - Page 121
to lock your port replicator to a stationary object to protect it from theft. ThinkPad Mini Dock Series 3 and ThinkPad Mini Dock Series 3 with USB 3.0 1 Power jack: Connect the ac power adapter. 2 DisplayPort connector: Connect a display device. 3 DVI connector: Connect a monitor that supports - Lenovo ThinkPad T430 | (English) User Guide - Page 122
replicator or docking station To attach your computer to a supported ThinkPad port replicator or docking station, do the following: Notes: • Before you attach the computer to a supported ThinkPad port replicator or docking station, disconnect the ac power adapter from the computer. 104 User Guide - Lenovo ThinkPad T430 | (English) User Guide - Page 123
connector has been disconnected. • The following illustrations are for the ThinkPad Mini Dock Series 3. The procedure is the same for other docking stations. For port replicators, start with step 2. 1. Make sure that the system lock key is in place and in the unlocked (horizontal) position. 2. Press - Lenovo ThinkPad T430 | (English) User Guide - Page 124
power adapter of that attachment to the power jack, your computer goes into battery mode. • If your computer and the port replicator or docking station are connected to separate ac power adapters, your computer goes into battery in the same group, the DisplayPort connector is inactive. 106 User Guide - Lenovo ThinkPad T430 | (English) User Guide - Page 125
connector has been ended. • The system lock key of the docking station is in place and in the unlocked (horizontal) position for: - ThinkPad Mini Dock Series 3 - ThinkPad Mini Dock Series 3 with USB 3.0 - ThinkPad Mini Dock Plus Series 3 - ThinkPad Mini Dock Plus Series 3 with USB 3.0 2. Press the - Lenovo ThinkPad T430 | (English) User Guide - Page 126
108. Using the system lock key The system lock key has two positions, unlocked and locked. When the key is in the locked position, the eject button of the docking station is locked, and you cannot remove your computer. The key lock indicator lights when the eject button is locked. 108 User Guide - Lenovo ThinkPad T430 | (English) User Guide - Page 127
and ThinkPad device drivers for http://www.lenovo.com/ThinkPadDrivers Before instructions you will use. Notes: If your computer is a Windows 7 model, note the following: - The UEFI BIOS features are supported only on the 64-bit version of the Windows 7 operating system. - If you want to start Windows - Lenovo ThinkPad T430 | (English) User Guide - Page 128
INTELINF\infinst_autol. 9. Install ThinkPad AMD SMBus Driver for Windows 7 and ThinkPad AMD SATA Controller Driver for Windows 7. 10. Install device drivers. See "Installing device drivers" on page 111. Installing the registry patches for Windows 7 Go to http://www.lenovo.com/support and install the - Lenovo ThinkPad T430 | (English) User Guide - Page 129
installed, click Cancel. Follow the instructions on the screen until the installation is finished. Installing the ThinkPad monitor file for Windows 2000/XP/Vista/7 The ThinkPad monitor file for Windows 2000/XP/Vista/7 is in the following directory: C:\SWTOOLS\DRIVERS\MONITOR Note: If you cannot find - Lenovo ThinkPad T430 | (English) User Guide - Page 130
Close. 15. Click Close to close the Display Properties window. 16. Click OK on the Monitor tab. 17. Click OK and close the Display Settings window. Installing other device drivers and software The device drivers are provided in the C:\SWTOOLS\DRIVERS directory on your hard disk drive. You will also - Lenovo ThinkPad T430 | (English) User Guide - Page 131
ThinkPad Setup. It displays the following configuration of your computer: • UEFI BIOS Version • UEFI BIOS key supports the corresponding features. Table 5. Config menu items Menu item Network Submenu item Wake On LAN Value • Disabled • AC only • AC and Battery Comments Enable the system to power - Lenovo ThinkPad T430 | (English) User Guide - Page 132
with UEFI first) USB UEFI BIOS Support • Disabled • Enabled • Disabled • Enabled • Disabled • Enabled Always On USB • Disabled • Enabled Always On USB Charge in • Disabled off mode • Enabled USB 3.0 Mode 114 User Guide • Disabled • Enabled Comments • AC power is required with magic packet - Lenovo ThinkPad T430 | (English) User Guide - Page 133
• Disabled • Enabled Fn and Ctrl Key swap • Disabled • Enabled Fn Key Lock • Disabled • Enabled Comments If you select Auto, it enables you to connect and route appropriate USB 3.0 or USB 2.0 connectors. If you select Enabled, it enables USB 3.0 mode and allows USB 3.0 to be supported in the - Lenovo ThinkPad T430 | (English) User Guide - Page 134
Note: NVIDIA Optimus should be selected only if you are using a Windows 7 model. The system BIOS automatically switches the Graphics Device setting to NVIDIA Optimus if the operating system supports the feature, and to Discrete Graphics if the operating system does not support it. 116 User Guide - Lenovo ThinkPad T430 | (English) User Guide - Page 135
support, lowest speed Scheme for AC • Maximize Performance • Balanced Scheme for Battery • Maximize Performance • Balanced Select a thermal management scheme to use. Maximize Performance: Reduce CPU throttling Balanced: Balance sound, temperature, and performance Optical Drive Speed CPU Power - Lenovo ThinkPad T430 | (English) User Guide - Page 136
when the system is waiting for a power-on, hard disk, or supervisor password. Different beeps will sound when the entered password matches or does not match the configured password. Enable or disable keyboard beep when unmanageable key combinations are pressed. Select SATA controller operation mode - Lenovo ThinkPad T430 | (English) User Guide - Page 137
in MEBx (Management Engine BIOS Extension) Setup. If key combination in the Startup Interrupt Menu window. To display the Startup Interrupt Menu window, press the Enter key during the power-on self-test your computer, select Date/Time from the ThinkPad Setup menu. The following submenu is displayed - Lenovo ThinkPad T430 | (English) User Guide - Page 138
cursor key, or type desired values from the keyboard directly. • Some items are displayed on the menu only if the computer supports the corresponding features. Table 6. Security menu items Menu item Submenu item Password Hardware Password Manager Supervisor Password Lock UEFI BIOS Settings - Lenovo ThinkPad T430 | (English) User Guide - Page 139
and reset settings to the factory state. As a result, any power-on security features previously enabled will not be able to work until they BIOS text string • CMOS Reporting: CMOS data • NVRAM Reporting: Security data stored in the Asset ID • SMBIOS Reporting: SMBIOS data Clear the encryption key - Lenovo ThinkPad T430 | (English) User Guide - Page 140
• Enabled I/O Port Access Ethernet LAN Wireless LAN WiMAX Wireless WAN Bluetooth USB Port ExpressCard Slot If you select Enabled, all users can update the UEFI BIOS. If you select Disabled, only the person If you select Enabled, a Virtual Machine Monitor (VMM) can utilize the additional hardware - Lenovo ThinkPad T430 | (English) User Guide - Page 141
screen will be displayed at next boot to enter the suspend mode. Enable or disable the UEFI BIOS interface to activate the computrace module. Computrace is an optional monitoring service encryption detects the change of startup sequence and locks the computer from booting. Changing the startup - Lenovo ThinkPad T430 | (English) User Guide - Page 142
power. • Use the Network submenu to specify the startup sequence that runs when Wake on LAN is enabled. Wake on LAN is commonly used by LAN administrators in corporate networks to get remote access to your computer. 2. Set the startup order by using the following keys: • Use cursor keys User Guide - Lenovo ThinkPad T430 | (English) User Guide - Page 143
, hardware, or a device driver, you might be informed that you need to update your UEFI BIOS in order for the new addition to work properly. To update your UEFI BIOS, go to the following Web site and follow the instructions on the screen: http://www.lenovo.com/ThinkPadDrivers Chapter 8. Advanced - Lenovo ThinkPad T430 | (English) User Guide - Page 144
you to remotely power on your computer BIOS of your computer supports an interface called System Management BIOS Reference Specification specification documents the standards for getting access to this BIOS ThinkPad Setup program. You can configure the following functions in the program: 126 User Guide - Lenovo ThinkPad T430 | (English) User Guide - Page 145
Wake On LAN, select one of the following: AC Only, AC and Battery, or Disabled. 5. Press F10 to save changes and exit. Network Boot : 1. On the the ThinkPad Setup program menu, select Boot. The Boot submenu is displayed. 2. Select Network Boot and press the Enter key. The boot device list is - Lenovo ThinkPad T430 | (English) User Guide - Page 146
128 User Guide - Lenovo ThinkPad T430 | (English) User Guide - Page 147
device drivers and UEFI BIOS when needed. 10. Profile your machine at http://www.lenovo.com/support to keep up to date with current drivers and revisions. 11. Keep up to date for device drivers on other non-Lenovo hardware. You might want to read the device driver information release notes prior - Lenovo ThinkPad T430 | (English) User Guide - Page 148
the error screen on or the message written down. Making sure device drivers are current Device drivers are programs that contain instructions for the operating system about how to operate or "drive" a certain piece of hardware. Each hardware component on your computer has its own specific driver. If - Lenovo ThinkPad T430 | (English) User Guide - Page 149
the computer hinge. • Do not turn your computer over while the ac power adapter is plugged in. This could break the adapter plug. Carry your be sure to remove any media, turn off attached devices, and disconnect cords and cables. • When picking up your open computer, hold it by the problems 131 - Lenovo ThinkPad T430 | (English) User Guide - Page 150
the instructions shipped a supervisor or hard disk password, Lenovo will not reset it, and you might your ThinkPad computer with Lenovo at http://www.lenovo.com/ Lenovo to notify you about possible technical information and upgrades. Be sure not to modify your computer • Only an authorized ThinkPad - Lenovo ThinkPad T430 | (English) User Guide - Page 151
cloth. 2. Wipe each keytop surface with the cloth. Wipe the keys one by one; if you wipe several keys at a time, the cloth might hook onto an adjacent key and possibly damage it. Make sure that no liquid drips onto . 6. Be sure to dry the display before closing it. Chapter 9. Preventing problems 133 - Lenovo ThinkPad T430 | (English) User Guide - Page 152
134 User Guide - Lenovo ThinkPad T430 | (English) User Guide - Page 153
to troubleshoot and resolve computer problems. It combines diagnostic tests, system information collection, security status, and support information, along with hints and tips for maximum system performance. To run the Lenovo Solution Center program on the Windows 7 operating system, see "Accessing - Lenovo ThinkPad T430 | (English) User Guide - Page 154
with ac power but does not start when the battery is attached, call the Customer Support Center for support. 3. While the computer is off, remove all sources of power (battery and the ac power adapter). Remove correct. The system board should be replaced. Have the computer serviced. 136 User Guide - Lenovo ThinkPad T430 | (English) User Guide - Page 155
in the EFI Variable is not correct. Enter ThinkPad Setup to check security settings, Press F10 and then press Enter to restart the system. If you still have a problem, have the computer serviced. • Message: 0187: EAIA data access error Solution: The access to EEPROM is failed. Have the computer - Lenovo ThinkPad T430 | (English) User Guide - Page 156
that: - The battery is installed correctly. - The ac power adapter is connected to the computer and the power cord is plugged into a working electrical outlet. - The computer is turned on. (Turn the power switch on again for confirmation.) If a power-on password is set: - Press any key to display - Lenovo ThinkPad T430 | (English) User Guide - Page 157
serviced. • Problem: My screen goes blank while the computer is on. Solution: Your screen saver or power management might have been enabled. Do either of the following: - Touch the TrackPoint pointing device or the touch pad, or press a key to exit the screen saver. - Press the power switch - Lenovo ThinkPad T430 | (English) User Guide - Page 158
at 100 Mbps. Solution: • Try another cable. • Make sure that the link partner is set to auto-negotiate. • Make sure that the switch is 802.3ab-compliant (gigabit over copper). A wireless LAN problem Problem: You cannot connect to the network using the built-in wireless network card. 140 User Guide - Lenovo ThinkPad T430 | (English) User Guide - Page 159
WAN card is installed. Solution: The WAN card is not supported on this computer. Remove it. Note: Depending on your computer, some models do not have a wireless WAN card. Bluetooth problems Problem: Sound does not come from the Bluetooth headset/headphone but comes from the local speaker even though - Lenovo ThinkPad T430 | (English) User Guide - Page 160
the screen brighter. • If the sleep status indicator is on (is green), press Fn to resume from the sleep mode. • If the problem persists, follow the solution for the following problem. Note: If you are using the Windows 7 operating system, it does not support the presentation scheme. 142 User Guide - Lenovo ThinkPad T430 | (English) User Guide - Page 161
working correctly. If not, click the Troubleshoot button and follow the instructions on the screen. 8. Click the Monitor tab. Check whether the color quality the computer serviced. Problem: The screen stays on even after you turn off your computer. Solution: Press and hold the power switch for four - Lenovo ThinkPad T430 | (English) User Guide - Page 162
display. • If the external monitor supports a lower resolution than the computer display, view output on the external monitor only. (If you view output on both the computer display and the external monitor, the external monitor screen will be blank or distorted.) Problem: You cannot set a higher - Lenovo ThinkPad T430 | (English) User Guide - Page 163
-click on the desktop, and click Screen resolution. Click Advanced Settings, select the Monitor tab, then set Colors. Problem: If you use the Extend desktop function, you cannot set a higher resolution or higher refresh rate on the secondary display. Chapter 10. Troubleshooting computer problems 145 - Lenovo ThinkPad T430 | (English) User Guide - Page 164
does support the display mode you have set, go to the setup menu for the monitor itself and adjust the settings there. Usually the external monitor has buttons for access to the setup menu. For details, see the documentation that comes with the monitor. Audio problems • Problem: Wave or MIDI sound - Lenovo ThinkPad T430 | (English) User Guide - Page 165
finger for authentication. • If your hands are too dry, apply lotion to them. Battery and power problems This topic contains instructions on troubleshooting battery and power problems. Battery problems Problem: The battery pack cannot be fully charged in the standard charge time when the computer is - Lenovo ThinkPad T430 | (English) User Guide - Page 166
these instructions now and keep it with your computer for reference later. If your computer is getting no power at all, check the following items: 1. Verify the power switch. Refer to "System-status indicators" on page 8. The power switch is illuminated whenever the computer is on. 148 User Guide - Lenovo ThinkPad T430 | (English) User Guide - Page 167
a ThinkPad port replicator or docking station" on page 107. 6. Remove all devices and then test for system power with minimal devices attached. a. Disconnect the ac power adapter and all cables from the computer. b. Close the computer display, and turn the computer over. c. Remove the battery - Lenovo ThinkPad T430 | (English) User Guide - Page 168
The battery power is getting low. Connect the ac power adapter to the computer and plug it into an electrical outlet, or replace the battery with a charged one. • Problem: The computer display remains blank after you press Fn to return from sleep mode. Solution: Check whether an external monitor was - Lenovo ThinkPad T430 | (English) User Guide - Page 169
drive begins or finishes getting access to data. • When you carry the hard disk drive. • When you carry your computer. This is a normal characteristic of a hard disk drive and is not a defect. Problem: The hard disk drive does not work. Solution: On the Boot menu of ThinkPad Setup, make sure that - Lenovo ThinkPad T430 | (English) User Guide - Page 170
applications run correctly on your computer. • The necessary device drivers are installed. • The application works when it is run on some other computer. If an error message is displayed while you are using the application program, refer to the manuals supplied with the application. 152 User Guide - Lenovo ThinkPad T430 | (English) User Guide - Page 171
operation. Solution: Make sure that: • The ac power adapter is connected to the docking station or the port replicator. • The indicator of the docking station is on. • The computer is securely attached to the docking station or the port replicator. Chapter 10. Troubleshooting computer problems 153 - Lenovo ThinkPad T430 | (English) User Guide - Page 172
154 User Guide - Lenovo ThinkPad T430 | (English) User Guide - Page 173
, go to the following Web site and follow the instructions on the screen: http://www.lenovo.com/support Recording information Before you talk to a Lenovo representative, record the following important information about your computer. Recording problem symptoms and details Collect the answers to the - Lenovo ThinkPad T430 | (English) User Guide - Page 174
the latest support information such as the following: • Drivers and software • Diagnostic solutions • Product and service warranty • Product and parts details • User guides and manuals • Knowledge base and frequently asked questions Calling Lenovo If you have tried to correct the problem yourself - Lenovo ThinkPad T430 | (English) User Guide - Page 175
of the problem • Exact wording of any error messages • Hardware and software configuration information for your system Telephone numbers For a list of the Lenovo Support phone numbers for your country or region, go to http://www.lenovo.com/support/phone or refer to the Safety and Warranty Guide that - Lenovo ThinkPad T430 | (English) User Guide - Page 176
158 User Guide - Lenovo ThinkPad T430 | (English) User Guide - Page 177
Wireless Fidelity (WiFi) certification as defined by the Wi-Fi Alliance. Your Bluetooth card is compliant to Bluetooth Specification 4.0 as defined by the Bluetooth Special Interest Group SIG, it support Profile (PAN) • Phone Book Access Profile (PBAP) • Service Discovery Protocol (SDP) • - Lenovo ThinkPad T430 | (English) User Guide - Page 178
makers. • In any other environment where the risk of interference to other devices or services is perceived or identified as harmful. If you are uncertain of the policy that applies to the use of wireless devices in a specific organization (such as airport or hospital), you are encouraged to ask for - Lenovo ThinkPad T430 | (English) User Guide - Page 179
list. Electronic emissions notices The following information refers to the ThinkPad T430 and T430i, machine types 2342, 2344, 2345, 2347, 2349, 2350, 2351. Federal Communications Commission Declaration of Conformity This equipment has been tested and found to comply with the limits for a Class - Lenovo ThinkPad T430 | (English) User Guide - Page 180
the installation of option cards from other manufacturers. This product has been tested and found to comply with the limits for Class B Information Technology die Konformitätserklärung nach Paragraf 5 des EMVG ist die Lenovo (Deutschland) GmbH, Gropiusplatz 10, D-70563 Stuttgart. 162 User Guide - Lenovo ThinkPad T430 | (English) User Guide - Page 181
EN 55022 Klasse B. Korea Class B compliance statement Japanese VCCI Class B statement Japan compliance statement for products which connect to the power mains with rated current less than or equal to 20 A per phase Lenovo product service information for Taiwan Appendix A. Regulatory information 163 - Lenovo ThinkPad T430 | (English) User Guide - Page 182
164 User Guide - Lenovo ThinkPad T430 | (English) User Guide - Page 183
end of life per this Directive. Users of electrical and electronic equipment (EEE) lenovo.com/lenovo/environment. Battery recycling information for Japan Collecting and recycling a disused Lenovo computer or monitor If you are a company employee and need to dispose of a Lenovo computer or monitor - Lenovo ThinkPad T430 | (English) User Guide - Page 184
and need to dispose of a battery pack, contact the proper person in Lenovo sales, service, or marketing, and follow that person's instructions. You also can refer to the instructions at http://www.lenovo.com/jp/ja/environment/recycle/battery/. If you use a Lenovo notebook computer at home and need - Lenovo ThinkPad T430 | (English) User Guide - Page 185
recycled at end of life. The label on the battery may also include a chemical symbol for the metal concerned in the battery (Pb for lead, Hg for mercury, and Cd for cadmium). Users of batteries and accumulators must not dispose of batteries and accumulators as unsorted municipal waste, but use the - Lenovo ThinkPad T430 | (English) User Guide - Page 186
168 User Guide - Lenovo ThinkPad T430 | (English) User Guide - Page 187
are not intended for use in implantation or other life support applications where malfunction may result in injury or death to persons. The information contained in this document does not affect or change Lenovo product specifications or warranties. Nothing in this document shall operate as an - Lenovo ThinkPad T430 | (English) User Guide - Page 188
Lenovo in the United States, other countries, or both: Lenovo Access Connections Active Protection System Rescue and Recovery Secure Data Disposal ThinkLight ThinkPad Research In Motion Limited. Other company, product, and service names may be trademarks or service marks of others. 170 User Guide - Lenovo ThinkPad T430 | (English) User Guide - Page 189
- Lenovo ThinkPad T430 | (English) User Guide - Page 190
Part Number: Printed in China (1P) P/N: **
-
 1
1 -
 2
2 -
 3
3 -
 4
4 -
 5
5 -
 6
6 -
 7
7 -
8
-
9
-
10
-
11
-
12
-
13
-
14
-
15
-
16
-
17
-
18
-
19
-
20
-
21
-
22
-
23
-
24
-
25
-
26
-
27
-
28
-
29
-
30
-
31
-
32
-
33
-
34
-
35
-
36
-
37
-
38
-
39
-
40
-
41
-
42
-
43
-
44
-
45
-
46
-
47
-
48
-
49
-
50
-
51
-
52
-
53
-
54
-
55
-
56
-
57
-
58
-
59
-
60
-
61
-
62
-
63
-
64
-
65
-
66
-
67
-
68
-
69
-
70
-
71
-
72
-
73
-
74
-
75
-
76
-
77
-
78
-
79
-
80
-
81
-
82
-
83
-
84
-
85
-
86
-
87
-
88
-
89
-
90
-
91
-
92
-
93
-
94
-
95
-
96
-
97
-
98
-
99
-
100
-
101
-
102
-
103
-
104
-
105
-
106
-
107
-
108
-
109
-
110
-
111
-
112
-
113
-
114
-
115
-
116
-
117
-
118
-
119
-
120
-
121
-
122
-
123
-
124
-
125
-
126
-
127
-
128
-
129
-
130
-
131
-
132
-
133
-
134
-
135
-
136
-
137
-
138
-
139
-
140
-
141
-
142
-
143
-
144
-
145
-
146
-
147
-
148
-
149
-
150
-
151
-
152
-
153
-
154
-
155
-
156
-
157
-
158
-
159
-
160
-
161
-
162
-
163
-
164
-
165
-
166
-
167
-
168
-
169
-
170
-
171
-
172
-
173
-
174
-
175
-
176
-
177
-
178
-
179
-
180
-
181
-
182
-
183
-
184
-
185
-
186
-
187
-
188
-
189
-
190
 |
 |

User Guide
ThinkPad T430 and T430i