Lenovo ThinkPad T530 (English) User Guide - Page 112
Installing a secondary hard disk drive - raid 0
 |
View all Lenovo ThinkPad T530 manuals
Add to My Manuals
Save this manual to your list of manuals |
Page 112 highlights
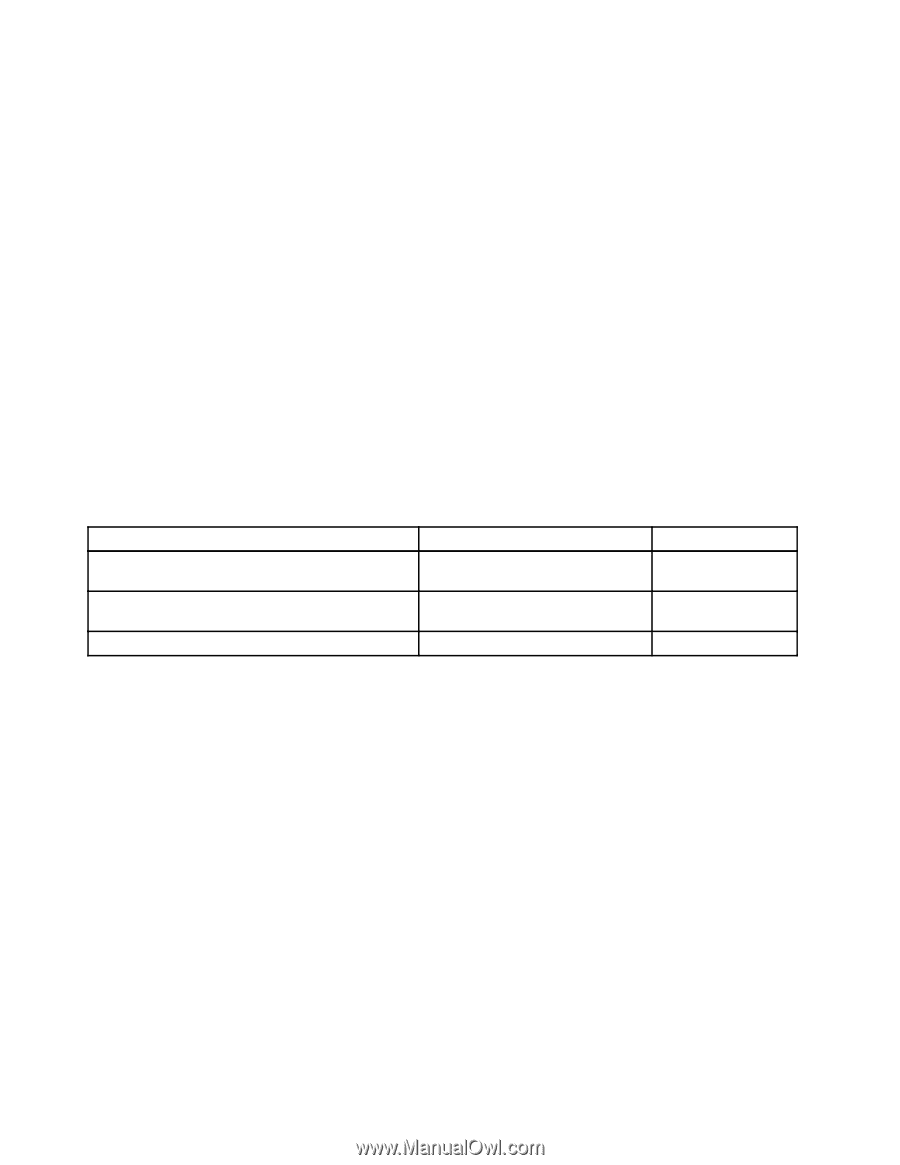
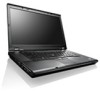
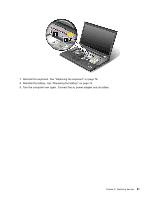
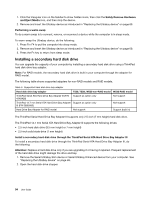
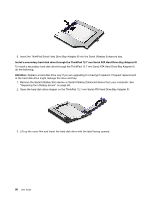
1. Click the triangular icon on the taskbar to show hidden icons, then click the Safely Remove Hardware and Eject Media icon, and then stop the device. 2. Remove and insert the Ultrabay device as introduced in "Replacing the Ultrabay device" on page 69. Performing a warm swap To do a warm swap is to connect, remove, or reconnect a device while the computer is in sleep mode. To warm-swap the Ultrabay device, do the following: 1. Press Fn+F4 to put the computer into sleep mode. 2. Remove and insert the Ultrabay device as introduced in "Replacing the Ultrabay device" on page 69. 3. Press the Fn key to return from sleep mode. Installing a secondary hard disk drive You can upgrade the capacity of your computer by installing a secondary hard disk drive using a ThinkPad hard disk drive bay adapter. Note: For RAID models, the secondary hard disk drive is built in your computer through the adapter for RAID model. The following table shows supported adapters for non-RAID models and RAID models. Table 5. Supported hard disk drive bay adapter Hard disk drive bay adapter T530, T530i, W530 non-RAID model W530 RAID model ThinkPad Serial ATA Hard Drive Bay Adapter III (P/N Support as option only 43N3428) Not support ThinkPad 12.7 mm Serial ATA Hard Drive Bay Adapter Support as option only III (P/N 0B55883) Not support Hard Drive Bay Adapter for RAID model Not support Support (built in) The ThinkPad Serial Hard Drive Bay Adapter III supports only 2.5-inch (7 mm height) hard disk drive. The ThinkPad 12.7 mm Serial ATA Hard Drive Bay Adapter III supports the following drives: • 2.5-inch hard disk drive (9.5 mm height or 7 mm height) • 2.5-inch solid state drive (7 mm height) Install a secondary hard disk drive through the ThinkPad Serial ATA Hard Drive Bay Adapter III To install a secondary hard disk drive through the ThinkPad Serial ATA Hard Drive Bay Adapter III, do the following: Attention: Replace a hard disk drive only if you are upgrading it or having it repaired. Frequent replacement of the hard disk drive might damage the drive and bay. 1. Remove the Serial Ultrabay Slim device or Serial Ultrabay Enhanced device from your computer. See "Replacing the Ultrabay device" on page 69. 2. Open the hard disk drive stopper. 94 User Guide
-
 1
1 -
2
-
3
-
4
-
5
-
6
-
7
-
8
-
9
-
10
-
11
-
12
-
13
-
14
-
15
-
16
-
17
-
18
-
19
-
20
-
21
-
22
-
23
-
24
-
25
-
26
-
27
-
28
-
29
-
30
-
31
-
32
-
33
-
34
-
35
-
36
-
37
-
38
-
39
-
40
-
41
-
42
-
43
-
44
-
45
-
46
-
47
-
48
-
49
-
50
-
51
-
52
-
53
-
54
-
55
-
56
-
57
-
58
-
59
-
60
-
61
-
62
-
63
-
64
-
65
-
66
-
67
-
68
-
69
-
70
-
71
-
72
-
73
-
74
-
75
-
76
-
77
-
78
-
79
-
80
-
81
-
82
-
83
-
84
-
85
-
86
-
87
-
88
-
89
-
90
-
91
-
92
-
93
-
94
-
95
-
96
-
97
-
98
-
99
-
100
-
101
-
102
-
103
-
104
-
105
-
106
-
 107
107 -
 108
108 -
 109
109 -
 110
110 -
 111
111 -
 112
112 -
 113
113 -
 114
114 -
 115
115 -
 116
116 -
 117
117 -
118
-
119
-
120
-
121
-
122
-
123
-
124
-
125
-
126
-
127
-
128
-
129
-
130
-
131
-
132
-
133
-
134
-
135
-
136
-
137
-
138
-
139
-
140
-
141
-
142
-
143
-
144
-
145
-
146
-
147
-
148
-
149
-
150
-
151
-
152
-
153
-
154
-
155
-
156
-
157
-
158
-
159
-
160
-
161
-
162
-
163
-
164
-
165
-
166
-
167
-
168
-
169
-
170
-
171
-
172
-
173
-
174
-
175
-
176
-
177
-
178
-
179
-
180
-
181
-
182
-
183
-
184
-
185
-
186
-
187
-
188
-
189
-
190
-
191
 |
 |