Lenovo ThinkServer RD330 MegaRAID SAS Software User Guide - Page 33
RAID 0 Drive Group Example with Two Drives, Table 7, RAID 0 Overview, Table 8, RAID 1
 |
View all Lenovo ThinkServer RD330 manuals
Add to My Manuals
Save this manual to your list of manuals |
Page 33 highlights
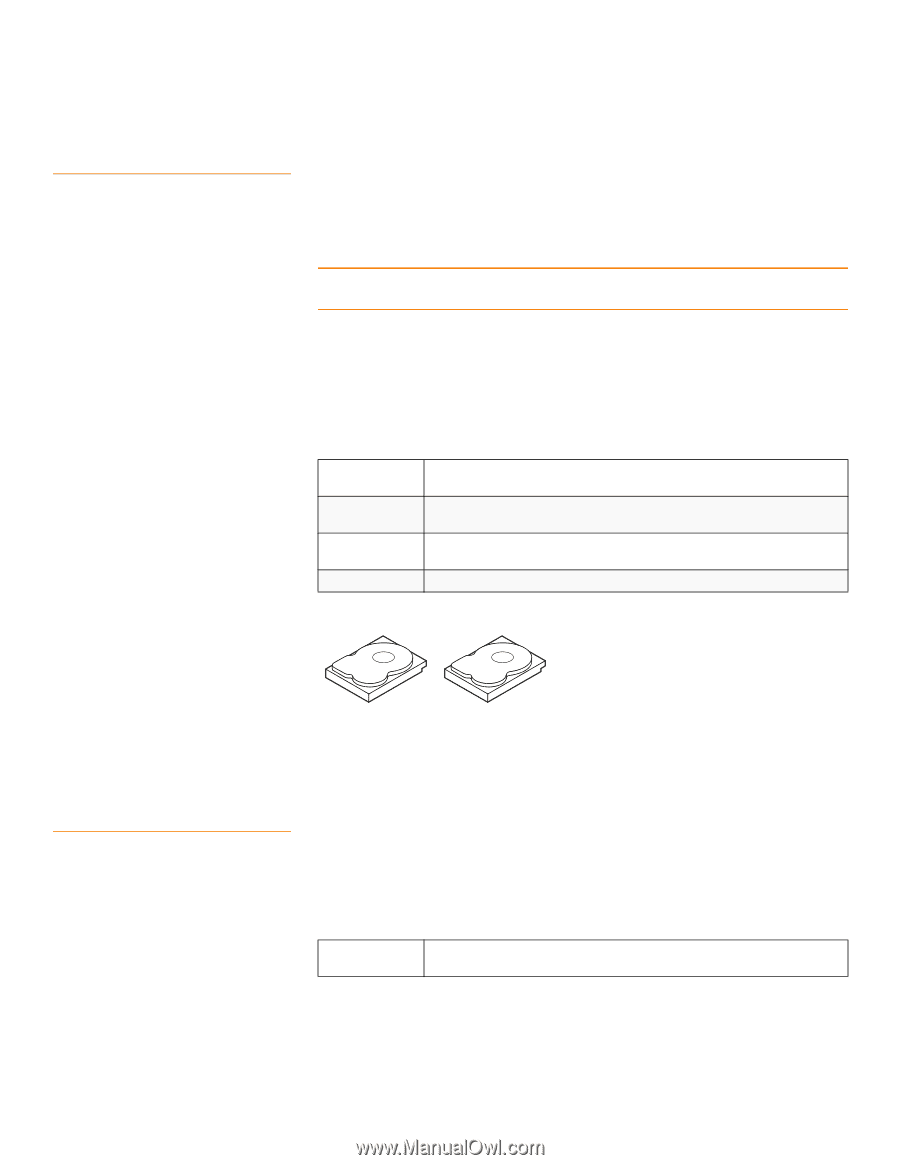
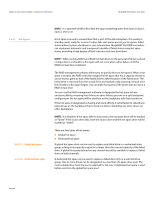
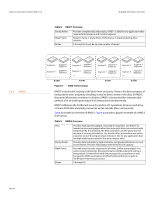
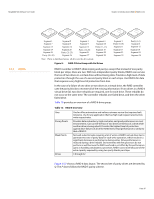
MegaRAID SAS Software User Guide 2.5.3 RAID 0 Chapter 2: Introduction to RAID | RAID Levels RAID 0 provides disk striping across all drives in the RAID drive group. RAID 0 does not provide any data redundancy, but, along with RAID 0, does offer the best performance of any RAID level. RAID 0 breaks up data into smaller segments, and then stripes the data segments across each drive in the drive group. The size of each data segment is determined by the stripe size. RAID 0 offers high bandwidth. NOTE: RAID level 0 is not fault tolerant. If a drive in a RAID 0 drive group fails, the whole virtual drive (all drives associated with the virtual drive) will fail. By breaking up a large file into smaller segments, the RAID controller can use both SAS drives and SATA drives to read or write the file faster. RAID 0 involves no parity calculations to complicate the write operation. This makes RAID 0 ideal for applications that require high bandwidth but do not require fault tolerance. Table 7 provides an overview of RAID 0. Figure 7 provides a graphic example of a RAID 0 drive group. Table 7: RAID 0 Overview Uses Strong Points Weak Points Drives Provides high data throughput, especially for large files. Any environment that does not require fault tolerance. Provides increased data throughput for large files. No capacity loss penalty for parity. Does not provide fault tolerance or high bandwidth. All data lost if any drive fails. 1 to 32 2.5.4 RAID 1 Segment 1 Segment 3 Segment 5 Segment 7 Segment 2 Segment 4 Segment 6 Segment 8 Figure 7: RAID 0 Drive Group Example with Two Drives In RAID 1, the RAID controller duplicates all data from one drive to a second drive in the drive group. RAID 1 supports an even number of drives from 2 through 32 in a single span. RAID 1 provides complete data redundancy, but at the cost of doubling the required data storage capacity. Table 8 provides an overview of RAID 1. Figure 8 provides a graphic example of a RAID 1 drive group. Table 8: RAID 1 Overview Uses Use RAID 1 for small databases or any other environment that requires fault tolerance but small capacity. Page 33
-
 1
1 -
2
-
3
-
4
-
5
-
6
-
7
-
8
-
9
-
10
-
11
-
12
-
13
-
14
-
15
-
16
-
17
-
18
-
19
-
20
-
21
-
22
-
23
-
24
-
25
-
26
-
27
-
 28
28 -
 29
29 -
 30
30 -
 31
31 -
 32
32 -
 33
33 -
 34
34 -
 35
35 -
 36
36 -
 37
37 -
 38
38 -
39
-
40
-
41
-
42
-
43
-
44
-
45
-
46
-
47
-
48
-
49
-
50
-
51
-
52
-
53
-
54
-
55
-
56
-
57
-
58
-
59
-
60
-
61
-
62
-
63
-
64
-
65
-
66
-
67
-
68
-
69
-
70
-
71
-
72
-
73
-
74
-
75
-
76
-
77
-
78
-
79
-
80
-
81
-
82
-
83
-
84
-
85
-
86
-
87
-
88
-
89
-
90
-
91
-
92
-
93
-
94
-
95
-
96
-
97
-
98
-
99
-
100
-
101
-
102
-
103
-
104
-
105
-
106
-
107
-
108
-
109
-
110
-
111
-
112
-
113
-
114
-
115
-
116
-
117
-
118
-
119
-
120
-
121
-
122
-
123
-
124
-
125
-
126
-
127
-
128
-
129
-
130
-
131
-
132
-
133
-
134
-
135
-
136
-
137
-
138
-
139
-
140
-
141
-
142
-
143
-
144
-
145
-
146
-
147
-
148
-
149
-
150
-
151
-
152
-
153
-
154
-
155
-
156
-
157
-
158
-
159
-
160
-
161
-
162
-
163
-
164
-
165
-
166
-
167
-
168
-
169
-
170
-
171
-
172
-
173
-
174
-
175
-
176
-
177
-
178
-
179
-
180
-
181
-
182
-
183
-
184
-
185
-
186
-
187
-
188
-
189
-
190
-
191
-
192
-
193
-
194
-
195
-
196
-
197
-
198
-
199
-
200
-
201
-
202
-
203
-
204
-
205
-
206
-
207
-
208
-
209
-
210
-
211
-
212
-
213
-
214
-
215
-
216
-
217
-
218
-
219
-
220
-
221
-
222
-
223
-
224
-
225
-
226
-
227
-
228
-
229
-
230
-
231
-
232
-
233
-
234
-
235
-
236
-
237
-
238
-
239
-
240
-
241
-
242
-
243
-
244
-
245
-
246
-
247
-
248
-
249
-
250
-
251
-
252
-
253
-
254
-
255
-
256
-
257
-
258
-
259
-
260
-
261
-
262
-
263
-
264
-
265
-
266
-
267
-
268
-
269
-
270
-
271
-
272
-
273
-
274
-
275
-
276
-
277
-
278
-
279
-
280
-
281
-
282
-
283
-
284
-
285
-
286
-
287
-
288
-
289
-
290
-
291
-
292
-
293
-
294
-
295
-
296
-
297
-
298
-
299
-
300
-
301
-
302
-
303
-
304
-
305
-
306
-
307
-
308
-
309
-
310
-
311
-
312
-
313
-
314
-
315
-
316
-
317
-
318
-
319
-
320
-
321
-
322
-
323
-
324
-
325
-
326
-
327
-
328
-
329
-
330
-
331
-
332
-
333
-
334
-
335
-
336
-
337
-
338
-
339
-
340
-
341
-
342
-
343
-
344
-
345
-
346
-
347
-
348
-
349
-
350
-
351
-
352
-
353
-
354
-
355
-
356
-
357
-
358
-
359
-
360
-
361
-
362
-
363
-
364
-
365
-
366
-
367
-
368
-
369
-
370
-
371
-
372
-
373
-
374
-
375
-
376
-
377
-
378
-
379
-
380
-
381
-
382
-
383
-
384
-
385
-
386
-
387
-
388
-
389
-
390
-
391
-
392
-
393
-
394
-
395
-
396
-
397
-
398
-
399
-
400
-
401
 |
 |