Lexmark 26B0001 User Manual
Lexmark 26B0001 Manual
 |
View all Lexmark 26B0001 manuals
Add to My Manuals
Save this manual to your list of manuals |
Lexmark 26B0001 manual content summary:
- Lexmark 26B0001 | User Manual - Page 1
C54x Series User's Guide www.lexmark.com - Lexmark 26B0001 | User Manual - Page 2
- Lexmark 26B0001 | User Manual - Page 3
duo drawer ...23 Attaching cables...24 Verifying printer setup...25 Printing menu settings pages ...25 Printing a network setup page ...26 Setting up the printer software...26 Installing printer software ...26 Updating available options in the printer driver...27 Setting up wireless printing...28 - Lexmark 26B0001 | User Manual - Page 4
manual feeder...44 Paper and specialty media guide 46 Paper guidelines...46 Paper characteristics...46 Unacceptable paper ...47 Selecting paper...47 Selecting preprinted forms and letterhead...47 Storing paper...48 Supported paper sizes, types, and weights...48 Paper sizes supported by the printer - Lexmark 26B0001 | User Manual - Page 5
242 paper jam...68 250 paper jam...69 Understanding printer menus 70 Menus list...70 Supplies menu...71 Paper menu...71 Default Source menu...71 Paper Size/Type menu ...72 Paper Texture menu ...75 Paper - Lexmark 26B0001 | User Manual - Page 6
support 137 Restoring the factory default settings...137 Adjusting Power Saver...137 Using the Embedded Web Server...138 Setting up e-mail alerts...138 Configuring supply notifications...138 Copying printer settings to other printers...139 Troubleshooting 140 Solving basic printer problems - Lexmark 26B0001 | User Manual - Page 7
occur...142 Solving option problems...143 Option does not operate card ...144 Solving paper feed problems...144 Paper frequently jams ...144 Solving print quality problems...145 Isolating print quality problems...145 Blank pages... problems...155 Color misregistration...155 FAQ about color printing - Lexmark 26B0001 | User Manual - Page 8
Notices 160 Product information...160 Edition notice...160 Industry Canada notices...163 Power consumption...168 Index 176 Contents 8 - Lexmark 26B0001 | User Manual - Page 9
documentation, to a professional service person. CAUTION-SHOCK HAZARD: To avoid the risk of electric shock when cleaning the exterior of the printer, unplug the power cord from the wall outlet and disconnect all cables from the printer before proceeding. SAVE THESE INSTRUCTIONS. Safety information 9 - Lexmark 26B0001 | User Manual - Page 10
(Noon-6:00 PM ET) region, and then select the Customer Support link. • Canada: 1-800-539-6275 Note: For additional information about Monday-Friday (8:00 AM-11:00 PM contacting Lexmark, see the printed ET) warranty that came with your printer. Saturday (Noon-6:00 PM ET) • Mexico: 001-888-377 - Lexmark 26B0001 | User Manual - Page 11
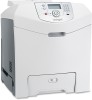
Support link. Note: For additional information about contacting Lexmark, see the printed warranty that came with your printer. Printer configurations Basic model The following illustration shows the basic printer model: 1 4 3 2 1 Standard exit bin 2 Standard 250-sheet tray (Tray 1) 3 Manual - Lexmark 26B0001 | User Manual - Page 12
airflow in the room meets the latest revision of the ASHRAE 62 standard. • Provide a flat, sturdy, and stable surface. • Keep the printer: - Away from the direct airflow of air conditioners, heaters, or ventilators - Free from direct sunlight, humidity extremes, or temperature fluctuations - Clean - Lexmark 26B0001 | User Manual - Page 13
5 1 4 2 3 1 304.8 mm (12.0 in.) 2 508 mm (20.0 in.) 3 304.8 mm (12.0 in.) 4 304.8 mm (12.0 in.) 5 508 mm (20.0 in.) When the printer is set up, allow clearance around it as shown. Learning about the printer 13 - Lexmark 26B0001 | User Manual - Page 14
to initiate action on a menu item. 3 Indicator light 4 Stop/Cancel Indicates the printer status: • Off-The power is off. • Blinking green-The printer is warming up, processing data, or printing. • Solid green-The printer is on, but idle. • Blinking red-Operator intervention is needed. Stops all - Lexmark 26B0001 | User Manual - Page 15
, then turn them off as well, and unplug any cables going into the printer. You can customize your printer connectivity and memory capacity by adding optional cards. The instructions in this section explain how to install the available cards; you can also use them to locate a card for removal. Note - Lexmark 26B0001 | User Manual - Page 16
options CAUTION-SHOCK HAZARD: If you are accessing the system board or installing optional hardware or memory devices sometime after setting up the printer, then turn the printer off, and unplug the power cord from the wall outlet before continuing. If you have any other devices attached to the - Lexmark 26B0001 | User Manual - Page 17
b Gently pull the cover away from the printer, and then remove it. Additional printer setup 17 - Lexmark 26B0001 | User Manual - Page 18
connector. Warning-Potential Damage: System board electrical components are easily damaged by static electricity. Touch something metal on the printer before touching any system board electronic components or connectors. 1 Flash memory card connector 2 Memory card connector 1 2 Additional - Lexmark 26B0001 | User Manual - Page 19
memory card. CAUTION-SHOCK HAZARD: If you are accessing the system board or installing optional hardware or memory devices sometime after setting up the printer, then turn the printer off, and unplug the power cord from the wall outlet before continuing. If you have any other devices attached to the - Lexmark 26B0001 | User Manual - Page 20
connector until it snaps into place. Make sure each latch fits over the notch located on either side of the memory card. 1 Notch 2 Latch 2 1 Additional printer setup 20 - Lexmark 26B0001 | User Manual - Page 21
memory card CAUTION-SHOCK HAZARD: If you are accessing the system board or installing optional hardware or memory devices sometime after setting up the printer, then turn the printer off, and unplug the power cord from the wall outlet before continuing. If you have any other devices attached to the - Lexmark 26B0001 | User Manual - Page 22
entire length of the connector on the card must touch and be flush against the system board. • Be careful not to damage the connectors. Additional printer setup 22 - Lexmark 26B0001 | User Manual - Page 23
5 Reinstall the system board cover. Installing hardware options Installing a 650-sheet duo drawer The printer supports one optional drawer, which allows an additional 650 sheets of paper to be loaded. The drawer includes a multipurpose feeder. CAUTION-SHOCK HAZARD: If you are - Lexmark 26B0001 | User Manual - Page 24
Attaching cables Connect the printer to the computer using a USB cable or an Ethernet cable. A USB port requires a USB cable. Be sure to match the USB symbol on the cable with the USB symbol on the printer. Match the appropriate Ethernet cable to the Ethernet port. Additional printer setup 24 - Lexmark 26B0001 | User Manual - Page 25
information that aids network printing configuration. Printing menu settings pages Print menu settings pages to review the current menu settings and to verify printer options are installed correctly. Note: If you have not made any menu item settings changes yet, then the menu settings pages list all - Lexmark 26B0001 | User Manual - Page 26
up the printer software Installing printer software A printer driver is software that lets the computer communicate with the printer. The printer software is typically installed during the initial printer setup. If you need to install the software after setup, follow these instructions: For Windows - Lexmark 26B0001 | User Manual - Page 27
to the Lexmark Web site at www.lexmark.com. 2 From the Drivers & Downloads menu, click Driver Finder. 3 Select your printer, and then select your operating system. 4 Download the driver and install the printer software. Updating available options in the printer driver Once the printer software and - Lexmark 26B0001 | User Manual - Page 28
Driver, and then add any installed hardware options. 5 Click OK. In Mac OS X version 10.4 and earlier 1 From the Go menu, choose Applications. 2 Double-click Utilities, and then double-click Print Center or Printer Setup Utility. 3 Select the printer, and then from the Printers system support person - Lexmark 26B0001 | User Manual - Page 29
to the same wireless network where you want to set up the printer. 1 Connect the power cable, and then turn the printer on. 1 2 Make sure the printer and computer are fully on and ready. Do not connect the USB cable until instructed to do so on the screen 2 Insert the Software and Documentation - Lexmark 26B0001 | User Manual - Page 30
7 Connect the cables in the following order: a Temporarily connect a USB cable between the computer on the wireless network and the printer. 1 2 Note: After the printer is configured, the software will instruct you to disconnect the temporary USB cable so you can print wirelessly. b If your - Lexmark 26B0001 | User Manual - Page 31
Open the Safari browser. 4 From the Bookmarks drop-down menu, select Show. 5 Under Collections, select Bonjour or Rendevous, and then double-click the printer name. 6 From the main page of the Embedded Web Server, navigate to the page where the wireless settings information is stored. Configure the - Lexmark 26B0001 | User Manual - Page 32
h Type the user password, and then click OK. All necessary software is installed on the computer. i Click Close when installation is complete. 2 Add the printer: a For IP printing: In Mac OS X version 10.5 1 From the Apple menu, choose System Preferences. 2 Click Print & Fax. 3 Click +. 4 Select the - Lexmark 26B0001 | User Manual - Page 33
from the list. 10 Click Add. Installing the printer on a wired network Use the following instructions to install the printer on a wired network. These instructions apply to Ethernet and fiber optic network connections. Before you install the printer on a wired network, make sure that: • You have - Lexmark 26B0001 | User Manual - Page 34
network setup page. You will need the IP address if you are configuring access for computers on a different subnet than the printer. 4 Install the drivers and add the printer. a Install a PPD file on the computer: 1 Insert the Software and Documentation CD in the CD or DVD drive. 2 Double-click the - Lexmark 26B0001 | User Manual - Page 35
pop-up menu, choose AppleTalk. 8 From the second pop-up menu, select Local AppleTalk zone. 9 Select the printer from the list. 10 Click Add. Note: If the printer doesn't show up in the list, you may need to add it using the IP address. Contact your system support person for assistance. Additional - Lexmark 26B0001 | User Manual - Page 36
automatically linked. The Paper Size setting for all trays must be set manually from the Paper Size menu. The Paper Type setting must be same custom names assigned will link. 1 Make sure the printer is on and Ready appears. 2 From the printer control panel, press . 3 Press the arrow buttons until - Lexmark 26B0001 | User Manual - Page 37
lets you print on paper sizes that are not preset in the printer menus. Set the Paper Size for the specified tray to Universal when inches or millimeters) • Portrait Height and Portrait Width • Feed Direction Note: The smallest supported Universal size is 76.2 x 127 mm (3 x 5 in.); the largest is - Lexmark 26B0001 | User Manual - Page 38
and width Defining a specific height and width measurement for the Universal paper size (in the portrait orientation) allows the printer to support the size, including support for standard features such as duplex printing and printing multiple pages on one sheet. 1 From the Universal Setup menu - Lexmark 26B0001 | User Manual - Page 39
the correct position for the paper size being loaded. Note: Use the size indicators on the bottom of the tray to help position the guide. 3 If the paper is longer than letter-size paper, push the green tab at the back of the tray to elongate it. 4 Flex the sheets - Lexmark 26B0001 | User Manual - Page 40
the tray, change the Paper Type or Paper Size setting for the tray from the printer control panel. Note: Mixing paper sizes or types in a paper tray may lead is loaded. The only differences are the look of the guide tabs and the location of the paper size indicators, as shown in the following illustration - Lexmark 26B0001 | User Manual - Page 41
1 2 3 1 Length guide tabs 2 Size indicators 3 Width guide tabs Using the multipurpose feeder 1 Push the multipurpose feeder latch to the left. 2 Open the multipurpose feeder. Loading paper and specialty media 41 - Lexmark 26B0001 | User Manual - Page 42
3 Grasp the extension, and pull it straight out until it is fully extended. 4 Prepare the paper for loading. • Flex sheets of paper back and forth to loosen them, and then fan them. Do not fold or crease the paper. Straighten the edges on a level surface. • Hold transparencies by the edges and fan - Lexmark 26B0001 | User Manual - Page 43
1 Tab 2 Stack height limiter 3 Width guide 4 Size indicators 6 Load the paper, and then adjust the width guide to lightly touch the edge of the paper coated linings, or self-stick adhesives. These envelopes may severely damage the printer.. Notes: • Do not load or close the multipurpose feeder while - Lexmark 26B0001 | User Manual - Page 44
facedown into the manual feeder. Load envelopes with the flap side up. Notes: • Align the long edge of the paper so that it is flush with the right side of the manual feeder. • To achieve the best possible print quality, use only high-quality paper designed for laser printers. Loading paper and - Lexmark 26B0001 | User Manual - Page 45
3 Move the width guide until it lightly touches the sheet. Do not force the width guide against the paper, or it could be damaged. 4 Push the paper in until it stops. The printer pulls it in farther. 5 From the printer control panel, set the Paper Size and Paper Type. Loading paper and specialty - Lexmark 26B0001 | User Manual - Page 46
found in the Cardstock and Label Guide available on Lexmark.com/publications. Paper guidelines Paper curl at its edges. Excessive curl can cause paper feeding problems. Curl can occur after the paper passes through the printer, where it is exposed to high temperatures. Storing paper unwrapped - Lexmark 26B0001 | User Manual - Page 47
problems printer: jams and helps ensure trouble-free printing. To inks might not. When in doubt, contact the paper supplier. Preprinted papers such as letterhead must be able to withstand temperatures up to 200°C (392°F) without melting or releasing hazardous emissions. Paper and specialty media guide - Lexmark 26B0001 | User Manual - Page 48
size, select the closest larger listed size. Paper sizes supported by the printer Paper size Dimensions 250-sheet 550-sheet Optional Manual tray tray multipurpose feeder (standard) (optional) feeder Duplex the size is specified by the software program. Paper and specialty media guide 48 - Lexmark 26B0001 | User Manual - Page 49
Paper size Dimensions 250-sheet 550-sheet Optional Manual tray tray multipurpose feeder (standard) (optional) feeder Duplex Standard exit tray Universal* 148 x 210 mm X (5.8 x 8.3 in.) up x 14 in.) unless the size is specified by the software program. Paper and specialty media guide 49 - Lexmark 26B0001 | User Manual - Page 50
stock X Transparencies* X X Envelopes X X X Paper labels X * Lexmark transparency part numbers 12A8240 and 12A8241 are supported from the standard tray, manual feeder, and the optional multipurpose feeder. Paper types and weights supported by the printer Paper type Standard 250-sheet - Lexmark 26B0001 | User Manual - Page 51
bond) paper, we recommend grain long fibers. 4 Lexmark transparency part numbers 12A8240 and 12A8241 are supported from the standard tray, manual feeder, and the optional multipurpose feeder. 5 The pressure sensitive area must enter the printer first. 6 100 percent cotton content maximum weight is - Lexmark 26B0001 | User Manual - Page 52
Lexmark supports the use of recycled office paper produced specifically for use in laser (electrophotographic) printers. In 1998, Lexmark recycled paper will feed well. Lexmark consistently tests its printers with recycled paper (20-100 work very well in laser printers, despite surface texture. Before - Lexmark 26B0001 | User Manual - Page 53
and paper that is cut grain-short for portrait (or short-edge) fed printers may have lower bending resistance than is required for reliable paper feeding. Before using meeting these guidelines may still cause paper feeding problems in any laser printer (for example, if the paper curls excessively - Lexmark 26B0001 | User Manual - Page 54
how reliably documents print. For more information, see "Avoiding jams" and "Storing paper." Printing a document 1 Load paper into a tray or feeder. 2 From the printer control panel Paper menu, set the Paper Type and Paper Size to match the loaded paper. 3 Do one of the following: For Windows users - Lexmark 26B0001 | User Manual - Page 55
for printing on speciality medias may be found in the Cardstock and Label Guide available on Lexmark.com/publications. Tips on using letterhead Page orientation is important when printing on vendor to determine whether the chosen preprinted letterhead is acceptable for laser printers. Printing 55 - Lexmark 26B0001 | User Manual - Page 56
tray, manual feeder, or optional multipurpose feeder. • Use transparencies designed specifically for laser printers. Check with problems, avoid getting fingerprints on the transparencies. • Before loading transparencies, fan the stack to prevent sheets from sticking together. • We recommend Lexmark - Lexmark 26B0001 | User Manual - Page 57
: • Feed envelopes from the manual feeder or optional multipurpose feeder. rough, cockle, or laid finishes • Adjust the width guides to fit the width of the envelopes. Note: A also contaminate the printer and the cartridge with adhesive, and could void the printer and cartridge warranties. • Do - Lexmark 26B0001 | User Manual - Page 58
1 mm (0.04 in.) away from edges is recommended. Adhesive material contaminates the printer and could void the warranty. • If zone coating of the adhesive is not possible, remove a 1.6 mm (0.06 in.) strip on the leading and driver edge, and use a non-oozing adhesive. • Portrait orientation works best - Lexmark 26B0001 | User Manual - Page 59
approved for use with the printer. For more information, visit the Lexmark Web site at www.lexmark.com. Notes: • Hi-Speed USB devices must support the Full-speed standard. Devices only supporting USB Low-speed capabilities are not supported. • USB devices must support the FAT (File Allocation Tables - Lexmark 26B0001 | User Manual - Page 60
appears. Printing the print quality test pages Print the print quality test pages to isolate print quality problems. 1 Turn the printer off. 2 Hold down and the right arrow button while turning the printer on. 3 Release the buttons when the dots appear, and wait for CONFIG MENU to appear. 4 Press - Lexmark 26B0001 | User Manual - Page 61
. For Macintosh users In Mac OS X version 10.5: 1 From the Apple menu, choose System Preferences. 2 Click Print & Fax, and then double-click the printer icon. 3 From the printer window, select the job to cancel. 4 From the icon bar at the top of the window, click the Delete icon. In Mac OS X version - Lexmark 26B0001 | User Manual - Page 62
4 From the printer window, select the job to cancel. 5 From the icon bar at the top of the window, click the Delete icon. Printing 62 - Lexmark 26B0001 | User Manual - Page 63
printer is printing. Load them prior to printing, or wait for a prompt to load them. • Do not load too much paper. Make sure the stack height does not exceed the indicated maximum height. • Make sure the guides information, see "Paper types and weights supported by the printer" on page 50. • Do not - Lexmark 26B0001 | User Manual - Page 64
Jam number Jam location Instructions 1 200 2 201 3 202 4 230 5 235 Standard 250-sheet tray and manual feeder (Tray 1) Under the fuser In the fuser In the duplex In the duplex Note: This jam number indicates that the paper being used for a duplex print job is not supported - Lexmark 26B0001 | User Manual - Page 65
Grasp the handle, and pull the standard 250-sheet tray (Tray 1) and manual feeder out. 2 Remove the jam. Note: Make sure all paper fragments are you to open it. CAUTION-HOT SURFACE: The inside of the printer might be hot. To reduce the risk of injury from a hot component, allow the surface to - Lexmark 26B0001 | User Manual - Page 66
jam 1 Grasp the front door at the side handholds, and then pull it toward you to open it. CAUTION-HOT SURFACE: The inside of the printer might be hot. To reduce the risk of injury from a hot component, allow the surface to cool before touching. 2 Grasp the green lever, and then - Lexmark 26B0001 | User Manual - Page 67
The fuser cover closes when released. Note: Make sure all paper fragments are removed. 4 Close the front door. 5 Press . Clearing jams 67 - Lexmark 26B0001 | User Manual - Page 68
230 paper jam 1 Grasp the front door at the side handholds, and then pull it toward you to open it. 2 Remove the jam. 3 Press . 235 paper jam 1 Grasp the front door at the side handholds, and then pull it toward you to open it. 2 Remove the jam. 3 Load the tray with the correct paper size. 4 Insert - Lexmark 26B0001 | User Manual - Page 69
250 paper jam 1 Push the lever in the multipurpose feeder to access the paper jammed. 2 Remove the jam. Note: Make sure all paper fragments are removed. 3 Insert the tray. 4 Press . Clearing jams 69 - Lexmark 26B0001 | User Manual - Page 70
of menus are available to make it easy for you to change printer settings: Note: Certain menus are not available on selected printer models. Supplies Menu Cyan Cartridge Magenta Cartridge Yellow Cartridge Black Cartridge Imaging Kit Waste Toner Bottle Paper Menu Default Source Size/Type Paper - Lexmark 26B0001 | User Manual - Page 71
Cartridge indicates the cartridge is nearly empty, and print quality problems may result. Shows the status of the imaging kit Shows the status of the waste toner bottle Paper menu Default Source menu Menu item Default Source Tray MP Feeder Manual Paper Manual . Understanding printer menus 71 - Lexmark 26B0001 | User Manual - Page 72
of Custom Type . • Use this menu item to configure automatic tray linking. Note: Only installed trays, drawers, and feeders are listed in this menu. Understanding printer menus 72 - Lexmark 26B0001 | User Manual - Page 73
setting in the Paper menu. • Plain paper is the factory default setting. Note: Only installed trays, drawers, and feeders are listed in this menu. Understanding printer menus 73 - Lexmark 26B0001 | User Manual - Page 74
is the international factory default setting. Manual Paper Type Plain Paper Glossy Paper paper being manually loaded Note: Plain Paper is the factory default setting. Manual Envelope Size setting. Manual Envelope Type Envelope Custom Type Specifies the type of envelope being manually loaded - Lexmark 26B0001 | User Manual - Page 75
: • Normal is the factory default setting. • Settings appear only if card stock is supported. Transparency Texture Smooth Normal Rough Specifies the relative texture of the transparencies loaded in a specific specific tray Note: Normal is the factory default setting. Understanding printer menus 75 - Lexmark 26B0001 | User Manual - Page 76
tray Notes: • Normal is the factory default setting. • Settings appear only if the custom type is supported. Specifies the relative texture of the heavy paper loaded in a specific tray Notes: • Normal is the a specific tray Note: Normal is the factory default setting. Understanding printer menus 76 - Lexmark 26B0001 | User Manual - Page 77
• Settings appear only if card stock is supported. Identifies the relative weight of the light paper • Settings appear only if light paper is supported. Identifies the relative weight of the heavy paper • Settings appear only if heavy paper is supported. Identifies the relative weight of the rough/ - Lexmark 26B0001 | User Manual - Page 78
tray Notes: • Normal is the factory default setting. • Settings appear only if custom paper is supported. Paper Loading menu Note: Certain options are not available on selected printer models. Menu item Description Recycled Loading Duplex Off Determines whether 2-sided printing occurs for all - Lexmark 26B0001 | User Manual - Page 79
as the paper type Notes: • Off is the factory default setting. • Custom Loading is available only if the custom type is supported. Note: Duplex sets the printer default to 2-sided printing for every print job unless 1-sided printing is selected from Print Properties (in Windows) or the Print - Lexmark 26B0001 | User Manual - Page 80
It is listed with the other paper size settings and includes similar options, such as support for duplex printing and printing multiple pages on one sheet. Menu item Units of Measure Inches if the longest edge is shorter than the maximum length supported in the tray. Understanding printer menus 80 - Lexmark 26B0001 | User Manual - Page 81
• The page prints when this item is selected. Profile List menu Menu item Print profiles Description Prints a list of profiles stored in the printer Note: The page prints when this item is selected. Print Fonts menu Menu item Print Fonts PCL Fonts PostScript Fonts PPDS Fonts Description Prints - Lexmark 26B0001 | User Manual - Page 82
optional flash memory card Notes: • The optional flash memory or printer hard disk must be installed correctly and working properly. • The Print Defects menu Menu item Print Defects Description Prints a diagnostic list of problems Notes: • The page prints when this item is selected. • The list - Lexmark 26B0001 | User Manual - Page 83
updated. Controls the network input buffer Notes: • Auto is the factory default setting. • The maximum size allowed depends on the amount of memory in the printer, the size of the other link buffers, and whether Resource Save is set to On or Off. • Changing this setting from the - Lexmark 26B0001 | User Manual - Page 84
Menu Wireless menu AppleTalk menu SE Menu Description List all the network setup menus, regardless of the active printer network Note: Certain options are not available on selected printer models. Wireless menu Use the following menu items to view or configure the wireless internal print server - Lexmark 26B0001 | User Manual - Page 85
updated. Controls the USB port buffer Notes: • Auto is the factory default setting. • The maximum size allowed depends on the amount of memory in the printer, the size of the other link buffers, and whether Resource Save is set to On or Off. • To increase the maximum size range for the - Lexmark 26B0001 | User Manual - Page 86
Menu item ENA Gateway Description Sets the gateway information for an external print server that is attached to the printer using a USB cable Note: This menu item is available only if the printer is attached to an external print server through the USB port. Settings General Settings menu Menu item - Lexmark 26B0001 | User Manual - Page 87
Cartridge Alarm Off Single Print Recovery Auto Continue Disabled 5 sec -255 sec Print Recovery Jam Recovery On Off Auto Description Allows the printer factory default setting. • On configures the printer to produce as little noise as possible. Instructs the printer to run the setup wizard Notes: • - Lexmark 26B0001 | User Manual - Page 88
: • Off is the factory default setting. Off prints a partial page when there is not enough memory to print the whole page. • On sets the printer to process the whole page so that the entire page prints. Specifies the number of minutes of inactivity before some systems begin entering a minimum power - Lexmark 26B0001 | User Manual - Page 89
default setting. Sets the print area Note: Normal is the factory default setting. Collects permanent resources that have been downloaded on the printer and automatically writes them to the flash drive Note: RAM is the factory default setting. Saves the permanently downloaded resources Note: Off - Lexmark 26B0001 | User Manual - Page 90
; for Macintosh users, click File > Print, and then adjust the settings from the Print dialog and pop-up menus. Software settings always override printer control panel settings. Specifies whether blank pages are inserted in a print job Note: Do Not Print is the factory default setting. Stacks the - Lexmark 26B0001 | User Manual - Page 91
color tables using the settings available from the Manual Color menu. • Due to the differences in additive and subtractive colors, certain colors that appear on computer monitors are impossible to duplicate on the printed page. Specifies the printed output resolution Understanding printer menus 91 - Lexmark 26B0001 | User Manual - Page 92
used. Adjusts saturation in color outputs Notes: • 0 is the factory default setting. • This does not affect files where CMYK color specifications are being used. Understanding printer menus 92 - Lexmark 26B0001 | User Manual - Page 93
True Black Vivid Off-RGB US CMYK Euro CMYK Vivid CMYK Off-CMYK Manual Color RGB Image Vivid sRGB Display Display-True Black sRGB Vivid Off desired printed output. • From a browser window, type the IP address of the printer to access a complete list of color sample pages from the Embedded Web Server. - Lexmark 26B0001 | User Manual - Page 94
Menu item Manual Color CMYK Image US CMYK Euro CMYK Vivid CMYK Off CMYK Text US refers to the memory added by installing an optional flash memory card in the printer. Warning-Potential Damage: Do not turn off the printer while the flash memory is formatting. Notes: • An optional flash memory card - Lexmark 26B0001 | User Manual - Page 95
Menu item Hex Trace Activate Coverage Estimator Off On Description Assists in isolating the source of a print job problem Notes: • When Activate is selected, all data sent to the printer is printed in hexadecimal and character representation and control codes are not executed. • To exit Hex Trace, - Lexmark 26B0001 | User Manual - Page 96
setting. • Courier shows the font name, font ID, and storage location in the printer. The font source abbreviation is R for Resident, F for Flash, and D for Symbol sets support the different languages or specific programs such as math symbols for scientific text. Only the supported symbol sets are - Lexmark 26B0001 | User Manual - Page 97
Specifies the number of lines that print on each page Notes: • 60 is the US factory default setting. 64 is the international default setting. • The printer sets the amount of space between each line based on the Lines per Page, Paper Size, and Orientation settings. Select the desired Paper Size and - Lexmark 26B0001 | User Manual - Page 98
Tray Off None 0-199 Assign Manual Paper Off None 0-199 Assign Man Env Off None 0-199 Tray Renumber View Factory Def None Tray Renumber Restore Defaults Yes No Image menu Menu item Auto Fit On Off Invert On Off Description Configures the printer to work with printer software or programs that use - Lexmark 26B0001 | User Manual - Page 99
set to Best Fit. Sets the image orientation Note: Portrait is the factory default setting. PictBridge menu Note: Certain options are not available on selected printer models. Menu item Photo Size Auto is the default L 2L Hagaki Postcard Card Size 100 x 150 mm 4 x 6 in 8 x 10 in Letter A4 A5 JIS B5 - Lexmark 26B0001 | User Manual - Page 100
Normal Draft Fine Paper Source MP Feeder Tray Manual Paper Description Determines which resolution, toner darkness, and color saver values the device uses when printing photos sent from a PictBridge-enabled device Note: If both the printer and the PictBridge-enabled camera have a value for - Lexmark 26B0001 | User Manual - Page 101
door Close the upper and lower doors. Check Config ID The printer configuration ID is invalid. Contact Customer Support. Check Model Name Set a valid model name. Check Serial Num Set a valid serial number. Low Replace the toner cartridge, and then wait for the message to clear. Defragmenting - Lexmark 26B0001 | User Manual - Page 102
printer. Invalid Engine Code The engine code is invalid. Contact Customer Support. Invalid Network Code The network code is invalid. Contact Customer Support to clear the message and continue printing. The printer manually overrides the manual request, and then the job prints from an automatic - Lexmark 26B0001 | User Manual - Page 103
, load a sheet, and then select to clear the message and continue printing. • Press to clear the message and continue printing. The printer manually overrides the manual request, and then paper prints from an automatic source. • Press , and then press to cancel printing. Output Bin Full Try one or - Lexmark 26B0001 | User Manual - Page 104
• Press , and then press to cancel printing. Remote Management Active The printer is offline while it configures settings. Wait for the message to clear. remove any packaging materials from the toner cartridges. Replace cartridge Replace the toner cartridge, and then press to clear the - Lexmark 26B0001 | User Manual - Page 105
for the message to clear. Warning-Potential Damage: Do not turn the printer off while this message appears on the display. Waste Toner Box The waste new one. 32.yy Replace Unsupported Cartridge Replace the unsupported toner cartridge with a supported one. 34 Short paper Try one or more - Lexmark 26B0001 | User Manual - Page 106
page is too complex to print. Press , and then press to cancel printing. 40 Invalid refill, change cartridge Replace the toner cartridge with a new one. 50 PPDS Font Error The printer has encountered a font error because a specific font may not be installed. Try one or more of the following - Lexmark 26B0001 | User Manual - Page 107
defective and require replacing. 56 Standard USB port disabled Try one or more of the following: • Press to clear the message and continue printing. The printer discards any data received through the USB port. • Make sure the USB port is not set to Disabled. 58 Too many flash options installed Too - Lexmark 26B0001 | User Manual - Page 108
4 Connect the power cord to a properly grounded outlet. 5 Turn the printer back on. 59 Incompatible tray Remove the specified tray. 82 Replace .yy Cartridge is low Press to clear the message and continue printing. 88.yy Replace Cartridge Replace the toner cartridge. 200.yy Paper - Lexmark 26B0001 | User Manual - Page 109
Paper jam 1 Clear the paper path. 2 Pull the tray out. 3 Remove the jammed paper. 4 Insert the tray. If all jams are cleared, the printer resumes printing. Note: When there is more than one jam, the message displays the number of pages jammed. Understanding - Lexmark 26B0001 | User Manual - Page 110
then turn the printer back on 940.02 The cyan toner cartridge needs maintenance. Call for service. 941.02 The magenta toner cartridge needs maintenance. Call for service. 942.02 The yellow toner cartridge needs maintenance. Call for service. 943.02 The black toner cartridge needs maintenance. Call - Lexmark 26B0001 | User Manual - Page 111
Periodically, certain tasks are required to maintain optimum print quality. Storing supplies Choose a cool, clean storage area for the printer supplies. Store supplies right side up in their original packing until you are ready to use them. Do not expose supplies to: • Direct sunlight • Temperatures - Lexmark 26B0001 | User Manual - Page 112
Web Site at www.lexmark.com or contact the place where you purchased the printer. Note: All life estimates for printer supplies assume printing on letter- or A4-size plain paper. Ordering toner cartridges When 88 Cyan Cartridge Low, 88 Magenta Cartridge Low, 88 Yellow Cartridge Low, or 88 Black - Lexmark 26B0001 | User Manual - Page 113
Cartridge Magenta Extra High Yield C544X2MG Toner Cartridge Yellow Extra High Yield Toner Cartridge C544X2YG C540 and C543 series C544 series Not supported Not supported Not supported Not supported Not supported Not supported Not supported bottle Part number C540X75G Maintaining the printer 113 - Lexmark 26B0001 | User Manual - Page 114
Replace the waste toner bottle when 82 Replace waste toner appears. The printer will not continue printing until the waste toner bottle is replaced. 1 it toward you. CAUTION-HOT SURFACE: The inside of the printer might be hot. To reduce the risk of injury from a hot component, allow - Lexmark 26B0001 | User Manual - Page 115
3 Open the top door. 4 Remove the right side cover. Maintaining the printer 115 - Lexmark 26B0001 | User Manual - Page 116
each side of the waste toner bottle, and then remove it. 6 Place the waste toner bottle in the enclosed packaging. For more information, see "Recycling Lexmark products" on page 136. 7 Insert the new waste toner bottle. 8 Replace the right side cover. Maintaining the - Lexmark 26B0001 | User Manual - Page 117
when Imaging Kit appears. 1 Grasp the front door at the side handholds, and then pull it toward you. CAUTION-HOT SURFACE: The inside of the printer might be hot. To reduce the risk of injury from a hot component, allow the surface to cool before touching. Maintaining the - Lexmark 26B0001 | User Manual - Page 118
2 Open the top door. 3 Remove the toner cartridges by lifting the handles, and then gently pulling away from the imaging kit. 4 Remove the right side cover. Maintaining the printer 118 - Lexmark 26B0001 | User Manual - Page 119
pull the imaging kit out. Warning-Potential Damage: Do not touch the underside of the imaging kit. This could damage the imaging kit. Maintaining the printer 119 - Lexmark 26B0001 | User Manual - Page 120
shake the black developer unit side to side. 11 Remove the packaging from the black developer unit. 12 Insert the black developer unit. Maintaining the printer 120 - Lexmark 26B0001 | User Manual - Page 121
each developer unit is inserted into a matching color slot. 14 Place the used black imaging kit in the enclosed package. For more information, see Recycling Lexmark Products. 15 Align and insert the imaging kit. 16 Rotate the blue levers down until the imaging kit drops into place. Maintaining the - Lexmark 26B0001 | User Manual - Page 122
17 Replace the waste toner bottle. 18 Replace the right side cover. 19 Replace the toner cartridges. Maintaining the printer 122 - Lexmark 26B0001 | User Manual - Page 123
appears. 1 Grasp the front door at the side handholds, and then pull it toward you to open it. CAUTION-HOT SURFACE: The inside of the printer might be hot. To reduce the risk of injury from a hot component, allow the surface to cool before touching. Maintaining the - Lexmark 26B0001 | User Manual - Page 124
2 Open the top door. 3 Remove the toner cartridges by lifting the handles, and then gently pulling away from the imaging kit. 4 Remove the right side cover. Maintaining the printer 124 - Lexmark 26B0001 | User Manual - Page 125
color imaging kit. Leave the packaging on the developer units. 9 Gently shake the yellow, cyan, magenta, and black developer units side to side. Maintaining the printer 125 - Lexmark 26B0001 | User Manual - Page 126
yellow, cyan, magenta, and black developer units. 12 Place the used black and color imaging kit in the enclosed package. For more information, see "Recycling Lexmark products" on page 136. 13 Align and insert the imaging kit. Maintaining the - Lexmark 26B0001 | User Manual - Page 127
14 Replace the waste toner bottle. 15 Replace the right side cover. 16 Replace the toner cartridges. Maintaining the printer 127 - Lexmark 26B0001 | User Manual - Page 128
: Damage caused by use of a non-Lexmark toner cartridge is not covered under warranty. Note: Degraded print quality may result from using non-Lexmark toner cartridges. 1 Make sure the printer is on and Ready or 88 Replace Cartridge appears. 2 Unpack the new cartridge, and set it near the - Lexmark 26B0001 | User Manual - Page 129
Y C M K 4 Remove the toner cartridge by lifting the handle, and then gently pulling away from the imaging kit. Y K M C 5 Align the new toner cartridge, and then press down until it is all the way into the slot. Y K M C Maintaining the printer 129 Y C M K - Lexmark 26B0001 | User Manual - Page 130
Y Replacing a developer unit Replace a developer unit when a print quality defect occurs or when damage occurs to the printer. Note: When a developer unit is replaced, you must manually calibrate the color. For more information, see "Color misregistration" on page 155. 1 Grasp the front door at the - Lexmark 26B0001 | User Manual - Page 131
3 Remove the toner cartridges by lifting the handles and then gently pulling away from the imaging kit. 4 Remove the right side cover. 5 Press the green levers on each side of the waste toner bottle, and then remove it. Maintaining the printer 131 - Lexmark 26B0001 | User Manual - Page 132
kit. This could damage the imaging kit. 8 Remove the used developer unit. 9 Place the used developer in the enclosed package. For more information, see "Recycling Lexmark products" on page 136. 10 Unpack the replacement developer unit. Leave the packaging on the developer unit. Maintaining the - Lexmark 26B0001 | User Manual - Page 133
11 Gently shake the developer unit side to side. 12 Remove the red shipping cover from the developer unit. 13 Insert the developer unit. 14 Align and insert the imaging kit. Maintaining the printer 133 - Lexmark 26B0001 | User Manual - Page 134
15 Replace the waste toner bottle. 16 Replace the right side cover. Maintaining the printer 134 - Lexmark 26B0001 | User Manual - Page 135
the toner cartridges. 18 Close the top door. 19 Close the front door. Cleaning the exterior of the printer 1 Make sure that the printer is turned off and unplugged from the wall outlet. CAUTION-SHOCK HAZARD: To avoid the risk of electric shock when cleaning the exterior of the printer, unplug the - Lexmark 26B0001 | User Manual - Page 136
1 Visit our Web site at www.lexmark.com/recycle. 2 Find the product type you want to recycle, and then select your country from the list. 3 Follow the instructions on the computer screen. Moving the printer Before moving the printer CAUTION-POTENTIAL INJURY: The printer weight is greater than 18 kg - Lexmark 26B0001 | User Manual - Page 137
Administrative support Restoring the factory default settings Menu settings marked with an asterisk (*) indicate the active settings. You can restore the original printer settings, often referred to as the factory default settings. 1 Make sure the printer is on and Ready appears. 2 From the printer - Lexmark 26B0001 | User Manual - Page 138
Web browser. Note: If you do not know the IP address of the printer, then print a network setup page and locate the IP address in the TCP want to receive e-mail alerts. 5 Click Submit. Note: See your system support person to set up the e-mail server. Configuring supply notifications You can determine - Lexmark 26B0001 | User Manual - Page 139
a language from the drop-down list, and then click Click here to submit language. 4 Click Printer Settings. 5 Enter the IP addresses of the source and target printers. Note: To add additional target printers, click the Add Target IP button. 6 Click Copy Printer Settings. Administrative support 139 - Lexmark 26B0001 | User Manual - Page 140
Troubleshooting Solving basic printer problems If there are basic printer problems, or the printer is unresponsive, make sure: • The power cord is plugged into the printer and a properly grounded electrical outlet. • The electrical outlet is not turned off by any switch or breaker. • The printer is - Lexmark 26B0001 | User Manual - Page 141
supported operating system and using compatible printer software. MAKE SURE YOU ARE USING A RECOMMENDED USB, SERIAL, OR ETHERNET CABLE For more information, visit the Lexmark Web site at www.lexmark.com. MAKE SURE PRINTER TO OFF 1 From the printer control panel, press . 2 sure the printer is not in - Lexmark 26B0001 | User Manual - Page 142
type of paper in each tray to be linked. • Move the paper guides to the correct positions for the paper size loaded in each tray. USE of the following: MAKE SURE COLLATE IS SET TO ON From the printer control panel Finishing menu, Print Properties, or the Print dialog, set press . Troubleshooting 142 - Lexmark 26B0001 | User Manual - Page 143
with the option, or go to www.lexmark.com/publications to view the option instruction sheet. MAKE SURE THE OPTION IS SELECTED From the computer you are printing from, select the option. For more information, see "Updating available options in the printer driver" on page 27. Drawers MAKE SURE THE - Lexmark 26B0001 | User Manual - Page 144
paper and specialty media guidelines. CHECK THE PAPER GUIDES Move the guides in the tray to the correct position for the size loaded. CHECK FOR SERVICE MESSAGES If a service message appears, turn the printer off, wait about 10 seconds, and then turn the printer back on. If the error recurs, call for - Lexmark 26B0001 | User Manual - Page 145
the problem, contact Customer Support. You may have a printer part that requires adjustment or replacement. Isolating print quality problems To help isolate print quality problems, print the print quality test pages: 1 Turn the printer off. 2 Load letter- or A4-size paper. Troubleshooting 145 - Lexmark 26B0001 | User Manual - Page 146
press . Blank pages The printer may need to be serviced. For more information, contact Customer Support. Characters have jagged or uneven SUPPORTED If you are using downloaded fonts, then verify that the fonts are supported by the printer, the host computer, and the software program. Troubleshooting - Lexmark 26B0001 | User Manual - Page 147
GUIDES Move the width and length guides in the tray to the correct positions for the paper size loaded. CHECK THE PAPER SIZE SETTING Make sure the paper size setting matches the paper loaded in the tray: 1 From the printer Darkness setting: • From the printer control panel, change the setting from - Lexmark 26B0001 | User Manual - Page 148
colored line These are possible solutions. Try one or more of the following: A TONER CARTRIDGE MAY BE DEFECTIVE Replace the defective toner cartridge. THE IMAGING KIT MAY BE DEFECTIVE Replace the imaging kit. Note: The printer has two types of imaging kits: a black and color imaging kit, and a black - Lexmark 26B0001 | User Manual - Page 149
setting matches the paper loaded in the tray. CHECK THE PAPER Avoid textured paper with rough finishes. THE TONER MAY BE LOW When 88 cartridge low appears, order a new cartridge. Troubleshooting 149 - Lexmark 26B0001 | User Manual - Page 150
printer automatically calibrates the colors whenever a new imaging kit is detected. If a cartridge is replaced, then you can calibrate the colors manually: 1 From the printer • From the printer control panel Quality button. 3 Click Printer Features. 4 Change kit. Note: The printer has two types of - Lexmark 26B0001 | User Manual - Page 151
. Try one or more of the following: CALIBRATE THE COLOR The printer will automatically calibrate the colors whenever a new imaging kit is detected. If a cartridge is replaced, then you can calibrate the colors manually: 1 From the printer control panel, press . 2 From the Admin menu, press the arrow - Lexmark 26B0001 | User Manual - Page 152
Cartridge Low appears, order a new cartridge. A TONER CARTRIDGE MAY BE DEFECTIVE Replace the toner cartridge. THE IMAGING KIT MAY BE WORN OR DEFECTIVE Replace the imaging kit. Note: The printer list of problems. For more information, see "Menu Settings Page menu" on page 81. Troubleshooting 152 - Lexmark 26B0001 | User Manual - Page 153
CHECK THE PAPER GUIDES Move the guides in the tray to the correct positions for the paper size loaded. CHECK THE PAPER Make sure you are using paper that meets the printer specifications. Solid color pages The printer may need to be serviced. For more information, contact Customer Support. Toner fog - Lexmark 26B0001 | User Manual - Page 154
kit contains cyan, magenta, yellow, and black. The black imaging kit contains black only. IS THERE TONER IN THE PAPER PATH? Contact Customer Support. Transparency print quality is poor CHECK THE TRANSPARENCIES Use only transparencies recommended by the printer manufacturer. Troubleshooting 154 - Lexmark 26B0001 | User Manual - Page 155
how some of the features provided in the printer control panel Quality menu can be used to solve typical color problems. Color misregistration ABCDE ABCDE Color has shifted following: REMOVE AND REINSTALL THE TONER CARTRIDGES Remove the toner cartridges, and then reinstall them. Troubleshooting 155 - Lexmark 26B0001 | User Manual - Page 156
, and black inks or toners can printer software? What settings should I use for the best color? The PostScript driver printer color sample pages may be useful in solving certain color-matching problems, see the question, "How can I match a particular color (such as a corporate logo)?" Troubleshooting - Lexmark 26B0001 | User Manual - Page 157
I can do to improve the color? This problem most commonly occurs when projecting transparencies with reflective overhead of color transparencies. What is manual color correction? When manual color correction is enabled, the printer employs user-selected color conversion tables . Troubleshooting 157 - Lexmark 26B0001 | User Manual - Page 158
printer Manual problem depends on the Color Correction setting being used (Auto, Off, or Manual ), the type of object being printed (text, graphics, or images), and how the color of the object is specified in the software program (RGB or CMYK combinations). When the printer printer network printer - Lexmark 26B0001 | User Manual - Page 159
the detailed Color Samples set. Contacting Customer Support When you call Customer Support, describe the problem you are experiencing, the message on the display, and the troubleshooting steps you have already taken to find a solution. You need to know your printer model type and serial number. For - Lexmark 26B0001 | User Manual - Page 160
. Some states do not allow disclaimer of express or implied warranties in certain transactions; therefore, this statement may not apply to or services, except those expressly designated by the manufacturer, are the user's responsibility. For Lexmark technical support, visit support.lexmark.com. - Lexmark 26B0001 | User Manual - Page 161
. PrintCryption is a trademark of Lexmark International, Inc. PCL® is a registered trademark of the Hewlett-Packard Company. PCL is Hewlett-Packard Company's designation of a set of printer commands (language) and functions included in its printer products. This printer is intended to be compatible - Lexmark 26B0001 | User Manual - Page 162
and used in accordance with the instructions, may cause harmful interference to radio • Consult your point of purchase or service representative for additional suggestions. The manufacturer a properly shielded and grounded cable such as Lexmark part number 1021231 for parallel attach or 1021294 - Lexmark 26B0001 | User Manual - Page 163
statement should be directed to: Director of Lexmark Technology & Services Lexmark International, Inc. 740 West New Circle Road Lexington, KY 40550 (859) 232-3000 Exposure to radio frequency radiation The following notice is applicable if your printer has a wireless network card installed. The - Lexmark 26B0001 | User Manual - Page 164
rieur est strictement interdite. Pour empêcher toute interférence radio au service faisant l'objet d'une licence, cet appareil doit être utilisé à directives is available from the Director of Manufacturing and Technical Support, Lexmark International, S. A., Boigny, France. This product satisfies the - Lexmark 26B0001 | User Manual - Page 165
vara er í samræmi við grunnkröfur og aðrar kröfur, sem gerðar eru í tilskipun 1999/5/EC. Italiano Con la presente Lexmark International, Inc. dichiara che questo questo prodotto è conforme ai requisiti essenziali ed alle altre disposizioni pertinenti stabilite dalla direttiva 1999/5/CE. Latviski - Lexmark 26B0001 | User Manual - Page 166
near these symbols without first touching the metal frame of the printer. Noise emission levels The following measurements were made in accordance dBA Ready Inaudible Values are subject to change. See www.lexmark.com for current values. Temperature information Ambient temperature Shipping and - Lexmark 26B0001 | User Manual - Page 167
Lexmark Web site at www.lexmark.com for your local sales office phone number. Product disposal Do not dispose of the printer installed. Laser notice The printer is certified in the U.S. to be hazardous. The printer contains internally a Class . The laser system and printer are designed so there is - Lexmark 26B0001 | User Manual - Page 168
table represent time-averaged measurements. Instantaneous power draws may be substantially higher than the average. Values are subject to change. See www.lexmark.com for current values. Power Saver This product is designed with an energy-saving mode called Power Saver. The Power Saver Mode is - Lexmark 26B0001 | User Manual - Page 169
included with the printer shall end earlier if it, or its original contents, are substantially used up, depleted, or consumed. To obtain warranty service you may be required to present proof of original purchase. You may be required to deliver your product to the Remarketer or Lexmark, or ship it - Lexmark 26B0001 | User Manual - Page 170
of prints produced by any product. Warranty service does not include repair of failures caused by: -Modification or unauthorized attachments -Accidents, misuse, abuse or use inconsistent with Lexmark user's guides, manuals, instructions or guidance -Unsuitable physical or operating environment - Lexmark 26B0001 | User Manual - Page 171
you. This limited warranty gives you specific legal rights. You may also have other rights that vary from state to state. DEVICE PATENT LICENSE Lexmark reserves the right to discontinue selling these toner cartridges any time after it discontinues service support for this printer. IMPORTANT: PLEASE - Lexmark 26B0001 | User Manual - Page 172
machine-readable instructions, audio/visual content (such as images and recordings), and associated media, printed materials and electronic documentation, whether incorporated into, distributed with or for use with your Lexmark product. 1 STATEMENT OF SOFTWARE LIMITED WARRANTY. Lexmark warrants that - Lexmark 26B0001 | User Manual - Page 173
states do not allow limitations on how long an implied warranty lasts or the exclusion of limitation of incidental or consequential damages, so number of authorized users to the number specified in your agreement with Lexmark. You may not separate the components of the Software Program for use - Lexmark 26B0001 | User Manual - Page 174
terms of this Software License Agreement, any other written agreement signed by you and Lexmark relating to your Use of the Software Program). To the extent any Lexmark policies or programs for support services conflict with the terms of this Software License Agreement, the terms of this Software - Lexmark 26B0001 | User Manual - Page 175
MICROSOFT CORPORATION NOTICES 1 This product may incorporate intellectual property owned by Microsoft Corporation. The terms and conditions upon which Microsoft is licensing such intellectual property may be found at http://go.microsoft.om/fwlink/?LinkId=52369. 2 This product is based on Microsoft - Lexmark 26B0001 | User Manual - Page 176
Customer Support 159 Custom Types menu 79 Cyan Low 101 D Default Source menu 71 Defective Cartridge 105 Defragmenting Flash 101 Device Statistics menu 81 directory list, printing 60 display troubleshooting display is blank 140 display shows only diamonds 140 display, printer control - Lexmark 26B0001 | User Manual - Page 177
support 10 publications 10 Finishing menu 89 Flash drive menu 100 flash memory card installing 21 troubleshooting in driver 27 printer software 26 installing printer software adding manual feeder loading 44 memory card installing 19 troubleshooting 144 menu settings loading on multiple printers - Lexmark 26B0001 | User Manual - Page 178
imaging kits 113 toner cartridges 112 waste toner bottle troubleshooting message remains after jam is cleared 145 paper jams avoiding 63 Paper Loading menu 78 Paper Size/Type menu 72 paper sizes supported by the printer 48 Paper Texture menu 75 paper types duplex support 50 supported by printer - Lexmark 26B0001 | User Manual - Page 179
105 Waiting, too many events 105 Waste Toner Box 105 Yellow Low 101 printer options troubleshooting drawers 143 flash memory card 143 memory card 144 multipurpose feeder 144 option not working 143 printer problems, solving basic 140 printing directory list 60 font sample list 60 from Macintosh - Lexmark 26B0001 | User Manual - Page 180
104 tray linking 36 tray unlinking 36 trays linking 36 unlinking 36 troubleshooting checking an unresponsive printer 140 contacting Customer Support 159 FAQ about color printing 156 solving basic printer problems 140 troubleshooting, display display is blank 140 display shows only diamonds 140
-
 1
1 -
 2
2 -
 3
3 -
 4
4 -
 5
5 -
 6
6 -
 7
7 -
8
-
9
-
10
-
11
-
12
-
13
-
14
-
15
-
16
-
17
-
18
-
19
-
20
-
21
-
22
-
23
-
24
-
25
-
26
-
27
-
28
-
29
-
30
-
31
-
32
-
33
-
34
-
35
-
36
-
37
-
38
-
39
-
40
-
41
-
42
-
43
-
44
-
45
-
46
-
47
-
48
-
49
-
50
-
51
-
52
-
53
-
54
-
55
-
56
-
57
-
58
-
59
-
60
-
61
-
62
-
63
-
64
-
65
-
66
-
67
-
68
-
69
-
70
-
71
-
72
-
73
-
74
-
75
-
76
-
77
-
78
-
79
-
80
-
81
-
82
-
83
-
84
-
85
-
86
-
87
-
88
-
89
-
90
-
91
-
92
-
93
-
94
-
95
-
96
-
97
-
98
-
99
-
100
-
101
-
102
-
103
-
104
-
105
-
106
-
107
-
108
-
109
-
110
-
111
-
112
-
113
-
114
-
115
-
116
-
117
-
118
-
119
-
120
-
121
-
122
-
123
-
124
-
125
-
126
-
127
-
128
-
129
-
130
-
131
-
132
-
133
-
134
-
135
-
136
-
137
-
138
-
139
-
140
-
141
-
142
-
143
-
144
-
145
-
146
-
147
-
148
-
149
-
150
-
151
-
152
-
153
-
154
-
155
-
156
-
157
-
158
-
159
-
160
-
161
-
162
-
163
-
164
-
165
-
166
-
167
-
168
-
169
-
170
-
171
-
172
-
173
-
174
-
175
-
176
-
177
-
178
-
179
-
180
 |
 |

C54x Series
User's Guide
www.lexmark.com