Lexmark 44J0000 Quick Reference Guide
Lexmark 44J0000 - J 110 Color Inkjet Printer Manual
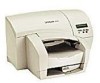 |
UPC - 734646207737
View all Lexmark 44J0000 manuals
Add to My Manuals
Save this manual to your list of manuals |
Lexmark 44J0000 manual content summary:
- Lexmark 44J0000 | Quick Reference Guide - Page 1
, a test page prints four color bars. If the print quality is still unsatisfactory, do a Long Clean (see Cleaning the Printheads on the User's Guide CD). Keep in mind that a Long Clean uses a substantial amount of ink and takes some time to run. If the problem persists, follow steps 1-5 above - Lexmark 44J0000 | Quick Reference Guide - Page 2
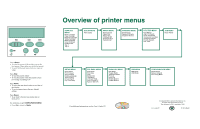
printer menus SUPPLIES MENU Black Cartridge Cyan Cartridge Magenta Cartridge Yellow Cartridge Black Printhead Color Printhead PerfectFinish Tray 1 Tray 2 COLOR Menu For additional information, see the User's Guide CD. © Copyright 2000. Lexmark International, Inc. All rights reserved. Printed
-
 1
1 -
 2
2
 |
 |
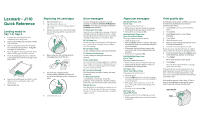
Lexmark
J110
Quick Reference
Loading media in
tray 1 or tray 2
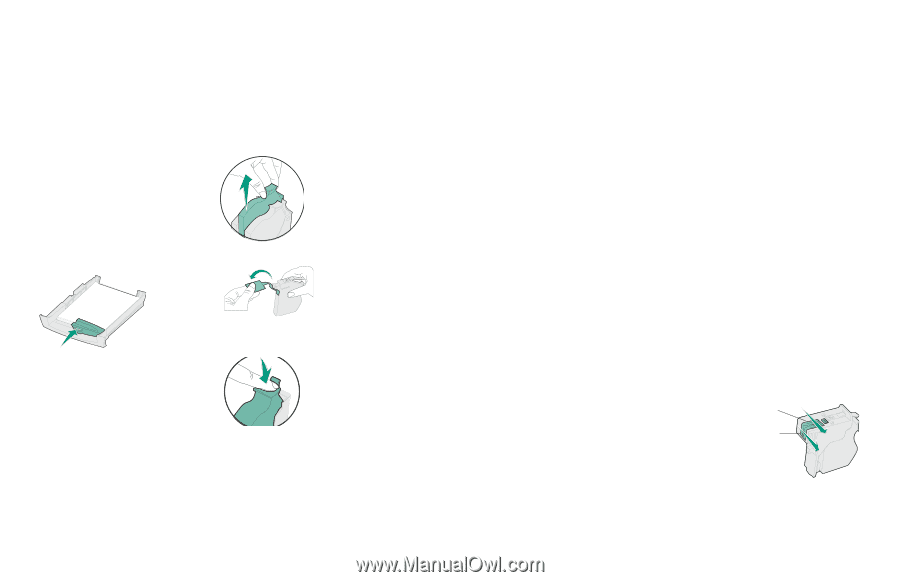
1
Grip the tray tab and pull the tray
completely out of the printer.
2
Squeeze the width guide and slide it all the
way to the left.
3
Before loading the media, flex the sheets
back and forth, then fan them.
Straighten
the edges on a flat surface.
4
Place the paper in the tray, print side down.
Make sure the paper lies flat in the tray.
5
Press the length guide button to slide the
guide lightly against the bottom edge of the
paper stack.
6
Squeeze the width guide and slide it to the
right until it is touching the edge of the
media stack.
7
Reinstall the tray.
Replacing ink cartridges
1
Turn the printer on (|).
2
Open the printer front cover.
The carrier moves to the load position at
the far left.
3
Squeeze the rear latch of the ink cartridge
you are replacing and lift it up and out of
the printer.
4
Remove the new ink cartridge from its
packaging and pull off the tape.
5
Insert the ink cartridge into the
corresponding printhead slot and push
down on the cartridge until it is securely in
place.
6
Close the front cover.
Error messages
An error message may indicate a color ink
cartridge or printhead (
C=Cyan, M=Magenta or
Y=Yellow
) or a black ink cartridge or printhead
(
K=Black
) needs attention.
31 Missing Ink Cartridge
Insert the ink cartridge that is missing.
If the ink
cartridge is already installed, remove it.
Check
that the tape has been removed and re-insert the
cartridge, making sure it is securely in place.
88 Cartridge Low
An ink cartridge is almost empty. Check that you
have a replacement cartridge and press
Go
to
clear the message.
89 Cartridge Empty
An ink cartridge is empty and must be replaced.
31 Defective Ink Cartridge
An ink cartridge is damaged and must be
replaced.
Printer Calibrating
The PerfectFinish cartridge applicator is refilling
the cartridge.
You may hear clicking noises as it
refills.
Once the cartridge applicator is refilled,
you may resume printing.
87 PerfectFinish Empty
The PerfectFinish cartridge is empty and must
be replaced.
31 Missing Printhead
A printhead is not detected.
Install the
printhead.
If the printhead is already installed,
check that it is positioned correctly in the printer.
930-938 Service
Turn the printer off and back on from the on/off
switch.
If this does not clear the error message,
do steps 1-7 under Print quality tips, or wipe the
copper contacts.
Paper jam messages
200/201/209 Paper Jam
Check Tray 1
The paper jammed from tray 1.
•
Remove tray 1 and look inside the opening.
•
Gently pull the jammed paper toward you.
•
Reinstall the tray and press
Go
.
203/204/205/207 Paper Jam
Open Cover/Move Media
The paper jammed inside the printer.
•
Open the front cover.
•
Press the
Menu>
button to advance the paper
incrementally until you can reach it and pull it
out of the printer.
•
If the paper does not advance, remove the
source tray, pull out the jammed paper, and
discard it.
•
Close the cover and press
Go
.
206/208/220/222 Paper Jam
Check Tray 2
The paper jammed from tray 2.
•
Remove tray 2 and look inside the opening.
•
Gently pull the jammed paper toward you.
•
Reinstall the tray and press
Go
.
221 Paper Jam
Check Tray 2/Move Media
The paper jammed from tray 2.
•
Open the cover.
•
Press the
Menu>
button to advance the paper
incrementally until you can reach it and pull it
out of the printer.
•
If the paper does not advance, remove the
source tray, pull out the jammed paper, and
discard it.
•
Close the cover and press
Go.
250 Paper Jam
Check MP Feeder
The paper jammed in the multipurpose feeder.
•
Pull the paper release lever toward the media
and hold it.
Print quality tips
If streaking or print quality problems occur, first
check that the printheads are positioned
correctly in the carrier:
1
Press
Menu>
until you see the Utilities
Menu
.
2
Press
Select
.
3
Press
Menu>
until you see Change
Printhead.
4
Press
Select
.
5
Open the printer cover.
6
Raise the carrier handle up and back down
to reseat the printheads.
7
Close the cover and reprint your job.
If you do not see any improvement, do a Short
Clean, which fixes most print quality problems.
1
From the Utilities Menu, press
Menu>
until
Clean Printheads appears on the display.
2
Press
Select
.
Short Clean appears on the display.
3
Press
Select.
Once the Short Clean finishes, a test page
prints four color bars.
If the print quality is still unsatisfactory, do a
Long Clean (see
Cleaning the Printheads
on the
User’s Guide
CD).
Keep in mind that a Long
Clean uses a substantial amount of ink and takes
some time to run.
If the problem persists, follow steps 1-5 above,
remove the printheads, and wipe the copper
contact area with a damp, lint-free cloth.
Copper contact area
Nozzles