Lexmark 5470 User's Guide - Page 167
Can receive but not send faxes, Fax Setup, Ringing and Answering, Fax Forward, Dialing and Sending
 |
UPC - 734646010801
View all Lexmark 5470 manuals
Add to My Manuals
Save this manual to your list of manuals |
Page 167 highlights
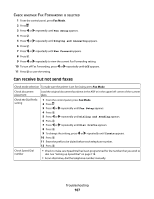
CHECK WHETHER FAX FORWARDING IS SELECTED 1 From the control panel, press Fax Mode. 2 Press . 3 Press or repeatedly until Fax Setup appears. 4 Press . 5 Press or repeatedly until Ringing and Answering appears. 6 Press . 7 Press or repeatedly until Fax Forward appears. 8 Press . 9 Press or repeatedly to view the current Fax Forwarding setting. 10 To turn off Fax Forwarding, press or repeatedly until Off appears. 11 Press to save the setting. Can receive but not send faxes Check mode selection To make sure the printer is set for faxing, press Fax Mode. Check document placement Load the original document facedown in the ADF or in the upper left corner of the scanner glass. Check the Dial Prefix setting 1 From the control panel, press Fax Mode. 2 Press . 3 Press or repeatedly until Fax Setup appears. 4 Press . 5 Press or repeatedly until Dialing and Sending appears. 6 Press . 7 Press or repeatedly until Dial Prefix appears. 8 Press . 9 To change the setting, press or repeatedly until Create appears. 10 Press . 11 Enter the prefix to be dialed before each telephone number. 12 Press . Check Speed Dial number • Check to make sure Speed Dial has been programmed for the number that you wish to dial. See "Setting up Speed Dial" on page 118. • As an alternative, dial the telephone number manually. Troubleshooting 167
-
 1
1 -
2
-
3
-
4
-
5
-
6
-
7
-
8
-
9
-
10
-
11
-
12
-
13
-
14
-
15
-
16
-
17
-
18
-
19
-
20
-
21
-
22
-
23
-
24
-
25
-
26
-
27
-
28
-
29
-
30
-
31
-
32
-
33
-
34
-
35
-
36
-
37
-
38
-
39
-
40
-
41
-
42
-
43
-
44
-
45
-
46
-
47
-
48
-
49
-
50
-
51
-
52
-
53
-
54
-
55
-
56
-
57
-
58
-
59
-
60
-
61
-
62
-
63
-
64
-
65
-
66
-
67
-
68
-
69
-
70
-
71
-
72
-
73
-
74
-
75
-
76
-
77
-
78
-
79
-
80
-
81
-
82
-
83
-
84
-
85
-
86
-
87
-
88
-
89
-
90
-
91
-
92
-
93
-
94
-
95
-
96
-
97
-
98
-
99
-
100
-
101
-
102
-
103
-
104
-
105
-
106
-
107
-
108
-
109
-
110
-
111
-
112
-
113
-
114
-
115
-
116
-
117
-
118
-
119
-
120
-
121
-
122
-
123
-
124
-
125
-
126
-
127
-
128
-
129
-
130
-
131
-
132
-
133
-
134
-
135
-
136
-
137
-
138
-
139
-
140
-
141
-
142
-
143
-
144
-
145
-
146
-
147
-
148
-
149
-
150
-
151
-
152
-
153
-
154
-
155
-
156
-
157
-
158
-
159
-
160
-
161
-
 162
162 -
 163
163 -
 164
164 -
 165
165 -
 166
166 -
 167
167 -
 168
168 -
 169
169 -
 170
170 -
 171
171 -
 172
172 -
173
-
174
-
175
-
176
-
177
-
178
-
179
-
180
-
181
-
182
-
183
-
184
-
185
-
186
-
187
-
188
-
189
-
190
-
191
-
192
-
193
-
194
-
195
-
196
-
197
-
198
-
199
-
200
-
201
-
202
 |
 |