Lexmark 5470 User's Guide - Page 37
Using a digital phone service, Understanding the control panel
 |
UPC - 734646010801
View all Lexmark 5470 manuals
Add to My Manuals
Save this manual to your list of manuals |
Page 37 highlights
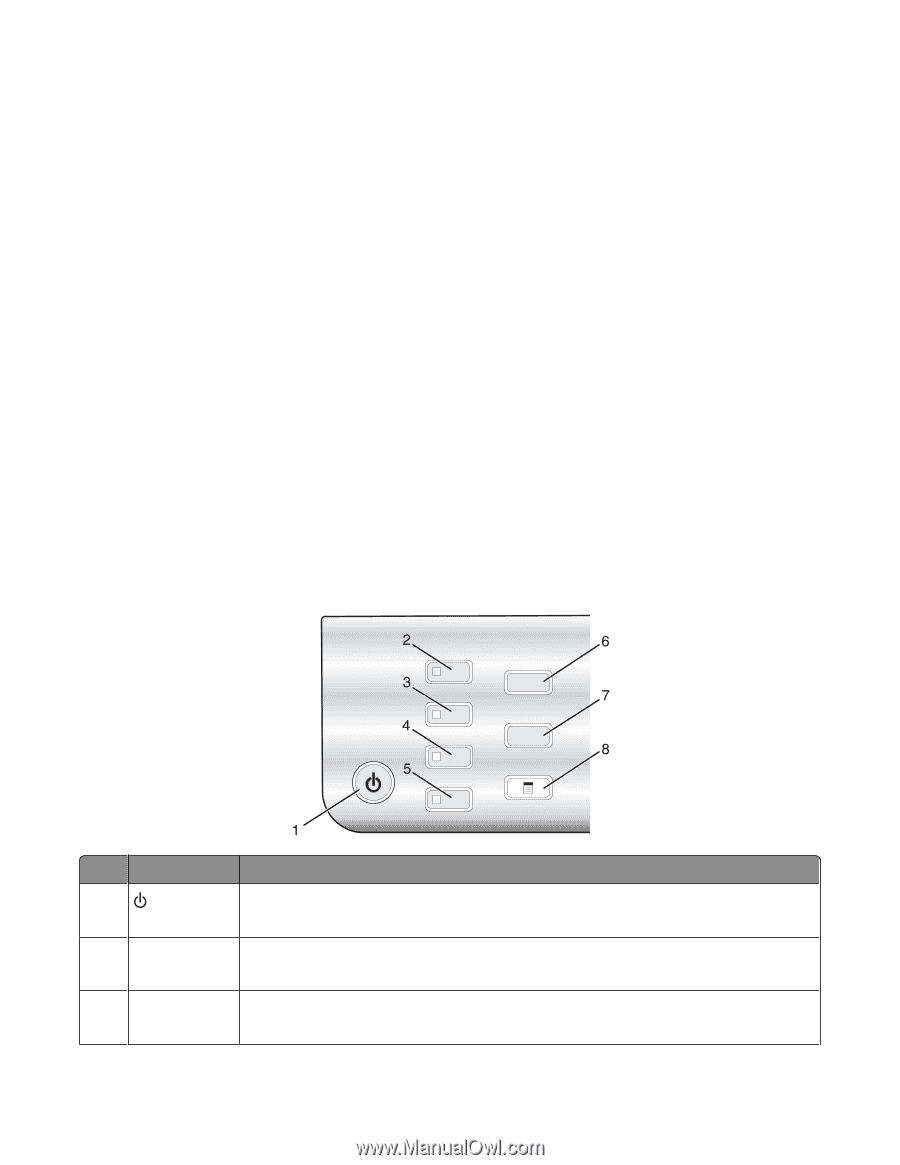
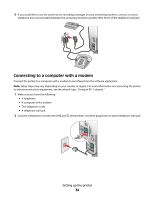
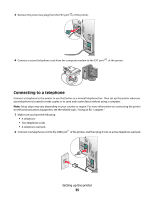
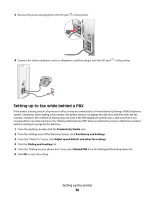
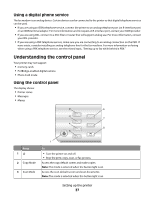
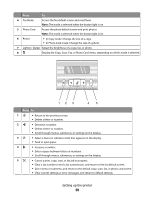
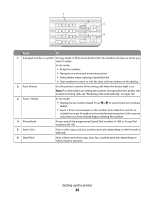
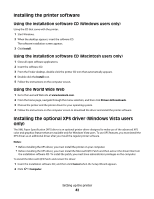
Using a digital phone service The fax modem is an analog device. Certain devices can be connected to the printer so that digital telephone services can be used. • If you are using an ISDN telephone service, connect the printer to an analog telephone port (an R-interface port) on an ISDN terminal adapter. For more information and to request an R-interface port, contact your ISDN provider. • If you are using DSL, connect to a DSL filter or router that will support analog use. For more information, contact your DSL provider. • If you are using a PBX telephone service, make sure you are connecting to an analog connection on the PBX. If none exists, consider installing an analog telephone line for the fax machine. For more information on faxing when using a PBX telephone service, see the related topic, "Setting up to fax while behind a PBX." Understanding the control panel Your printer may not support: • memory cards • PictBridge-enabled digital camera • Photo Card mode Using the control panel The display shows: • Printer status • Messages • Menus Press 1 2 Copy Mode 3 Scan Mode To • Turn the printer on and off. • Stop the print, copy, scan, or fax process. Access the copy default screen and make copies. Note: The mode is selected when the button light is on. Access the scan default screen and scan documents. Note: The mode is selected when the button light is on. Setting up the printer 37
-
 1
1 -
2
-
3
-
4
-
5
-
6
-
7
-
8
-
9
-
10
-
11
-
12
-
13
-
14
-
15
-
16
-
17
-
18
-
19
-
20
-
21
-
22
-
23
-
24
-
25
-
26
-
27
-
28
-
29
-
30
-
31
-
 32
32 -
 33
33 -
 34
34 -
 35
35 -
 36
36 -
 37
37 -
 38
38 -
 39
39 -
 40
40 -
 41
41 -
 42
42 -
43
-
44
-
45
-
46
-
47
-
48
-
49
-
50
-
51
-
52
-
53
-
54
-
55
-
56
-
57
-
58
-
59
-
60
-
61
-
62
-
63
-
64
-
65
-
66
-
67
-
68
-
69
-
70
-
71
-
72
-
73
-
74
-
75
-
76
-
77
-
78
-
79
-
80
-
81
-
82
-
83
-
84
-
85
-
86
-
87
-
88
-
89
-
90
-
91
-
92
-
93
-
94
-
95
-
96
-
97
-
98
-
99
-
100
-
101
-
102
-
103
-
104
-
105
-
106
-
107
-
108
-
109
-
110
-
111
-
112
-
113
-
114
-
115
-
116
-
117
-
118
-
119
-
120
-
121
-
122
-
123
-
124
-
125
-
126
-
127
-
128
-
129
-
130
-
131
-
132
-
133
-
134
-
135
-
136
-
137
-
138
-
139
-
140
-
141
-
142
-
143
-
144
-
145
-
146
-
147
-
148
-
149
-
150
-
151
-
152
-
153
-
154
-
155
-
156
-
157
-
158
-
159
-
160
-
161
-
162
-
163
-
164
-
165
-
166
-
167
-
168
-
169
-
170
-
171
-
172
-
173
-
174
-
175
-
176
-
177
-
178
-
179
-
180
-
181
-
182
-
183
-
184
-
185
-
186
-
187
-
188
-
189
-
190
-
191
-
192
-
193
-
194
-
195
-
196
-
197
-
198
-
199
-
200
-
201
-
202
 |
 |