Lexmark 5470 User's Guide - Page 50
Loading paper and original documents, Loading paper, Using the automatic paper type sensor
 |
UPC - 734646010801
View all Lexmark 5470 manuals
Add to My Manuals
Save this manual to your list of manuals |
Page 50 highlights
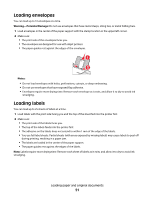
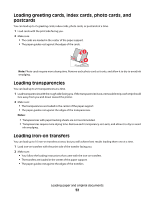
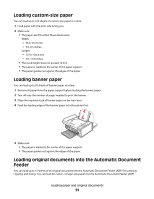
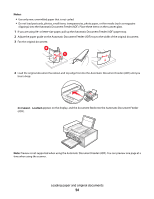
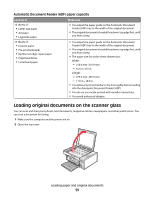
Loading paper and original documents Loading paper 1 Make sure: • You use paper designed for inkjet printers. • If you are using photo, glossy, or heavyweight matte paper, you load it with the glossy or printable side facing you. (If you are not sure which side is the printable side, see the instructions that came with the paper.) • The paper is not used or damaged. • If you are using specialty paper, you follow the instructions that came with it. • You do not force paper into the printer. 2 Before loading paper the first time, slide the paper guides out toward the edges of the paper support. You can load up to: • 100 sheets of plain paper • 25 sheets of heavyweight matte paper • 25 sheets of photo paper • 25 sheets of glossy paper Note: Photos require more drying time. Remove each photo as it exits, and allow it to dry to avoid ink smudging. 3 Load the paper vertically in the center of the paper support, and adjust the paper guides to rest against the edges of the paper. 1 2 Note: To avoid paper jams, make sure the paper does not buckle when you adjust the paper guides. Using the automatic paper type sensor The printer is equipped with an automatic paper type sensing device. The Paper Type Sensor automatically detects the type of paper that has been loaded into the printer and adjusts the settings for you. For example, if you want to print a photo, load photo paper into the printer. The printer detects the type of paper and automatically adjusts the settings to give you optimum photo-printing results. Loading paper and original documents 50
-
 1
1 -
2
-
3
-
4
-
5
-
6
-
7
-
8
-
9
-
10
-
11
-
12
-
13
-
14
-
15
-
16
-
17
-
18
-
19
-
20
-
21
-
22
-
23
-
24
-
25
-
26
-
27
-
28
-
29
-
30
-
31
-
32
-
33
-
34
-
35
-
36
-
37
-
38
-
39
-
40
-
41
-
42
-
43
-
44
-
 45
45 -
 46
46 -
 47
47 -
 48
48 -
 49
49 -
 50
50 -
 51
51 -
 52
52 -
 53
53 -
 54
54 -
 55
55 -
56
-
57
-
58
-
59
-
60
-
61
-
62
-
63
-
64
-
65
-
66
-
67
-
68
-
69
-
70
-
71
-
72
-
73
-
74
-
75
-
76
-
77
-
78
-
79
-
80
-
81
-
82
-
83
-
84
-
85
-
86
-
87
-
88
-
89
-
90
-
91
-
92
-
93
-
94
-
95
-
96
-
97
-
98
-
99
-
100
-
101
-
102
-
103
-
104
-
105
-
106
-
107
-
108
-
109
-
110
-
111
-
112
-
113
-
114
-
115
-
116
-
117
-
118
-
119
-
120
-
121
-
122
-
123
-
124
-
125
-
126
-
127
-
128
-
129
-
130
-
131
-
132
-
133
-
134
-
135
-
136
-
137
-
138
-
139
-
140
-
141
-
142
-
143
-
144
-
145
-
146
-
147
-
148
-
149
-
150
-
151
-
152
-
153
-
154
-
155
-
156
-
157
-
158
-
159
-
160
-
161
-
162
-
163
-
164
-
165
-
166
-
167
-
168
-
169
-
170
-
171
-
172
-
173
-
174
-
175
-
176
-
177
-
178
-
179
-
180
-
181
-
182
-
183
-
184
-
185
-
186
-
187
-
188
-
189
-
190
-
191
-
192
-
193
-
194
-
195
-
196
-
197
-
198
-
199
-
200
-
201
-
202
 |
 |