Lexmark C534n User's Guide - Page 54
Configuring the printer for color printing and replacing the color supplies, CONFIG MENU - transfer belt
 |
UPC - 734646258524
View all Lexmark C534n manuals
Add to My Manuals
Save this manual to your list of manuals |
Page 54 highlights
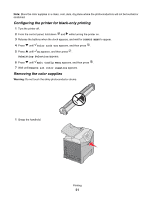
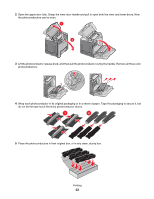
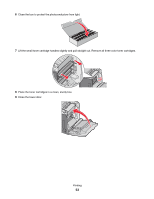
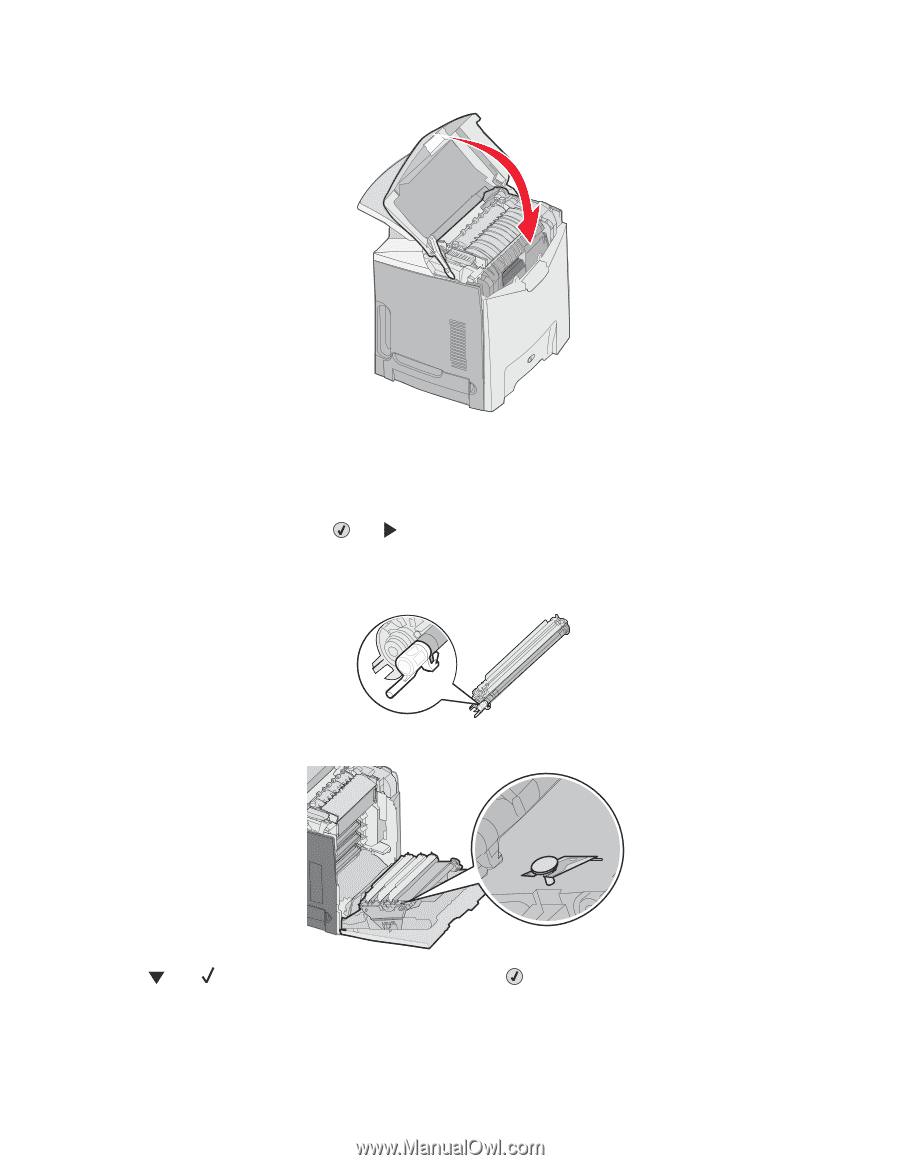
10 Close the upper door. Configuring the printer for color printing and replacing the color supplies To return to color printing, complete the following steps: 1 Turn the printer off. 2 From the control panel, hold down and while turning the printer on. 3 Release the buttons when the clock appears, and wait for CONFIG MENU to appear. Locate the color residue on the clear end of each photoconductor. Match the residue to the color label on the transfer belt. 4 Press until Color Lock Out appears, and then press . Printing 54
-
 1
1 -
2
-
3
-
4
-
5
-
6
-
7
-
8
-
9
-
10
-
11
-
12
-
13
-
14
-
15
-
16
-
17
-
18
-
19
-
20
-
21
-
22
-
23
-
24
-
25
-
26
-
27
-
28
-
29
-
30
-
31
-
32
-
33
-
34
-
35
-
36
-
37
-
38
-
39
-
40
-
41
-
42
-
43
-
44
-
45
-
46
-
47
-
48
-
 49
49 -
 50
50 -
 51
51 -
 52
52 -
 53
53 -
 54
54 -
 55
55 -
 56
56 -
 57
57 -
 58
58 -
 59
59 -
60
-
61
-
62
-
63
-
64
-
65
-
66
-
67
-
68
-
69
-
70
-
71
-
72
-
73
-
74
-
75
-
76
-
77
-
78
-
79
-
80
-
81
-
82
-
83
-
84
-
85
-
86
-
87
-
88
-
89
-
90
-
91
-
92
-
93
-
94
-
95
-
96
-
97
-
98
-
99
-
100
-
101
-
102
-
103
-
104
-
105
-
106
-
107
-
108
-
109
-
110
 |
 |
10
Close the upper door.
Configuring the printer for color printing and replacing the color supplies
To return to color printing, complete the following steps:
1
Turn the printer off.
2
From the control panel, hold down
and
while turning the printer on.
3
Release the buttons when the clock appears, and wait for
CONFIG MENU
to appear.
Locate the color residue on the clear end of each photoconductor.
Match the residue to the color label on the transfer belt.
4
Press
until
Color Lock Out
appears, and then press
.
Printing
54