Lexmark C534n User's Guide - Page 63
Clearing jams under the fuser or fuser cover - color photoconductors
 |
UPC - 734646258524
View all Lexmark C534n manuals
Add to My Manuals
Save this manual to your list of manuals |
Page 63 highlights
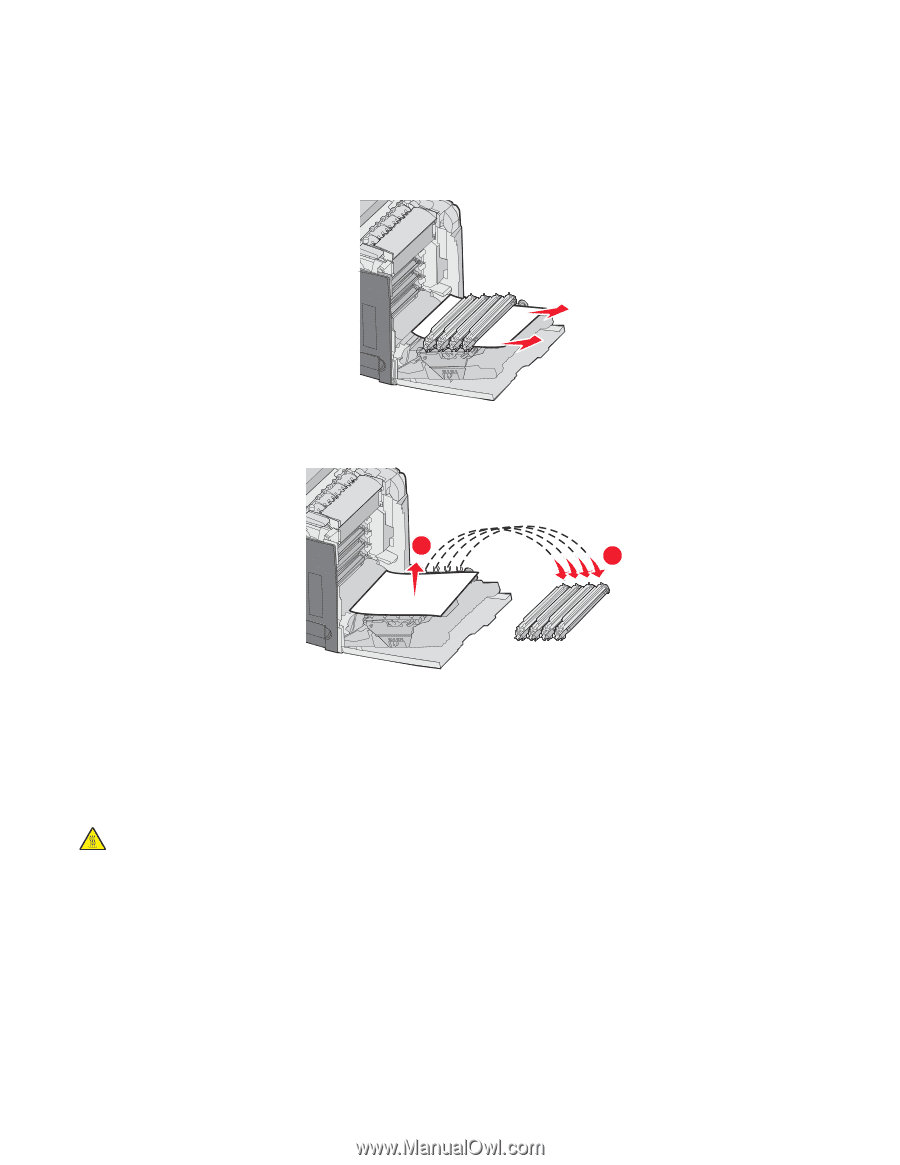
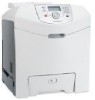
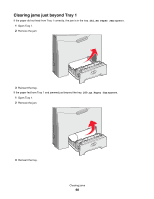
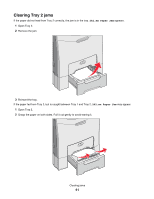
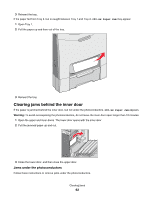
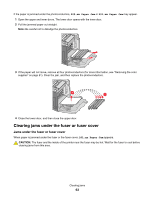
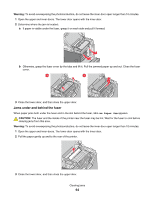
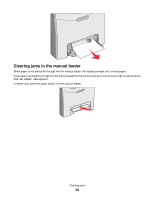
If the paper is jammed under the photoconductors, 200.xx Paper Jam or 201.xx Paper Jam may appear. 1 Open the upper and inner doors. The lower door opens with the inner door. 2 Pull the jammed paper out straight. Note: Be careful not to dislodge the photoconductors. 3 If the paper will not move, remove all four photoconductors (for more information, see "Removing the color supplies" on page 51). Clear the jam, and then replace the photoconductors. 2 1 4 Close the lower door, and then close the upper door. Clearing jams under the fuser or fuser cover Jams under the fuser or fuser cover When paper is jammed under the fuser or the fuser cover, 201.xx Paper Jam appears. CAUTION: The fuser and the inside of the printer near the fuser may be hot. Wait for the fuser to cool before clearing jams from this area. Clearing jams 63
-
 1
1 -
2
-
3
-
4
-
5
-
6
-
7
-
8
-
9
-
10
-
11
-
12
-
13
-
14
-
15
-
16
-
17
-
18
-
19
-
20
-
21
-
22
-
23
-
24
-
25
-
26
-
27
-
28
-
29
-
30
-
31
-
32
-
33
-
34
-
35
-
36
-
37
-
38
-
39
-
40
-
41
-
42
-
43
-
44
-
45
-
46
-
47
-
48
-
49
-
50
-
51
-
52
-
53
-
54
-
55
-
56
-
57
-
 58
58 -
 59
59 -
 60
60 -
 61
61 -
 62
62 -
 63
63 -
 64
64 -
 65
65 -
 66
66 -
 67
67 -
 68
68 -
69
-
70
-
71
-
72
-
73
-
74
-
75
-
76
-
77
-
78
-
79
-
80
-
81
-
82
-
83
-
84
-
85
-
86
-
87
-
88
-
89
-
90
-
91
-
92
-
93
-
94
-
95
-
96
-
97
-
98
-
99
-
100
-
101
-
102
-
103
-
104
-
105
-
106
-
107
-
108
-
109
-
110
 |
 |