Lexmark C792 Maintenance Guide
Lexmark C792 Manual
 |
View all Lexmark C792 manuals
Add to My Manuals
Save this manual to your list of manuals |
Lexmark C792 manual content summary:
- Lexmark C792 | Maintenance Guide - Page 1
C790 Series Maintenance Guide April 2011 www.lexmark.com - Lexmark C792 | Maintenance Guide - Page 2
print cartridge...5 Ordering a fuser or a transfer module...6 Ordering a waste toner bottle...6 Ordering staple cartridges...6 Ordering a cleaning kit...7 Replacing supplies...7 Replacing a print cartridge...7 Replacing the waste toner bottle...10 Moving the printer...11 Before moving the printer - Lexmark C792 | Maintenance Guide - Page 3
the printhead lenses Clean the printhead lenses when you encounter print quality problems. 1 Open the front door. 2 Remove all print cartridges. Warning-Potential Damage: Do not touch the shiny area on the photoconductor drum. Doing so can damage the photoconductor. Maintaining the printer 3 - Lexmark C792 | Maintenance Guide - Page 4
compressed air. Warning-Potential Damage: Do not touch the printhead lenses. 5 Reinstall the print cartridges. 6 Close the front door. Storing supplies Choose a cool, clean storage area for the printer supplies. Store supplies right side up in their original packing until you are ready to use them - Lexmark C792 | Maintenance Guide - Page 5
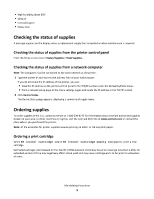
where you purchased the printer. Note: All life estimates for printer supplies assume printing on letter- or A4-size plain paper. Ordering a print cartridge When 88 [color] cartridge low or 88 [color] cartridge nearly low appears, order a new cartridge. Estimated cartridge yield is based on the ISO - Lexmark C792 | Maintenance Guide - Page 6
bottle When 82 Waste toner bottle nearly full appears, order a replacement waste toner bottle. When 82 Replace waste toner bottle appears, replace the waste toner bottle. Note: Waste toner bottle reuse is not recommended. Part name Waste toner bottle Part number C792X77G Ordering staple cartridges - Lexmark C792 | Maintenance Guide - Page 7
the touch screen. Part name Cleaning kit (wet and dry wipes) Part number 40X0392 Replacing supplies Replacing a print cartridge 1 Open the front door. 2 Lift the green handle and pull the print cartridge. Grasp the top handle and lift the cartridge out of the machine. Maintaining the printer 7 - Lexmark C792 | Maintenance Guide - Page 8
in the replacement cartridge shipping box, and then attach the return label to the box for shipping. 4 Unpack a new print cartridge. Warning-Potential Damage: Be careful not to touch the photoconductor drum. Doing so may affect the print quality of future print jobs. Maintaining the printer 8 - Lexmark C792 | Maintenance Guide - Page 9
5 Shake the new cartridge front-to-back and side-to-side to evenly distribute the toner. 6 Remove the red packing strip from the new cartridge. 7 Insert the new cartridge into the printer, and then push the green handle back in place. Note: Make sure the cartridge is fully pushed in. Maintaining - Lexmark C792 | Maintenance Guide - Page 10
8 Close the front door. Replacing the waste toner bottle Replace the waste toner bottle when 82.xx Replace waste toner bottle appears. The printer will not continue printing until the waste toner bottle is replaced. 1 Remove the replacement waste toner bottle from its shipping box, and then unpack - Lexmark C792 | Maintenance Guide - Page 11
removed the replacement part from. 6 Peel the recycling label off, and place it on the shipping box. 7 Insert the new waste toner bottle into the printer. 8 Close tray 1, and then close the front door. Moving the printer Before moving the printer CAUTION-POTENTIAL INJURY: The printer weight is - Lexmark C792 | Maintenance Guide - Page 12
cart used to move the options must have a surface able to support the dimensions of the options. • Keep the printer in an upright position. • Avoid severe jarring movements. Shipping the printer When shipping the printer, use the original packaging or call the place of purchase for a relocation
-
 1
1 -
 2
2 -
 3
3 -
 4
4 -
 5
5 -
 6
6 -
 7
7 -
8
-
9
-
10
-
11
-
12
 |
 |

C790 Series
Maintenance Guide
April 2011
www.lexmark.com