Lexmark E210 Online Information
Lexmark E210 - Optra B/W Laser Printer Manual
 |
UPC - 734646229807
View all Lexmark E210 manuals
Add to My Manuals
Save this manual to your list of manuals |
Lexmark E210 manual content summary:
- Lexmark E210 | Online Information - Page 1
Lexmark E210 User's Guide May 2001 www.lexmark.com - Lexmark E210 | Online Information - Page 2
publication to products, programs, or services do not imply that the Software clause at DFARS 252.2277013 and in applicable FAR provisions: Lexmark International, Inc., Lexington, KY 40550. Conventions Warning! A warning identifies something that could damage your printer hardware or software - Lexmark E210 | Online Information - Page 3
Your Printer 2.2 STEP 2: Installing the Toner Cartridge 2.3 STEP 3: Loading Print Media 2.5 STEP 4: Connecting to the Computer with a Parallel Cable 2.7 STEP 5: Turning on the Printer 2.8 STEP 6: Printing a Demo Page 2.8 STEP 7: Installing the Printer Software 2.9 Installing Software from - Lexmark E210 | Online Information - Page 4
One Sheet of Paper 5.8 Fitting Your Document to a selected Paper Size 5.9 Printing Posters 5.10 Setting Graphic Properties 5.12 Printing Watermarks 5.14 Using Page Overlay 5.17 Printing on a Network Environment 5.22 6 Maintaining Your Printer Maintaining the Print Cartridge 6.2 Cleaning the - Lexmark E210 | Online Information - Page 5
Printing Problems 7.3 Clearing Jams 7.7 Solving Print Quality Problems 7.12 Troubleshooting Error Messages 7.18 Solving Common Windows Problems 7.20 Appendix A: Driver and Printer Specifications Printer Specifications A.2 Print Media Specifications A.3 Using Your Printer with a USB cable - Lexmark E210 | Online Information - Page 6
1chapter Introducing Your Printer Congratulations on your purchase of the LexmarkTM E210 printer! This chapter provides information on the following topics: • Special Features • Printer Components - Lexmark E210 | Online Information - Page 7
Features Lexmark E210 is a versatile, productive printer equipped with special features that improve print quality, giving you a competitive edge. You can: Print with excellent quality • You can print at 600 dots per inch (dpi). See "Setting Graphic Properties" on page 5.12. Handle print media - Lexmark E210 | Online Information - Page 8
can be magnified and printed across several sheets of paper. After the document has printed, trim off the white edges of each sheet. Tape the sheets together to form a poster. See "Printing Posters" on page 5.10. Print in various environments • Your printer is compatible with Windows 95/98/Me/NT - Lexmark E210 | Online Information - Page 9
Printer Components Paper output support Paper support Automatic input tray Face-down output slot Output lever Face-up output slot Control panel Paper guides Manual input tray Front cover 1.4 INTRODUCING YOUR PRINTER - Lexmark E210 | Online Information - Page 10
Printer Components Print cartridge Front cover Power switch Power receptacle USB port Parallel port INTRODUCING YOUR PRINTER 1.5 - Lexmark E210 | Online Information - Page 11
1: Unpacking Your Printer • STEP 2: Installing the Print Cartridge • STEP 3: Loading Print Media • STEP 4: Connecting to the Computer with a Parallel Cable • STEP 5: Turning on the Printer • STEP 6: Printing a Demo Page! • STEP 7: Installing the Printer Software • Installing Software from Diskette - Lexmark E210 | Online Information - Page 12
the right. Print cartridge Power cord Paper output support CD Setup Guide Notes: • If any items are missing or damaged, notify your point of purchase. • Components may differ from one country to another. • The CD (compact disk) contains the printer driver, the User's Guide, the Adobe Acrobat - Lexmark E210 | Online Information - Page 13
off with a dry cloth and wash the clothing in cold water. Hot water sets toner into fabric. Warning! To prevent damage, do not expose the print cartridge to light for more than a few minutes. Cover it with a piece of paper if it will be left exposed for more than a few minutes. SETTING UP YOUR - Lexmark E210 | Online Information - Page 14
slots, one on each side. 5 Insert the cartridge until it snaps into place. 6 Close the front cover securely. Note: When printing text at 5% coverage, expect a print cartridge life of approximately 2,000 pages (1,000 pages for the print cartridge that is shipped with the printer). 2.4 SETTING UP YOUR - Lexmark E210 | Online Information - Page 15
on the automatic input tray support until it stops. 2 Before loading any print media, flex the sheets back and forth to loosen them, and then fan them. Tap the edges of the stack on a table top to straighten them. This helps prevent jams. 3 Load a stack of paper into the automatic input tray with - Lexmark E210 | Online Information - Page 16
Do not load too much paper. This tray holds 150 sheets. Keep the paper below this height mark. 4 Push the guide gently against the paper stack. Notes: • Do not push the width guide tightly causing the print media to warp. • Adjust the width guide to avoid jams. • To add more print media to the tray - Lexmark E210 | Online Information - Page 17
and the computer are turned off and unplugged. 2 Plug the parallel printer cable into the connector as shown. Push the metal clips down to fit inside the notches on the cable plug. 3 Connect the other end of the cable to the parallel interface port on your computer, and tighten the screws. Refer - Lexmark E210 | Online Information - Page 18
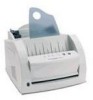
page provides a sample of the print quality and helps you verify the printer is printing correctly. 2.8 SETTING UP YOUR PRINTER E210 Personal Laser Printer for the Home or Office 12 Pages per minute 66 MHz processor Parallel & USB standard Windows & Linux support 5,000 pages maximum monthly usage - Lexmark E210 | Online Information - Page 19
is a CD containing the printer driver for some of the most popular Windows-based software applications. To operate your printer, you must install a printer driver, which translates data from your application into data that the printer understands. If you are printing with a parallel interface See - Lexmark E210 | Online Information - Page 20
Installing the Printer Software Installing the Printer Software from the CD LEXMARK E210 1 Place the CD in the CD-ROM drive. Installation begins automatically. If the CD-ROM the installation procedure, click the x in the upper right corner of the box, or click Cancel. 2.10 SETTING UP YOUR PRINTER - Lexmark E210 | Online Information - Page 21
Installing the Printer Software 2 Click Install the Lexmark Software on your PC. 3 The Welcome window opens. Click Next. The files are copied into the appropriate directory. SETTING UP YOUR PRINTER 2.11 - Lexmark E210 | Online Information - Page 22
, such as paper size and page orientation, may be available through your application settings. Use application settings, if available, because they override printer driver settings. Access advanced printer features through your printer driver. See Chapter 5 "Printing Tasks" for instructions on using - Lexmark E210 | Online Information - Page 23
the printing software? In Windows, after installation, the Uninstall icon in the Lexmark E210 program group allows you to select and remove any or all of the Lexmark E210 printing system components. If you are upgrading the printer driver, or if your installation fails, follow these instructions to - Lexmark E210 | Online Information - Page 24
are running on your computer. • Uninstall the printer software using the instruction above, and repeat the installation procedure. Can I use this printer in other operating systems? The Lexmark E210 Printer supports the Linux system. See "Linux Driver Installation" on page A.17 for information on - Lexmark E210 | Online Information - Page 25
floppy diskettes, and then use the diskettes instead of the CD to install the software. Making Installation Diskettes LEXMARK E210 You can make the installation diskettes for the Lexmark E210 printer driver. Make sure that you have several formatted diskettes ready, and then follow these steps - Lexmark E210 | Online Information - Page 26
of software. The Copy to Floppy dialog box appears. 4 Select the floppy disk drive you will use to insert the diskette. Shows the number of disks required to copy the selected component. Shows the path of the selected component. Select the floppy drive you will use. 2.16 SETTING UP YOUR PRINTER - Lexmark E210 | Online Information - Page 27
in order as you create it: Lexmark E210 driver, disk 1 of 2, and so on. 7 If you have more than one disk, insert the next disk and click Yes. 8 When copying to diskettes is complete, click Close in the Copy to Floppy dialog box. Then, click Exit in the Lexmark printer dialog box. SETTING UP YOUR - Lexmark E210 | Online Information - Page 28
(if the selected software diskettes are more than one). 2 From the Start menu, select Run. 3 Type A:\setup.exe in the Open box and click OK. (If your floppy drive is not A, substitute the correct letter.) 4 Follow the on-screen instructions to complete the installation. 2.18 SETTING UP YOUR PRINTER - Lexmark E210 | Online Information - Page 29
3chapter Using the Control Panel This chapter describes how to use the printer control panel. It provides information on the following topics: • Control Panel Buttons • Control Panel Lights - Lexmark E210 | Online Information - Page 30
for 2 seconds until the control panel lights blink slowly to print a demo page. The printer must be in Ready mode. For more information, see "Printing a Demo Page" on page 2.8. Cleaning the inside of the printer Press and hold for 10 seconds until the control panel lights remain lit. After cleaning - Lexmark E210 | Online Information - Page 31
printer and the computer, and then returns to the Ready mode. This may take some time, depending on the size of the print job. Note: If the button is accidentally pushed, the job must be reprinted. There is no undo function. Manual feeding When you select Manual for Paper Source from your software - Lexmark E210 | Online Information - Page 32
. Pressing the button cancels the current job. One or two pages may print as the printer clears the print job. The printer returns to the Ready mode after the job is canceled. Paper out The printer is out of paper. Load paper into the printer. For the automatic tray, there is no need to press any - Lexmark E210 | Online Information - Page 33
with the Lexmark E210 printer and how to properly load the different input trays for the best print quality. Topics included are: • Choosing Paper and Print Media • Selecting the Output Location • Printing on Paper • Printing on Envelopes • Printing on Heavy Paper • Printing on Labels • Printing on - Lexmark E210 | Online Information - Page 34
project. • Size: You can use any print media that fits easily within the guides of the tray. • Weight: Your printer supports paper weights as follows: • 16-24 lb bond for the automatic input tray • 16-43 lb bond for the manual input tray • Brightness: Some papers are whiter than others and produce - Lexmark E210 | Online Information - Page 35
Choosing Paper and Print Media Print Media Sizes and Capacities Media Size Plain Paper Letter 216 x 279 mm (8.5 x 11 in.) Legal 216 x 356 mm (8.5 x 14 in.) Executive 184 x 267 mm (7.25 x 10.5 in.) A4 210 x 297 mm (8.27 x 11.7 in.) A5 148 x 210 mm (5.83 x 8.27 in.) B5 182 x 257 mm (7.17 x 10.1 in.) - Lexmark E210 | Online Information - Page 36
on damp, curled, wrinkled, or torn print media can cause jams and poor print quality. • Use cut-sheet paper only. You cannot use multi-part paper. • Use only high-quality, copier grade paper. • Do not use print media that has already been printed on or that has been fed through a photocopier. • Do - Lexmark E210 | Online Information - Page 37
Media • Preprinted forms must be printed with nonflammable, heatresistant inks that do not melt, vaporize, or release hazardous emissions when subject to the printer fusing temperature of approximately 400°F (205°C) for 0.1 second. • Store paper in its ream wrapper until ready to use. Place cartons - Lexmark E210 | Online Information - Page 38
it down to open the slot. • If paper coming out of the face-down output slot has problems, such as excessive curl, try printing to the face-up output slot. • To avoid jams, do not change the position of the output lever while the printer is printing. Printing to the Face-Down Output Slot The face - Lexmark E210 | Online Information - Page 39
to the Face-Up Output Slot The printer prints to the face-up output slot if the slot is open. Push the output lever down to open the slot. Paper comes out of the printer face-up. Using the face-up output slot might improve output quality with the following: • Envelopes • Labels • Transparency - Lexmark E210 | Online Information - Page 40
change the print settings in your software application, if you select Manual in the Paper Source option, you can manually load paper in the manual input tray. Manually loading paper allows the use of different print media without unloading the automatic input tray. If you experience a jam from the - Lexmark E210 | Online Information - Page 41
sheet of paper in the manual input tray with the print side up. 2 Push the paper guide gently against the paper. Printing on Paper 3 Push the output lever down to open the face-up output slot. 4 Select Manual under Paper Source from the software application, and then select the correct paper size - Lexmark E210 | Online Information - Page 42
Printing on Paper 5 Print the document. Note: If you are printing multiple pages, load the next sheet after the first page prints. 6 Press to start feeding. 4.10 USING PRINT MEDIA - Lexmark E210 | Online Information - Page 43
Printing on Envelopes Guidelines • Only use envelopes recommended for laser printers. • Before you load envelopes in the input tray, make sure that they are undamaged and are not stuck together. • Do not feed stamped envelopes. • Never use envelopes with clasps, snaps, windows, coated lining or self - Lexmark E210 | Online Information - Page 44
on Envelopes 3 Push the guide to the edge of the envelope stack. 4 Push the output lever down. 5 When you print on envelopes, configure the source, type and size properly in the software application. For details, see page 5.4. Note: If you are printing multiple envelopes, load the next envelope - Lexmark E210 | Online Information - Page 45
6 Print the document. 7 After printing, push the output lever up. Printing on Envelopes USING PRINT MEDIA 4.13 - Lexmark E210 | Online Information - Page 46
, you can use 24 lb paper. The maximum paper weight available for your printer is 43 lb (163 g/m2). • Do not use extremely heavy paper stock, which is greater than 43 lb (163 g/m2 bond). Misfeeds, mis-stacking, jams, poor toner fusing, poor print quality and excessive mechanical wear can result - Lexmark E210 | Online Information - Page 47
3 Push the output lever down. Printing on Heavy Paper 4 When you print on heavy paper, select Bond in the Paper Type section, and then configure the paper source and size in the software application. For details, see page 5.4. 5 Print the document. USING PRINT MEDIA 4.15 - Lexmark E210 | Online Information - Page 48
for laser printers. • Verify that the label adhesive material can tolerate fusing temperature of 200°C (392°F) for 0.1 second. • Make sure that there is no exposed adhesive material between the labels. Exposed areas can cause labels to peel off during printing, which can cause paper jams. Exposed - Lexmark E210 | Online Information - Page 49
3 Push the output lever down. Printing on Labels 4 When you print on labels, configure the source, type and size in the software application. For details, see page 5.4. 5 Print the document. Note: To prevent labels from sticking together, do not let the printed label sheets stack up as they are - Lexmark E210 | Online Information - Page 50
for use in laser printers. • Make sure that the transparencies are not wrinkled or curled, and that they do not have any torn edge. • Hold the transparencies by the edges and avoid touching the print side. Oils from your fingers on the transparency can cause print quality problems. • Be careful not - Lexmark E210 | Online Information - Page 51
in the software application. For details, see page 5.4. 5 Print the document. Notes: • To prevent transparencies from sticking together, do not let the printed sheets stack up as they are printed out. • Place transparencies on a flat surface after removing them from the printer. USING PRINT MEDIA - Lexmark E210 | Online Information - Page 52
use with the design face up, top edge toward the printer. 2 Push the guide against the paper stack without bending the stack. 3 When you print on the preprinted paper, configure the paper source, type and size in the software application. For details, see page 5.4. 4 Print the document. 4.20 USING - Lexmark E210 | Online Information - Page 53
3 by 5 in. (index) cards can be printed with your printer. Guidelines • Always insert the short-edge first into the input tray. If you want to print in landscape mode, make this selection through your software. Inserting paper longedge first may cause a jam. • Do not print on card stock that is too - Lexmark E210 | Online Information - Page 54
Printing on Card Stock 4 Configure the source, size and type in the software application. For details, see page 5.4. 5 Print the document. 4.22 USING PRINT MEDIA - Lexmark E210 | Online Information - Page 55
some common printing tasks. Topics included are: • Printing a Document • Printing Multiple Pages on One Sheet of Paper (N-Up Printing) • Fitting Your Document to a Selected Paper Size • Printing Posters • Setting Graphic Properties • Printing Watermarks • Using Page Overlay • Printing on a Network - Lexmark E210 | Online Information - Page 56
procedure describes the steps required for printing from various Windows-based applications. The exact steps for printing a document may vary depending on the software application program. Refer to your software application documentation for the exact printing procedure. 1 Open the document you want - Lexmark E210 | Online Information - Page 57
, click Properties in the next screen. 4 The Lexmark E210 Properties dialog box lets you access and change printer settings. If necessary, click the Paper tab to display the settings shown as follows. The Paper tab lets you access and change the settings for basic paper handling. PRINTING TASKS 5.3 - Lexmark E210 | Online Information - Page 58
a Document Select Auto Select from the Paper Source options box unless you are printing with special print media. To print with special print media, select Manual and feed one sheet at a time into the printer. See page 4.8. Select Plain Paper from the Paper Type options box unless you want to - Lexmark E210 | Online Information - Page 59
box displays. 7 Click OK to start printing. Notes: • Most Windows-based applications override settings you specify in the printer driver. First, change all print settings available in the software application and then, any remaining settings in the printer driver. • The settings you change remain in - Lexmark E210 | Online Information - Page 60
the current job in the printer. If more than one print job is in printer memory, must be pressed once for each job. To stop a print job from the Printers folder 1 From the Start menu, select Settings. 2 Select Printers to open the Printers window, and double-click the Lexmark E210 icon. 3 From the - Lexmark E210 | Online Information - Page 61
on any setting. These help screens give detailed information about the printer features provided by the Lexmark E210 printer driver. To restore the default printer properties setting when you change the print settings, click Default in the Lexmark E210 Properties dialog box. PRINTING TASKS 5.7 - Lexmark E210 | Online Information - Page 62
the sheet. You can specify up to 16 pages. 1 To change the print settings from your software application, access the printer properties. See page 5.3 to access the printer properties. From the Paper tab, select the paper orientation, source, size and type. 2 Click the Output tab, and choose Multiple - Lexmark E210 | Online Information - Page 63
a Selected Paper Size This printer feature lets you scale your print job to any selected print media size regardless of the digital A document size. This can be useful when you want to check fine details on a small document. 1 To change the print settings from your software application, access - Lexmark E210 | Online Information - Page 64
software application, access the printer properties. See "Setting Graphic Properties" on page 5.12 to access the printer properties. From the Paper tab, select the paper orientation, source, size and type. 2 Click the Output tab, and select Poster printing in the Type drop-down list. 5.10 PRINTING - Lexmark E210 | Online Information - Page 65
Printing Posters 3 To determine the scaling factor, select the Style: 2x2, 3x3, 4x4, 5x5 or 6x6. For example, if you select 2x2, the an overlap in pixel to make it easier to reconstruct the resulting poster. 25 pixels Overlap=0 Overlap=25 5 Click OK, and then start printing. PRINTING TASKS 5.11 - Lexmark E210 | Online Information - Page 66
Setting Graphic Properties Use the following options to adjust the print quality for your specific printing needs when you access the printer properties. See page 5.3 for more information on accessing printer properties. If necessary, click the Graphic tab to display the settings shown below. Click - Lexmark E210 | Online Information - Page 67
line width, higher definition in graphics, and lighter grayscale images. Power Save Mode To conserve power when a printer is idle, the printer enters a reduced power state after completing a print job, according to a time specified by you in the Power Save Mode box. Select the length of time - Lexmark E210 | Online Information - Page 68
from your software application, access the printer properties. See page 5.3 to access the printer properties. 2 Click the Watermark tab, and select the desired watermark in the Message drop-down list. You will see the selected watermark in the preview window. preview window 5.14 PRINTING TASKS - Lexmark E210 | Online Information - Page 69
1 To change the print settings from your software application, access the printer properties. See page 5.3 to access the printer properties. 2 Click the Watermark tab, and enter the text message in the Text field. The watermark is displayed in the preview window. The preview window is provided so - Lexmark E210 | Online Information - Page 70
the watermark, select None in the Message drop-down list. To delete a 1 To change the print settings from your software watermark application, access the printer properties. See page 5.3 to access the printer properties. 2 From the Watermark tab, select the watermark you want to delete in the - Lexmark E210 | Online Information - Page 71
same information that is currently on your letterhead. Then, when you want to print a letter with your company letterhead, you do not need to load preprinted letterhead paper. You need only tell the printer to print the letterhead overlay on your document. Creating a New Page Overlay To use a page - Lexmark E210 | Online Information - Page 72
dialog box, type a name of up to eight characters in the File name box. Select the destination path if necessary. (The default is C:\FORMOVER). 5.18 PRINTING TASKS 5 Click Save. You see the name in the Overlay List box. 6 Click OK or Yes until you complete the creation. The file is not - Lexmark E210 | Online Information - Page 73
Create or open the document you want to print. 2 To change the print settings from your software application, access the printer properties. See page 5.3 to access the printer properties. 3 Click the Overlays tab, and can load the file when you access the Load Overlay window. PRINTING TASKS 5.19 - Lexmark E210 | Online Information - Page 74
Answering No to the message box cancels overlay printing. If this box is empty, and an overlay has been selected, the overlay is automatically printed with your document. 7 Click OK or Yes until the printing starts. The selected overlay is downloaded with your print job and printed on your document. - Lexmark E210 | Online Information - Page 75
Page Overlay 8 Click OK or Yes until the printing starts. The selected overlay is downloaded with your print job and printed on your document. Deleting a Page Overlay You can delete page overlays that are no longer used. 1 In the Printer Properties dialog box, click the Overlays tab. 2 Select - Lexmark E210 | Online Information - Page 76
. Note: You need to install the Lexmark E210 printer driver on each computer connected to the printer. Setting Up the Host Computer 1 Start Windows. 2 From the Start menu, select Control Panel, and double-click on the Network icon. 3 Check the File and Print Sharing box, and click OK. Close - Lexmark E210 | Online Information - Page 77
the port you want, check the Reconnect at log on box, and then click OK. 5 From the Start menu, select Settings, and then Printers. 6 Double-click your printer icon. 7 From the Printers menu, select Properties. 8 Press the Details tab, select the printer port, and then click OK. PRINTING TASKS 5.23 - Lexmark E210 | Online Information - Page 78
6chapter Maintaining Your Printer This chapter provides suggestions for high-quality and economical printing, and information for maintaining the print cartridge and the printer. Topics included are: • Maintaining the Print Cartridge • Cleaning the Printer - Lexmark E210 | Online Information - Page 79
use it. • Do not refill print cartridges. The printer warranty does not cover damage caused by using a refilled cartridge. • Store print cartridges in the same environment as the printer. • Do not remove a print cartridge from the printer except to replace it, clean it or clear a jam. Replace the - Lexmark E210 | Online Information - Page 80
quality by redistributing the toner. The following procedures may let you finish the current print job before replacing the print cartridge. 1 Pull the front cover open. 2 Remove the print cartridge from the printer by lifting up and pulling it towards the front. CAUTION! The fuser area may be hot - Lexmark E210 | Online Information - Page 81
from side to side 5 or 6 times to redistribute the toner. Note: If the toner gets on your clothing, wipe it off with a dry cloth and wash the clothing in cold water. Hot water sets toner into fabric. 4 Reinsert the print cartridge and make sure it snaps into place. 6.4 MAINTAINING YOUR PRINTER - Lexmark E210 | Online Information - Page 82
5 Firmly close the cover. Maintaining the Print Cartridge Notes: • If the print remains light, remove the used catridge and install a new print cartridge. See "Installing the Print Cartridge" on page 2.3. MAINTAINING YOUR PRINTER 6.5 - Lexmark E210 | Online Information - Page 83
During the printing process, paper, toner and dust particles can accumulate inside the printer. Over time, this buildup can cause print quality problems such as toner specks or smearing. Cleaning inside the printer eliminates or reduces these problems. Cleaning inside the 1 Turn the printer off and - Lexmark E210 | Online Information - Page 84
spilled toner from the print cartridge area and the print cartridge cavity. Warning! To prevent damage to the print cartridge, do not expose it to light for more than a few minutes. Cover it with a piece of paper, if necessary. Also, do not touch the black transfer roller inside the printer. Doing - Lexmark E210 | Online Information - Page 85
control panel for about 10 seconds until all control panel lights are lit, and then release the button. 3 Your printer automatically picks up a sheet of paper from the tray and prints out a cleaning sheet with the dust or toner particles on it. Note: The cartridge cleaning process takes some time - Lexmark E210 | Online Information - Page 86
helpful information on what to do if you encounter a printer error. It provides information on the following topics: • Troubleshooting Checklist • Solving General Printing Problems • Clearing Jams • Solving Print Quality Problems • Troubleshooting Error Messages • Solving Common Windows Problems - Lexmark E210 | Online Information - Page 87
in the input tray. • If the paper jams in the printer, see " Clearing Jams" on page 7.7. • If the indicator light is illuminated on the control panel, see "Troubleshooting Error Messages" on page 7.18. If there is a print quality problem, see "Solving Print Quality Problems" on page 7.12. • If the - Lexmark E210 | Online Information - Page 88
power source. Your printer is not selected Select Lexmark E210 as your default as the default printer. printer. Check the printer for the following: • The printer cover is not closed. • Print media is jammed. • No print media is loaded. • Print cartridge is not installed. • Printer system error - Lexmark E210 | Online Information - Page 89
Reduce the complexity of the page or try adjusting the print quality settings. If using Windows 95, the Spooling Setting may be set incorrectly. From the Start menu, choose Settings and Printers. Right-click the Lexmark E210 printer icon, choose Properties, click the Details tab, and then choose - Lexmark E210 | Online Information - Page 90
If possible, attach the cable and printer to another computer and try the same print job. If still unable to print, try replacing the printer cable. The wrong printer driver was selected. Check the application printer selection menu to make sure that your printer is selected. TROUBLESHOOTING 7.5 - Lexmark E210 | Online Information - Page 91
Problem Possible Cause Solution The printer prints, but the The software application is Try printing a job from another text is wrong, garbled or malfunctioning. application. incomplete. (continued) Pages print, but are totally blank. The print cartridge is defective or out of toner - Lexmark E210 | Online Information - Page 92
first look inside the printer. Output Area Note: Print media jams in this area may result in loose toner on the page. If you get any toner on your clothes, wash them in cold water. Hot water sets the toner into the fabric. 1 Pull the jammed paper carefully out of the output slot. TROUBLESHOOTING 7.7 - Lexmark E210 | Online Information - Page 93
. Check the inside of the printer. Input Area Note: If print media enters the print cartridge area, see "Inside the Printer" on page 7.9. It is easier to remove jams from the inside of the printer than the input area. 1 Carefully pull the jammed print media out of the input tray. 7.8 TROUBLESHOOTING - Lexmark E210 | Online Information - Page 94
front cover to resume printing. Clearing Jams Inside the Printer Note: Print media jams in this area may result in loose toner on the page. If you get any toner on your clothes, wash them in cold water because hot water sets the toner into the fabric. 1 Pull the cover open. TROUBLESHOOTING 7.9 - Lexmark E210 | Online Information - Page 95
a piece of paper over the top of the toner cartridge to shield it while it is out of the printer. 3 Gently pull the print media toward you to remove it. Make sure no print media remains inside the printer. 4 Reinsert the print cartridge and close the cover. Resume printing. 7.10 TROUBLESHOOTING - Lexmark E210 | Online Information - Page 96
print media. See "Print Media Specifications" on page A.3. • Make sure that the recommended print side is facing up when loading the print media in both input trays. • Keep print media stored in an acceptable environment. See "Printer and Print Media Storage Environment" on page A.7. TROUBLESHOOTING - Lexmark E210 | Online Information - Page 97
Redistribute the toner in the print cartridge (see "Redistributing Toner" on page 6.3). • Clean the inside of the printer (see "Cleaning the Inside" on page 6.6). • Adjust the print resolution from the printer properties (see "Resolution" on page 5.13). • Troubleshoot general printing problems (see - Lexmark E210 | Online Information - Page 98
repetitive defects" on page 7.14. • If these steps do not correct the problems, contact a service representative. If black vertical streaks appear on the page: • The photosensitive drum inside the print cartridge has probably been scratched. Install a new print cartridge. TROUBLESHOOTING 7.13 - Lexmark E210 | Online Information - Page 99
still have the same problems, install a new print cartridge. • Parts in the printer may have toner on them. If the defects occur on the back of the page, the problem corrects itself after a few more pages. • The fusing assembly may be damaged. Contact a service representative. 7.14 TROUBLESHOOTING - Lexmark E210 | Online Information - Page 100
that have overlapping seams on the reverse side. Printing on seams can cause this problem. • If background scatter covers the entire surface of a printed page, adjust the print resolution through your software application or the printer properties. AaBbCc AaBbCc • If characters are images, the - Lexmark E210 | Online Information - Page 101
AaBbCc AaBbCc AaBbCc • The print cartridge may not be installed properly. Remove the cartridge and reinsert it. • The print cartridge may be defective and need replacing. Install a new print cartridge. • The printer may require repairs. Contact a service representative. 7.16 TROUBLESHOOTING - Lexmark E210 | Online Information - Page 102
or smears appear: • The print cartridge may be installed incorrectly. Remove the cartridge and reinsert it. • The print cartridge may be defective. Install a new print cartridge. • If the problem persists, the printer may require repairs. Contact a service representative. TROUBLESHOOTING 7.17 - Lexmark E210 | Online Information - Page 103
specified AC voltage. Jam or no print cartridge Print Media is jammed inside the printer or the print cartridge is not installed. • Clear the paper jam. See "Clearing Paper Jams" on page 7.7. • Make sure the print cartridge is correctly installed in the printer. Print media out The printer is out of - Lexmark E210 | Online Information - Page 104
of the printer. Press the button to cancel the current job. • Simplify the image or print at a lower resolution. System error - Fuser or LSU error • Reset the printer by briefly turning the printer off and back on again. • If the error persists, contact a service representative. TROUBLESHOOTING 7.19 - Lexmark E210 | Online Information - Page 105
Problems Problem Possible Cause and Solution "File in Use" message appears during installation. Quit all software applications. Remove all software from the StartUp Group, and then restart Windows. Reinstall the printer driver. "Error Writing to LPTx" message appears. • Make sure the cables - Lexmark E210 | Online Information - Page 106
Appendix A: Driver and Printer Specifications This appendix provides information on the following topics: • Printer Specifications • Print Media Specifications • Using Your Printer with a USB cable • Linux Driver Installation - Lexmark E210 | Online Information - Page 107
Time Warmup Time Power Rating Power Consumption Acoustic Noise Toner Supply Print Cartridge Life Duty Cycle 600 dpi Less than 13 seconds 30 seconds AC 100 ~ 127 V (USA, Canada) / 220 ~ 240 V (Others), 50 / 60 Hz 250 W average during operation / Less than 10 W in sleep mode Stand by: Less than 35 dB - Lexmark E210 | Online Information - Page 108
this manual. Always test print media before buying large quantities. Warning! Using print media that does not meet these specifications may cause problems for the printer, requiring repairs. This repair is not covered by the Lexmark warranty or service agreements. DRIVER AND PRINTER SPECIFICATIONS - Lexmark E210 | Online Information - Page 109
) Note: You may experience some jams when using any print media with a length of less than 127 mm (5 in.). For optimum performance, make sure you are storing and handling the print media correctly. See "Printer and Print Media Storage Environment" on page A.7. A.4 DRIVER AND PRINTER SPECIFICATIONS - Lexmark E210 | Online Information - Page 110
check the label on the package of the paper. The following problems with paper cause print quality deviations, jams or even damage to the printer. Symptom Poor print quality or toner adhesion problems with feeding Dropout, jams, curl Problem with Paper Too moist, too rough, too smooth, or embossed - Lexmark E210 | Online Information - Page 111
Print Media Specifications Paper Specifications Category Acid Content Caliper Curl in Ream Cut Edge Paper Output Capacity Output Slot Face-down output slot Face-up output slot Capacity 100 sheets of 20 lb bond (75 g/m2) paper 1 sheet of 20 lb bond (75 g/m2) paper A.6 DRIVER AND PRINTER - Lexmark E210 | Online Information - Page 112
print media). • The best way to store an opened ream of paper is to rewrap it tightly in its moisture- proof wrapping. If the printer environment is subject to extremes, unwrap only the amount of paper to be used during the day operation to prevent unwanted moisture changes. DRIVER AND PRINTER - Lexmark E210 | Online Information - Page 113
and pressure of the printer. • Size: Use only envelopes within the following size ranges. Minimum Automatic input 95 x 127 mm tray (3.8 x 5 in.) Manual input tray 76 x 127 mm (3 x 5 in.) Maximum 216 x 356 mm (8.5 x 14 in.) Note: You may experience some jams when using any print media with - Lexmark E210 | Online Information - Page 114
adhesives compatible with the heat and pressure in the printer. The extra flaps and strips might cause wrinkling, creasing or jams, and may even damage the fuser. Envelope The following table gives typical address margins for a Margins commercial #10 or DL envelope. Type of Address Return address - Lexmark E210 | Online Information - Page 115
Transparencies used in the printer must be able to withstand 200 °C (392 °F), the printer fusing temperature. Warning! To avoid damaging the printer, use only transparencies recommended for use in laser printers. See "Printing on Transparencies" on page 4.18. A.10 DRIVER AND PRINTER SPECIFICATIONS - Lexmark E210 | Online Information - Page 116
the Printer Software - Windows 98/ME 1 Install Lexmark E210 USB driver 2 Connect printer with USB cable and install USB driver To operate your printer with a Windows PC, you must install the Lexmark E210 USB printer driver. Place the CD in the CD-ROM drive and follow the instructions under - Lexmark E210 | Online Information - Page 117
Using Your Printer with a USB Cable c Plug the other end into the USB port on the computer. d The Add New Hardware Wizard dialog box appears. Click Next. e Check Search for the best driver for your device and click Next. A.12 DRIVER AND PRINTER SPECIFICATIONS - Lexmark E210 | Online Information - Page 118
Using Your Printer with a USB Cable f Check CD-ROM drive and click Browse, then choose x:\USB (where x is the drive letter for the CD-ROM drive). g Click Next. The USB driver will be installed. h Follow the instructions on the screen to complete the installation. DRIVER AND PRINTER SPECIFICATIONS A. - Lexmark E210 | Online Information - Page 119
, then select printer port Printers. b Select the Lexmark E210 printer icon in the Printers folder. c Select Properties from the File menu. d Click the Details tab. Select USB: (E210) in the Print to the following port box. Click OK. The setup is now completed. A.14 DRIVER AND PRINTER SPECIFICATIONS - Lexmark E210 | Online Information - Page 120
an option to customers who want to print from Windows 98, Windows 2000 and Windows Me using a USB printing connection. If your computer USB port is enabled and properly setup, you can connect your printer to it or to a chain of USB devices via a USB cable. QHow can I determine if my computer's USB - Lexmark E210 | Online Information - Page 121
USB Cable QCan other users on my USB chain print to my Lexmark E210 printer on the USB chain? A Yes. Windows 98 allows you to "share" your printer using software settings on your computer. After others on the USB chain have installed the printer software for your specific printer, they can print - Lexmark E210 | Online Information - Page 122
GDI compatible Lexmark E210 printer and supports Linux RedHat 6.0 or higher, Mandrake, SuSE and so on. If you want to know the detail installation method for nonRedHat Linux, see the readme.txt file in the Linux directory of the driver CD. Linux Driver Configuration Installation • Configuration - Lexmark E210 | Online Information - Page 123
Linux Driver Installation 2 Install the Ghostscript. Note: Ghostscript may already be installed in your Linux machine. To support the Lexmark printer GDI, you must update the ghostscript. If you are not sure whether the ghostscript is already installed in your machine, use the command: >rpm -q - Lexmark E210 | Online Information - Page 124
paper size. i To save the setting, press the OK button. j In the Edit xxxx Entry window, press the OK button to complete the printer driver installation. k The printer driver is added to the driver window. Select Quit from the PrintTool menu. GNU Ghostscript software, in directory /linux/gs5.10 - Lexmark E210 | Online Information - Page 125
Appendix B: Safety - Lexmark E210 | Online Information - Page 126
described in the operating instructions, to a professional service person. • This product is designed, tested, and approved to meet strict global safety standards with the use of specific Lexmark components. The safety features of some parts may not always be obvious. Lexmark is not responsible for - Lexmark E210 | Online Information - Page 127
Appendix C: Notices - Lexmark E210 | Online Information - Page 128
Notices Laser Notice The Lexmark E210 printer is certified in the U.S. to conform to the requirements of DHHS 21 CFR Subchapter J for Class I (1) laser products, and elsewhere is certified as a Class I laser product conforming to the requirements of IEC 825. Class I laser products are not - Lexmark E210 | Online Information - Page 129
Appendix D: Warranty This appendix provides information on your printer warranty. - Lexmark E210 | Online Information - Page 130
that came with your printer. Lexmark E210 This Statement of Limited Lexmark or a Lexmark remarketer, referred to in this statement as "Remarketer." Warranty Lexmark warrants that this product: • Is manufactured from new parts, or new and serviceable used parts, which perform like new parts - Lexmark E210 | Online Information - Page 131
further explanation of your warranty alternatives and the nearest Lexmark authorized servicer in your area, please contact Lexmark at 1-800-LEXMARK (1-800-5396275), or on the World Wide Web at www.lexmark.com. Free remote technical support is provided for this product throughout its warranty period - Lexmark E210 | Online Information - Page 132
Lexmark or a Lexmark authorized servicer • Operation of a product beyond the limit of its duty cycle • Failure to have installed a maintenance kit as specified (if applicable) • Use of printing media outside of Lexmark specifications • Use of other than Lexmark supplies (such as print cartridges - Lexmark E210 | Online Information - Page 133
will not apply to claims by you for bodily injury or damage to real property or tangible personal property for which Lexmark is legally liable. In no event will Lexmark be liable for any lost profits, lost savings, incidental damage, or other economic consequential damages. This is true even if you - Lexmark E210 | Online Information - Page 134
output slot 4.7 features 1.2 fitting to a selected paper size 5.9 G graphic properties 5.12 I install Linux driver A.17 print cartridge 2.3 printer software 2.9 software from diskette 2.15 USB driver A.11 J jams, clearing input area 7.8 inside the printer 7.9 output area 7.7 tips for avoiding 7.11 - Lexmark E210 | Online Information - Page 135
5.4 page size, setting 5.3 Paper light 3.4 paper out, indication 3.4, 7.18 paper source, setting 5.4 parallel connection 2.7 posters, printing 5.10 print cartridge cleaning 6.5 installing 2.3 life expectancy 6.2 recycling 6.2 redistributing toner 6.3 storage 6.2 print media acceptable size and - Lexmark E210 | Online Information - Page 136
printer driver see driver printer software, installing 2.9 printer setup 2.2 printing cancel 5.6 cleaning sheet 6.8 demo page 2.8 fitting to a selected paper size 5.9 general problems, solving 7.3 help 5.7 multi pages on one sheet 5.8 on a network envirionment 5.22 page overlay 5.17 posters 5.10 - Lexmark E210 | Online Information - Page 137
P/N: 10S0152 E.C.: Lexmark and Lexmark with diamond design are trademarks of Lexmark International, Inc., registered in the United States and/or other countries. © 2001 Lexmark International, Inc. 740 West New Circle Road Lexington, Kentucky 40550 www.lexmark.com
-
 1
1 -
 2
2 -
 3
3 -
 4
4 -
 5
5 -
 6
6 -
 7
7 -
8
-
9
-
10
-
11
-
12
-
13
-
14
-
15
-
16
-
17
-
18
-
19
-
20
-
21
-
22
-
23
-
24
-
25
-
26
-
27
-
28
-
29
-
30
-
31
-
32
-
33
-
34
-
35
-
36
-
37
-
38
-
39
-
40
-
41
-
42
-
43
-
44
-
45
-
46
-
47
-
48
-
49
-
50
-
51
-
52
-
53
-
54
-
55
-
56
-
57
-
58
-
59
-
60
-
61
-
62
-
63
-
64
-
65
-
66
-
67
-
68
-
69
-
70
-
71
-
72
-
73
-
74
-
75
-
76
-
77
-
78
-
79
-
80
-
81
-
82
-
83
-
84
-
85
-
86
-
87
-
88
-
89
-
90
-
91
-
92
-
93
-
94
-
95
-
96
-
97
-
98
-
99
-
100
-
101
-
102
-
103
-
104
-
105
-
106
-
107
-
108
-
109
-
110
-
111
-
112
-
113
-
114
-
115
-
116
-
117
-
118
-
119
-
120
-
121
-
122
-
123
-
124
-
125
-
126
-
127
-
128
-
129
-
130
-
131
-
132
-
133
-
134
-
135
-
136
-
137
 |
 |

Lexmark E210
May 2001
User’s Guide
www.lexmark.com