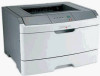
Lexmark E260D Maintenance Guide
Lexmark E260D - Taa/gov Compliant Manual
 |
UPC - 734646084079
View all Lexmark E260D manuals
Add to My Manuals
Save this manual to your list of manuals |
Lexmark E260D manual content summary:
- Lexmark E260D | Maintenance Guide - Page 1
Lexmark E260, E260d, and E260dn Series Maintenance Guide May 2008 www.lexmark.com - Lexmark E260D | Maintenance Guide - Page 2
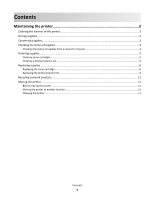
the printer 3 Cleaning the exterior of the printer...3 Storing supplies...3 Conserving supplies...3 Checking the status of supplies...4 Checking the status of supplies from a network computer 4 Ordering supplies...5 Ordering toner cartridges ...5 Ordering a photoconductor kit ...5 Replacing - Lexmark E260D | Maintenance Guide - Page 3
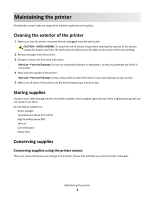
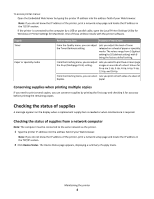
sunlight • Temperatures above 35°C (95°F) • High humidity above 80% • Salty air • Corrosive gases • Heavy dust Conserving supplies Conserving supplies using the printer menus There are some settings you can change in the printer menus that will help you conserve toner and paper. Maintaining the - Lexmark E260D | Maintenance Guide - Page 4
setup page and locate the IP address in the TCP/IP section. • If the printer is connected to the computer by a USB or parallel cable, open the Local Printer Settings Utility for Windows or Printer Settings for Macintosh. One of these utilities installs with the printer software. Supply Toner Paper - Lexmark E260D | Maintenance Guide - Page 5
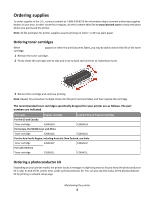
a photoconductor kit Depending on your printer model, the printer issues a message or a light sequence to let you know the photoconductor kit is near its end of life. At this time, order a photoconductor kit. You can also see the status of the photoconductor kit by printing a network setup page - Lexmark E260D | Maintenance Guide - Page 6
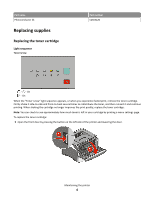
improves the print quality, replace the toner cartridge. Note: You can check to see approximately how much toner is left in your cartridge by printing a menu settings page. To replace the toner cartridge: 1 Open the front door by pressing the button on the left side of the printer and lowering - Lexmark E260D | Maintenance Guide - Page 7
2 Press the button on the base of the photoconductor kit, and then pull the toner cartridge out using the handle. 3 Unpack the new toner cartridge. Warning-Potential Damage: When replacing a toner cartridge, do not leave the new cartridge exposed to direct light for an extended period of time. - Lexmark E260D | Maintenance Guide - Page 8
‑ Blinking ‑ On Replace photoconductor ‑ Blinking ‑ Blinking ‑ On When you first receive either light sequence, you should immediately order a new photoconductor kit. While the printer may continue to function properly after the photoconductor kit has reached its official end‑of‑life, print quality - Lexmark E260D | Maintenance Guide - Page 9
on a flat, clean surface. 3 Press the button on the base of the photoconductor kit. Pull the toner cartridge up and out using the handle. 4 Unpack the new photoconductor kit. Warning-Potential Damage: Be careful not to touch the photoconductor drum. Doing so may affect the print quality of future - Lexmark E260D | Maintenance Guide - Page 10
the toner cartridge with the tracks. Push the toner cartridge in until it clicks into place. 6 Install the unit into the printer by aligning the arrows on the guides of the unit with the arrows in the printer. Push the unit as far as it will go. 7 After you replace the photoconductor kit, reset the - Lexmark E260D | Maintenance Guide - Page 11
must have a surface able to support the dimensions of the options. • Keep the printer in an upright position. • Avoid severe jarring movements. Shipping the printer When shipping the printer, use the original packaging or call the place of purchase for a relocation kit. Maintaining the printer
-
 1
1 -
 2
2 -
 3
3 -
 4
4 -
 5
5 -
 6
6 -
 7
7 -
8
-
9
-
10
-
11
 |
 |

Lexmark E260, E260d, and E260dn
Series
Maintenance Guide
May 2008
www.lexmark.com