Lexmark E322 Setup Guide
Lexmark E322 - Printer - B/W Manual
 |
UPC - 734646512169
View all Lexmark E322 manuals
Add to My Manuals
Save this manual to your list of manuals |
Lexmark E322 manual content summary:
- Lexmark E322 | Setup Guide - Page 1
E320/E322 Setup Guide April 2001 www.lexmark.com - Lexmark E322 | Setup Guide - Page 2
LEXMARK INTERNATIONAL addressed to Lexmark International, or services do not Lexmark provisions: Lexmark International, instructions, to a professional service person. • This product is designed, tested, and approved to meet strict global safety standards with the use of specific Lexmark instructions - Lexmark E322 | Setup Guide - Page 3
of information viii Viewing the Lexmark Publications CD ix Step 1: Unpack the printer 1 Attaching an operator panel overlay 2 Removing print cartridge packaging 2 Step 2: Install the print cartridge 4 Step 3: Install memory cards 6 Removing the printer side cover 6 Removing the system - Lexmark E322 | Setup Guide - Page 4
20 Step 6: Load paper 21 Loading tray 1 21 Loading the manual feed 24 Loading the optional tray 2 27 Step 7: Verify printer setup 30 Step 8: Understanding the operator panel lights 31 Step 9: Install printer drivers 38 Local printing 38 Network printing 39 Statement of limited warranty 44 - Lexmark E322 | Setup Guide - Page 5
E320 4MB 68MB PCL 5e and Macintosh compatibility Parallel and USB Ships with print cartridge yield (at approximately 5% coverage) 1,500 pages (standard) Lexmark E322 Lexmark E322n 8MB 16MB 72MB 80MB PostScript Level 2 and PostScript Level 2 and PCL 6 PCL 6 Parallel and USB 3,000 pages - Lexmark E322 | Setup Guide - Page 6
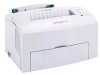
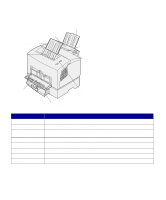
Top output bin Tray 1 Paper support Manual feed Paper guide Front output door Optional tray 2 Operator panel lights Use this feature: Tray 1 Paper support Manual feed Paper guides Operator panel lights Top output bin Front output door Optional tray 2 When you want to: Load up to 150 sheets - Lexmark E322 | Setup Guide - Page 7
this feature: When you want to: Parallel cable connector Connect your computer to the Lexmark E320 or E322 parallel port with a parallel cable. USB connector Connect your computer to your printer's USB port with a Universal Serial Bus (USB) cable. Ethernet cable connector Connect your computer - Lexmark E322 | Setup Guide - Page 8
setting up your printer. This Setup Guide provides detailed instructions for unpacking and setting up the printer, installing supplies and options, loading media, launching the drivers CD to install printer drivers and utilities, and printing information from the Lexmark Publications CD. Other - Lexmark E322 | Setup Guide - Page 9
version of the drivers CD shipped with your printer, it may also contain MarkVision Professional, other printer utilities, worldwide customer support phone numbers, screen fonts, and additional documentation. These items and updates to the printer drivers are also located on the Lexmark Web site at - Lexmark E322 | Setup Guide - Page 10
Lexmark Web site Access our site on the World Wide Web for updated printer drivers and utilities, and other Lexmark E320/E322 printer documentation: www.lexmark.com. x Preface - Lexmark E322 | Setup Guide - Page 11
you need to repack the printer for service or storage. 2 Remove all tape from outside and inside the printer. 3 Make sure you have the following items: - Printer with print cartridge installed - Setup Guide - Lexmark Publications CD - Quick Reference card - Power cord - Drivers CD - Operator panel - Lexmark E322 | Setup Guide - Page 12
4 Place the printer on a flat, stable surface in a well-ventilated area near your computer. Do not place the printer: - In direct sunlight - Near heat panel overlay If you have a non-English operator panel overlay in your printer box and wish to use it, peel it off, align it on the operator panel - Lexmark E322 | Setup Guide - Page 13
pull the print cartridge straight up. 3 Remove the protective foam packaging from the print cartridge. 4 Pull off the plastic piece attached to the ends of the print cartridge. Discard the plastic piece, foam and paper. 5 Continue with "Install the print cartridge" on page 4. Unpack the printer 3 - Lexmark E322 | Setup Guide - Page 14
evenly. 4 Install the print cartridge 2 Insert the print cartridge: a Align the colored labels on either side of the print cartridge with the corresponding labels in the printer. b Holding the handle, tilt the print cartridge down and guide it between the print cartridge grooves. c Push down on - Lexmark E322 | Setup Guide - Page 15
3 Close the printer cover. What do I do next? Task Install optional memory Install tray 2 Attach cables Go to page ... 6 15 17 Install the print cartridge 5 - Lexmark E322 | Setup Guide - Page 16
Step 3: Install memory cards Depending on your printer model, you can increase printer memory for a total of up to 68MB (Lexmark E320), 72MB (Lexmark E322), and 80MB (Lexmark E322n). If you have a Lexmark E322 or E322n, you can also install a 1MB, 2MB, or 4MB optional flash memory card for storing - Lexmark E322 | Setup Guide - Page 17
CAUTION! If you are installing memory cards sometime after setting up the printer, turn the printer off and unplug any attached peripherals before continuing. 1 Open the printer front cover. Install memory cards 7 - Lexmark E322 | Setup Guide - Page 18
2 Firmly push in the two oval tabs as you pull open the side cover. 3 Remove the cover and set it aside. Removing the system board shield You will need a small Phillips screwdriver to remove the metal shield covering the printer system board. 8 Install memory cards - Lexmark E322 | Setup Guide - Page 19
and set it aside. Installing a printer memory card Warning! Printer memory cards are easily damaged by static electricity. Touch something metal on the printer before you touch a memory card. To install an optional printer memory card: 1 Unpack the printer memory card. Install memory cards 9 - Lexmark E322 | Setup Guide - Page 20
Connection points System board 2 Avoid touching the connection points along the edge of the card. Save the packaging. 3 Locate the top connector on the system board. 4 Hold the memory card with the connection points pointing toward the top connector on the system board. 5 Insert the card into the - Lexmark E322 | Setup Guide - Page 21
memory in a Lexmark E322 or E322n, continue. Otherwise, reattach the metal shield and side cover. See page 13 for instructions. Installing a flash memory card Note: Flash memory cards are easily damaged by static electricity. Touch something metal on the printer - Lexmark E322 | Setup Guide - Page 22
Connection points 2 Avoid touching the connection points along the edge of the card. Save the packaging. 3 Locate the bottom connector on the system board. 4 Hold the option card with the connection points pointing toward the bottom connector on the system board. 5 Insert the card into the - Lexmark E322 | Setup Guide - Page 23
6 Push the card firmly into the connector with your thumbs until the latches snap into place. 7 Reattach the metal shield and side cover. Reattaching the metal shield When you have finished installing the memory card(s): 1 Align the metal shield between the top and bottom grooves and slide it all - Lexmark E322 | Setup Guide - Page 24
Reattaching the side cover Tab 1 Align the top and bottom tabs with the corresponding slots. 2 As you close the door, push the oval tabs firmly into the slots. 3 Close the front cover. Tab What do I do next? Task Install the tray 2 Attach cables Go to page... 15 17 14 Install memory cards - Lexmark E322 | Setup Guide - Page 25
the optional 250-sheet drawer, which attaches underneath the printer. A drawer consists of a paper tray and a support unit. 1 Remove the tray from the support unit. 2 Remove all packing material and tape from the tray and the support unit. 3 Place the support unit in the location you have chosen for - Lexmark E322 | Setup Guide - Page 26
Note: If you install the 250-sheet drawer at a later time, be sure to turn off the printer before installing the drawer. 4 Align the printer with the front of the support unit and place it on top of the support unit. Make sure the support unit is firmly in place. When you complete setting up the - Lexmark E322 | Setup Guide - Page 27
Step 5: Attach cables Local printing To attach a Lexmark E320 or E322 printer to a computer using an IEEE1284 compliant parallel cable, we recommend using Lexmark part number 1329605 (10 ft) or 1427498 (20 ft). 1 Make sure the printer, computer, and any attached peripherals are turned off and - Lexmark E322 | Setup Guide - Page 28
a computer using a USB cable, we recommend Lexmark part number 12A2405 (2 m). 1 Plug one end of the USB cable into the USB port on the printer. Match the USB symbol on the cable to the USB symbol on the printer. 2 Plug the other end of the cable into the USB port on the computer. 18 - Lexmark E322 | Setup Guide - Page 29
Network printing You can attach a Lexmark E322n printer to a network using an Ethernet cable (UTP cable with RJ.45 connector). To attach the printer to a network with an Ethernet cable: 1 Plug one end of the Ethernet cable into the Ethernet network port on the MarkNet™ print server. 2 Plug the - Lexmark E322 | Setup Guide - Page 30
Attaching a power cord 1 Make sure the printer is turned off. 2 Plug one end of the power cord into the power cord connector. 3 Plug the other end into a properly grounded outlet. 4 Turn on the printer. Each indicator light turns on and off, starting with Press Button and ending with the Ready - Lexmark E322 | Setup Guide - Page 31
Top output bin Tray 1 Paper support Manual feed Front output door Tray 2 Your printer has two standard paper sources: tray 1, which holds up to 150 sheets of plain paper, and a single-sheet manual feed. Use tray 1 for most print jobs. Use the manual feed to feed a single page, transparency - Lexmark E322 | Setup Guide - Page 32
1 Extend the rear paper support until you hear a click. 2 Flex the sheets back and forth to loosen them, then fan them. 22 Load paper - Lexmark E322 | Setup Guide - Page 33
3 If loading: • letterhead paper, insert letterhead with the top of the page pointing down, facing you • envelopes, insert them vertically, flap side down with the stamp area in the top left corner To reduce paper jams, do not use envelopes that: - Have excessive curl - Are stuck together - Are - Lexmark E322 | Setup Guide - Page 34
Slide the paper guides against the edges of the paper or envelopes. 8 Select the paper size and type from your software application. 9 Select the number of copies from your software application or printer driver if you are printing multiple copies. 10 Start your print job. Loading the manual Use the - Lexmark E322 | Setup Guide - Page 35
If you experience problems feeding envelopes or card stock in tray 1, try printing them one at a time from the manual feed. 1 Extend the front paper support on the paper output bin until you hear a click. 2 If you are loading legal paper, extend the front paper support all the way up. 3 Open the - Lexmark E322 | Setup Guide - Page 36
adhesive when the flap is in the sealed position 5 Slide the paper guides flush against the edges of the paper or envelope. 6 Select the light and the Press Button light come on, place another piece of media in the manual feed. 10 Press the operator panel button to print another page. What do I - Lexmark E322 | Setup Guide - Page 37
Loading the optional tray 2 1 Grasp the tabs on either side of the tray and pull it completely out of the printer. 2 Make sure the metal plate is pressed down before inserting it into the printer. After the tray is inserted, the metal plate springs back up so the paper can feed into the - Lexmark E322 | Setup Guide - Page 38
or legal size paper, extend the paper support on the front of the tray. Corner bucklers 4 Flex the sheets back and forth to loosen them, then fan them. 5 If loading letterhead paper, insert letterhead face down with the top of the page entering the printer first. 6 Do not exceed the stack height - Lexmark E322 | Setup Guide - Page 39
8 Slide the paper guides flush against the edges of the paper. 9 Reinstall the tray, making sure the tray is pushed all the way in. 10 Select the paper size and type from your software application. 11 Start your print job. Load paper 29 - Lexmark E322 | Setup Guide - Page 40
setup Print a menu settings page for a list of the current printer settings. If you have a Lexmark E322n, your printer prints both a menu settings page and a setup page listing the IP address and other network settings. 1 Make sure the printer is on and briefly press the operator panel button to - Lexmark E322 | Setup Guide - Page 41
needs intervention, or the printer needs servicing. Some of the more common light sequences are shown in the next section. For a complete explanation of all of the light sequences, refer to the Understanding the operator panel lights section of the Lexmark Publications CD. Understanding the operator - Lexmark E322 | Setup Guide - Page 42
Button Press Button • A brief button press (push the button once for no more than 3 seconds) restarts the printer. • A long button press (hold until all the lights come on) resets the printer or selects a setting in the special function menu (see the Publications CD for more information). • A double - Lexmark E322 | Setup Guide - Page 43
The printer is ready to receive and process data. The printer is busy receiving or processing data. Understanding the operator panel lights 33 - Lexmark E322 | Setup Guide - Page 44
is waiting until additional data is received. The printer top cover is open or the print cartridge is not installed. If both the Error light and Press Button lights are on, a secondary error has occurred: 1 Press the operator panel button with a double- - Lexmark E322 | Setup Guide - Page 45
Tray 1 or tray 2 is out of media or the media did not feed properly. The printer prompts you to load another sheet of media in the manual feed. Understanding the operator panel lights 35 - Lexmark E322 | Setup Guide - Page 46
detects a jam. The printer alerts you the toner is getting low. Remove the print cartridge and shake it to print more pages before replacing it. (On the Lexmark E320, the Toner Low light does not come on if the standard 1,500-page print cartridge is installed.) 36 Understanding the operator panel - Lexmark E322 | Setup Guide - Page 47
The printer has a service error. Turn the printer off and back on. If the lights are still blinking, contact your point of purchase. Understanding the operator panel lights 37 - Lexmark E322 | Setup Guide - Page 48
printer drivers are supported: • Windows system printer driver • Lexmark E322 custom printer driver System drivers are built into Windows operating systems. Custom drivers are available on the drivers CD. Updated system and custom drivers are available at www.lexmark.com. Installation instructions - Lexmark E322 | Setup Guide - Page 49
test page to verify your printer is correctly set up. Network printing If you have a Lexmark E322n, the following instructions explain how to install printer drivers on printers attached to a network. Windows Ports The following network printer ports are supported: • Microsoft IP port (Windows NT - Lexmark E322 | Setup Guide - Page 50
CD shipped with your printer, you may also find this software on the drivers CD. Launch this utility and follow the instructions to install the PPDs. Send a test print job when you have finished. NetWare The Lexmark E322n works with both Novell Distributed Print Services (NDPS) and regular queue - Lexmark E322 | Setup Guide - Page 51
, the snap-ins, the support files and a white paper with installation instructions on the Web at www.lexmark.com/networking/ndps.html. Additional information about network printer installation can be found in the online documentation on the drivers CD that shipped with your printer. Non-NDPS (queue - Lexmark E322 | Setup Guide - Page 52
Step 10: Troubleshooting tips Problem: What to do: Installing a print cartridge Characters appear light or blurred. • The print cartridge may be low on toner. Replace the cartridge. The printer seems to be printing, but pages • The print cartridge has an error. Replace the cartridge. are blank - Lexmark E322 | Setup Guide - Page 53
Problem: What to do: The paper fails to feed from tray 1. • Make sure tray 1 is selected from the printer driver. • Remove the paper from tray 1 and fan the paper. The paper fails to feed from the optional tray 2. • Make sure tray 2 is selected from the printer driver. • Make sure the tray is - Lexmark E322 | Setup Guide - Page 54
the country-specific warranty information that came with your printer. Lexmark E320/E322 printer This Statement of Limited Warranty applies to this product the product for which it was designed. To obtain warranty service, you may be required to present the feature or option with the product. - Lexmark E322 | Setup Guide - Page 55
further explanation of your warranty alternatives and the nearest Lexmark authorized servicer in your area, please contact Lexmark at 1-800-LEXMARK (1-800-539-6275), or on the World Wide Web at http://www.lexmark.com. Free remote technical support is provided for this product throughout its warranty - Lexmark E322 | Setup Guide - Page 56
kit as specified (if applicable) • Use of printing media outside of Lexmark specifications • Use of other than Lexmark supplies (such as toner cartridges, inkjet cartridges, and ribbons) • Use of other than Lexmark product or component ALL EXPRESS AND IMPLIED WARRANTIES, INCLUDING THE IMPLIED - Lexmark E322 | Setup Guide - Page 57
23, 25, 28 B B5, loading 23, 25, 28 C cable, connecting Ethernet 19 parallel 17 USB 18 card stock, loading 23 cautions iii CD drivers ix changing a print cartridge see Publications CD Reference connecting the printer using a parallel cable 17 Index using a USB cable 18 using an Ethernet cable 19 - Lexmark E322 | Setup Guide - Page 58
Lexmark Publications CD viii Lexmark Web site x loading card stock 23, 25 envelopes 23, 25 manual printing, drivers 38 M Macintosh printer drivers 40 manual feed, loading cartridge installing 4 removing 2 replacing see Publications CD printer features vi lights 31 reset 32 unpacking 1 printer drivers - Lexmark E322 | Setup Guide - Page 59
a print cartridge 42 loading paper 42 paper jams see Publications CD or Quick Reference printing from the correct tray 43 restoring factory defaults see the Publications CD U unpacking the printer 1 USB cable 18 W warnings iii warranty 44 Web site, Lexmark x Windows printer drivers 39 Index - Lexmark E322 | Setup Guide - Page 60
Lexmark and Lexmark with diamond design are trademarks of Lexmark International, Inc., registered in the United States and/or other countries. © 2001 Lexmark International, Inc. 740 West New Circle Road Lexington, Kentucky 40550 www.lexmark.com
-
 1
1 -
 2
2 -
 3
3 -
 4
4 -
 5
5 -
 6
6 -
 7
7 -
8
-
9
-
10
-
11
-
12
-
13
-
14
-
15
-
16
-
17
-
18
-
19
-
20
-
21
-
22
-
23
-
24
-
25
-
26
-
27
-
28
-
29
-
30
-
31
-
32
-
33
-
34
-
35
-
36
-
37
-
38
-
39
-
40
-
41
-
42
-
43
-
44
-
45
-
46
-
47
-
48
-
49
-
50
-
51
-
52
-
53
-
54
-
55
-
56
-
57
-
58
-
59
-
60
 |
 |

www.lexmark.com
Setup Guide
April 2001
E320/E322