Lexmark E460 IPDS Emulation User's Guide - Page 71
Remote Configuration of Printer IPDS Settings, 8.1 Why Use a Browser
 |
View all Lexmark E460 manuals
Add to My Manuals
Save this manual to your list of manuals |
Page 71 highlights
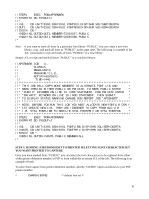
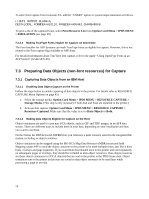
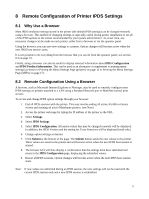
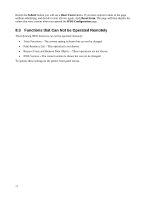
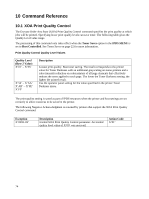
8 Remote Configuration of Printer IPDS Settings 8.1 Why Use a Browser Most IPDS emulation settings stored in the printer (the default IPDS settings) can be changed remotely using a browser. This method of changing settings is especially useful during printer installation to set all of the IPDS options to the values recommended by your system administrator. At a later time, any necessary changes can be made on each printer, either from a browser or via the operator panel. Using the browser, you can save new settings to a printer. Option changes will become active when the next IPDS host session starts. It is not possible to do everything from the browser that you can do from the operator panel; see section 8.3 on page 72. Finally, using a browser can also be useful to display selected information about IPDS Configuration and IPDS Product Information. This can be used as an alternative or supplement to printing menu settings (as shown in Printing the Menu Settings Page (printers) on page 14 or Printing the Menu Settings Page (MFPs) on page 17). 8.2 Remote Configuration Using a Browser A browser, such as Microsoft Internet Explorer or Netscape, may be used to remotely configure most IPDS settings on printers attached to a LAN using a Standard Network port or MarkNet internal print servers. To access and change IPDS option settings through your browser: 1. End all IPDS sessions with the printer. This may involve ending all active AS/400 or iSeries writers and draining all active Mainframe printers. (see Note) 2. Access the printer web page by typing the IP address of the printer as the URL. 3. Select Settings. 4. Select IPDS Settings. 5. Select IPDS Configuration. All option values that may be changed remotely will be displayed. In addition, the IPDS Version and the setting for Trace Functions will be displayed (read only). 6. Change option settings as desired. 7. Click Submit at the bottom of the page. The Submit button sends the new values to the printer. These values are saved in the printer and will become active when the next IPDS host session is started. 8. The browser GUI will then display a confirmation that the settings have been submitted and return to the IPDS Configuration page, displaying the submitted values. 9. Restart all IPDS sessions. Option changes will become active when the next IPDS host session starts. Note: If new values are submitted during an IPDS session, the new settings will not be used until the current IPDS session ends and a new IPDS session is established. 71
-
 1
1 -
2
-
3
-
4
-
5
-
6
-
7
-
8
-
9
-
10
-
11
-
12
-
13
-
14
-
15
-
16
-
17
-
18
-
19
-
20
-
21
-
22
-
23
-
24
-
25
-
26
-
27
-
28
-
29
-
30
-
31
-
32
-
33
-
34
-
35
-
36
-
37
-
38
-
39
-
40
-
41
-
42
-
43
-
44
-
45
-
46
-
47
-
48
-
49
-
50
-
51
-
52
-
53
-
54
-
55
-
56
-
57
-
58
-
59
-
60
-
61
-
62
-
63
-
64
-
65
-
 66
66 -
 67
67 -
 68
68 -
 69
69 -
 70
70 -
 71
71 -
 72
72 -
 73
73 -
 74
74 -
 75
75 -
 76
76 -
77
-
78
-
79
-
80
-
81
-
82
-
83
-
84
-
85
-
86
-
87
-
88
-
89
-
90
-
91
-
92
-
93
-
94
-
95
-
96
-
97
-
98
-
99
-
100
-
101
-
102
-
103
-
104
-
105
-
106
-
107
-
108
-
109
-
110
-
111
-
112
-
113
-
114
-
115
-
116
-
117
-
118
-
119
 |
 |