Lexmark E462dtn Maintenance Guide
Lexmark E462dtn - Mono Laser Printer Manual
 |
UPC - 734646331050
View all Lexmark E462dtn manuals
Add to My Manuals
Save this manual to your list of manuals |
Lexmark E462dtn manual content summary:
- Lexmark E462dtn | Maintenance Guide - Page 1
Lexmark E460dn, E460dw, and E462dtn Maintenance Guide January 2010 www.lexmark.com - Lexmark E462dtn | Maintenance Guide - Page 2
3 Ordering supplies...4 Ordering toner cartridges ...4 Ordering a photoconductor kit ...5 Ordering a maintenance kit ...5 Replacing supplies...5 Replacing the toner cartridge ...5 Replacing the photoconductor kit ...7 Moving the printer...10 Moving the printer to another location...10 Shipping the - Lexmark E462dtn | Maintenance Guide - Page 3
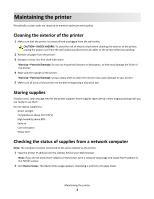
: The computer must be connected to the same network as the printer. 1 Type the printer IP address into the address field of your Web browser. Note: If you do not know the IP address of the printer, print a network setup page and locate the IP address in the TCP/IP - Lexmark E462dtn | Maintenance Guide - Page 4
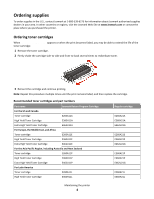
authorized supplies dealers in your area. In other countries or regions, visit the Lexmark Web Site at www.lexmark.com or contact the place where you purchased the printer. Ordering toner cartridges When 88 Cartridge low appears or when the print becomes faded, you may be able to extend the life - Lexmark E462dtn | Maintenance Guide - Page 5
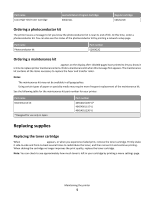
Part name Extra High Yield Toner Cartridge Lexmark Return Program Cartridge E462U11L Regular cartridge E462U21G Ordering a photoconductor kit The printer issues a message to let you know the photoconductor kit is near its end of life. At this time, order a photoconductor kit. You can also see - Lexmark E462dtn | Maintenance Guide - Page 6
-Potential Damage: When replacing a toner cartridge, do not leave the photoconductor kit exposed to direct light for an extended period of time. Extended light exposure can cause print quality problems. 4 Rotate the cartridge in all directions to distribute the toner. Maintaining the printer 6 - Lexmark E462dtn | Maintenance Guide - Page 7
on the tracks of the photoconductor kit. Push the toner cartridge in as far as it will go. The cartridge clicks into place when correctly installed. 6 Close the front door. Replacing the photoconductor kit The printer automatically notifies you before the photoconductor kit reaches a page maximum - Lexmark E462dtn | Maintenance Guide - Page 8
Place the unit on a flat, clean surface. 4 Press the button on the base of the photoconductor kit. Pull the toner cartridge up and out using the handle. 5 Unpack the new photoconductor kit. Warning-Potential Damage: Be careful not to touch the photoconductor drum. Doing so may - Lexmark E462dtn | Maintenance Guide - Page 9
the photoconductor kit by aligning the rollers on the toner cartridge with the tracks. Push the toner cartridge until it clicks into place. 7 Install the unit into the printer by aligning the arrows on the guides of the unit with the arrows in the printer. Push the unit as far as it will go. 8 After - Lexmark E462dtn | Maintenance Guide - Page 10
Any cart used to move the options must have a surface able to support the dimensions of the options. • Keep the printer in an upright position. • Avoid severe jarring movements. Shipping the printer When shipping the printer, use the original packaging or call the place of purchase for a relocation
-
 1
1 -
 2
2 -
 3
3 -
 4
4 -
 5
5 -
 6
6 -
 7
7 -
8
-
9
-
10
 |
 |

Lexmark E460dn, E460dw, and
E462dtn
Maintenance Guide
January 2010
www.lexmark.com