Lexmark Impact S300 User's Guide - Page 96
Jams and misfeeds troubleshooting, Paper jam in the printer
 |
View all Lexmark Impact S300 manuals
Add to My Manuals
Save this manual to your list of manuals |
Page 96 highlights
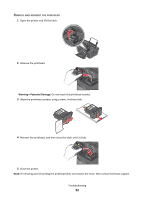
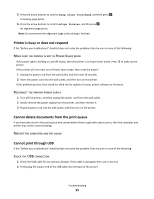
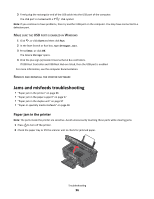
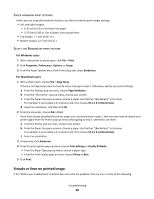
3 Firmly plug the rectangular end of the USB cable into the USB port of the computer. The USB port is marked with a USB symbol. Note: If you continue to have problems, then try another USB port on the computer. You may have connected to a defective port. MAKE SURE THE USB PORT IS ENABLED IN WINDOWS 1 Click , or click Start and then click Run. 2 In the Start Search or Run box, type devmgmt.msc. 3 Press Enter, or click OK. The Device Manager opens. 4 Click the plus sign (+) beside Universal Serial Bus controllers. If USB Host Controller and USB Root Hub are listed, then the USB port is enabled. For more information, see the computer documentation. REMOVE AND REINSTALL THE PRINTER SOFTWARE Jams and misfeeds troubleshooting • "Paper jam in the printer" on page 96 • "Paper jam in the paper support" on page 97 • "Paper jam in the duplex unit" on page 97 • "Paper or specialty media misfeeds" on page 98 Paper jam in the printer Note: The parts inside the printer are sensitive. Avoid unnecessarily touching these parts while clearing jams. 1 Press to turn off the printer. 2 Check the paper tray or lift the scanner unit to check for jammed paper. Troubleshooting 96
-
 1
1 -
2
-
3
-
4
-
5
-
6
-
7
-
8
-
9
-
10
-
11
-
12
-
13
-
14
-
15
-
16
-
17
-
18
-
19
-
20
-
21
-
22
-
23
-
24
-
25
-
26
-
27
-
28
-
29
-
30
-
31
-
32
-
33
-
34
-
35
-
36
-
37
-
38
-
39
-
40
-
41
-
42
-
43
-
44
-
45
-
46
-
47
-
48
-
49
-
50
-
51
-
52
-
53
-
54
-
55
-
56
-
57
-
58
-
59
-
60
-
61
-
62
-
63
-
64
-
65
-
66
-
67
-
68
-
69
-
70
-
71
-
72
-
73
-
74
-
75
-
76
-
77
-
78
-
79
-
80
-
81
-
82
-
83
-
84
-
85
-
86
-
87
-
88
-
89
-
90
-
 91
91 -
 92
92 -
 93
93 -
 94
94 -
 95
95 -
 96
96 -
 97
97 -
 98
98 -
 99
99 -
 100
100 -
 101
101 -
102
-
103
-
104
-
105
-
106
-
107
-
108
-
109
-
110
-
111
-
112
-
113
-
114
-
115
-
116
-
117
-
118
-
119
-
120
-
121
-
122
-
123
-
124
-
125
-
126
-
127
-
128
-
129
-
130
-
131
-
132
-
133
-
134
-
135
-
136
-
137
-
138
-
139
-
140
-
141
-
142
-
143
-
144
 |
 |
